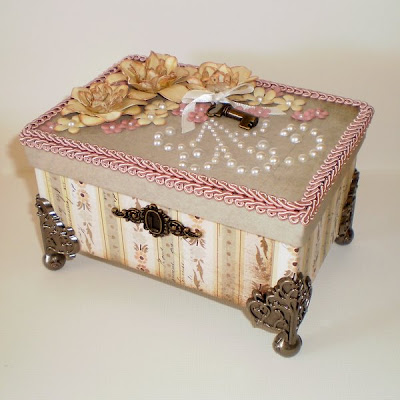
a.k.a. The Ultimate Box Makeover
Today I want to show you how to transform one of those inexpensive little gift boxes you can pick up in the dollar shops into a beautiful keepsake box perfect for holding jewellery and other precious items. You may have noticed that I decorated the top of my box with the handmade roses we made in a
previous tutorial but you can add whatever embellishments suit the theme or purpose of your creation.
Requirements:
1 gift box
Co-ordinating patterned papers - enough to cover the whole box
Adhesives - I used strong liquid glue, double sided tape and glue dots
Matte varnish - optional
Soft brush for applying the varnish
Small metal hinges - available in hardward stores and most variety supermarkets
Small metal brads
Piercing tool
Pencil and eraser
For Embellishing:
Assorted ribbon
Braiding
Flowers
Self-adhesive pearls - I used Kaisercraft
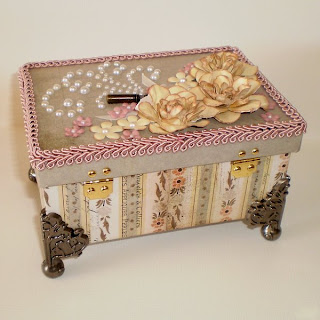
Metal ball feet - I used the ones from Tim Holtz
Metal key hole and key - I used the ones from Tim Holtz
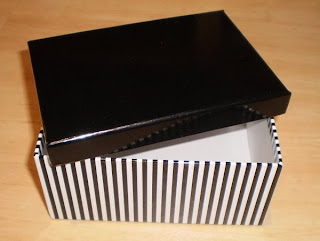
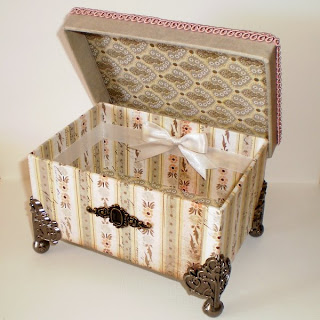
1. Start with your gift box. The one I chose was about 6" long and 4" wide and made from covered cardboard. It cost about $2.50 from a discount store at the local shopping centre. When selecting your box, look for one that has a very loose lid as you will be building up the sides with patterned paper making it a much tighter fit. You also want a box that is nice and straight without twists, bends and buckled sides. Check that the box is sturdy and not coming loose at any of the joins.
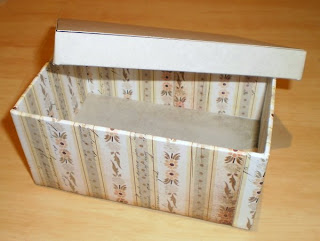
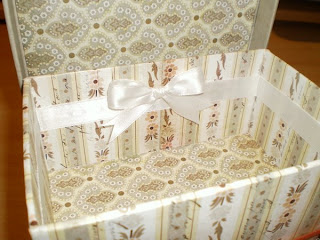
2. Cover the entire box, inside and out including the lid, with patterned paper. I used papers from the gorgeous Capella series by Basic Grey. Try to keep any joins at the back of your project, preferrably away from the corners and edges of the box where the majority of the wearing will occur. Use reliable adhesives to keep the papers secured. If your original box is smooth and slick like mine was it's a good idea to give it a quick sanding to help the adhesive grip better.
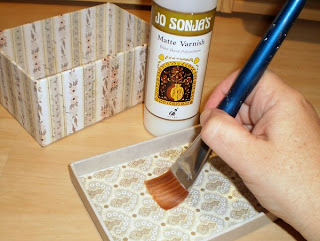
3. Apply two or three coats of clear matte varnish to your project to help maintain it's strength and keep it safe from dust and dirt. Make sure you choose a good quality varnish that will not yellow over time and apply it with a nice soft brush. Allow to dry.
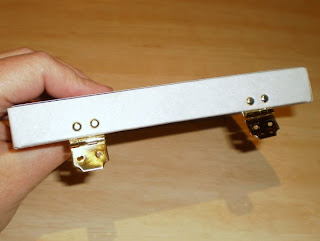
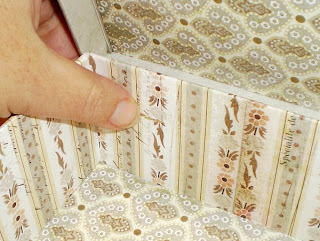
4. Applying the hinges can be a little tricky as they are going to be attached in a slightly different way than normal. Look closely at the following pictures and read the instructions carefully. The screws or nails that come with the hinges are no good for our project since they are much too long and won't hold if we cut them to size. This is where the little brads and the strong adhesive are required.
Measure and mark the placement of the hinges on the INSIDE of the box lid. (Normally hinges are positioned on the outside of a box, but because we are using a lid that overlaps the bottom we need to place the two sections of the hinge in different places.) My hinges are placed about 1" from either side. You will need to adjust this measurement if either your box or hinges are larger or smaller than mine.
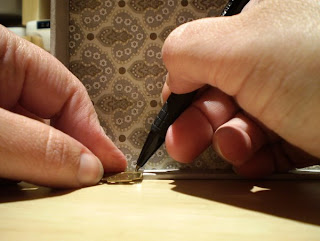
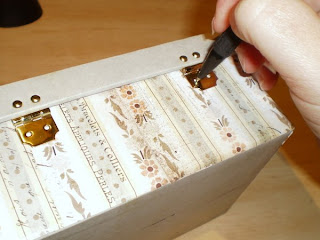
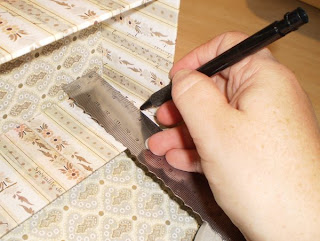
5. Use your piercing tool to punch holes through the box lid. This is where you will attach your hinge with the little brads.
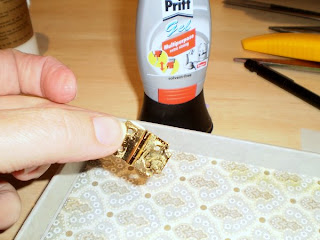
6. Apply some strong liquid glue to the right side of the top section of your hinge and glue to the inside of the box lid, lining up the holes of the hinge with the holes you punched in the previous step.
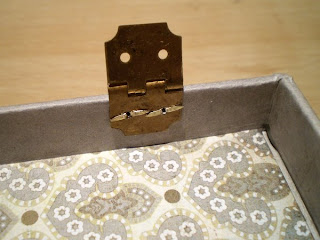
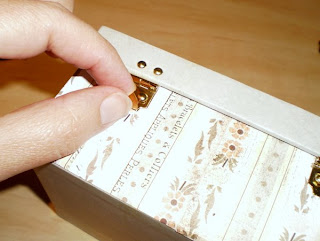
7. Push the brads through the box lid then through the hinge so that the tops of the brads are visible on the outside of the lid. As you can see from the picture below, the moving part of the hinge rests above the lip of the box lid.

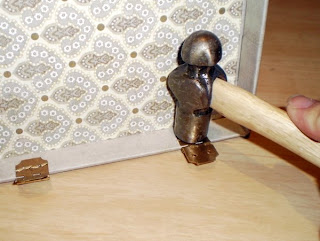
8. Open the brads on the inside of the box lid as shown below. I use a small hammer to neatly flatten and tighten the brads.
9. Repeat the process with the other brad. Allow the glue to dry before continuing.
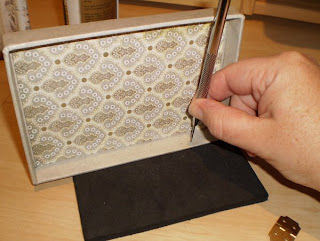
10. Place the lid securely on the box and use the pencil to mark the position of the holes in the lower section of the hinge.
11. Punch through the box with your piercing tool then secure the bottom section of the hinge to the outside of the box with liquid adhesive and the little brads just as you did with the lid.
12. Open the brads on the inside of the box and gently flatten with the hammer. Allow the glue to dry completly.
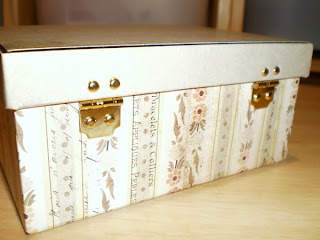
13. You have now completed the basic hinged box. The remainder of this tutorial deals with the outer embellishments that I added to my own project, which you may wish to use as a guide for your own creation.
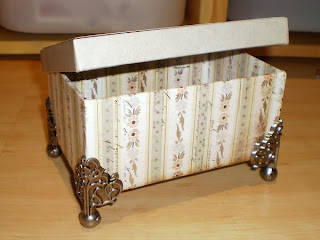
14. The next step is to attach the metal feet. Please note that this is the method I personally use to attach these items to my projects. You may wish to visit Tim's site for more ideas and uses for his products.
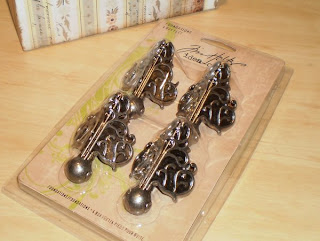
15. Using strong liquid adhesive (I use Pritt glue) attach the ball feet to the bottom of the box. Attach all four at once and hold them in place with several rubber bands stretched around all four feet. Ensure you have a rubber band (or tie of some kind) keeping tension on the top of the feet and one keeping tension on the bottom of the feet. Stand your project up and weight it down slightly as the glue dries. Along with the rubber bands, I placed a heavy book on top of my box and left it to dry overnight.
16. To hide the brad ends that are visible on the inside of the box, I attached a piece of ribbon and a bow. Measure the inside of the box so that your ribbon is even all the way around. Attach the ribbon in a single length with double sided tape or glue. The bow is made and attached separately over the join.
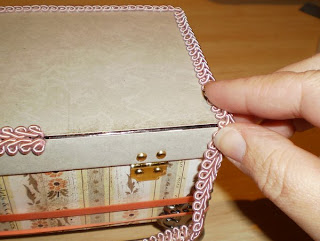
17. Glue some co-ordinating braid around the box lid. Be sure you secure this well with adhesive as it tends to be the place people will put their fingers to open the lid. (If you look closely you can see the rubber bands still holding the metal feet in place.)
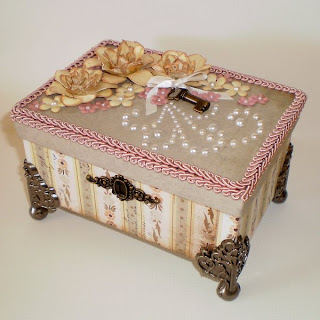
18. Now it's a matter of embellishing the top and sides of the box as desired. I glued a Tim Holtz metal lock to the front of the box and a key on the top. I added lots of pearls and some handmade flowers to complete the look.
 Я - фотографПлагин для публикации фотографий в дневнике пользователя. Минимальные системные требования: Internet Explorer 6, Fire Fox 1.5, Opera 9.5, Safari 3.1.1 со включенным JavaScript. Возможно это будет рабо
 ОткрыткиПерерожденный каталог открыток на все случаи жизни


