| YARINA_23 написал 23.02.2011 09:29:39: Чтобы освещать своим светом других - нужно носить солнце в душе.
|

| lydmila_18 написал 23.02.2011 09:20:42: КАК МНОГО ИНТЕРЕСНОГО,чудесный дневничок.Обязательно ознакомлюсь!!!
|
Серия сообщений "айрис фолдинг":Выбрана рубрика айрис фолдинг.
Часть 1 - Айрис фолдинг. Схемы, идеи.
Часть 2 - Встречаем Пасху с айрис фолдинг
Часть 3 - подушка "объемная роза"
Часть 4 - Японская роза
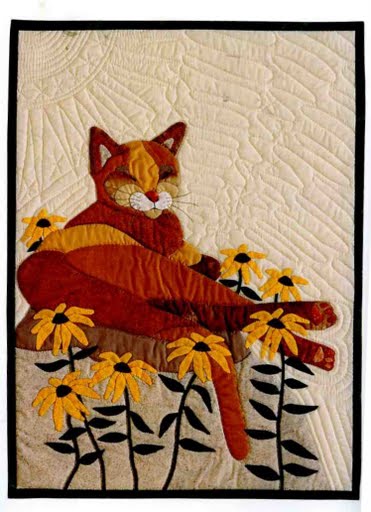
Часть 5 - Для любителей кошек панно. Апликация
Айрис фолдинг. Схемы, идеи. |
 |
Техника "айрис-фолдинг" только кажется сложной, на самом деле, она требует внимания и аккуратности, но при этом позволяет без труда делать эффектные открытки или украшать свои скрап-странички интересными декоративными элементами. Существует множество ресурсов, где можно найти шаблоны и инструкции по айрис-фолдингу. Инструкции и примеры работ вы можете просмотреть здесь или здесь
|
|
|
Встречаем Пасху с айрис фолдинг |
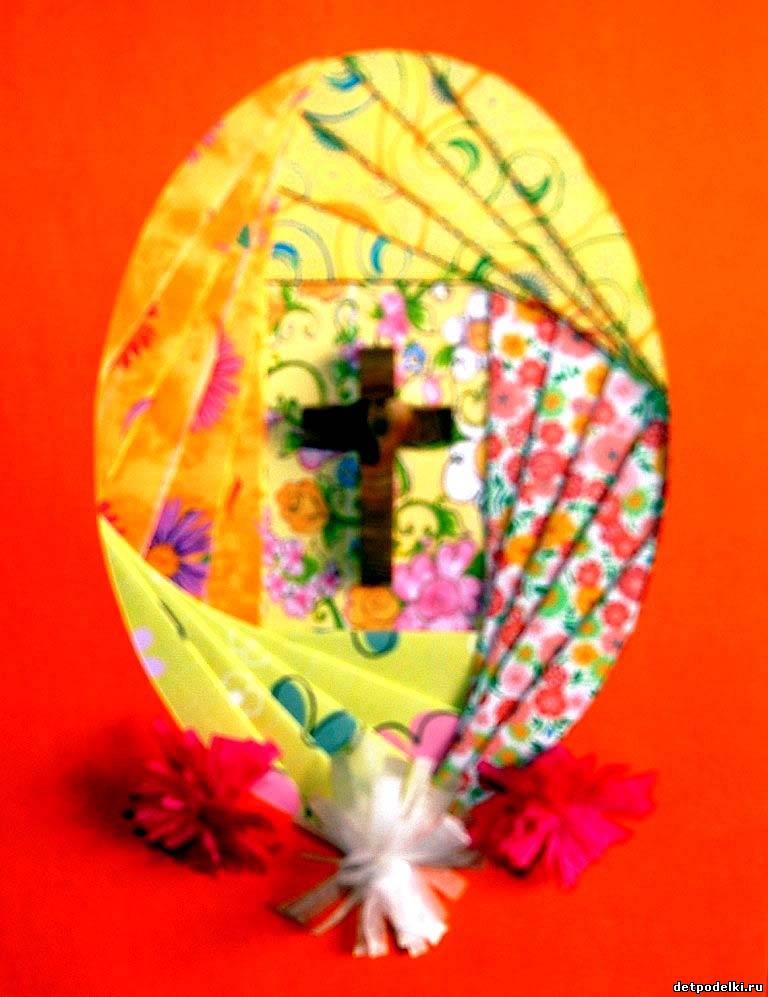 |
Светлый праздник Пасхи уже не за горами, поэтому сейчас самое подходящее время, чтобы научить ваших детей делать поделки к Пасхе в технике айрис-фолдинг (или «радужное складывание»). Я предлагаю вам сделать пасхальное яичко. Для поделки мы заполним рисунок сложенными пополам бумажными полосками, которые накладываются в определенной последовательности и под определенным углом. Что для поделки нужно: 1 лист цветного картона, цветная бумага четырех цветов, шаблон, который предварительно нужно распечатать (или нарисовать самим), скотч или клей-карандаш, ножницы и канцелярский нож. |
|
подушка "объемная роза" |


Серия сообщений "мои работы":
Часть 1 - прихватки с фруктами-moy rabota
Часть 2 - salfetka dly moego salona
Часть 3 - prixvatki dly moei kuxni
Часть 4 - мои шторы в салоне и в спалне
Часть 5 - подушка "объемная роза"
Часть 6 - подушка "органзовая роза и не только...."
Часть 7 - пончо от люлю-кати.
...
Часть 10 - моя шАЛь "ЦВЕТОК" из онлайна на форуме все-сама.ру
Часть 11 - Розы узор
Часть 12 - prixvatohka
|
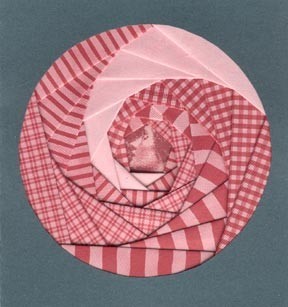
Японская роза |
Rosa japonesa de patchwork | Japanese rose of patchwork
Posted: 18 Feb 2010 09:48 AM PST

|
Passei o carnaval tentando fazer esta rosa de patchwork. |
 |
|
I spent the carnival trying to make this rose of patchwork. |
 |
|
It is a bit of work but it is not difficult once we know how to do. |
    |
|
Cut a circle of 10 cm in diameter. |
   |
|
Take 3 square of 4x4 cm fold into triangle and place a little filling |
 |
|
Secure with a pin. Do this with the other squares. |
  |
|
Place the first triangle in the center of the circle. |
 |
  |
|
The third triangle between the 2 above so that they are united in the center of the circle. Secure with pins |
   |
|
Sew into a circle the 3 triangles together |
 |
|
Like this. |
  |
|
Take 5 triangles of different fabric and place one at a time around the 3 triangles already sewn. Leave appear about 2 cm of the 3 initial triangles |
  |
|
Put one beside the other, leaning a little, forming a pentagon in the center of the rose. |
  |
|
Pin and sew in a circle. |
 |
|
Like this |
   |
|
If you experience difficulty in tailoring a circle, cut a circle of 5 cm in low-weight paper (fine), place a pin in the center and sew all around. |
  |
|
Stay tuned for the fabric to be sewn on the tips of the triangles |
 |
|
Take 6 triangles with filling in another fabric and sew them around the 5 triangles. |
  |
|
Like this. |
   |
|
Sew in a circle. |
   |
|
Take 7 filled triangles with fabric of different color and stitch leaving a margin of about 1 cm of the previous triangles. |
 |
|
Sew around in a circle. |
  |
|
The next step is to cut the excess fabric that remains taking care not to cut the seam. |
   |
|
Finish by placing a border for the finish |
 |
|
The rose will look like this. |
 |
|
This rose was made with fabrics that match better |
  |
|
I finished this way. |
  |
|
I hope you enjoy. I loved it. Any questions do not be shy. continua... to be continued... |
|
Для любителей кошек панно. Апликация |
|
| Страницы: | [1] |