хоз. мыло.варим гель. И снова хозяйственное мыло! Гель для мытья посуды Фанатам хозяйственного...
Точки аккупунктуры - (0)Быстрый массаж на все случаи жизни: Этот массаж даёт мгновенный результат, потому что это самы...
Без заголовка - (0)Овен Овен Обидчивый гороскоп
Цветочные мотивы для трафаретов. - (0)Цветочные мотивы для трафаретов. Цветочные мотивы для трафаретов. Идея расписывать&nb...
Карта рождения - (0)КАРТА РОЖДЕНИЯ. МАТРИЦА СУДЕБ! Перед Вами интерпретация древней системы, использующей ас...


МК волосы для куклы |
 |
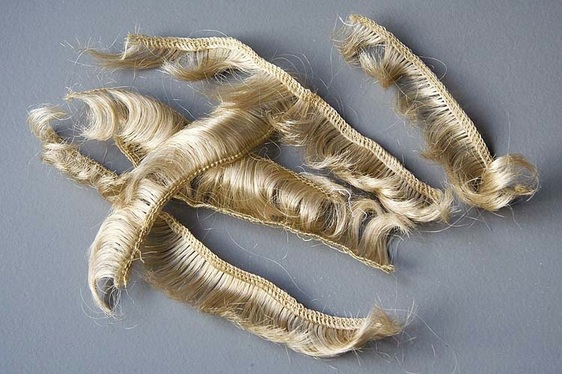
Long ago I used to make all my own doll wigs. In this tutorial I will share my technique so you can create your own one-of-kind wigs. The instructions in this tutorial are for making a wig using pre-wefted strips of synthetic hair. I would buy used wigs (real people size) in secondhand discount stores, and pick them apart with a seam-ripper. For really creative wigs you could also use wefting from colourful Hallowe'en wigs, or even from hair extensions from the dollar store. I create my wig cap by crocheting with fine baby wool or heavier crochet thread. The instructions in this tutorial will make a size 6 wig cap, and assume you already know how to crochet. |
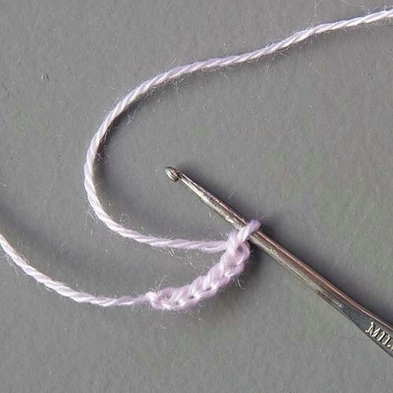 1. Using fine baby yarn and an appropriate sized crochet hook; chain 6
|
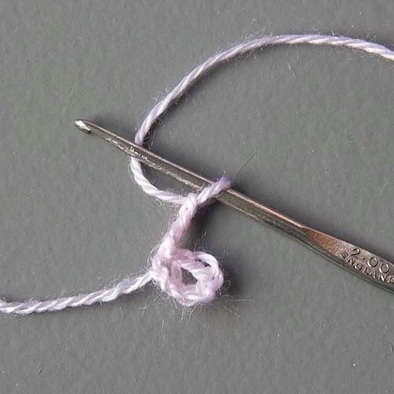 2. Make loop, chain 4
|
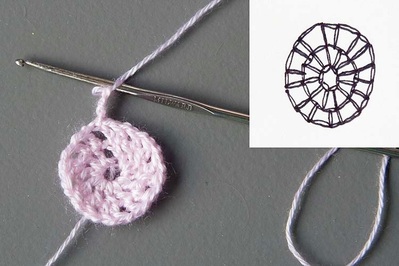
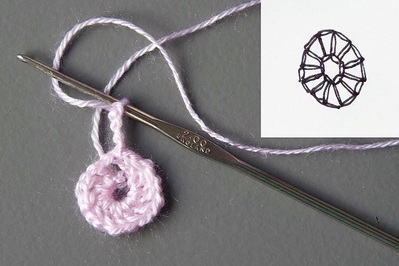 3. First Row: double crochet, chain one, 11 times. Connect at start and crochet 4. (12 spokes in circle)
Chain 4. |
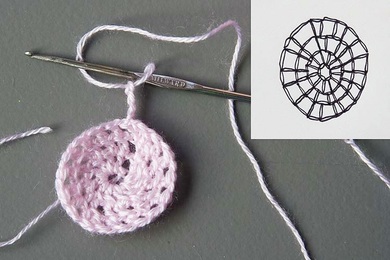
 4. Second row: repeat 'double crochet, chain one' pattern, increasing 4 times as shown in illustration (16 spokes in circle). Chain 4.
|
 5. Third Row: continue with 'double crochet, chain one' pattern increasing twice at opposite sides (18 spokes in circle) Chain 4.
|
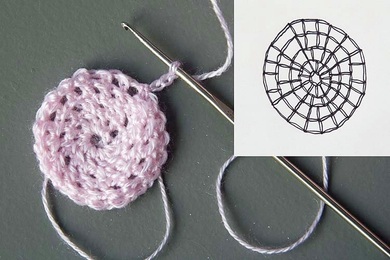 6. Fourth Row: continue with 'double crochet, chain one' pattern increasing twice again (20 spokes in circle) Chain 4. Crochet two more rows without increasing. Cut thread and work away loose ends.
|
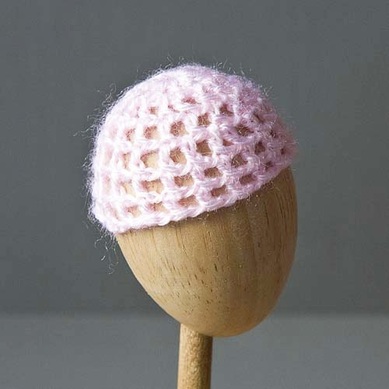 7. Completed crochet cap on a 'wig stand' made from a wooden egg exactly 6" in circumference.
|
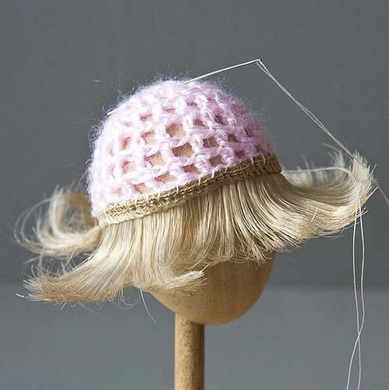 8. Using the same colour thread as your wefted hair, start by hand-stitching the bottom row onto the bottom edge of the crochet cap. *Do not cut the wefting when you get all the way around - instead spiral it up to the next row.
|
 9. Continue sewing the wefted hair onto the crochet cap spiraling upward until you reach the last row.
|
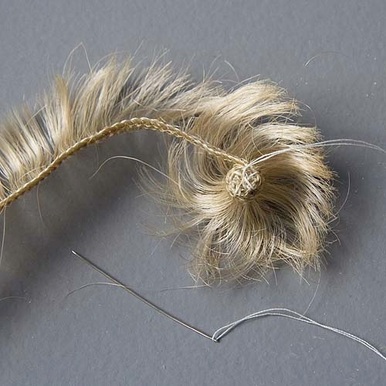 10. To make the 'crown' roll the remaining wefted strip into a spiral, hand-stitching it tightly together as you go.
|
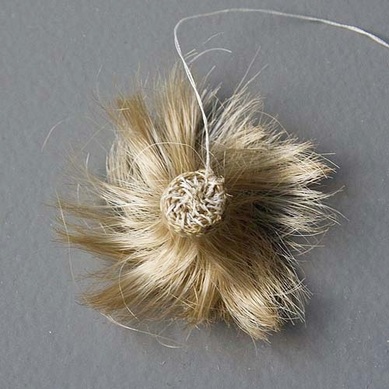 11. The completed 'crown spiral'
|
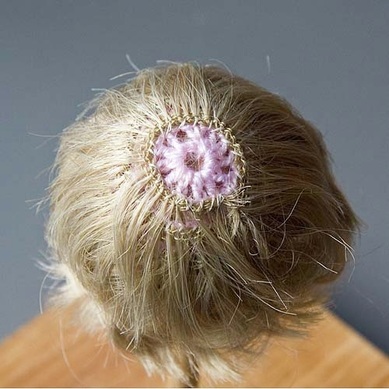
 12. Securely sew the 'crown spiral' onto the bare spot at the top of the wig. It will stick up like a fountain at this point.
|
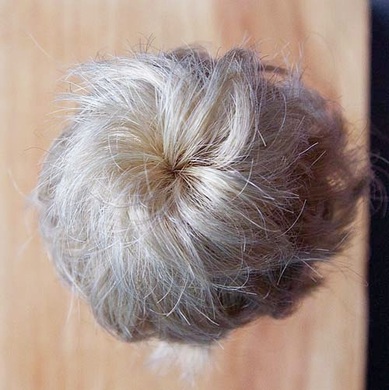 13. Top view of the wig
|
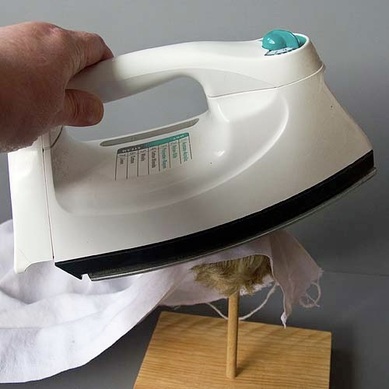 14. To flatten crown: wet a soft cloth and place carefully over crown to flatten it. Gently touch the top with a warm iron and hold for a few seconds. *Do not use too hot an iron or the synthetic hair will kink - or melt)
|
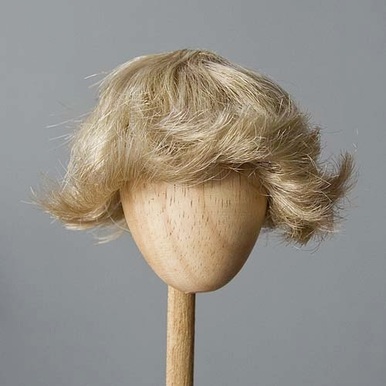 15. Finished wig with flattened crown.
|
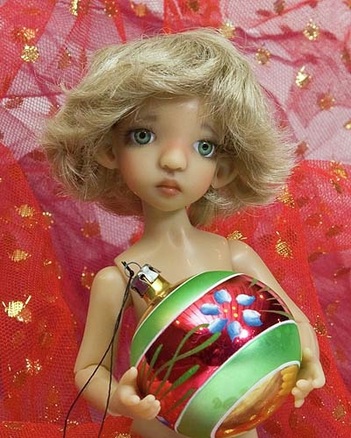
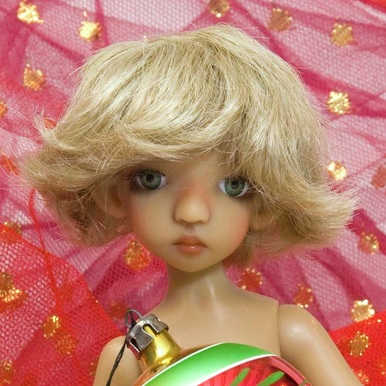 Wig on Kaye Wiggs Cinnamon
|
Серия сообщений "волосы,глазки,носики и пр. для кукол и мишек":
Часть 1 - парик для куклы
Часть 2 - Волосы из атласной ленты
...
Часть 6 - МК по глазкам, ещё один...
Часть 7 - МК по глазкам и ресничкам...
Часть 8 - МК волосы для куклы
Часть 9 - Веки и реснички для мягких игрушек. Мастер-класс
Часть 10 - Энциклопедия мишкоделия от Наталии Шепель. Моделирование ушей
...
Часть 15 - Шьём мишку Тедди.ФОТО - МАСТЕР - КЛАСС.Подушечки для мишкиных лап.
Часть 16 - Шьём мишку Тедди.Фото-мастер-класс «Объёмные щёчки и приоткрытый ротик»
Часть 17 - Объемные лапки у мишки.
| Комментировать | « Пред. запись — К дневнику — След. запись » | Страницы: [1] [Новые] |


