Суббота, 27 Апреля 2013 г. 23:59
+ в цитатник
http://www.denofangels.com/forums/showthread.php?451667-Convertible-Infinity-Dress-Tutorial-(Easy-for-Beginners!)
Convertible/Infinity Dress Tutorial (Easy for Beginners!)
I actually found this tutorial while searching for this infinity dress and realized just how easy it was to make this even when I am just doing handsewing. I already made a couple of them for my Minifee. The tutorial is about the same with the tutorial linked up there, but I would be putting my own version here just easier with the pictures I took and for more BJD wise kind of thing.
So let us begin! Let us start with the materials first.
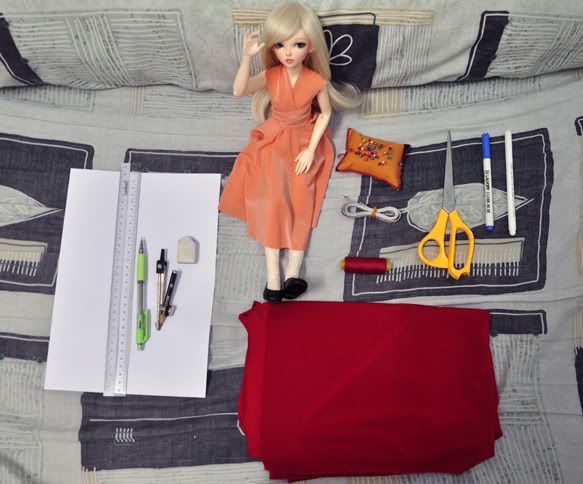

What you need is:
Office Paper/Tracing Paper (Big enough to draw out the pattern. I used one A4 size paper for my Minifee, but if bigger, then you might need more. Just paste together the papers and yeah.)
Pencil
Eraser
Compass (If you don't have one, that's alright!)
Pins
Sewing Needle
Measuring Tape
Fabric Scissors
Fabric Pen/Chalk (I used fabric pen for most of the works I do. Very convenient if you ask me.)
Polyester Knit (Stretchy, drapey fabric. Love this fabric so much!)
Matching Thread
And of course. Not forgetting, your model. I would be using my Minifee Chloe who is small bust A-line with cutie legs. Anybody with that body can just use the measurements I took. :>
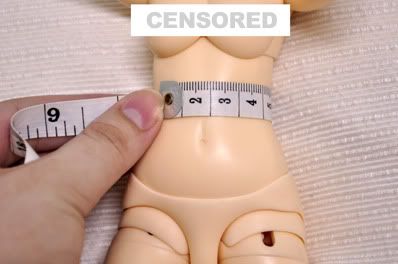
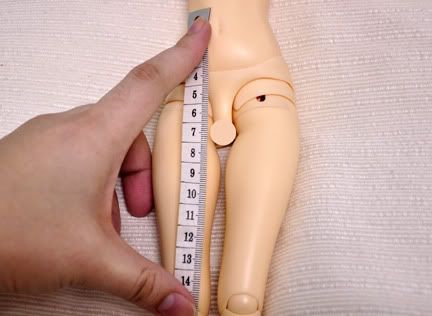
So we should start by taking measurements first! We start by measuring from the middle of the breasts over the fullest part (which means over the nipple) and towards the middle of the underarm. This measurement would be the width of the straps for your dress. I measured 4.5 cm for my Minifee small bust, so that would be the width.

Now for the strap length, you just need to make the straps 1.5 times higher than the doll's height. So for my Minifee, she's 41 cm so the strap length would be 61.5 cm.
Now let us go to the skirt. Let's measure the waist. And I got 12 cm for the waist.
Now for the length of the skirt. I usually go for below the knees like so. And I used 16 cm.
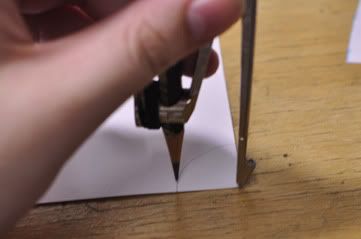
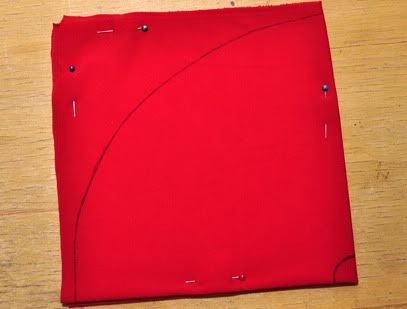
So that would be it for the measurements! Now off to the pattern! You just need to make a pattern for your circle skirt. To make the pattern, we would need to do some maths calculation because we would want to get the radius of circle of the waist measurement that you took. If you really want to know how I got the radius, here goes.
Circumference = 2 x pi x radius
Circumference = Waist Measurement
Radius = Circumference / (2 x pi)
Hopefully that's understandable. But the inner radius for the circle skirt I measures would be 1.9 cm. So using the compass, I measured 1.9 cm and then drawing out starting from one end of the paper like so.
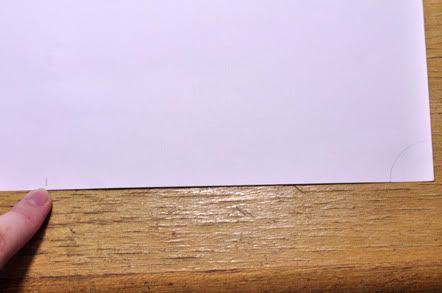
Then from there, at the end of the circle radius, I measured out the skirt length I wanted which is 16 cm.

So you should get something like this.
Do the same for the other side. The compass would not be able to do 16 cm sadly, so people would just use the oldest trick in the book. Using string and a pencil.

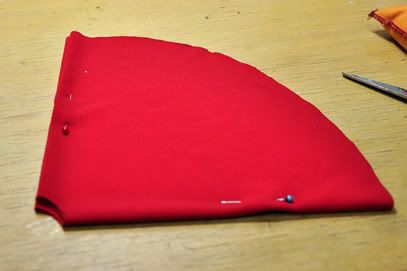
After you draw that outer circle out, then cut it out. You should have a skirt pattern like so.

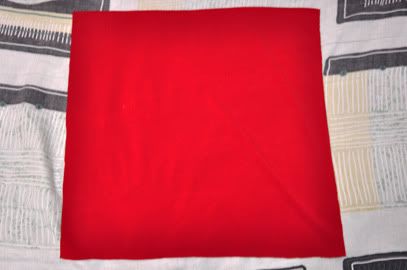
Now you got your pattern, now it is time to cut the fabric! What I usually would do is I cut a a piece of the huge fabric I bought. It would be easier for me to cut the circle skirt out that way too. What I do is that I cut out a square which could fit the whole circle of the skirt inside.
What I do is that I took the length of the skirt and know that when it would come out, it would be double the length. So it would be 32 cm. I give some allowance, and just measure out 39 x 39 cm square from the large piece of fabric.
Then that fold square two times, making sure the fabric doubled on itself place the pattern onto the fabric like so that the edges would match up together.


Then using either fabric pen or chalk, just trace over. What I do is using pins to make sure the fabric doesn't move when I traced and even when I cut the shape out.
And then cut it out, and you would result in this.
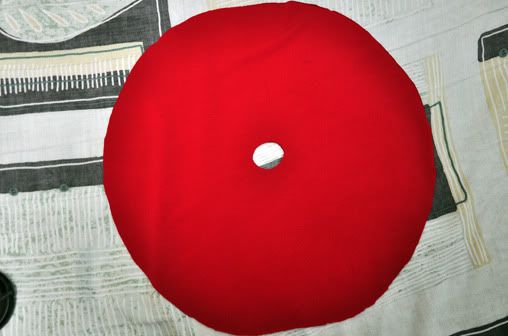
One circle skirt! YAY! Sometimes the skirt cutting would not be so clean and you could always trim the ends of the skirt to make it look more even. But it's not so needed!
Now for the straps!
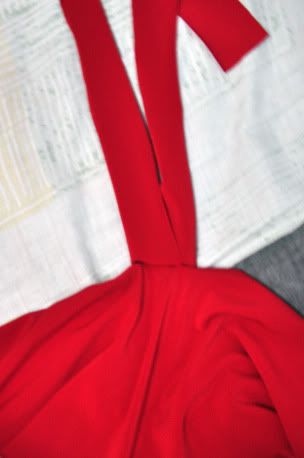
What I do is actually the easier (and way lazy) method, but what I would do is that I measure out 61.5 cm in length and measuring double the width of the strap, so that would be 9 cm. I cut the piece out, fold it together to get a half and just cut through so you would get two almost equal straps.
And you would end up with this!

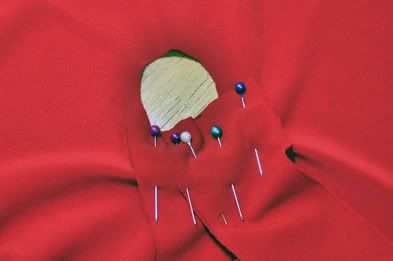
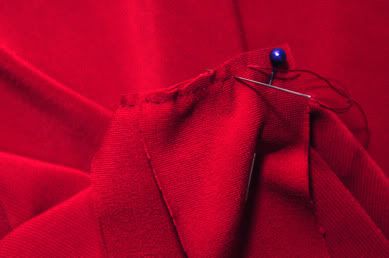
Now the straps need to be overlapped and I would put 3 cm, so just overlap the straps at either ends and just pin them together.

And now it's time to put the straps onto your nicely cut circle skirt! Choose a middle point of your skirt and pin the straps down, from one edge to the other. If you are using some knit that has patterns on the right side and such, I would recommend that you put the straps right side down and the skirt right side up together! But if your fabric is like mine in the picture, it does not matter!
And now it's time to sew, using the matching thread! I use backstitch for the dresses I sew, but you can use the overlapping stitch or buttonstick really. I'm a handsewer (until I get my own sewing machine) but if you have a sewing machine, you can try to use it if you can!
So just keep on sewing, sewing sewing until you are done~! And you'll get this almost perfectly done dress!
ALMOST THERE!
Now you have to sew the waistband! You can actually sew the waistband together with the straps earlier, but I find it a bit more difficult to keep them all together so I did it separately. But it's your choice!
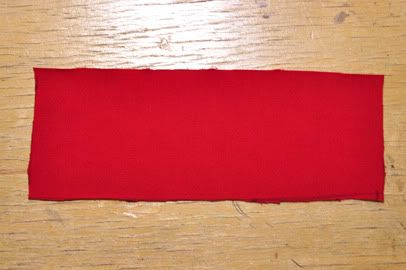
Now for the waistband, I took the measurements from the human versioned tutorial where they mentioned to cut a 10 inches tall for the waistband. Figured this is for a 1/4 doll, I just do the maths 1.4 x 10 inches, then I use centimeter, and I got 6 cm for the waistband. (Perhaps for the SD, you can just calculate 1/3 and for Yo-SD, which is 1/6).
For the length, we measured it would be 12 cm, but to be safe, I would usually add about 3-4 cm more to the length of the waistband to give some allowance. So I measured maybe 15 cm for the waistband length. And just draw and cut it out, and you would have this.
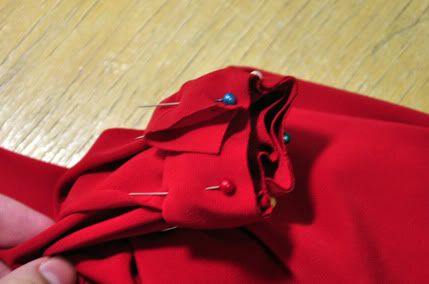
Fold the waistband in half and start in the middle of the dress, just pin them down like so. And then just sew like you did to the straps. Then when you are done sewing over the circle of the waistband, do sew the two front of the waistband together.
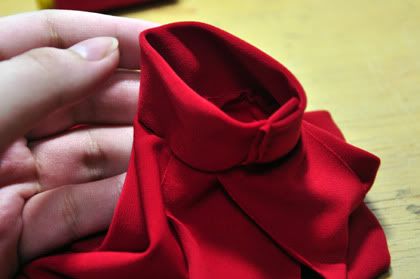
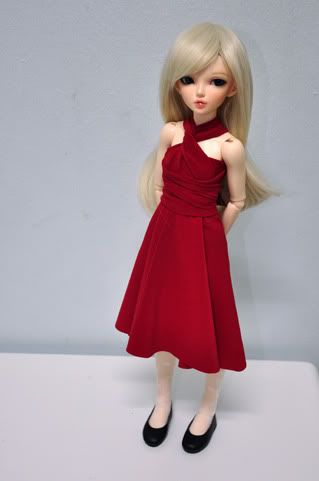
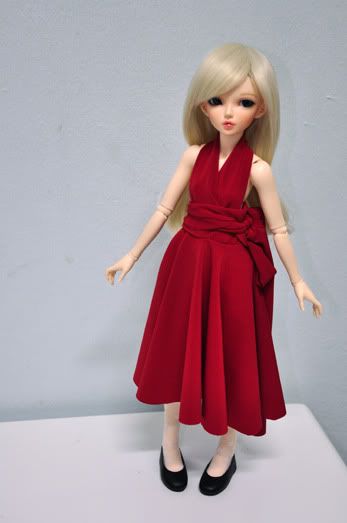
And you're done!
-
Запись понравилась
-
0
Процитировали
-
0
Сохранили
-


