-Рубрики

 -Цитатник

МК- Мандрагора. Создаем магическое существо :) - (0)

Автор мастер-класса ZhukovaMiniart пишет: Хочу предложить создать/слепить мандрагору. Создание...

Вышиваем бабочки бисером и пайетками. Мини МК - (0)

1. 2. 3. 4. 5. 6. 7. 8. ...

Проект "КНИЖКА-РАЗВИВАЙКА" - (0)

Автор:Tanya     1-ая страничка   Ну что? ...

Алонкины игрушки. Книжка сказок из фетра. - (0)

Ну что, мои дорогие, будьте готовы, сейчас будет много фоток , наверное, много буковок. Дело ...

Оригинальная заколка одуванчик - (0)

Нам понадобятся: шарик пенопластовый(диаметр 3см) , проволока обклеенная серой бум...

 -Поиск по дневнику

Поиск сообщений в vampirko

 -Подписка по e-mail


 -Статистика

Статистика LiveInternet.ru: показано количество хитов и посетителей
Создан: 20.03.2012
Записей: 848
Комментариев: 14
Написано: 1238


свитер из носка

Суббота, 27 Апреля 2013 г. 17:22 + в цитатник


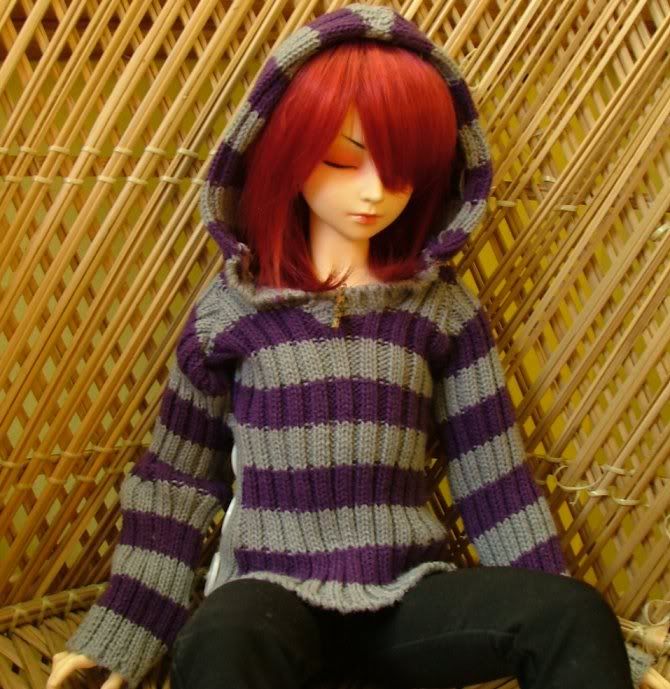
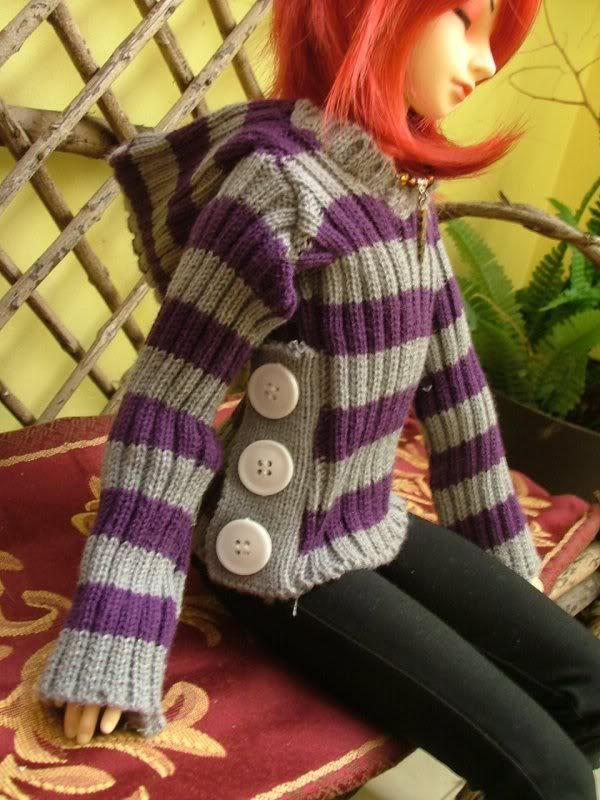
I made a few hoodies / sweaters for my dolls and people wanted to know how I made them from legwarmers. I luckily had taken step by step on the second one I made and so I would like to share this very easy project with my fellow dolly lovers!
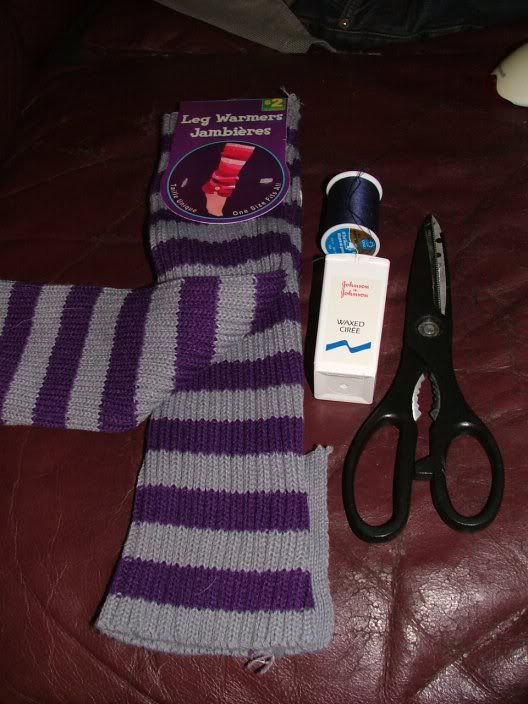

Tools of the trade!
You will need:
Scissors
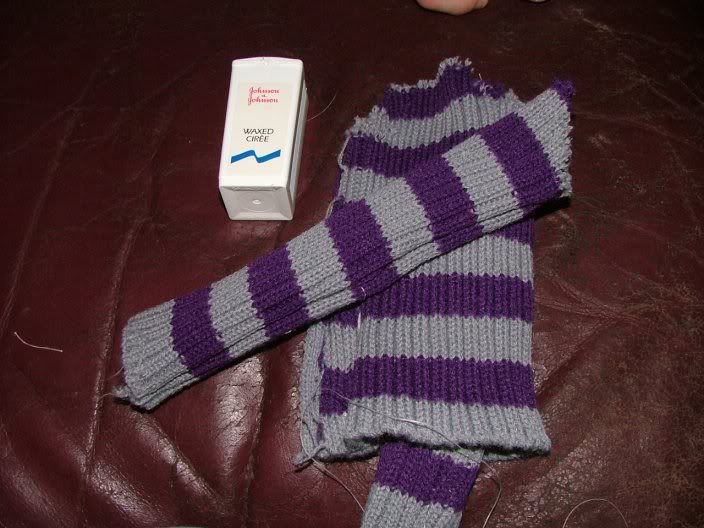
1 pair (2) legwarmers
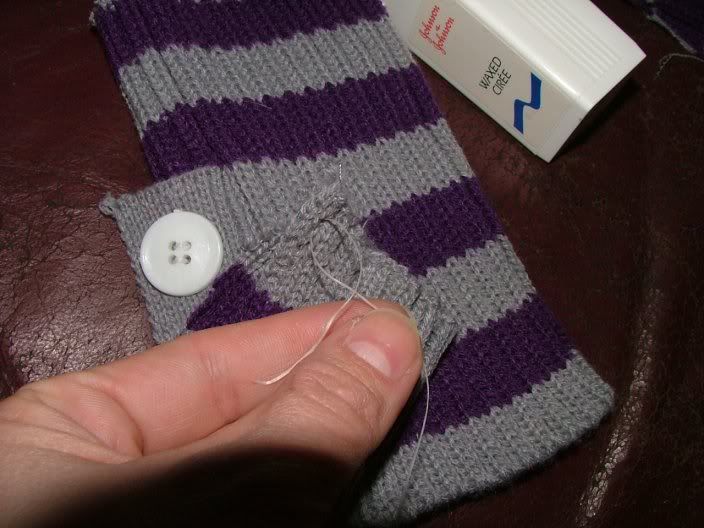
Wax Thread
(or floss, as I used XD Minty!)
Regular thread
(roughly of the colors you're using works)
And of course your doll for measuring sake
(My model is a CP SS Woosoo from eluts.com
faceup by artemiselani)


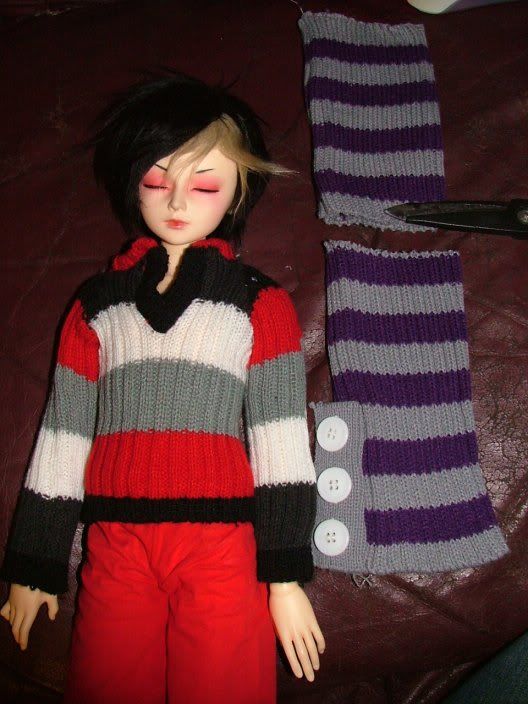
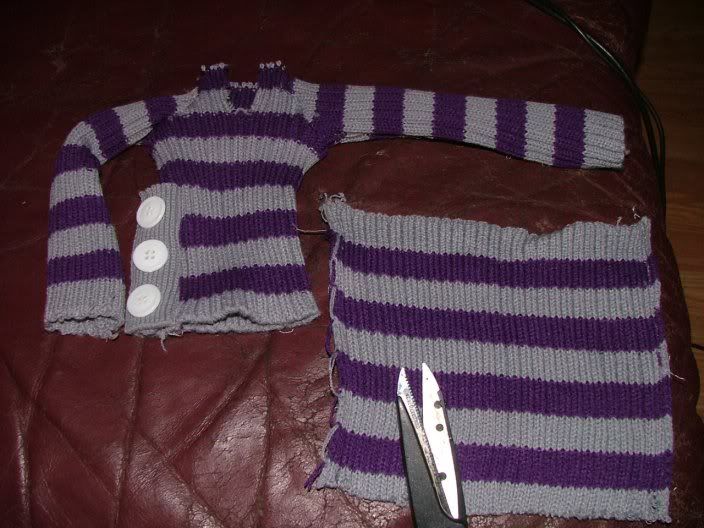
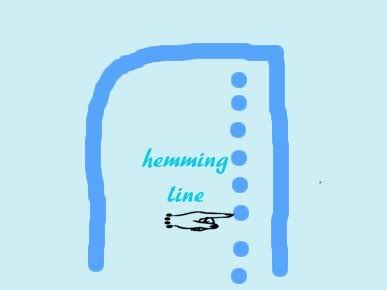
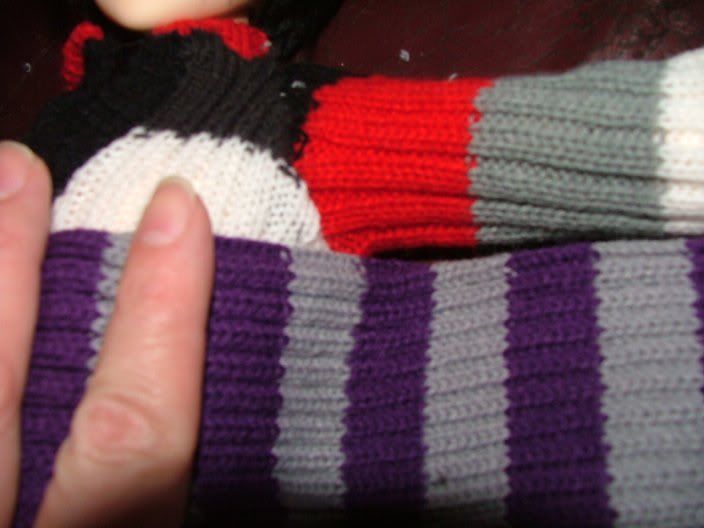
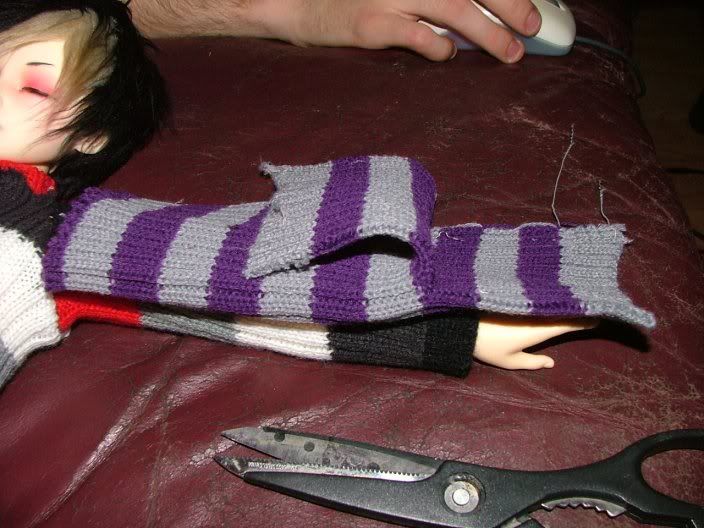
1. Lay your dolly down and the legwarmer. Use the bottom of it so you don't have to do any hemming, then cut the legwarmer at the top of your dolls shoulders.


2. Cut on an angle for the arms so it looks a bit like the outline of a tank top. I used two stripes as a reference point. Just don't cut it TOO MUCH...you can always cut more, you can't put it back!


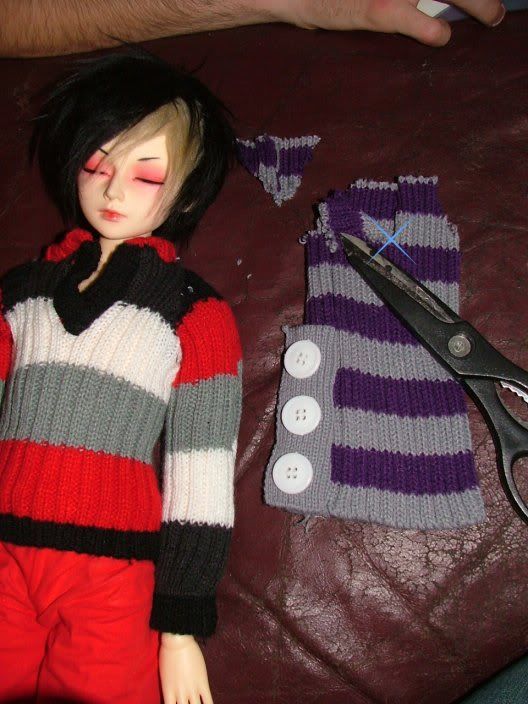
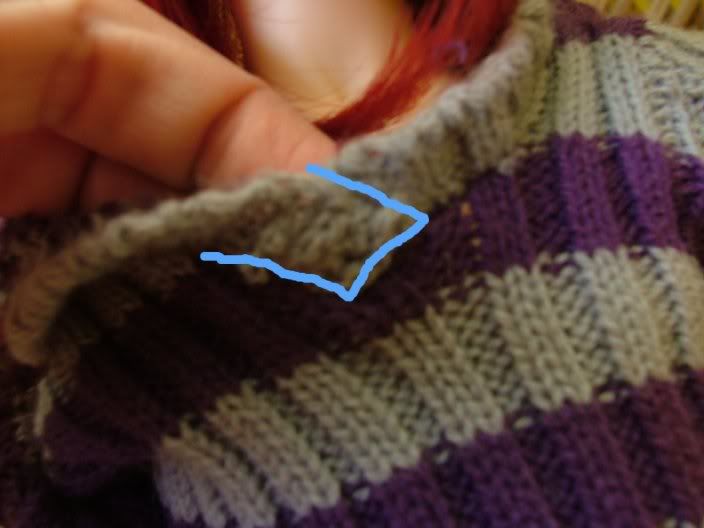
3. To make the v neck, cut to about where the star is in a V shape. Don't make this too wide, just enough so the fabric doesn't touch when laying flat.


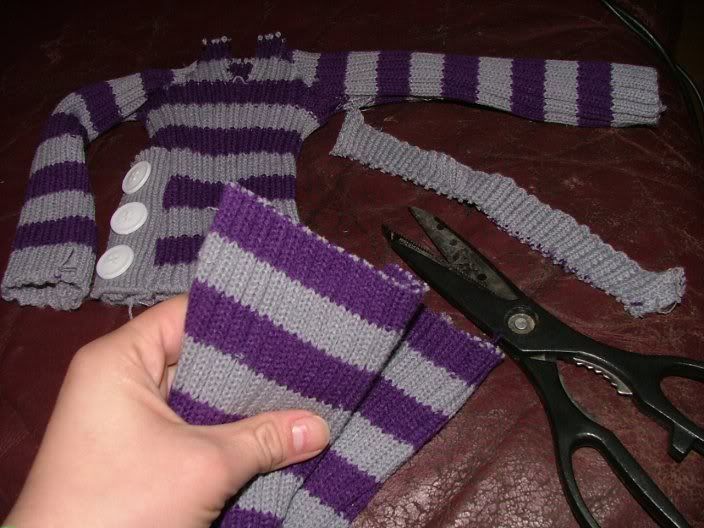
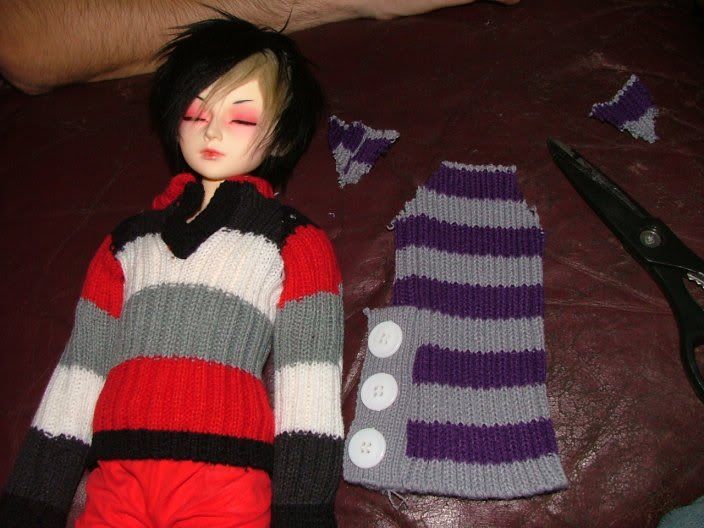
4. Take the OTHER legwarmer and lay your dolly like so. Make sure the edge of the legwarmer is the cuff to avoid hemming.


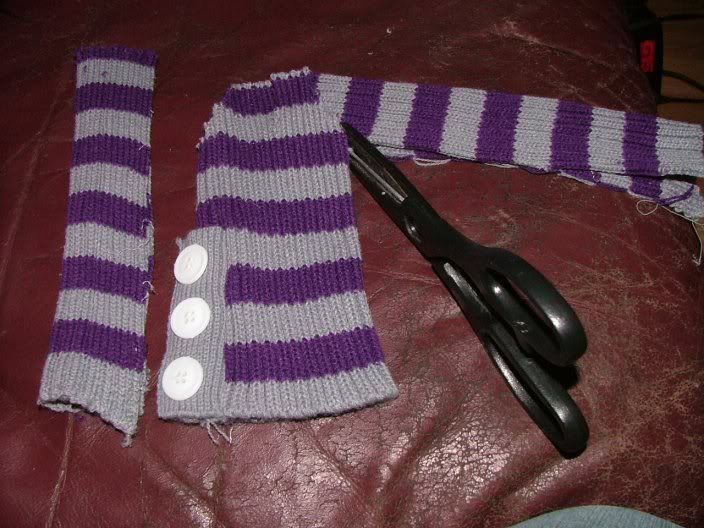
5. Cut ONE STRIPE larger than the length you want for the arm. Cut it right across like you did for the top.


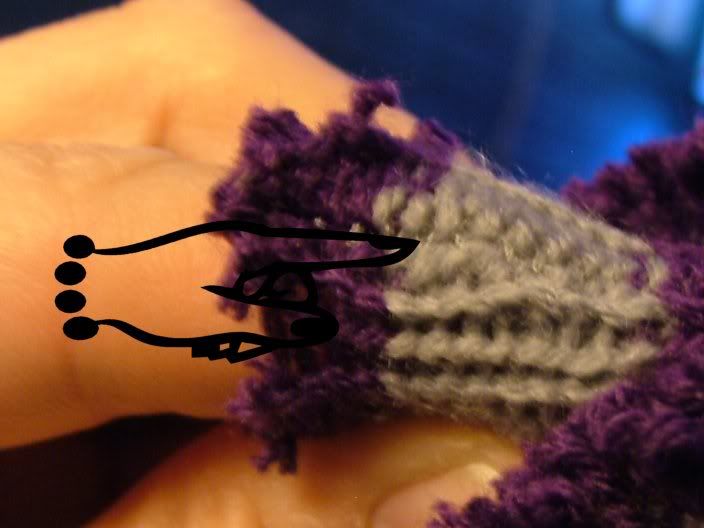
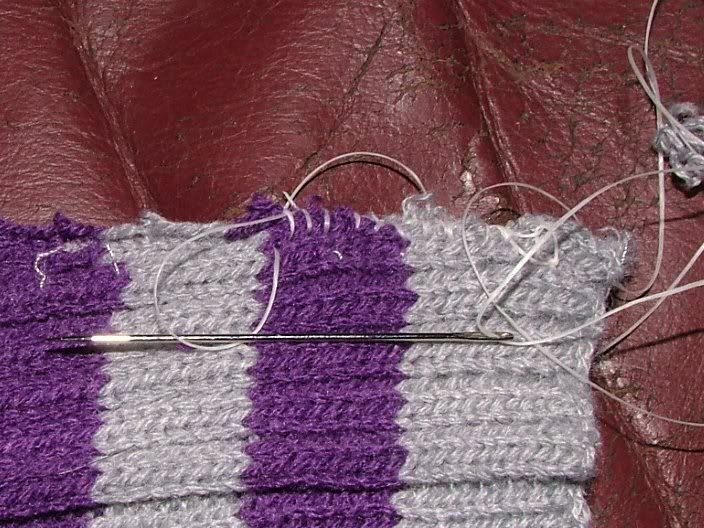
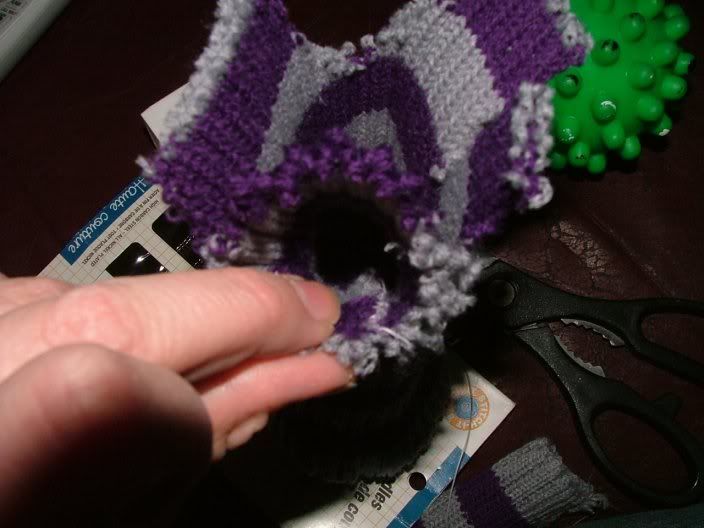
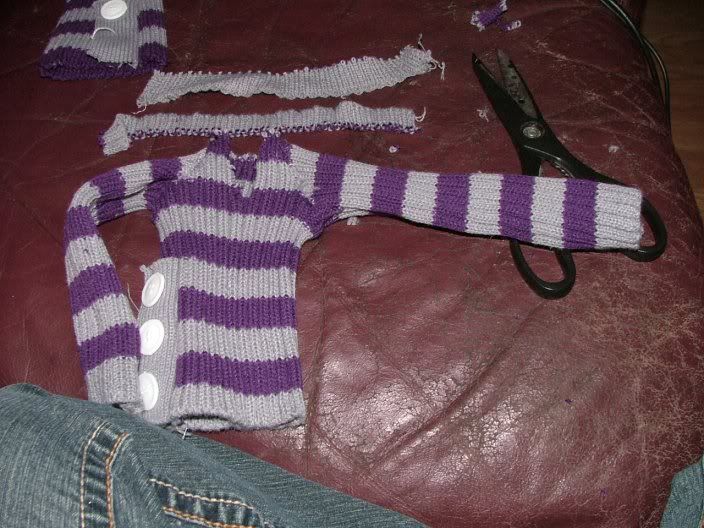
6. Pull out the seam of the legwarmer to avoid more sewing or holes.


7. Cut the square in half.


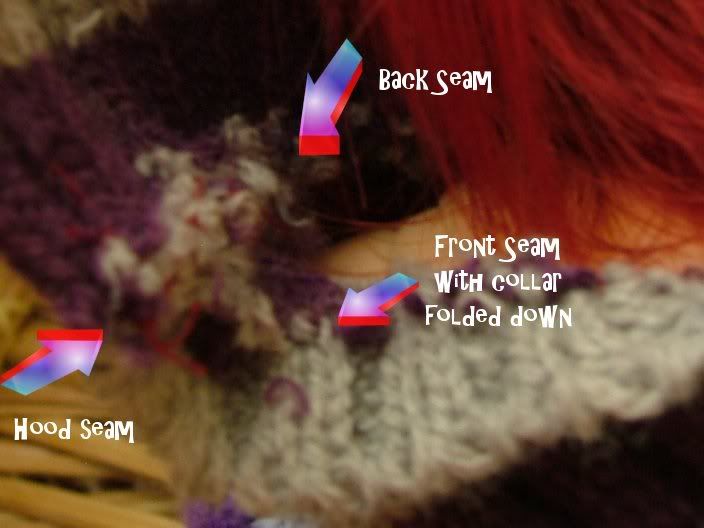
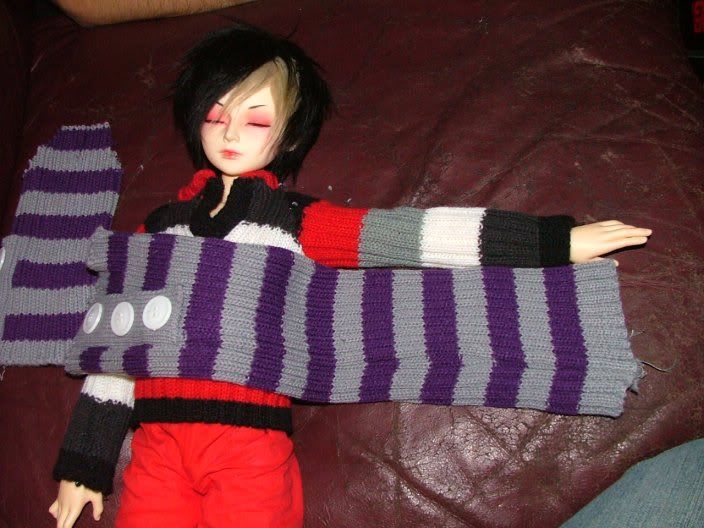
8. Fold the halves so you have a basic idea of the arms. You then want to line the arm up like I did on the right so the arm "SEAM" is on the bottom, and cut it at an angle


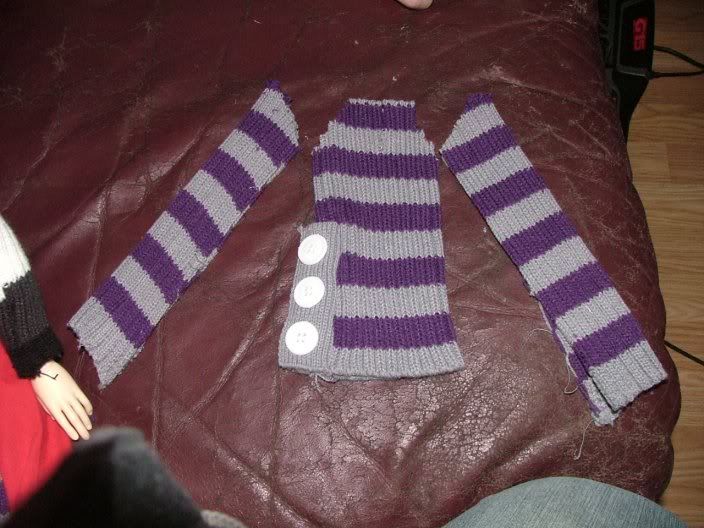
9. This is now what you should have ^-^

10. Use the wax thread, it will save you time, believe me, and it holds the raw edges together nicely. Make one stitch like so, and then tie it in a triple knot. Make it tight.


11. Hold the raw edges together and make another stitch, but this time thread the needle through the loop before pulling it tight. This will catch all the raw edges nicely. This is the most important step because you're working with a knit, and without this step it will pull apart. Sometimes there will be loops that stick up in different ways, always try to pin these down with another stitch.


This is what the stitching should look like when you're done. It's rough but you won't see it and tight stitches mean you don't see the thread you're using.


12. flip the arms inside out so that the seam you just made is on the INSIDE <-very important step!
13. Flip the body of the sweat so the seams are OUTSIDE. <-very important step!


14. Slide the arm in so the angled edges are together. You want the SEAM you just sewed of the ARM to be sitting where the armpit is.


15. Pinch the ARM SEAM and ARM PIT together and make a stitch. pinch the TOP of the arm with the top of the shoulders and make another stitch. You're going to use the same method as above as you go along. the rest of the edges.


You're still going to have another large half of the legwarmer left over. This will be your collar, and the hood.


16. Cut the finished edge off for the collar and set it aside. Fol the remainder in half.

17. Cut a shape like this, bigger than your dolls head with the wig ON. (you can always sew smaller, that's what I did until I got the desired shape when it was being worn).
18.Get your similar-color thread now. You're done using the wax from now on.
19. Sew the seam together on the back, rounded edge of the hood the same way you did with the wax thread.
20. Sew the hem that frames your dolls face by folding the edge in once and making simple in-out out stitching.


21. Measure out the length of edging you'll need for the collar. A rough estimate will do, I didn't technically measure anything using anything but my eye. When you stitch the collar and front V together...you want to keep the shirt so all seams are INSIDE, lay the collar along the V edge with the finished side DOWN, pinch the two together and sew them using the same method as the wax string above. Make tiny stitches, and make sure to sew down all stray parts.


To make the V more prominent, you may want to fold down the left side of the collar so that it lines up with the right side and stitch it down. I suggest this, but it isn't needed if you want a more rounded collar. (which kind of looked Final Fantasy Mage-like!)


Sew your hood on the back using the same method, only you will stitch each edge of the hood on the right and left side. Then fol the shirt and hood so the middle seam is on the middle of the shirt collar and make another stitch there. then proceed to stitch using the wax string method.


And that's it! You should have a nice hooded sweater like so <3
I hope this was helpful, pass it on to friends! You now have a dolly


Рубрики:  Куклы/одежда


Добавить комментарий:
Текст комментария: смайлики

Проверка орфографии: (найти ошибки)

Прикрепить картинку:

 Переводить URL в ссылку
 Подписаться на комментарии
 Подписать картинку