http://www.antiquelilac.com/more-wired-wings---tutorial.html
More Wired Wings
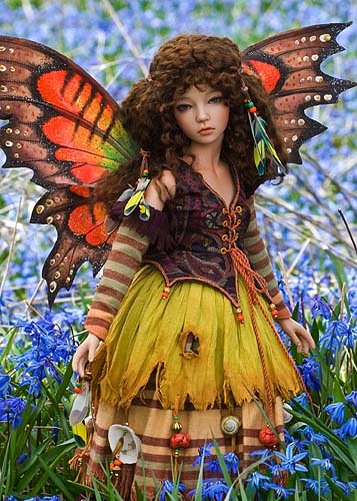
Make a set of wired wings for your favourite fairy.
These wings are a slightly more advanced version of 'Simple Wired Wings', and are sewn from semi-sheer fabric, and have wires inserted which slip into pockets sewn onto the back of the costume bodice.
The tutorial covers the steps involved in making the wings for my 'Mini Topaz'.
|
|
Materials
- sheer fabric (with some body - not too flimsy)
- scissors
- wire - thickness depends on size of wings being
made. For MSD size wings use an 18 gauge.
- pliers
- sewing machine & thread
- Fray Check
- iron
- needle
- hot glue gun
- acrylic or Folk Art Paint in colours to match your
fairy outfit
- Textile Medium
- brushes
- glitter paint
|
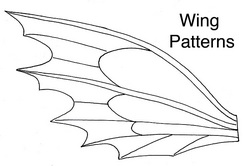
Wing Patterns
This tutorial includes the actual size wing patterns used for making my Mini Forest Fairy wings, as well as several other wing patterns you may want to try.
To download the pattern pdf click on the Wings Pattern Button below.
Instructions
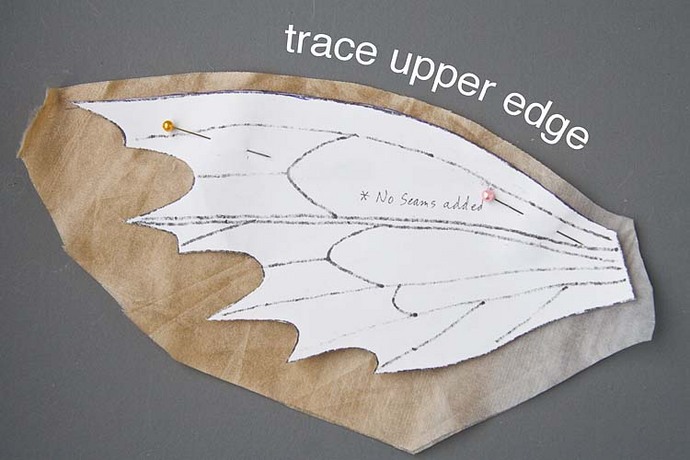
1. Print and cut out wing pattern. Pin pattern onto double layer sheer fabric. Trace upper edge of pattern onto fabric and cut with a 3/8" seam allowance along the top edge and leaving plenty of excess around the other outer edges of wing pattern.
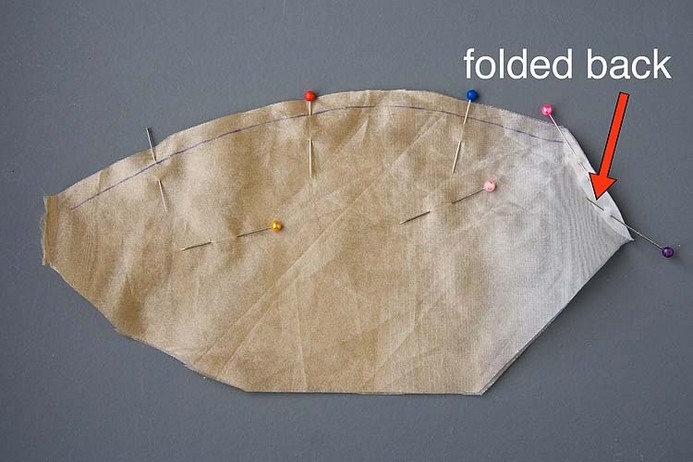
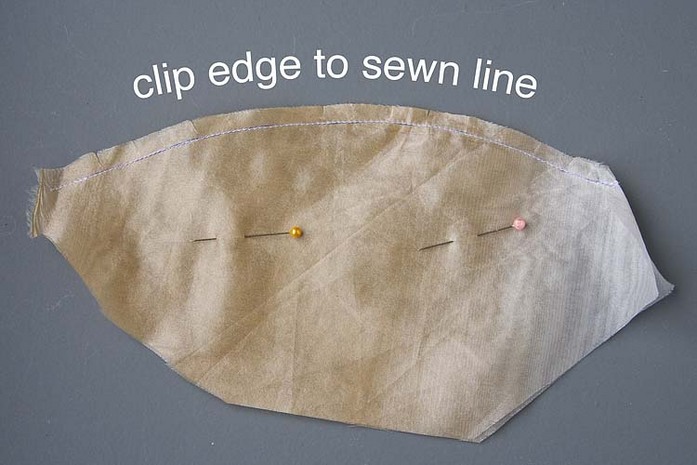
2. Fold back body edge of wing fabric and sew along top edge of wing.
3. Clip the curve with scissors. Turn wing right side out, and press using a soft cloth to protect
the fabric from direct contact with the iron.
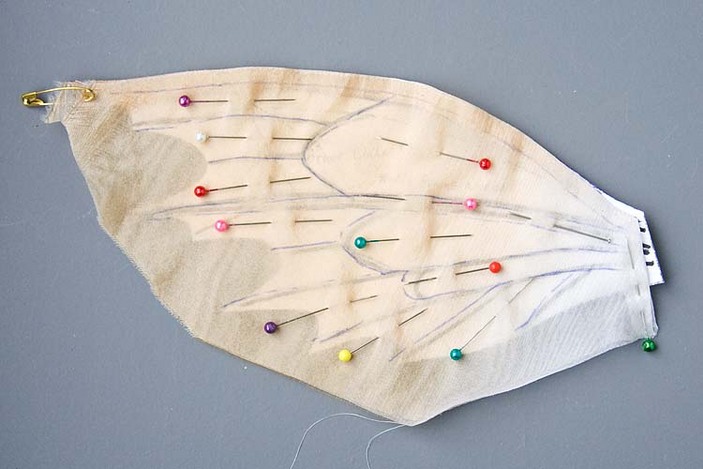
4. Pin sewn wing onto pattern to keep it from moving, and trace vein lines
onto fabric with pencil. Remove pattern from back of wing and re-pin fabric.
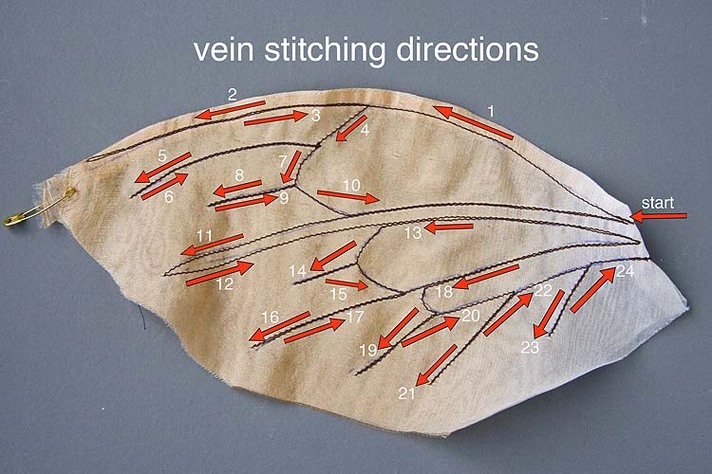
5. Using a thread matching the colour of the bodice, stitch the vein lines. Start at 'body
end' of wing, stitch out to end of pencil vein line, turn and continue stitching vein lines in
one continuous line following numbered arrows in photo below. *The extra fabric beyond
the edge of the actual wing makes stitching to end of line and turning much easier.
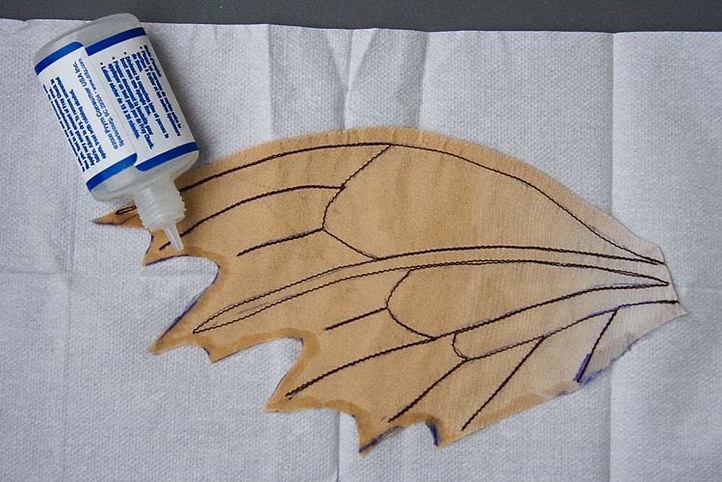
6. Press wing, then trace outer wing edge onto fabric. Cut outer wing edge being careful not
to clip ends of sewn vein lines. Draw a line of Fray Check along outer wing edge. Let Dry.
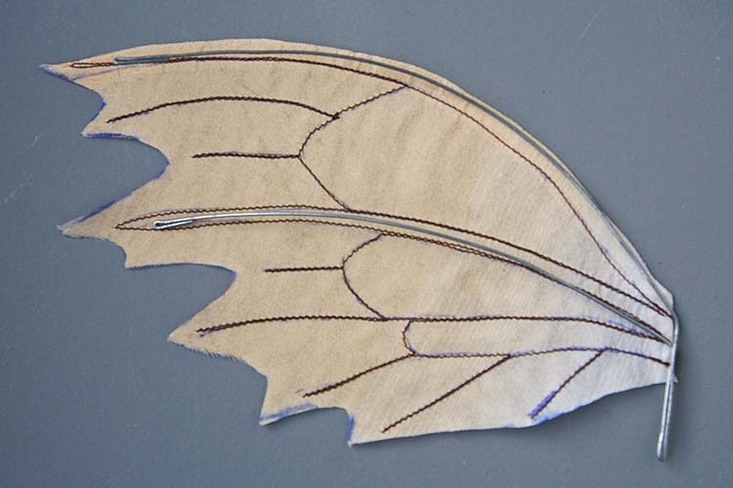
7. Using pliers, bend wire to fit into pockets. The thickness of the wire depends on the size
of the wings being made. My Mini Topaz wings used an 18 gauge wire. Very large wings will
need a heavier gauge but tiny wings will need a lighter gauge. Start with upper tip, bend a
little bit back on itself to create a blunt end. Laying wire along sewn wing, measure wire
along upper pocket, then bend down at 'body end'. Leaving 1 1/2" of wire for pocket, bend
wire back up tightly with pliers. About 1/4" below upper wire, bend second wire out below it.
Measure along fabric wing, cut end and bend under the end of the wire to make a blunt end.
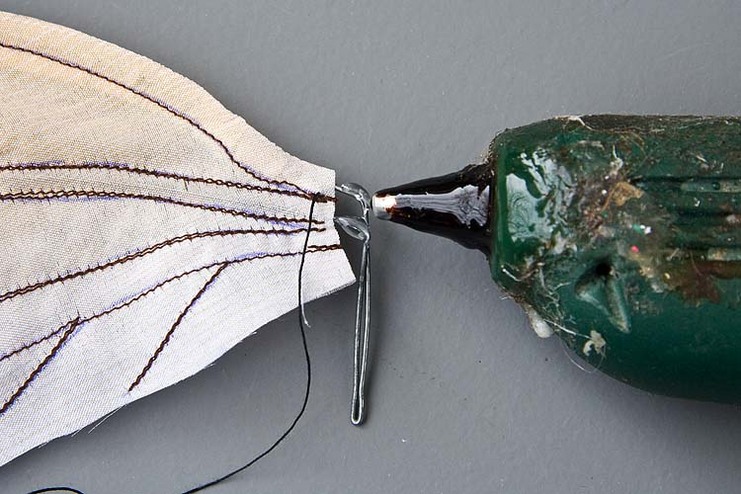
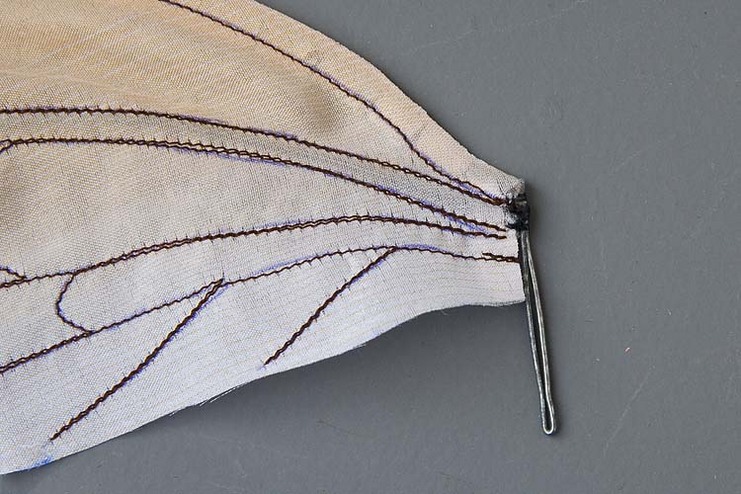
8. Insert wires into fabric pockets. Thread needle with strong thread, knot end, and thread
through one of the wing pockets. Pull fabric back along wires, apply a bit of hot glue to the
two wire ends and pull fabric back over wires. Quickly stitch securely with needle and thread.
9. Tie off thread, and smooth any bumps of cooled glue with tip of hot glue gun.
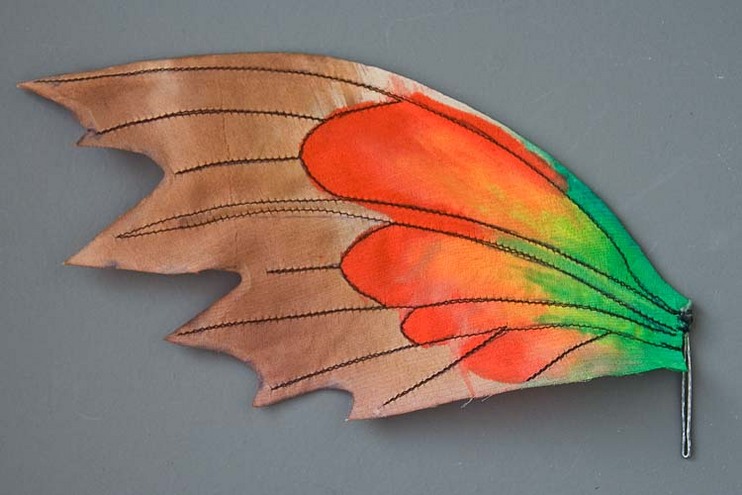
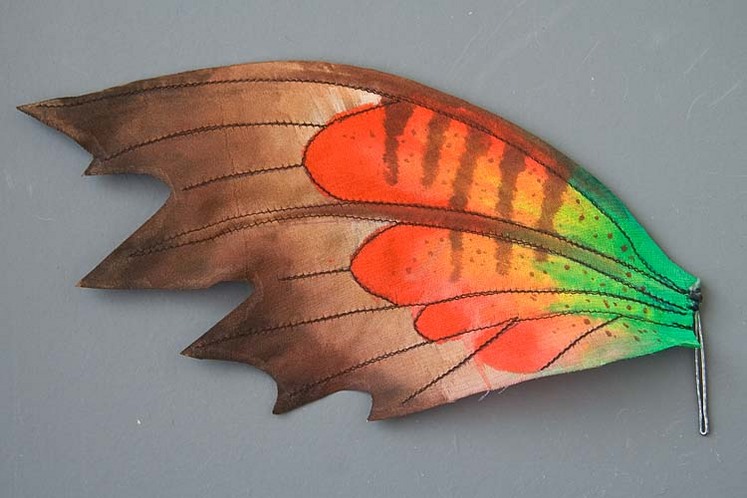
10. Soak wing with water, lay on paper towel. Mix desired paint colour with equal part textile
medium and dilute with water. Using a soft brush 'bleed' the base paint colours onto the wet wing.
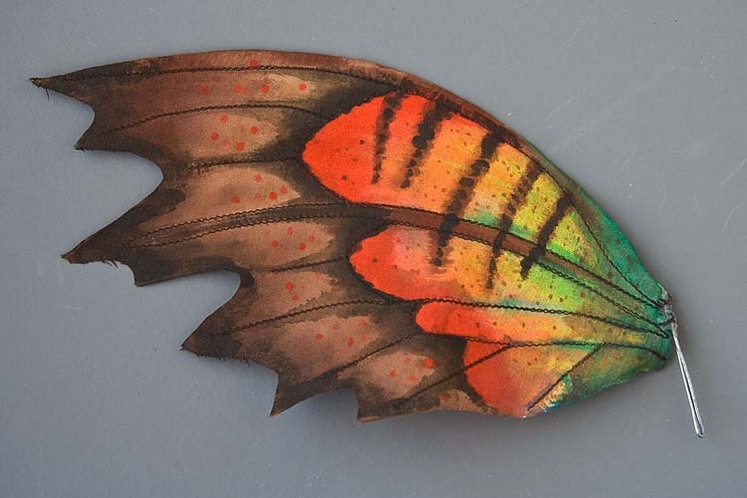
11. Build up second layer of colour
12. Add more shading, texture and details
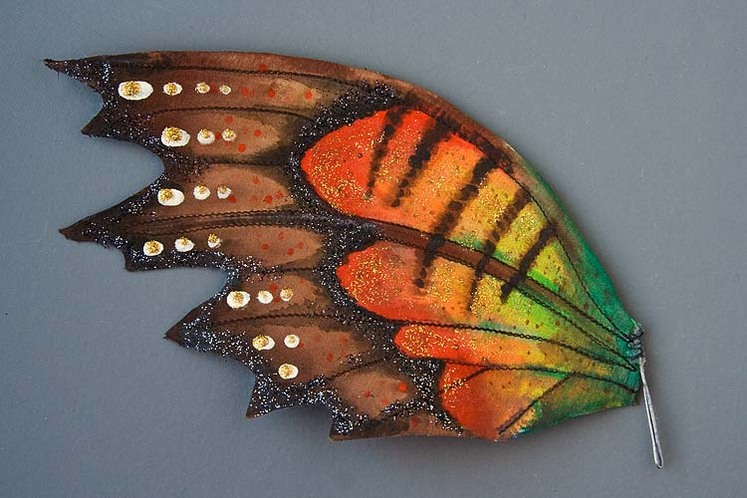
13. Add dots and glitter
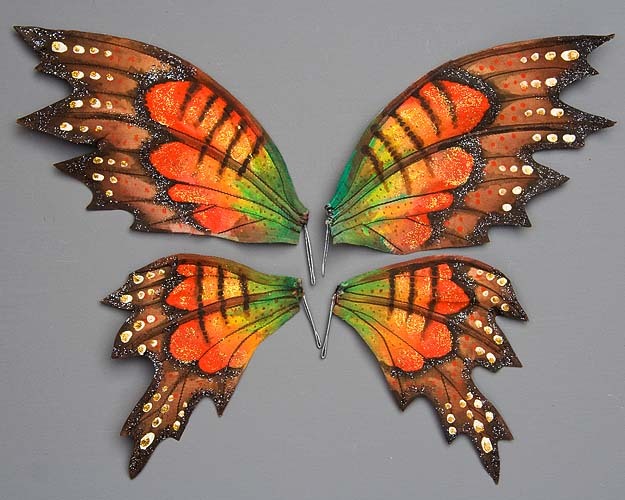
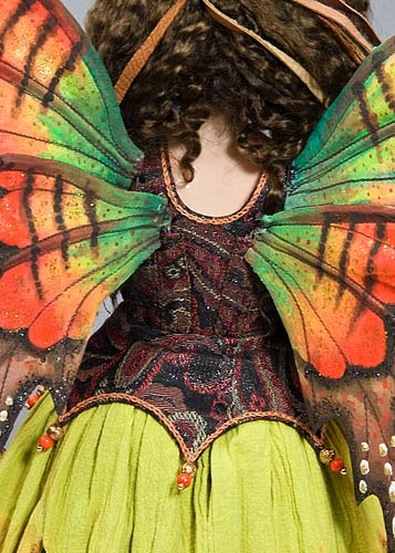
Finished set of upper and lower wings
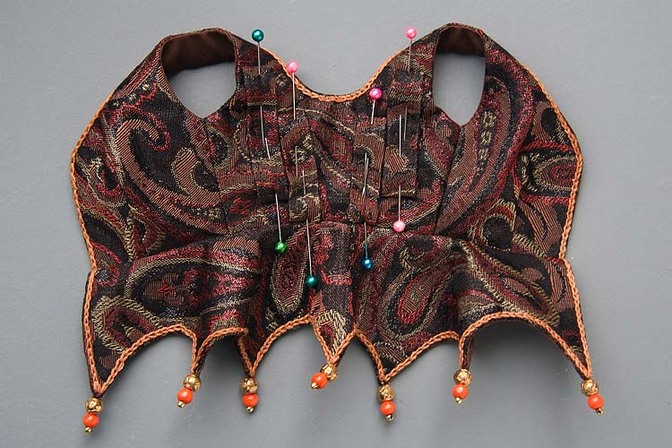
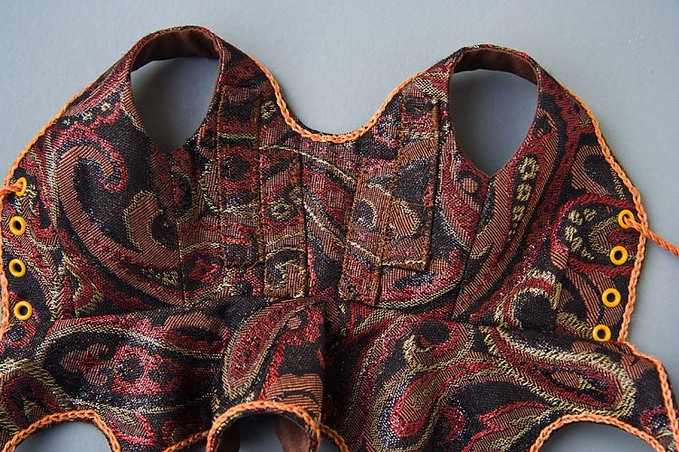
Adding Pockets to Back of Bodice
1. To make pockets on back of bodice into which to insert wing wires, cut 4 strips
of iron-on interfacing and iron onto the back side of extra bodice fabric. Cut out
and zig-zag edges. Fold under all the edges and hand baste to hold.
2. Pin basted strips onto back of bodice
3. Using small zig-zag stitch with matching coloured thread sew strips into place,
making sure to leave top edge open.
4. Insert wing wires into pockets