http://www.antiquelilac.com/cute--colourful-msd-pattern---tutorial.html
Cute & Colourful ©
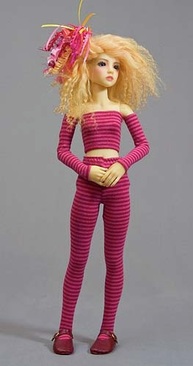
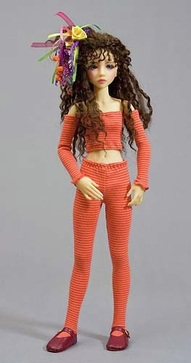
This pattern was designed to fit Narae43 by Narindoll.
Her measurements are; height 43cm, neck circumference 7.3cm, bust 17cm, waist 13.2cm, hips 19cm,
shoulder width 8.2cm, arm length 12.5cm, leg length 23cm.
The patterns will also fit other slim MSD-size dolls with similar measurements.
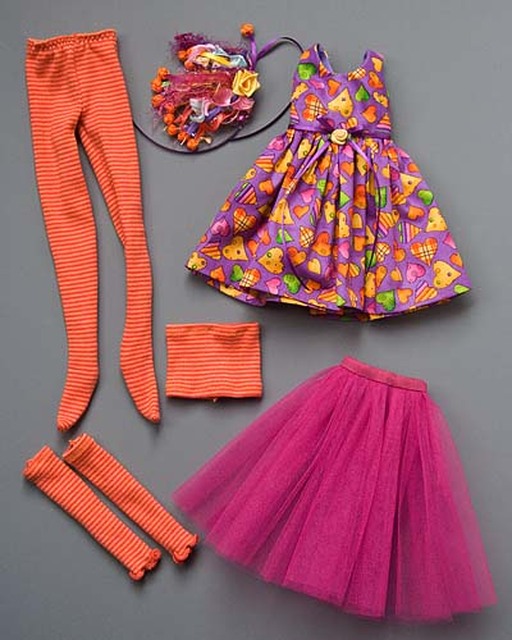
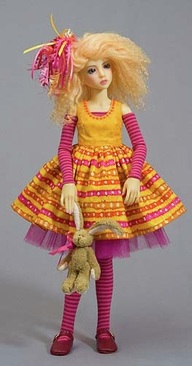
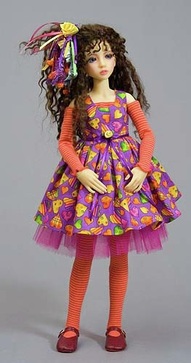
The dress is made of print cotton.
The tights, tube top, and arm warmers are made from a stretch knit. Knits with tiny stripes may be found by looking in the children's and ladies sections at used or discount clothing stores
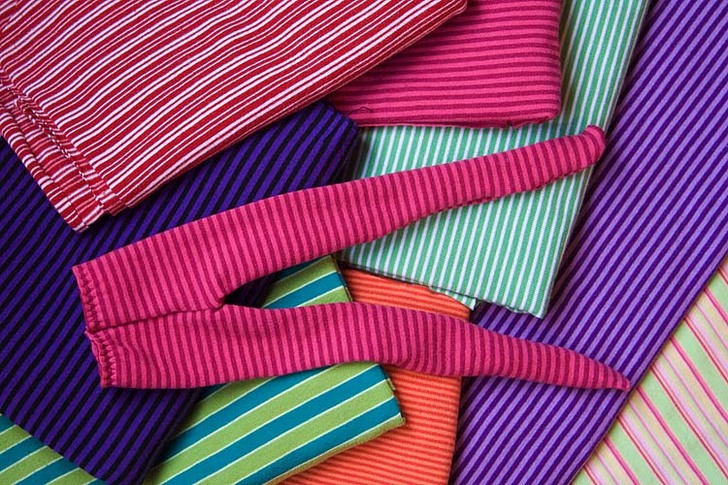
Some of the striped stretchy fabrics I've found as used clothing in discount stores, and a pair of tights made from one of them
.
Patterns
To download a PDF with full-size, ready-to-print patterns click: Cute & Colourful Pattern
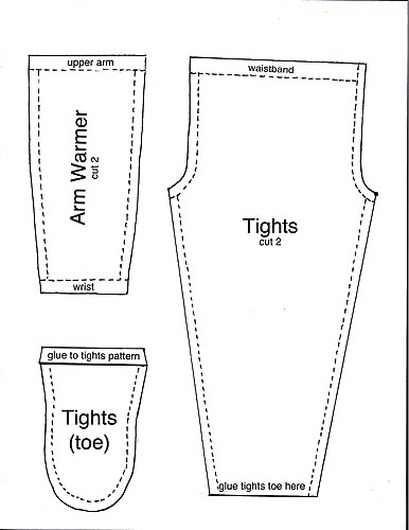
Cut out the patterns and glue the Tights toe onto the main Tights pattern piece.
The tube top, tights and arm warmer patterns are designed for a moderately stretchy knit. If your knit is VERY stretchy, you will need to shrink those patterns accordingly. The orange stripe in the sample was a moderate stretch, whereas the pink stripe was far stretchier so the patterns had to be reduced by cutting approximately 1/4" off the two sides, and making the tights shorter. If you are in doubt, make the items with the patterns given, and if they turn out to be too wide, just turn the items inside out and re-sew the back seams to make them smaller.
Dress Instructions
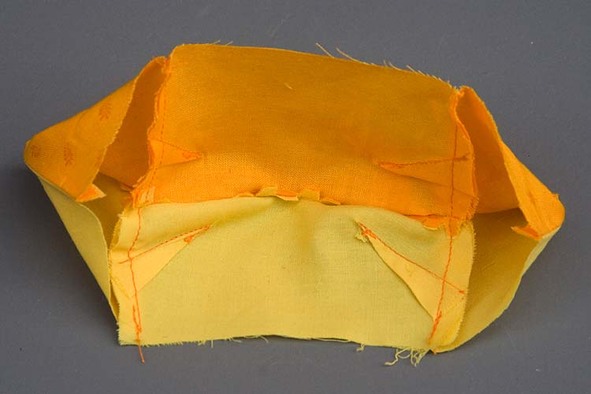
1. Trace the bodice template onto the wrong side of your dress fabric. Cut it out remembering to add 1/4" seam allowance. Cut out a bodice lining. Pin the right sides of the bodice fabric and lining together. Sew up one back edge, around neckline, and down other back edge. Then sew the two 'armholes'. Clip all the curves and turn bodice right side out by pulling each back section through it's corresponding 'shoulder strap'.
2. Sew darts on bodice and lining. Press. To make a neatly lined bodice, pin the underarm seams of bodice fabric to bodice fabric, and lining to lining as shown. Stitch.
Open seams wide and flat, fold lining down inside bodice and press, to create a neat lined bodice.
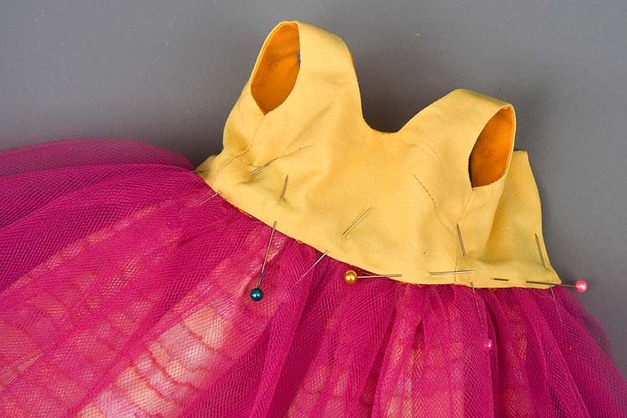
3. Cut skirt fabric 6" long by 30" wide. Finish back seams, stitch lower back of skirt together leaving top open. Hem bottom of skirt. Press.
4. Gather skirt just onto the bodice - not the lining.
Cut a strip of tulle 6 1/2" long - use scalloping or pinking shears if you have them. Gather the tulle skirt onto the bodice.
5. Fold under the bottom edge of the bodice lining and pin into place. Sew closed by hand. Sew snap closures along back opening. Embellish the dress with ribbons or flowers as desired.
*Option; Instead of sewing the tulle underskirt into the dress itself, sew the tulle onto a separate waistband to create a separate underskirt to be worn under the dress.
Tube Top - cut one. Fold top edge inside and hem with stretch stitch. Repeat for bottom edge. Fold widthwise with right sides together and stitch back seam.
Arm Warmers - cut two. Fold top edge inside and hem with stretch stitch, Repeat with wrist edge. Fold lengthwise with right sides together and sew side seam.
Tights - cut two. With right sides together, sew front 'panty' seam with stretch stitch. Fold top edge inward and sew elastic across top. With right sides together sew back 'panty' seam with stretch stitch. Match the crotch seams and pin the tights with right sides together. Stitch with stretch stitch starting at one foot, going up to crotch, then down other leg.
Hair Ornament - cut an 8" length of thin ribbon. Cut several 5" lengths of assorted thin ribbons and fancy yarns that match the colour of your oufit. Tie each of the ribbons and yarns onto the 8" length, pushing them all together and then tie the 8" ribbon to keep everything from slipping off.