Автор мастер-класса ZhukovaMiniart пишет: Хочу предложить создать/слепить мандрагору. Создание...
Вышиваем бабочки бисером и пайетками. Мини МК - (0)1. 2. 3. 4. 5. 6. 7. 8. ...
Проект "КНИЖКА-РАЗВИВАЙКА" - (0)Автор:Tanya 1-ая страничка Ну что? ...
Алонкины игрушки. Книжка сказок из фетра. - (0)Ну что, мои дорогие, будьте готовы, сейчас будет много фоток , наверное, много буковок. Дело ...
Оригинальная заколка одуванчик - (0)Нам понадобятся: шарик пенопластовый(диаметр 3см) , проволока обклеенная серой бум...
тапки |
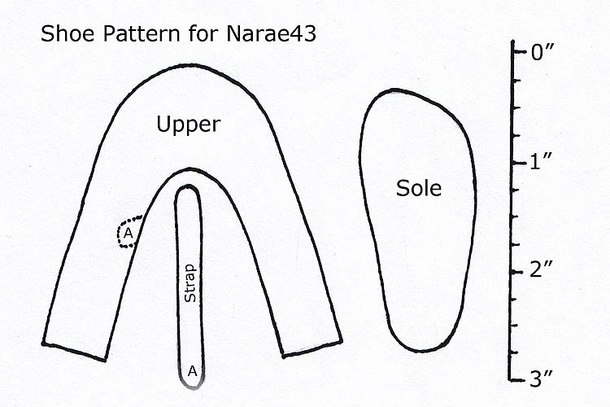
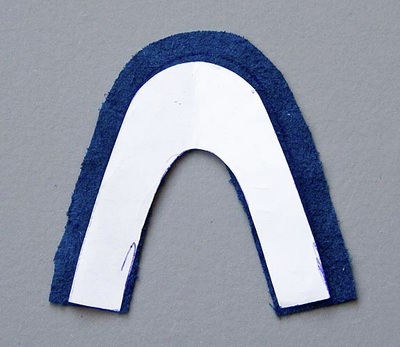
1. Print patterns to scale shown. Cut out patterns. Trace shoe upper onto the back side of leather. Cut out the leather making sure to add about 3/8" extra around outer edge.
|
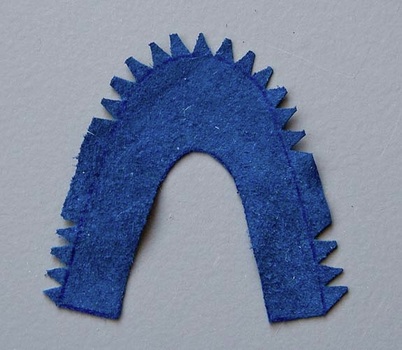
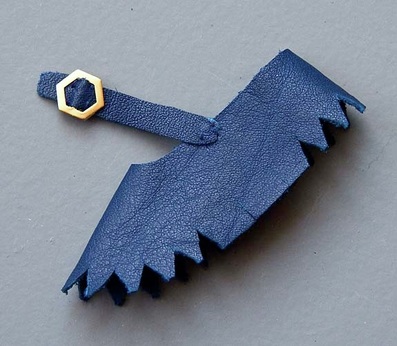
2. Clip around outer edge of shoe with sharp scissors as shown.
|
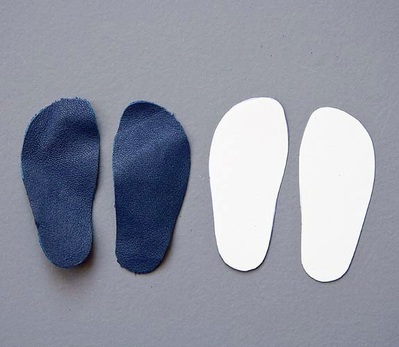
3. Cut out two sets of soles - one set out of leather, and another set out of white cardboard.
|
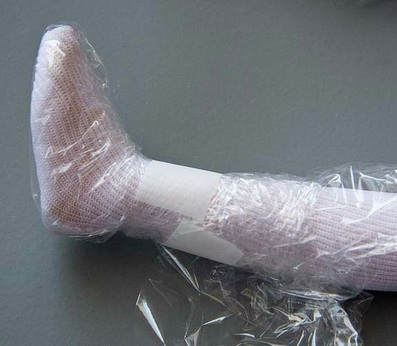
4. With stockings on foot, wrap foot with plastic wrap and secure with tape.
|
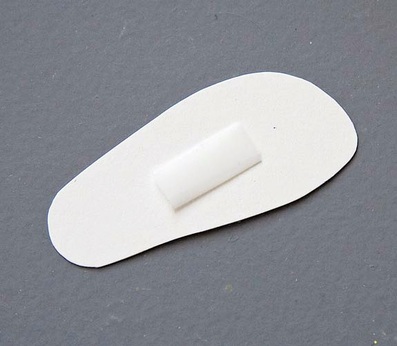
5. The white cardboard sole will be the inner sole. Roll a small piece of tape...
|
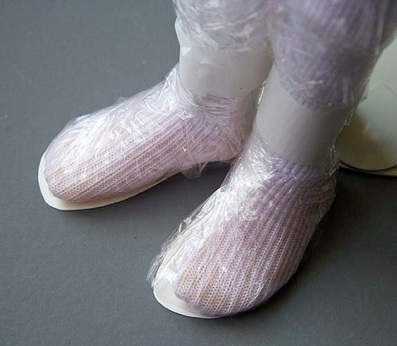
6. ... and stick soles onto bottoms of feet.
|
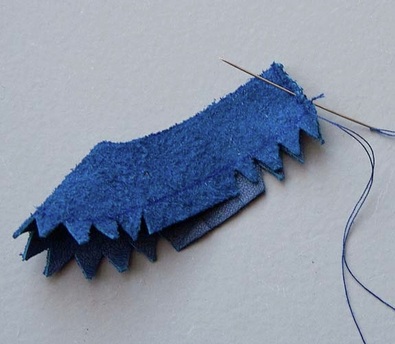
7. With right sides together, hand-sew the back of the shoe
|
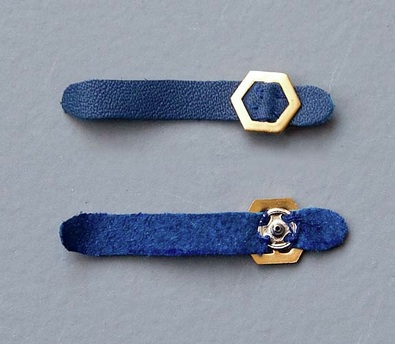
8. Trace and cut out two shoe straps. Insert strap into the buckle, then hand-stitch a snap fastener underneath (optional)
|
9. Apply a thin layer of glue to the underside of the strap and position as indicated on the pattern.
Stitch into place. |
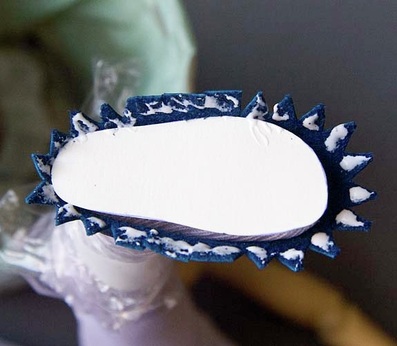
10. Slip the shoe over the foot - making sure the strap is on the correct side. Apply glue to all the tabs around the outside edge of the leather upper.
|
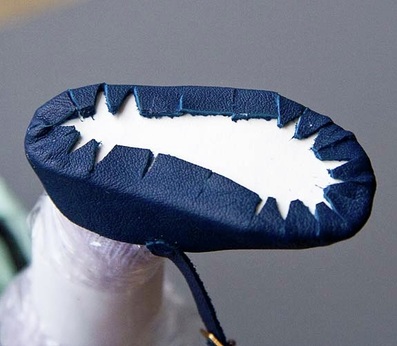
11. Carefully glue the leather upper onto the cardboard sole.
|
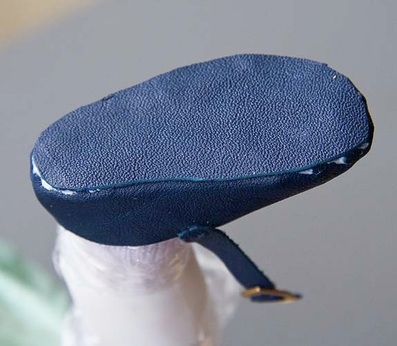
12. Apply glue over entire shoe sole and glue on leather sole. Carefully wipe away excess glue. Let shoes dry thoroughly before removing from foot.
|
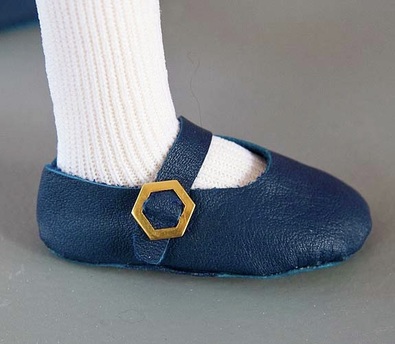
13. Sew the second half of the snap fastener onto the outside of the shoe.
|
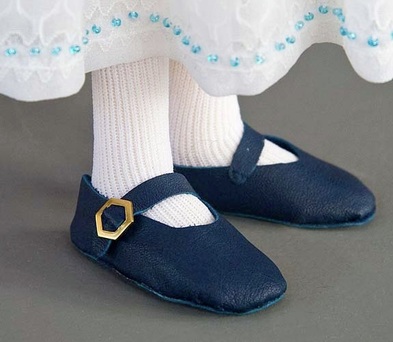
14. The finished shoes.
|
| Комментировать | « Пред. запись — К дневнику — След. запись » | Страницы: [1] [Новые] |


