-–убрики
- ¬идео мастер-классы (41)
- ‘отошоп (6)
- ¬ ”—Ќ≈Ќ№ ќ≈ (1600)
- из молочных продуктов (сыры, йогурты и тд) (87)
- постные блюда (50)
- сервировка и украшение стола (47)
- букеты из конфет (46)
- микроволновка (24)
- хлебопечка (2)
- пароварка (2)
- выпечка (327)
- десерты (торты, пирожные. желе и тд) (361)
- заготовки (57)
- закуски ,салаты (261)
- конфеты, сладости (227)
- м€со (229)
- напитки (59)
- рыба (34)
- ƒ≈ ”ѕј∆ (107)
- карты дл€ декупажа (24)
- ¬—я »≈ –ј«Ќџ≈ –” ќƒ≈Ћ » (750)
- бисер (90)
- гипс (7)
- вал€ние (6)
- пейп-арт (5)
- ћукосольки (поделки из теста) (72)
- папье-маше (38)
- ѕластиковые бутылки и поделки из них (28)
- ѕлетение из газет (223)
- поделки из бумаги (125)
- поделки из ниток (15)
- скрап (16)
- лепка (’‘, фимо, глина и тд) (77)
- ¬џЎ»¬јЌ»≈ (27)
- ¬я«јЌ»≈ (470)
- в€зание дет€м (153)
- в€заные цветы (12)
- в€зание дл€ взрослых (136)
- в€заные игрушки (162)
- Ќосочки,шарфики, шапочки (50)
- ƒј„ј, —јƒ, ќ√ќ–ќƒ (125)
- ƒ≈“» (1414)
- ¬оспитание детей (128)
- »гры с детьми (95)
- ѕоделки с детьми (273)
- развитие детей (556)
- раскраски дл€ детей (32)
- ƒЋя ћ≈Ќя!!!! (то, что мне нужно))))) (667)
- «ƒќ–ќ¬№≈ (96)
- »гольницы (34)
- »√–”Ў » (1903)
- прочие игрушки не вошедшие в список (323)
- игрушки из фетра (175)
- детские подушки-игрушки (135)
- кошечки, тигры (133)
- птицы,бабочки, улитки, насекомые (128)
- ƒругие куклы (122)
- ’рюшки, коровки,овечки,лошадки (84)
- слоники, жирафы,бегемоты (75)
- простые игрушки дл€ самых маленьких (67)
- новогодние игрушки (66)
- собаки (54)
- игрушки из носков (53)
- овощи, фрукты (43)
- полезные советы при изготовлении игрушек (43)
- мебель дл€ кукол (43)
- игрушки на руку, на пальчики (15)
- »грушки из помпонов (14)
- зайцы (220)
- мишки (154)
- развивающие игрушки дл€ самых маленьких (178)
- тильды (299)
- подарки (57)
- »Ќ“≈–№≈– ƒ≈“— ќ… ќћЌј“џ (180)
- примеры готовых интерьеров (46)
- ”крашение детской (вс€кие красивые вещички и идеи) (135)
- »Ќ“≈–№≈– ¬ј–“»–џ (1338)
- текстильный декор (138)
- абажуры, лампы (14)
- деревь€, веночки дл€ интерьера, топиарии (214)
- другой декор (не текстиль) (352)
- коврики (56)
- подушки (307)
- ѕримеры интерьеров квартир (79)
- прихватки, грелки на чайник (67)
- свечи (71)
- фонтаны (2)
- шторы (68)
- опилка ссылок (32)
- оробочки, шкатулочки (160)
- ќ—ћ≈“»„ » (221)
- –ј—ќ“ј (524)
- диеты (102)
- ногти (8)
- уход за волосами (86)
- уход за лицом (130)
- уход за телом (102)
- фитнес, стрип-денс, пилатес, боди-флекс (77)
- ” Ћџ (161)
- ћастер-классы (0)
- ћ≈Ѕ≈Ћ№ (181)
- ћебель (делаем сами) (108)
- кресла-груши (5)
- ћебель из картона (48)
- ѕримеры мебели (23)
- ћќ» –јЅќ“џ » ћј—“≈–_ Ћј——џ (2)
- ћ”«џ ј (15)
- ћџЋќ¬ј–≈Ќ»≈ (67)
- ќЅ”¬№ (делаем сами) (287)
- ќбувь дл€ малышей (140)
- ѕеределка обуви (идеи) (38)
- “апочки (106)
- ѕ≈–≈ƒ≈Ћ » ( из старых вещей) (345)
- ѕолезные советы (629)
- заработок в интернете; где продавать свои издели€ (66)
- полезности дл€ рукодели€ (147)
- советы блог (206)
- советы дом (136)
- советы компьютер (90)
- советы по фотосъемке (29)
- ѕ–ј«ƒЌ»„Ќџ≈ »ƒ≈» ƒ≈ ќ–ј (812)
- гирл€нды (29)
- ƒень св€того ¬алентина (149)
- детский праздник (62)
- другие праздники (70)
- Ќовый год идеи (526)
- пасха (66)
- свадьба (136)
- ѕ–≈ƒћ≈“џ »Ќ“≈–№≈–ј (275)
- другое (146)
- вазы (68)
- цветочные горшки (44)
- бутылочки (42)
- картины (34)
- ѕсихологи€ (154)
- –азное (1136)
- –емонт (36)
- —”ћќ„ » (458)
- детские сумочки (77)
- клатчи (46)
- кошельки (20)
- органайзеры дл€ шить€, в€зани€ (21)
- сумки (98)
- “ќЋ№ ќ ƒЋя ƒ≈¬”Ў≈ ;) (4)
- трафареты (142)
- ” –јЎ≈Ќ»я (1435)
- цветы (553)
- цветы из лент и ткани (467)
- аксессуары (183)
- цветы-канзаши (64)
- банты (61)
- цветы из фетра (37)
- в€заные цветы (17)
- Ѕижутери€ (308)
- ÷веточки, бантики, резиночки (1024)
- ”паковка (23)
- фото (0)
- ÷¬≈“џ ∆»¬џ≈ (11)
- ЎитьЄ (2231)
- шитье дл€ беременных и самых маленьких деток(подуш (140)
- шитье дл€ дома (23)
- Ѕуфы (20)
- √оловные уборы (шл€пки, панамки и др) (1)
- ƒекор одежды (72)
- карнавальные костюмы (71)
- полезности дл€ шить€ (111)
- ‘асоны платьев (без выкроек) (69)
- Ўитье (взрослым) (1003)
- Ўитье (деткам) (855)
- шитьЄ дл€ домашних животных (55)
- Ё“ќ »Ќ“≈–≈—Ќќ (105)
- ёћќ– (99)
-ѕоиск по дневнику
-ѕодписка по e-mail
—оседние рубрики: шторы(68), фонтаны(2), свечи(71), ѕримеры интерьеров квартир(79), подушки(307), коврики(56), другой декор (не текстиль)(352), деревь€, веночки дл€ интерьера, топиарии(214), абажуры, лампы(14), текстильный декор(138)
ƒругие рубрики в этом дневнике: ёћќ–(99), Ё“ќ »Ќ“≈–≈—Ќќ(105), ЎитьЄ(2231), ÷¬≈“џ ∆»¬џ≈(11), ‘отошоп(6), фото(0), ”паковка(23), ” –јЎ≈Ќ»я(1435), трафареты(142), “ќЋ№ ќ ƒЋя ƒ≈¬”Ў≈ ;)(4), —”ћќ„ »(458), –емонт(36), –азное(1136), ѕсихологи€(154), ѕ–≈ƒћ≈“џ »Ќ“≈–№≈–ј(275), ѕ–ј«ƒЌ»„Ќџ≈ »ƒ≈» ƒ≈ ќ–ј(812), ѕолезные советы(629), ѕ≈–≈ƒ≈Ћ » ( из старых вещей)(345), ќЅ”¬№ (делаем сами)(287), ћџЋќ¬ј–≈Ќ»≈(67), ћ”«џ ј(15), ћќ» –јЅќ“џ » ћј—“≈–_ Ћј——џ(2), ћ≈Ѕ≈Ћ№(181), ћастер-классы(0), ” Ћџ(161), –ј—ќ“ј(524), ќ—ћ≈“»„ »(221), оробочки, шкатулочки(160), опилка ссылок(32), »Ќ“≈–№≈– ¬ј–“»–џ(1338), »Ќ“≈–№≈– ƒ≈“— ќ… ќћЌј“џ(180), »√–”Ў »(1903), »гольницы(34), «ƒќ–ќ¬№≈(96), ƒЋя ћ≈Ќя!!!! (то, что мне нужно))))) (667), ƒ≈“»(1414), ƒ≈ ”ѕј∆(107), ƒј„ј, —јƒ, ќ√ќ–ќƒ(125), ¬я«јЌ»≈(470), ¬џЎ»¬јЌ»≈ (27), ¬—я »≈ –ј«Ќџ≈ –” ќƒ≈Ћ »(750), ¬ ”—Ќ≈Ќ№ ќ≈(1600), ¬идео мастер-классы(41), подарки(57)
Ѕезупречна€ защита |
Ёто цитата сообщени€ Katra_I [ѕрочитать целиком + ¬ свой цитатник или сообщество!]
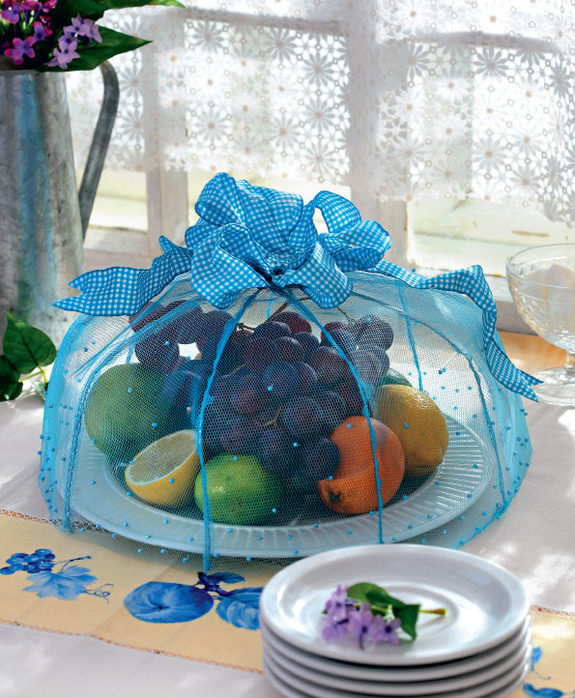
Ўатер от мух. ћастер-класс

„тобы оградить при€тное дачное застолье на свежем воздухе от непрошеных гостей – назойливых мух и прочих жужжащих парнокрылых, нужно тщательно спр€тать все съестное, особенно сладкое. ј сделать это несложно.
„то потребуетс€?
|
ѕрихватка Ђ¬ две рукиї своими руками... замечательна€ иде€ дл€ кухни... |
Ёто цитата сообщени€ милена70 [ѕрочитать целиком + ¬ свой цитатник или сообщество!]
ѕрихватка «¬ две руки» своими руками... замечательна€ иде€ дл€ кухни...

»сточник - http://women-on-line.ru

|
расота на кухне |
Ёто цитата сообщени€ SelenArt [ѕрочитать целиком + ¬ свой цитатник или сообщество!]
|
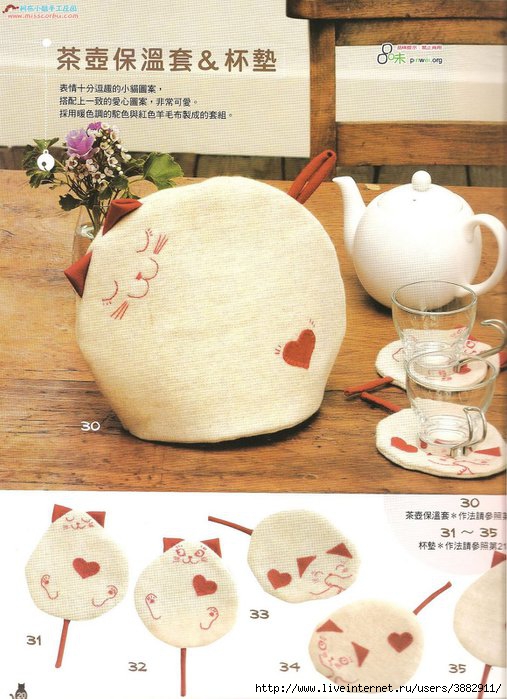
√релка на чайник и салфеточки котики. ¬ыкройка |
Ёто цитата сообщени€ “ј“» _222 [ѕрочитать целиком + ¬ свой цитатник или сообщество!]
“акие забавные котики украс€т вашу кухню и будут отличным подарком родным и близким к любому празднику.

|
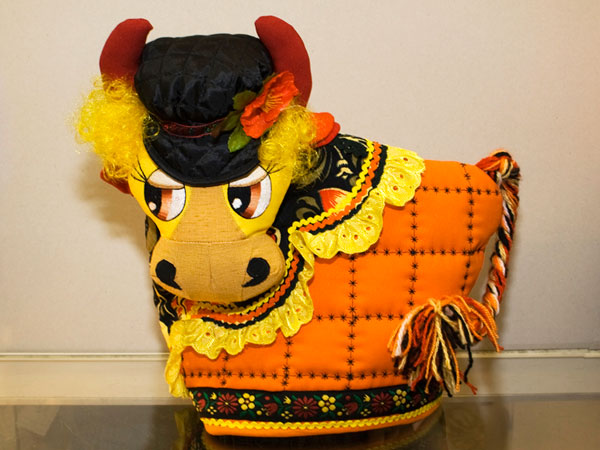
√релки на заварник.(132 шт) |
Ёто цитата сообщени€ Vikylia68 [ѕрочитать целиком + ¬ свой цитатник или сообщество!]
√релки на заварник.(132 шт)
¬ыкладываю всЄ что собирала дл€ себ€.
ѕост без комментариев, не вижу необходимости.

„итать далее
|
ѕрихватка "Ѕабочка" |
Ёто цитата сообщени€ “аша92 [ѕрочитать целиком + ¬ свой цитатник или сообщество!]


ѕрихватка «Ѕабочка» поразила мен€ своей оригинальностью, необычностью, красотой… ѕри желании такие же бабочки могут поселитьс€ и на вашей кухне. —мотрите далее детали выкройки прихватки и… фантазируйте ;)
ћетки: бабочка прихватка кухн€ |
орзиночка к ѕасхе! |
Ёто цитата сообщени€ ћа_ль_ва [ѕрочитать целиком + ¬ свой цитатник или сообщество!]
ћетки: пасха праздник украшение корзинка текстиль шитье |
¬ы любите клубнику |
Ёто цитата сообщени€ Dama_Madama [ѕрочитать целиком + ¬ свой цитатник или сообщество!]
|
—алфетка "јрбузна€ долька". Ўита€. Ќе смогла пройти мимо этой красоты) ќчень уж мило! |
Ёто цитата сообщени€ Nikash [ѕрочитать целиком + ¬ свой цитатник или сообщество!]
—алфетка "јрбузна€ долька". Ўита€. Ќе смогла пройти мимо этой красоты) ќчень уж мило!
—ери€ сообщений "ƒекор":
„асть 1 - ќгненна€ саламандра: роспись по ткани. расива€ подушечка)
„асть 2 - ѕарочка ћ по джинсовым цветочкам.
...
„асть 18 - ƒекор подушек) »деи классные!
„асть 19 - ѕодушки - котики) выкройки
„асть 20 - —алфетка "јрбузна€ долька". Ўита€. Ќе смогла пройти мимо этой красоты) ќчень уж мило!
|
—алфетка "ћорковка". Ўита€ (без перевода) |
Ёто цитата сообщени€ Nikash [ѕрочитать целиком + ¬ свой цитатник или сообщество!]
—алфетка "ћорковка". Ўита€ (без перевода)
Materials
Quilt Designer: Shelley Robson of The Quilted Forest
From Quilts and More, Spring 2006
1/2 yard of backing fabric
1/8 yard each of seven assorted orange prints for table runner top
18x22" piece (fat quarter) of mottled orange for binding
2 -- 18x22" pieces (fat quarters) of assorted green prints for stem
16x28" of thin quilt batting
Lightweight fusible web
Medium-weight cutaway stabilizer
Quilt basting spray (optional)
Finished table runner (including stem): 13x32-1/4"
Quantities are for 44/45"-wide, 100% cotton fabrics. All measurements include a 1/4" seam allowance. Sew with right sides together unless otherwise stated.
To order a kit of similar fabrics (all fabrics for quilt top, backing, and binding), send $24.50 ppd. to The Quilted Forest, 109 N. Clark, Forest City, IA 50436; or call 641-585-2438.
Cut the Fabrics
To make the best use of your fabrics, cut the pieces in the order that follows. Click on "Download This Project" to download the full-size patterns. (Patterns A and B will print out together as four pages and Pattern C will print out as two pages; after printing, tape sheets together on the dotted lines to make patterns.) Be sure to transfer the center positioning line onto the A fabric piece after cutting.
From backing fabric, cut:
1 of Pattern A
From each assorted orange print, cut:
2 -- 1-1/2x42" strips
From mottled orange, cut:
Enough 2-1/2"-wide bias strips to total 75" in length for binding.
From each green print, cut:
1 -- 11x16" rectangle
From lightweight quilt batting, cut:
1 of Pattern A
From fusible web, cut:
2 -- 11x16" rectangles
From stabilizer, cut:
1 -- 11x16" rectangle
Assemble and Quilt Table Runner
1. Lay the backing fabric A piece on your work surface with the right side down. Place the thin quilt batting A piece on top. (If desired, use quilt basting spray to secure the layers together.)
2. With the right side up, place an orange print 1-1/2x42" strip across the middle of the layered A pieces; one edge should run along the center positioning line and the end should extend just beyond the top of the layered A pieces. Trim the excess orange print strip just beyond the bottom edge of the layered A pieces (Diagram 1).
3. With the right side down, place a second orange print 1-1/2x42" strip atop the first strip; trim the excess strip as before. Sew together through all layers (Diagram 2). Finger-press the top strip open. (Designer Shelley Robson recommends using a walking foot attachment on your machine during the construction to avoid puckers on the quilt back.)
4. Continue adding assorted orange print strips in both directions until the layered A pieces are covered; press. Center the B template on the strip-covered A piece; trace around and cut out to make the table runner (Diagram 3).
Complete the Table Runner
1. Using diagonal seams, sew together the mottled orange 2-1/2"-wide bias strips to make a 75"-long strip. Bind table runner with 75"-long strip.
2. Following the manufacturer's instructions, press the fusible-web 11x16" rectangles onto the backs of the green print 11x16" rectangles; let cool. Peel off the paper backings.
3. Lay one Step 2 green print rectangle on your work surface with the right side down. Place the stabilizer 11x16" rectangle on top. With the right side up, place the remaining Step 2 green print rectangle on top of the layered rectangles. Following the manufacturer's instructions, fuse all of the pieces together.
4. Trace Pattern C onto the fused Step 3 rectangle, tracing the stitching line and six pleat lines. Cut out on the outer drawn lines to make the stem. Using a short, wide zigzag stitch, sew around all edges of the stem.
5. Fold the stem so a set of two pleat lines match up; pin through both pleat lines. Then press lightly to form a pleat. Repeat to fold and press a total of three pleats in the stem. Machine-baste on the marked stitching line to hold the pleats in place (Diagram 4).
6. Place the pleated stem on the wide end of the table runner so the short stem end is on the table runner and the stitching line is 1/2" from the bound edge (Diagram 5). Topstitch over the basting stitches to secure the stem to the table runner. Fold the stem in half so both portions extend above the top of the carrot shape; press lightly to complete the project.
|


