Жидкость для мытья посуды своими руками |

Нам понадобится:
немного свободного времени
хозяйственное мыло– 25 грамм
горячая вода – 0,5 л
глицерин – 4 столовых ложки
водка или разведенный спирт – 1 столовая ложка.
|
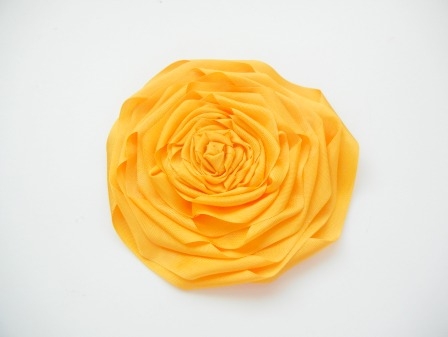
Розы из ленты. Очень красивые |
Посмотрите по этому мастер классу как быстро можно сделать из ленты красивые розы. Замечательные получаются
|
обруч с цветами |
Дневник |
I was smitten and couldn't stop thinking about them.
Every time I went to the mall I'd pay them a visit.
I was tempted to buy one for my granddaughter but came to my senses.
Even described them to her, but she wasn't at all interested.
Shoot.
I'll bet I could make those, I thought. But never did.
Then I saw one of my favorite girls wearing one here and knew I needed to figure out how to make them.
Here's what I came up with:
Cut cardstock weight paper into 1/2" x 11" strips. I used an old manila envelope for this. Make a bunch cause you'll use them eventually even though you can reuse them over and over.
Cut or tear fabric into a strip that measures 1" wide by 44" long. (Not all fabric that I used in my samples would tear which made cutting necessary. Both methods work. Tearing just produces a more ragged edge). Remove the selvages and cut the strip in half so that you end up with two pieces that measure 1" x 22" (more or less - doesn't have to be exact). One whole piece will yield two roses.
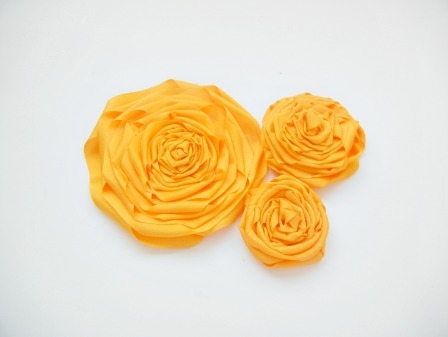
Fold the fabric strips in half lengthwise and press. (My black roses were made from velveteen and I folded the center one with the velvet side out and the other two with the velvet side in - I wanted to vary the color and texture, but you could make them all with the velvet side out if you wanted to).
Secure one end of the folded strip to one end of a cardstock strip and loosely wrap until the entire strip is wrapped. Pin the other end. Try not to overlap the wraps as you go. And whatever you do, don't wrap too tightly or you won't be able to get the dang thing off the cardboard later (ask me how I know).
Lightly spray the wrapped strip with starch and press both sides of the strip with a hot steam iron. Let cool completely.
Now carefully slide the cardstock out from the wrapped strip being careful not to disturb the folds.
Working on your ironing board, lay the strip back out and starch and steam one more time. You may need to reposition your folds if they got messed up.
Starting at one end, place a pencil on the strip and start to loosely roll the strip onto the pencil. Do not pick the strip up. Just work with the strip laying on your ironing board as pictured.
Once it's rolled you can hold your little rolled rose in your hand and gently remove the pencil.
Hot glue the end to the side of the rose to secure.
Squeeze a puddle of hot glue onto a piece of matching felt. (The rose should be just slightly larger than the glue circle).
Place the rose in the glue and as it is drying pull the outside petals slightly out with tweezers or the point of your scissors. Continue opening up your rose petals as it dries being careful to make sure that all of the petals are secured in the glue. You can twist the inside of your rose with your tweezers to close up the hole if you're not adding a button to the center.
Let the rose cool completely.
Trim the felt around each rose as close to the dried glue as possible.
Glue a button into the center of your rose if you'd like.
I added a couple of little gathered poofs of netting to my roses.
You can now attach your single rose or cluster of roses to a hair clip, headband, or pin back.
With headband they cost about $2.50 to make.
A heck of a lot better than the $32 huh?
....................................................................................................
Hints and thoughts:
:: If the ragged edges bother you, try making them with a sewn tube of fabric. Simply add a seam allowance to your strip, sew with right sides together and turn. Then follow instructions.
:: As I was making these I was thinking seam binding might work. Didn't have any to try but it has folded edges so the raw edges would be on the inside of the strip. It might work. Not sure.
:: If you use velvet or other heavy fabric your roses will be bigger than roses made with quilt weight cotton. If you want larger flowers just start with a longer strip and a longer piece of cardstock.
:: I think this would be a great craft project to do with young women (or old women for that matter) who don't sew. This method is foolproof so anyone can make them.
:: The headbands are all by Goody and are available at drug stores and grocery stores. Mine came from Ralph's and Vons.
I'd love to hear your thoughts and ideas!
Encourage one another,
|
| Страницы: | [1] |


