-

  • (42)
  •     (12)
  •     (11)
  •     (10)
  •     (7)
  •     (3)
  •     (1)
  • FOOD (39)
  •     (9)
  •     (9)
  •     (8)
  •    apetizers (6)
  •     (1)
  •     (1)
  •     (1)
  •     (1)
  • (25)
  •    N/Y (5)
  •    / (5)
  •    pilows (3)
  •     (2)
  • handy crap (12)
  •    tree (4)
  •    c (4)
  •     (3)
  •    ideas (1)
  • (2)
  •     (2)

 -

   Shprotka

 - e-mail


 -

 LiveInternet.ru:
: 23.01.2012
: 121
: 10
: 130

:

.


: (12), (7), (1), (11), (3), (10)

: (2), (25), handy crap(12), FOOD(39)
(0)

+ + !

, 03 2012 . 20:50 +
//: , : , , , , , : 4-5 : 3 - - "": " , ...". - , , , !
? 1. . 2.. 0,2 . 3. 1,5. 4. (, ). 5. . 6.. 7. - . ( ) , - . , !

. , .

, 50-70 . 2-3 , .

? , . 2-3 . "".
:

, . -, ! - , . , .
, . , 35 50 , , 40-42 50 . .

, , . . . ! ( 50-70 ?) . .

, , , , .

:

, .
.
/

(0)

TUTORIAL- WIRE WRAPPED SEA GLASS PENDANT

, 03 2012 . 20:36 +
Supplies:
Sea glass

Flat nosed pliers
Round nosed pliers
Side cutter pliers (not pictured)

About 18 inches of wire (I used a copper coated base wire for mine, but you can use any sort of wire you would like)

Select a piece of sea glass you want to use for your pendant.

Set your piece of sea glass aside and create a wire wrapped loop.
To do this:
Bend the wire at a 45 degree angle using your flat nosed pliers.

Create a loop using your round nosed pliers.

Wrap underneath the bottom of the loop by holding the loop with your flat nose pliers and wrapping the short end of the wire around the long end underneath the loop. If there is extra after three wraps or so, trim it off using your side cutter pliers.

Position the loop where you would like the top of the pendant to be and begin wrapping. Have fun and experiment!


Keep wrapping until you are ready to finish the piece. Begin a spiral using your round nosed pliers.

Continue the spiral by grasping the start of it with your flat nosed pliers and twisting the wire around itself.

Position the spiral where you would like it, ensuring that the sea glass is supported by the wire and can not fall out.


/

(0)

. .

, 03 2012 . 20:23 +


/

(0)

Chocolate Flower Necklace tutorial....

, 03 2012 . 18:50 +

so.... i have been out of town for nearly the whole summer and my poor sweet talented sis Sophie might go nuts if i don't post...
p.s. great work Sophie!!

here she is (as promised)
The Chocolate Flower Necklace
tutorial....

supplies;


* vinyl/ leather looking fabric scraps (or thick textured fabric)
* matching felt
* matching thread
* chain
* scissors
* glue gun
* sewing needle


cut yourself 2 "v" shapes out of felt
make some cute petals six flowers (3 large and 3 small) six petals each
i cut rectangles first and then trim the corners


i put the flowers together the same way i did it for "fancy flip flops"

i sewed them to the felt, the three big ones in the center with 2 little ones on the outside with one stacked on top of the center one, you can use the last pic as your guide (you might be able to just glue them on :) )
sew your chain onto the back
make a felt-glue-felt sandwich keeping the chain in the center...
/

(0)

flower/zipper

, 29 2012 . 12:47 +
- .


/
/

(0)

-.

, 24 2012 . 14:30 +
- . , .

:

* 123 .;
* ;
* .

1. 123 .

2. 121.5 .
3. .

4. , .

5. , .

VOILA!


/

(0)

, 24 2012 . 12:29 +
Katra_I [ + !]

-


-

3576489_img_8191_0 (360x480, 47Kb)3576489_img_8177_0 (360x480, 30Kb)

! , ...

 -,   (): .  ,    .  1
. , ( ))), -.
                                                   
...
/

(0)

, 24 2012 . 12:26 +
__ [ + !]

jenmenkhaus .

jenmenkhaus , .
. .
!
!
il_570xN.197546030 (432x324, 41Kb)
...
/
/

(0)

fabric flower tutorial

, 16 2012 . 18:14 +

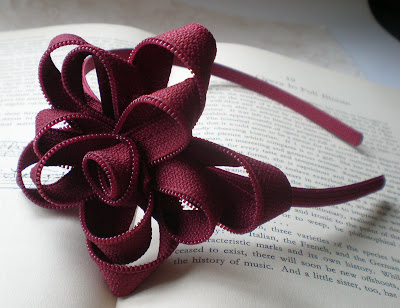
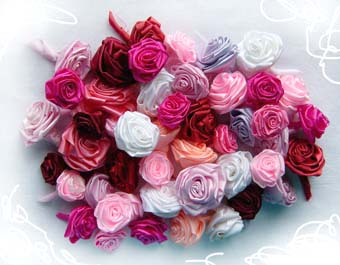
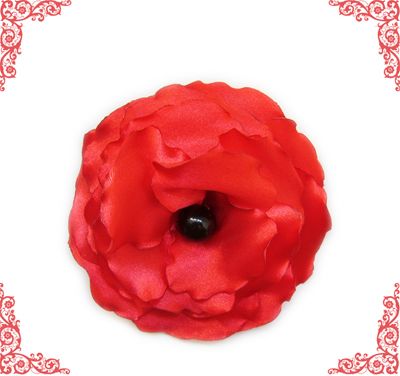
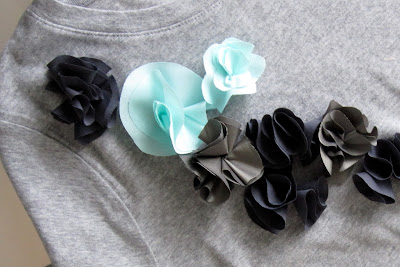
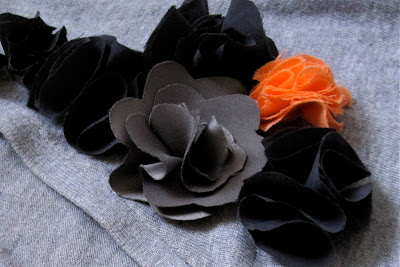
So, you may have noticed the flowers this spring. They're popping up all over the place. Fabric flowers on headbands and hair clips and ribbon belts and dresses ... and the t-shirts. Oh, the beautiful $45 t-shirts. You know the ones.

I'm not even usually a flowery type of girl, but even I have been seduced by the fabric flowers this season. So I started making some.

Here's a couple of little tutorials if you'd like to do the same. (It's really easy.)

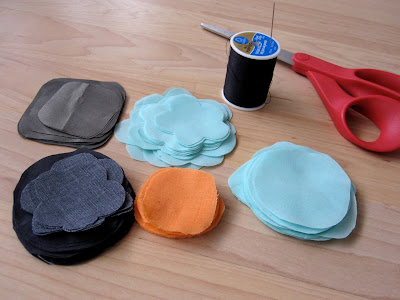
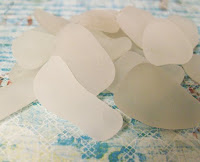
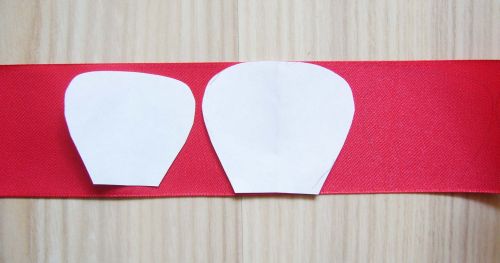
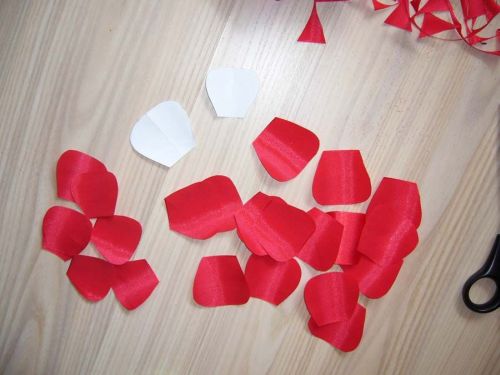
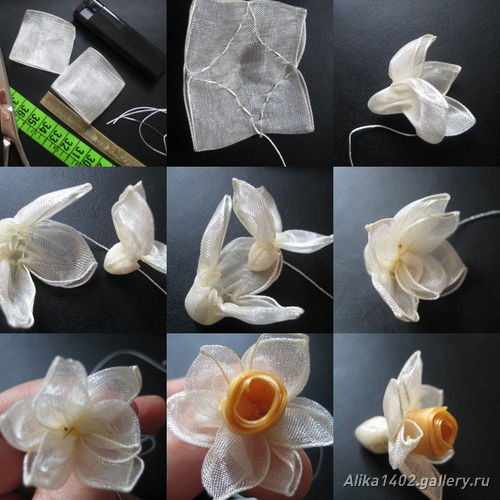
First, find some fabric scraps or swatches and cut out several circles. (Mine are about 2" in diameter, but you can make them whatever size you want.) Then cut out some flowery shapes with petals make some of them smaller, and some a little bit larger. I free-handed mine; they really don't need to be perfect.

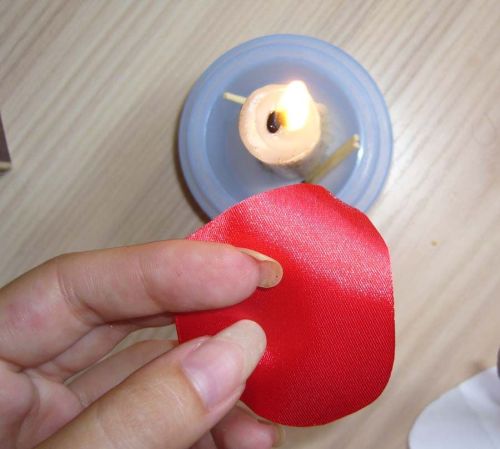
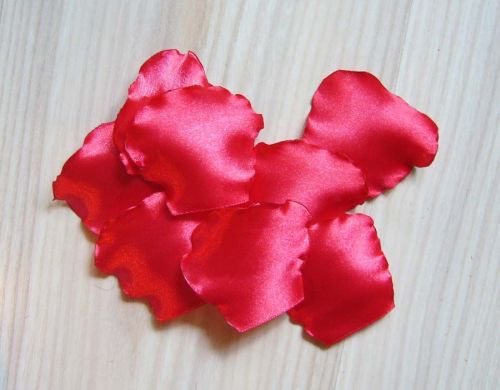
A note on fabric: I used all kinds of scraps that I already had in my fabric stash. Some fabrics will fray a bit on the edges, but that's okay. I used cotton, satin, organza, weird chiffon-y stuff and even some cotton jersey, which worked great. This could be the perfect way to re-purpose some old t-shirts that you don't know what else to do with.

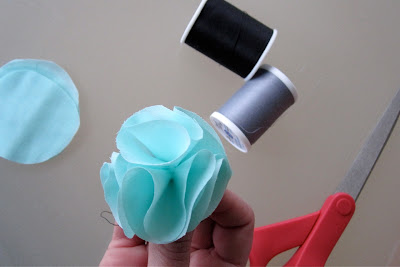
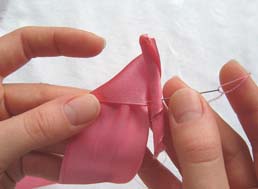
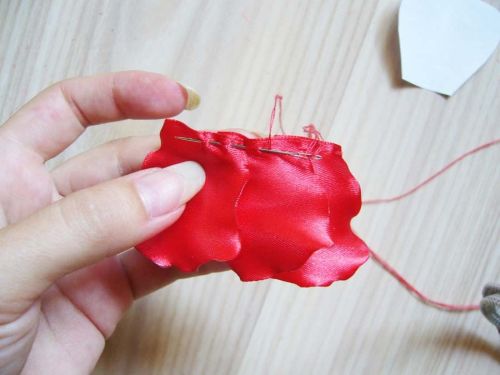
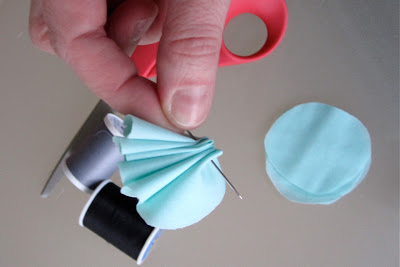
Grab your stack of flowery cut-outs with petals. To make the flower's center, start by pinching one of your smaller flower shapes as shown so it's in fourths.

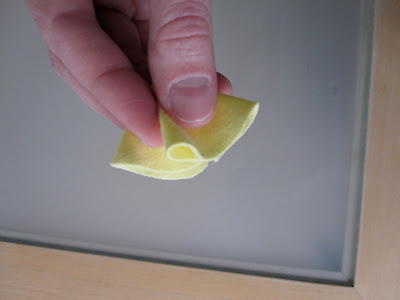
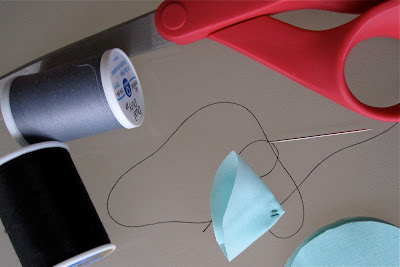
Hold it in place, and grab your needle and thread. (I used contrasting thread here in hopes that you could see what I was doing a little bit better, but you'll want to choose thread that matches your flower.)

Make a few stitches in the very bottom of the pinched section, making sure to catch all of the folds that you pinched so it will stay gathered. Knot at the back.

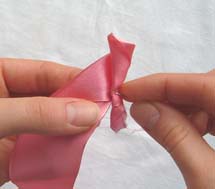
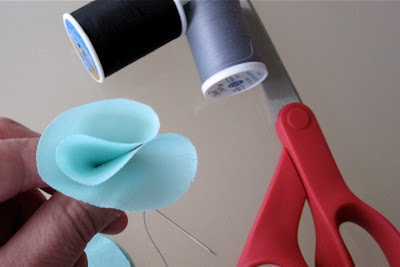
Add another similar sized flower cut-out behind it, and again, pinch the whole thing to gather it a bit. Sew through the back of the center of this flower at the base, where you pinched it. Stitch through all of the layers and continue to make folds/gathers to give it dimension.

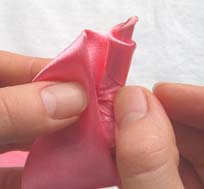
The back side will look something like this. You don't need tons of stitches to make this work; a few will do.

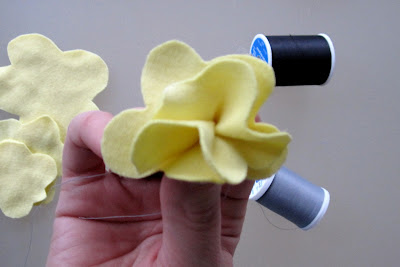
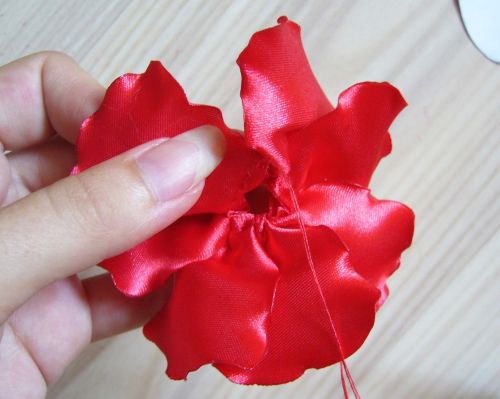
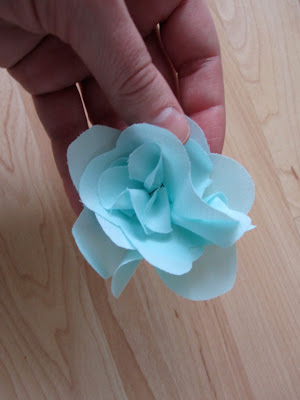
Then add another larger flower layer to the back, and another until you've achieved the size and shape you're going for.

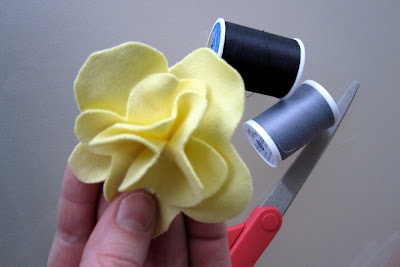
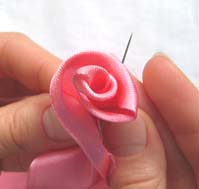
Ta-da! Just eyeball it as you go. You really can't mess it up.


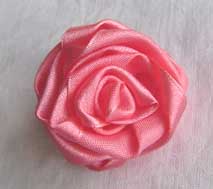
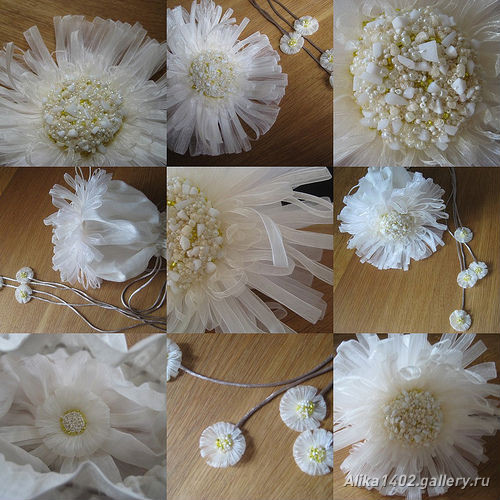
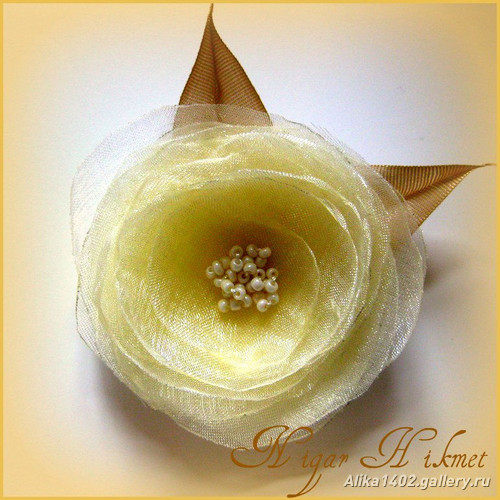
Here's another example of this type of flower, with more layers and in a lighter weight fabric.

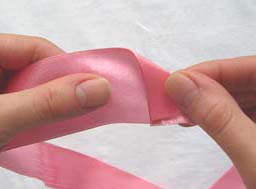
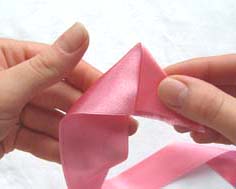
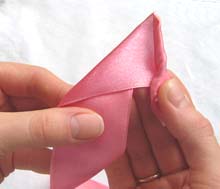
The second type flower will be made from the circles that you cut. Start by folding one of your circles in half, and then fold it in half again. (As shown.)

Stitch through the layers at the center point of your folds.

Again, just a couple of secure stitches will do the job.

Then, fold several more of these little ruffles, stitch and knot their center points, and then line them all up on your needle.

Squish them all together like this, and stitch through them all at once. I usually use around six to eight circles but you can use as many or as few as you want.
/

(0)

, 16 2012 . 17:57 +


/

(0)

, 16 2012 . 17:46 +

5 . , , . 1-1,5 .

5 . , . , .

. , . . ( ), 1-2 0,5 , .

, , . . , , .

, .

. - .

, , . , , - . . !
/

(0)

, 16 2012 . 17:14 +
. . , - .


. = .

, 5.

, .

,

. .

(, , ...) : , ...

.. ----.

" "


( )
/

(0)

, 16 2012 . 16:26 +

. .

.

, . .


. , . , ( !).


, ( ). .

/

(0)

, 16 2012 . 15:38 +

:
: 5 7 ; ; .

1.

( 1 25 )

2. ( )

. , )))

3.

4. ( )

5. () .

/

(0)

, 28 2012 . 14:43 +
- 10 - 11 . , - . - - , .

- : , , , , , . . ( , , , , , ). 1 .

, , .

- , , 1,5 - 2 .

( , , ).

, .

, . .

.


.

.

- .

, , ! ! , , .

( ).
/

(0)

, 25 2012 . 13:02 +
_ [ + !]

/

(0)

, 25 2012 . 13:00 +
92 [ + !]

.

. , , , . – . .

...
/

(0)

, 25 2012 . 12:26 +
_ [ + !]

!

 http://www.myjane.ru/articles/text/?id=8669

 
    !

!

, !

:

( ) - 1 . 3040 .
.
.
.
, .
().


:

1.  , , , . . , ! ,  .


2.  . .


3.  , , , . , .


4.   .


5.  . , .


6.  . .


7.  . , .

/

(0)

, 25 2012 . 11:42 +
helen1 [ + !]

.

– . , - , . :


...
/

(0)

, 25 2012 . 11:40 +

, Kate Cusack, . ( $400 $1000). 2008 .

( Marie Claire 2009 ) .


, Kate Cusack .


, , , . !
/


 : [3] 2 1