Ways to Fix QuickBooks Multi-User Not Working Error |
When important services for QuickBooks Multi-User, like QBDBMgrn or QBCFMonitorservice, cease to work, users run into many technical issues. These issue show up in the form of different error codes like including H202, H505, or H303. Due to these errors the multi-user mode of QuickBooks could stop working or might crash. QuickBooks multi user not working error can be fixed by following the guidelines laid in this article. If you need our expert help in guiding you through the issue, you may call us at 1 800 761 1787.
The major instigators of the Multi-user error in QuickBooks are given as under:
• The multi-user error can show up if QuickBooks isn't on the server PC.
• If the network hosting setup is turned off, the multi-user mode won't work.
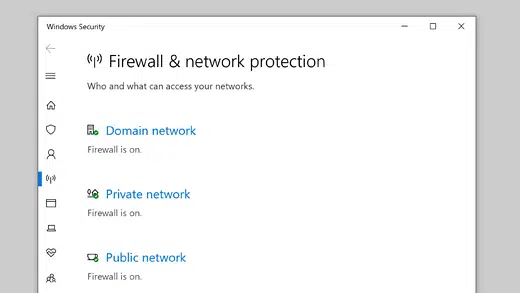
• If the Firewall is obstructing the network access to QuickBooks, then also this error may show.
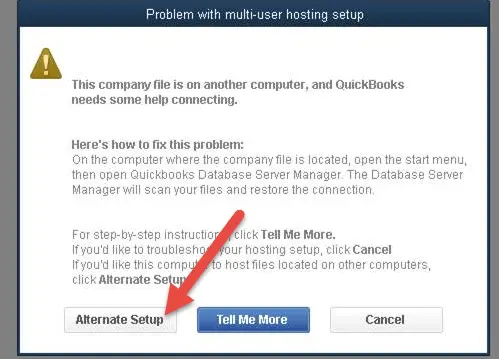
• When the database server is facing some issues and can't open the company file, the multi-user mode is inaccessible and shows the error message.
• Insufficient permissions.
The various troubleshooting approaches to get this error fixed are given as under:
• Shut down the QuickBooks program.
• Get the latest version of the QuickBooks Tool Hub.
![]()
• Follow the instructions on the screen to put the Hub utility on your computer.
• If you are using a 64-Bit operating system, you must install the QuickBooks Tool Hub for 64 Bit.
• If the problem with your program is caused by a broken part, you should first try QuickBooks Quick fix my software.
• At this point, you need to launch the Intuit Tool Hub.
• Then, in the left navigation pane, click on Program Problems.
• Click on Quick Fix My Program from the menu.
• When the process is done, tap the OK button.
• If the QuickBooks fast fix my application doesn't work, you should do the steps below.
• Click the Run QuickBooks File Doctor Tool button in the Company File Issues section.

• You can use the Browse and Search button to find your company file.
• Choose Check your file from the menu, then tap Continue.
• When asked, enter your password, and then click Next.
• It will then start the scanning process, which takes time and depends on how big your files are. When QuickBooks multi-user aborts linked to company files happen, the software diagnoses and fixes them automatically. If the problem still exists after the scan, make sure the folder permissions are set correctly.
• Open Windows Explorer on the computer that is your server.
• Hit on the right button of your mouse after hovering the same over the company file folder.
• Click on the Properties button to see the Security tab.
• Under "Advanced," choose QBDataServiceUserXX.
• Choose Edit from the menu.
• Grant all the necessary permissions.
• To get to the Appdata folder, you must go to the location and type App data in the search box.
• The desktop version of QuickBooks is at C:/Users/(your user name)/AppData/Local/Intuit.
• If you can't find the AppData folder in the users' folder, you will need to show the hidden File.
• Look for "MULTIUSERMODE."
• Put Y (MULTIUSERMODE=Y) on the Multiuser mode line.
• To save the QBWuser.ini file, press Ctrl + S keys.
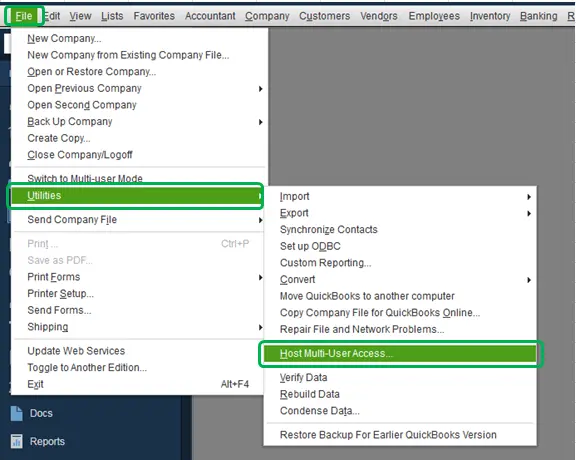
• Choose Utilities from the File menu.
• Then, choose the option to Host Multi-User Access.
• Click "Yes" to agree with the changes.
• Important: To avoid getting the HXXX series Error code, make sure that the Host multi-user mode is turned off on all workstations.
• Go to the location where the company file is stored.
• The folder C:/Users/Public/Documents is where you can find Intuit, QuickBooks, and Company Files.
• Right-click the .ND and.TLG files.
• Choose the rename button to add the.OLD extension to each file.
• After you restart the PC, start QuickBooks in multi-user mode.
• Press the Windows key.
• Type "Windows Firewall" into the search box to find the Windows Firewall setting.
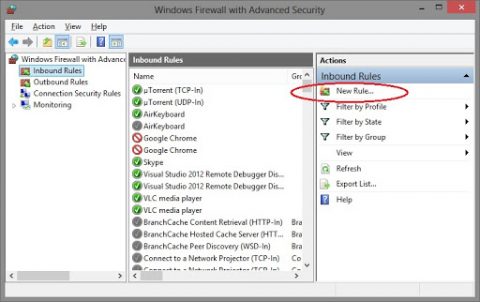
• Choose Firewall advanced options from the list on the left.
• Move to the Advanced options.
• After choosing Inbound Rules, click the New Rules button.
• In the New Rules window, after you choose Port, choose TCP.
• Depending on the version of QuickBooks you are using, add the Port.
• The outbound rules need to be taken out, but the actions from before need to be done again.
o If you are a QuickBooks Desktop 2019 user, then type 8019, XXXX.
o For QuickBooks Desktop 2020, enter 8019, XXXX.
o Type port Numbers 8019, 56728, and 55378–55382 for QuickBooks Desktop 2018.
o Type port Numbers 8019, 56727, and 55373-55377 for QuickBooks Desktop 2017.
• Add QuickBooks to the Firewall.
• All of the steps above are the same, except this time we won't choose a port. Instead, we'll add QuickBooks Program to our inbound and outbound firewall rules.
• Choose New Rule from the list of advanced firewall settings.
• This time, choose the application and then go to the directory where the software's executable File is.
OnlineBackup.exe — IntuitSyncManager.exe — QBUpdate.exe — QBLaunch.exe —QBCFMonitorService.exe — QBServerUtilityMgr.exe — QBDBMgrN.exe — QBW32.exe QuickBooksMessaging.exe — FileMovementExe.exe — FileManagement.exe — DBManagerExe.exe Dbmlsync.exe — AutoBackupExe.exe
• Add QuickBooks to the Firewall.
• All of the steps above are the same, except this time we won't choose a port. Instead, we'll add QuickBooks Program to our inbound and outbound firewall rules.
• Choose New Rule from the list of advanced firewall settings.
• This time, choose the application and then go to the directory where the software's executable File is.
While we reach to the end of this blog related to fixing the QuickBooks multi-user not working error, we hope that the instructions entailed herein helped you in troubleshooting this error. For further help, you should call our helpline at 1 800 761 1787.
| Комментировать | « Пред. запись — К дневнику — След. запись » | Страницы: [1] [Новые] |


