How To Use Trail Cameras Throughout Hunting Season |
I can still remember how exciting it was to check my first trail camera and see the crisp, clear pictures of bucks moving naturally through lush vegetation near a few apple trees. It felt like I had a security camera in their living room! I got into the trail-camera game nearly a decade ago, and like most bowhunters, haven’t looked back since.
There is perhaps no other single tool that has advanced deer hunting more than trail cameras. They are the ultimate “tell-all” when it comes to gaining knowledge about the deer you are hunting. But, in order to maximize the value of scouting cameras, you must know where, when and how to deploy them — especially during the hunting season. During the early-season, pre-rut, prime-rut and post-rut periods, I move my cameras as buck behavior changes.
Camera tactics can also vary depending on your hunting area and how it lays out. For example, a property containing lots of conifers and thermal cover might attract a high density of deer during the winter. However, without an acceptable amount of food, this property might hold relatively few deer during late summer or early fall compared to neighboring lands with oaks or early-successional browse. Knowing how and why deer use your property throughout the archery season is critical to avoiding a camera dry spell and missing information.
On my property in Wisconsin, I operate seven cameras on 115 acres throughout the archery season. I typically deploy cameras in early July to begin gathering an inventory of local bucks. My goal is to collect as many buck pictures as possible. During the two weeks leading up to opening day, I make certain a few of my cameras are over my two perennial clover food plots and a traditional staging area at the head of a ditch that holds a few apple trees. This staging area at the head of two massive ridges produces my best quantity and quality buck pictures during late summer and the early season. This spot is no larger than a basketball court. I believe this location works for a couple reasons. First, it is pinched between two thick bedding areas on different ridges. Bucks can easily appear out of thick cover from either hillside to find falling apples in this small area. Secondly, this location is very low in topography, where cooling nighttime thermals fall and gather, providing a nice reprieve for bucks dealing with summertime heat.
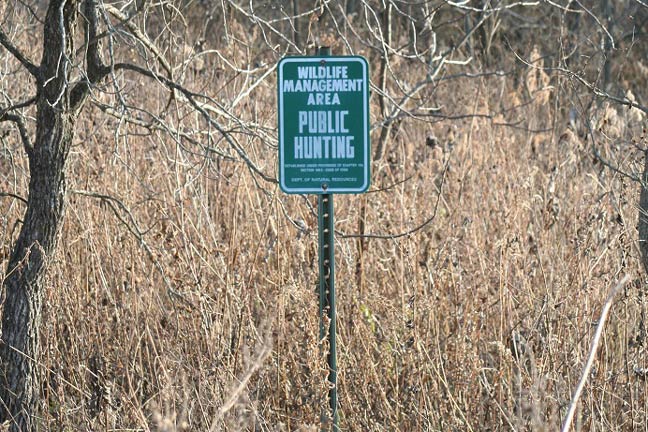
Since it is not legal to bait in my county, using cameras over field edges, water or food plots are also excellent options. A well-used creek crossing, pond or manufactured waterhole are great areas to gather inventory and catch natural buck movement during early season.
When reviewing bucks captured on my cameras in late summer and early in the season, I do so with the realization that many of them will soon shift to a different fall range and disappear off my property. It doesn’t mean you can’t catch up with these bucks later during the rut, but don’t put much stock into believing every buck you had on camera in August will be around on opening day in mid-September.
If your property has a limited resource, such as the only water source in the surrounding 500 acres, that is a critical part of understanding how to use your trail cameras during early season, and every stage of the season for that matter. The next critical piece of early-season camera tactics is to find where bucks are moving in daylight hours. If you have a buck moving on a summertime pattern in daylight, be aggressive and move in for the kill.

During the pre-rut (roughly Oct. 15-28), I still place cameras on food plots but shift my focus to finding bucks over scrapes that may lead to food. I am like most hunters and put my main efforts into hunting the rut. Therefore, pre-rut camera strategies are the most important to me for a few reasons. First, I can pull these cameras in late October and gain important information about what deer have stayed on the property and use this information to help me hunt the rut during my scheduled vacation. Second, I can see whether bucks are beginning to move in daylight and decide what weather conditions could be causing daylight movement, helping me decide what weather is optimal for seeing bucks in each stand. There is no better time of year to place a camera on a scrape than late in the pre-rut, as scrape activity will be at its peak. Typically, I will utilize the “picture plus video” mode over scrapes to ensure I have a good view of the buck. While scraping, bucks drop and lift their head often, and you run the risk of capturing a poor photo if you only have your camera on picture mode. Capturing a short video is also ideal to determine where a buck might be headed after he works a scrape.
When placing a camera at a scrape, mount it in a spot where deer will not easily see the camera. If you feel cameras spook deer, hang your camera high or some distance away from the scrape. In my experience, the amount of disturbance a camera causes varies greatly from buck to buck. Some bucks are very wary of them, while others couldn’t care less and are very photogenic.
As for timing, I have found Oct. 20 an excellent time to move cameras over scrapes. And though I am not a regular user of deer urine while in the treestand, I do use scent drippers over scrapes and have seen great results. However, a word of caution here: too much of a good thing is possible when creating scrapes. I first heard this from Jeff Sturgis of Whitetail Habitat Solutions, who mentioned that having too many scrapes may devalue the pulling power of one “hot” scrape. If you create too many mock scrapes, you run the risk of spreading out buck visits among many locations rather than condensing buck visits down to one or two “hot” scrapes tucked near your bow stand. I was a little mock scrape happy in my early years and have since removed a few to increase control of the few prime scrapes.

It’s also important to limit your human scent when making your mock scrapes and installing and checking your cameras in these locations. I spray my boots with odor eliminator and avoid touching vegetation. If you can, deploy cameras in the middle of the day and drive right up to the location and hang the camera from an ATV. In highly pressured areas, I find deer to be less spooked with vehicle scent and sound. This is especially true if you check cameras on a regular basis and have deer somewhat conditioned to your presence throughout the year.
In summary, the pre-rut is all about finding the bucks’ fall range and getting prepped for the precious moment when they will be moving in daylight.
Peak-rut trail camera strategies are certainly important, but the payoff sometimes doesn’t occur until the following season. During the peak rut, I still have a few cameras on scrapes, even though scraping is typically taking a backseat to travel routes. My focus is placing cameras on major trails — especially those skirting doe bedding areas.
If you have a week or more of vacation to hunt the peak rut and can easily access cameras without blowing deer out, checking cameras on the way to hunt a stand could very well be the ticket to “patterning” a buck and tagging out. Most hunters only have a handful of days to hunt and do not have the luxury of experimenting with camera locations during the rut. For example, if you only have five days to hunt the rut each year, it is very difficult to gauge what stand location could be holding a hot doe. I used to believe placing cameras near a stand was harmful and put too much pressure on bucks, but if you hang the camera properly and somewhat out of view and only check the camera when you go in to hunt, hanging a camera near a stand can be a good strategy. Conversely, if you check the camera often without hunting the area, you are probably harming the spot for your next hunt.
Not all is lost for those who have limited hunting time. Yearly rut patterns do exist, and regardless of moon phase, wind, rain or temperature, my trail cameras have consistently shown daylight buck activity during the period of Nov. 3-8. If I have less than a week to hunt, those are peak days for me to be in the woods each year. If your cameras are not catching the action you would expect, that does not always mean bucks are not around. During the peak chasing phase, bucks take whacky routes to get from one area to another. Oftentimes, bucks will cut off doe trails and walk perpendicular trying to pick up doe scent, inadvertently avoiding cameras as well. Last Halloween, a family member harvested a buck while the deer took a very odd route to seven yards below his stand. There is no sure thing with peak-rut trail-camera strategies.
Post-rut camera tactics are perhaps least important to the typical hunter who puts all his or her eggs into hunting the rut. But for those who are still empty-handed come late season, it can be the absolute best time to pattern a buck on a food source. Considering bucks could take any trail imaginable to the food source, placing cameras directly on the food is probably the best tactic. One tactic I’ve found effective during the late season is to utilize the camera’s time-lapse mode and cover the food source for the last two hours of daylight. If the food source isn’t too big, this technique will miss very little activity.
If you do not have a food source available, concentrating on easy travel routes on hillsides receiving sunlight can also be an excellent way to gather information for your next hunt. Where legal, bait and supplemental feed will attract deer and give you an idea of what is around.
Throughout much of the nation in 2017, the acorn crop was substantial. If little snowfall exists during late season, do not count out placing cameras inside the timber to catch bucks feeding on leftover acorns.
For today’s bowhunters, better bowhunting is often the result of efficient trail-cam use. Regardless of the stage of the season, I have found my prime camera locations by trial and error. Give a camera a minimum of two weeks to see if the spot you picked is consistently seeing movement.
It may take a few years, but once you begin to study your hunting area and how bucks utilize it throughout the season, your cameras will deliver critical information and confident hunting is sure to follow.
|
|
Whitetail Messaging: Why Deer Rely on Scent |
In order to understand the hows and whys of animal behavior, we often must dig deeply into the origins of a species and take a closer look at its ancestors. So it is with the whitetail.
It’s commonly thought that the deer family, Cervidae, evolved somewhere in the tropics of Asia, then expanded east and west into Europe and the Americas, respectively. This process began sometime during the Pleistocene Era — the so-called “Age of Mammals,” which ended around 11,700 years ago — a time at which the number of species was proliferating into a vast array of biological “experiments.” If a form of mammal could be dreamed up, paleontologists probably have found the remains of something like it.
The ancestral home of deer could be characterized as heavy tropical forest. While such habitats are even today rich in species diversity, populations of large animals are very low, due to the nature of the habitat. Larger animals that eat vegetation require many pounds of it each day, and this vegetation needs to be nutritious. As is the case today, a given unit of land could support only so many individuals.
The low population density and very nature of the forest forced the ancestors of modern deer to develop innovative ways to find mates. Most mammals aren’t particularly vocal. Deer do make a variety of sounds, of course, but sound doesn’t travel well in thick vegetation. For that reason, presumably, scent became the deer family’s primary means of communication.
Early deer-like animals evolved structures we think served to dissipate scent. These growths on their heads, which we call ossicones, took many forms. They probably were covered by skin and hair. The structures might have been glandular, but they also might have been used to pick up scent from other parts of the body.
Many of these early deer had fangs used for combat and protection. Such teeth remain today in Chinese water deer (Hydropotes inermis), which have been known to maim dogs when attacked. Most likely, the bugling teeth of elk and the occasional canine teeth found in whitetails attest to this ancestral trait.
There are other theories as to the function of ossicones, including heat dissipation, social display and scent dispersal. Perhaps all of these came into play at one time or another. There’s nothing wrong with the idea that an organ can have more than one function.
No one knows how these animals used scent to communicate, but based on what modern deer do, they probably rubbed the structures on vegetation. Think of it as the original social network. Over time, the ossicones lost their skin covering and became weapons of combat, mostly in males. This shift to what we now call antlers probably happened gradually.
The modern-day muntjac (genus Muntiacus) offers a clue of what the first hardened antlers looked like. It has very long pedicels armed with short, hooked antlers. (I once was sent an old sailor’s knife from the Smithsonian to determine the origin of the antler used on the handle. It turned out to have been from a muntjac.)
As deer evolved, they developed two primary social structures: The first is solitary and the second is small family groups and herds. The whitetail falls into the first category.
The basic social unit of whitetails is the clan: a group of closely related females. Bucks begin life in the clan but grow solitary as they mature. A buck will only associate with one or rarely two other individuals. Often the subordinate buck is a year younger, but not always. The bucks remain loosely associated until one dies. After that, the survivor rarely finds another “buddy.”
(Yes, I’m aware you probably have seen many bucks come together to feed in a field in summer. But if you watch carefully, you’ll see they arrive either singly or in small groups.)
A dominant resident buck grows up pretty close to where he was born, although sometimes relocates to another place. Regardless, he spends his life in a relatively small area. A dominant floater, on the other hand, is a wanderer. I feel floaters are much better fighters and that the serious fights hunters report probably are clashes between dominant residents and dominant floaters.

This is a brief overview of the very complex social structure of white-tailed deer. We also have learned through years of radio-telemetry studies that bucks and does often prefer different habitats. Their movement patterns are different for most of the year and only become coincident during that annual tempest we call “the rut.”
However, it’s a mistake to assume does and bucks only interact during a narrow part of autumn, or that all behaviors we see during the rut are restricted to that time frame. We recently made discoveries of scraping, scenting and posturing behaviors during spring and summer.
Here at the Institute for White-tailed Deer Management and Research, we were among the first to identify and name the most active social center of whitetails: the staging area. It’s generally located downwind (based on prevailing wind) of common feeding areas, where bucks go to intercept does coming to eat. These areas have an open understory and many young trees on which bucks can rub. The most important of these rubs is the signpost, which is a special kind of rub in which a dominant buck rubs the bark off using the base of his antlers and then deposits scent from his forehead gland.
The signpost has both a visual and olfactory function. Bucks tend to select tree species with bright under- bark, which makes them highly visible from a distance. Willows, conifers, hollies and other species are preferred. Once the signpost is sufficiently constructed, the buck rubs the base of his antlers and forehead on it to announce his presence. I have included frames from videos we have taken over the years of this activity.
Bucks generally are late sleepers and tend to get up from their daytime beds, work another type of signpost around the bed, then head out for a specific staging area. How they chose them I do not know, but they do make a decision (at least at that moment). Arriving at the staging area just at dark, each buck works his signpost, then lies down or just hangs around the area, waiting on does.
Our videos clearly show that a subordinate buck will also visit the rub. But he’ll smell the signpost without adding scent to it. Does also visit signposts of dominant bucks (see video frame) and rub their foreheads on them. We’ve seen that red deer (Cervus elaphus) females will rub male scent over their shoulders and back. Their reason for doing this is currently unknown, but I tend to think it helps them thwart unwanted suitors. I have no evidence one way or another.
The rubs and scrapes you often encounter also have their functions, serving as a “social network” in the deer community. Over the last two decades, we’ve been conducting studies using GPS to locate and map rubs and scrapes across the landscape, then using a geospatial analysis program to create deer-use maps of the land.
Most recently, my assistant Nathaniel Parker mapped the rubs and scrapes from 2017 over a 4,000-acre area in Georgia. The resulting map (page 16) is striking, to say the least. It’s allowing us to define landscape features that affect the movements of bucks. Needless to say, we’re learning a great deal about how they use their habitat. This study already is revealing areas of intense activity previously undiscovered and unreported.
All these social and biological factors illustrate just how complicated our favorite game animal is. Next month, I’ll explain how you can turn this information into a successful hunting strategy year after year.
|
|
5 Reasons to Hunt October |
A large number of bowhunters take the month of October off, which is great for those of us who don't.
While the there are good reasons most hunters do not see as many deer during this pre-rut month, there are some compelling times and places to be in the woods during the month of October. Here are five that might make you rethink your October complacency.
It's Lonely Out There
Since so few hunters take October seriously, you may be all alone out there. October may be the single best time to hunt public land because there is little pressure putting the deer on edge.
There may be a few people out and about on the weekends, but you might find that you have normally busy areas of public hunting properties all to yourself in October.
Hunting pressure definitely causes deer to change their behavior patterns. Once they begin to feel pressure, many mature bucks go underground and won't be caught out during daylight. Hunting in October gives us a chance to target them before they feel the heat. They can still be in fairly predictable fall feeding and bedding patterns, which leads us to reason number two.
Predictable Movements
October is a time of ease for most bucks. Food is everywhere and the bedding areas are mostly undisturbed. Acorns are still around in abundance, cut corn and soybean fields offer easy to reach food, alfalfa is still green.
The daily lives of a buck might be to rise in late afternoon, hang out with the guys a little, make a few rubs and maybe sniff a scrape. He may do a little sparring with other bucks and then make his way towards the food source where he arrives with a half hour or so of daylight left.
He'll probably hang out just inside the woods until nearly full dark before exposing himself in the open, which gives a hunter the perfect opportunity to connect with him just inside the woods.
In the morning, he works his way back to his preferred bedding cover without much urgency, nibbling at browse along the way. Then he will spend his days in cover chewing his cud and only rising to stretch and relieve himself occasionally before going through his routine again in the late afternoon. It's a pretty good time for a savvy hunter to figure out the pattern and waylay a mature buck who has no idea he's being hunted.
Enjoy the Autumn
The living is pretty easy for us hunters too. Another great reason to hunt October is to get out and enjoy pleasant fall weather while gathering information for upcoming rut.
Evenings are delightful in a treestand at this time of the year. Mosquitoes have succumbed to frost and the colorful leaves are pleasant to the eye. Mornings are cool but not shivering-in-your-boots cold. It's just a great time to enjoy some of the things we love about hunting and being outdoors to observe nature and its natural goings on.

You can learn a lot that will help you better hunt the upcoming rut as well. October offers you a chance to inventory the deer in your area and get a feel for where the does are bedding. This knowledge will be valuable come the helter-skelter activity of the rut. You have to get out there among the deer to gain this knowledge.
Calling and Rattling
The second half of October is arguably the best time of the year to use calling and rattling to bring in a buck. Testosterone is surging and bucks are on edge as the urges of the upcoming rut are beginning to run through their veins.
The success rates of using combinations of grunt calls and rattling antlers can be at its peak in late October. Bucks come running with more abandon than at any other time of the year. Find a good spot with lots of ground cover near a bedding area and do some calling sequences. Make sure you are set up where the buck can't see a long ways, but must come close to investigate the source of the sound.

The largest buck my son Ben shot with a bow was taken under these exact circumstances. We set up at the point of a wooded draw where it cut into an alfalfa field. At the bottom of the draw was a thick creek bottom; perfect bedding cover.
I put out a buck decoy and Ben concealed himself 20 yards downwind of the decoy while I rattled. Almost immediately, a buck came strutting up out of the bottom and challenged the decoy. Less than 10 minutes into the sequence, he had the 10-pointer on the ground.
Sign Success
By the last week in October, scrapes and rubs are a central part of the area deer's lives. This pre-rut period is the time of the year when scrapes are visited in the daylight and rubs are being worked often. I don't hunt sign just for sign's sake very much, but the last week in October is the one time when it's definitely worth the effort.

When you've found an area all torn up with scrapes and rubs, the hunting can be good there both mornings and evenings. Set up downwind and use some good scent such as Trails End #307 or use a scrape dripper with Active Scrape lure in it. Spicing up the scrapes with good quality scent works very well during this time of the annual cycle. Many bucks will circle to wind-check the area from downwind so be sure you set up your stand accordingly.
If you can't find the scrapes and rubs in the right situation to set up a good ambush, create your own. Mock scrapes with fresh scent work just as well — sometimes better--than the real thing. Use a pocket knife to forge imitation rubs. The local bucks feel compelled to investigate.
So don't spend October on the recliner in anticipation of November. These five reasons should be incentive enough to get out there and tag a buck before the masses fill the woods.
|
|
5 Advantages to Early-Season Deer Hunting |
It didn't feel much like deer hunting weather — temps in the 70s, muggy and buggy — yet there I was, perched in a ladder stand 80 yards from a persimmon patch roughly the size of a house. It being so warm, I didn't expect much action until the waning moments of daylight. So it was somewhat unexpected when a doe and fawn showed up with two full hours of daylight remaining. That turned out to be the tip of the iceberg.
It wasn't long before a young buck showed up, followed by another, and another. As the afternoon wore on, the number and age of bucks arriving to feed on newly dropped nectar of the gods grew. I stopped counting individual rack bucks at 10, though I know there were more. None quite made my personal minimum, but the experience of seeing that many adult bucks in one place at one time was reward enough.
The assembly was somewhat unexpected, though it should have been. It was early muzzleloader season in Kansas, a state that has a lot of bucks, at a time when those bucks tend to be at their most visible and potentially vulnerable period. While most deer hunters favor cooler temps and the hot action of the rut, early season offers some alternatives that rival and may even exceed the rut if your goal is to bag a big buck.
One advantage of early season hunting involves social interaction. In late summer, whitetail bucks begin forming loose associations called bachelor groups or bachelor herds that will remain together to some extent into the early fall. They may include as few as two or three deer, or more than a dozen depending on deer densities and food availability.
I use the term "loose" because the groups can vary in size and individual deer from day to day. The bottom line is that if you see one buck at this time of year, chances are good you'll see another, and another, and another — and they tend to get larger as the evening wears on so be patient.
When talking about deer, the term "rut" is typically applied to that magical time when even the wiliest whitetails drop their guard and wander around during daylight hours. When referring to ourselves, we humans ascribe the term rut to a monotonous routine we're stuck in.
While we don't call it that, whitetails also sometimes get into a fairly repetitious routine, but only early in the season. While the rut is exciting, it's also very random. To the contrary, whitetails are at their most routine, and most "patternable" very early in the hunting season.
While deer — particularly bucks — tend to be fairly routine, it doesn't take much to throw them out of their early-season patterns. Studies have shown deer move increasingly less during daylight, and more in thicker cover as hunting pressure increases. Like the savvy fisherman who wants first water — to be the first to cast a fly into a particular pool — you want to be the first in a particular patch of woods. And if you did your scouting properly, your fist sit should be your best as deer will quickly begin patterning and avoiding you.
As already mentioned, deer tend to be rather routine in the early season, and one of the more common patterns is that daylight activity tends to be compressed into the first and last few minutes of the day. Deer don't like moving around when it's warm, and more importantly, in full daylight. Their eyes function best in fading light. Knowing this, you can maximize your effective hunting hours by concentrating on the first and last hours of the day. There's no need to sit those long, all-day vigils like you will when the rut kicks in. And because the days are much longer in the early season, you may be able to hunt peak hours and still put in a full day's work.
For several reasons, early-season hunting tends to be more relaxed. Some of it has to do with weather. You don't have too, nor do you want to move too quickly when it's warm. Deer season is a marathon, not a sprint, so you want to pace yourself and work up to speed slowly. Early success also brings certain benefits. With a deer or two in the freezer, and potentially at the taxidermist, the pressure is off so you can relax and get more enjoyment out of the weeks and months of deer hunting still to come.
|
|
Facts About Deer Vision and How It Can Help Us Succeed |
|
|
Scent Control: 3 Effective Steps for Deer Hunting |
Controlling scent to beat a buck's nose is possible. It just takes a smart scent-eliminator strategy that employs the proper equipment and a good attitude toward getting everything as right as you can. It's definitely a process, and it requires extra effort, but getting around a deer's number-one defense is absolutely worth it — especially if you're targeting mature bucks. Here's how to eliminate your scent in three easy steps. As you can probably imagine, the first step in scent control involves the wind.
1. Plan and Work the Wind
The best defense against watching a whitetail bouncing away from your stand through the foliage is to play the wind. That's the first lesson they teach in remedial deer hunting. Any deer that gets downwind of you has a much better chance of busting you.
A deer passing upwind, however, doesn't have a chance to wind you. I've messed around with bird dogs for a fair share of my adult life and I'm always amazed at how a good upland dog won't catch a whiff of a downed rooster even from a few feet away if the wind is blowing the scent away from them. A deer is no different
Set your stands and blinds accordingly and you'll have a good start, but it's not enough to consider how the wind will blow at your ambush sites. How you get there matters as well. A lot, in fact. And if you walk past the best bedding area on the property and let your wind blow right through it, you'll spend your evening stand time counting squirrels. Plan your exit and entrance routes around the wind as well. Like I said, it's a lot of work but it's worth it.
2. Add Scent Control Clothing and Boots to Your Strategy
There has been a lot of money spent on scent-control camo clothing and scent-eliminator sprays on the promise of taking oblivious Booners. Scent-control clothing does offer advantages and there are some excellent products on the market, but you need to use such clothing as a part of your overall scent-controlstrategy. Most important, you need to follow all of the manufacturer's directions carefully. I've met with a lot of the people who have designed those clothes, and they know a lot more about how they function than we do. Trust me on that.

Use them correctly, and pair them with knee-high rubber boots. Remember those bird dogs I mentioned? One way I can trick them is by using knee-high rubber boots and spraying them down very liberally with scent-eliminator sprays while I set up blind retrieves. Normally, a dog that doesn't have sludge between his ears will quickly learn to follow your tracks to the spot you either placed the dummy or tossed it, essentially hacking the training drill with his snout. When you use knee-high boots and treat them correctly, you can watch a seasoned bird dog run right past your scent trail without picking it up.
This applies to deer as well, and it matters most on your way into and out of your stand. Every time you walk through the woods you leave yourself open to contamination, and that has a cumulative effect. A deer that crosses your fresh trail and realizes he is now sharing the woods with a predator is a lot harder to kill than one who doesn't recognize the threat.
If you think this step doesn't matter, you're missing out. I can remember in my early days of deer hunting when all we did was play the wind, and it was always a bummer to see a deer heading toward where I had walked in because I knew they were going to turn around and walk out. And they did, nearly every single time.
3. Use Active Scent Control
The last step to beating a buck's nose is employing ozone odor-eliminator technology as part of your strategy. There are a lot of armchair scientists who claim ozone can't work in the woods, but they don't really understand how it works. Ozone is a natural bleaching agent, which occurs in the environment during thunderstorms. It's an unstable molecule that seeks to cling to other molecules, and when it does, it renders them scentless. It also happens to be heavier than the atmosphere, meaning it sinks. That's why the air smells clean after a storm.
An in-field ozone generator, mounted over your head and aimed downwind will take care of almost all of the new scent you're creating while you're sitting (you're always creating scent). Ozone technology has been around since the 1800s. Among its many benefits is the fact that you can control where it goes and the amount you need to nearly erase your scent.
I spent a couple of years trying to disprove its effectiveness on hard-hunted public land and finally gave up. It works well. Really well. An in-field ozone generator doesn't always keep a perfectly downwind deer from catching a whiff of something suspicious, but their reaction is always that of a deer that seems to think a predator is a lot farther away than he really is. They don't stomp and snort, and take the whole herd away with them. Instead, deer stick their noses into the air and look around for a bit before simply walking off. A lot of times, they walk right by.
|
|
How To Use Decoys To Fool Big Bucks |
Many things aren’t quite as they seem. Flip through a fashion magazine and you’ll see how drastically someone’s appearance can be altered if enough time is spent and enough cash changes hands. From silkier hair to whiter teeth, fuller lips, thinner thighs and so on, the available tweaks are all but endless. Whoever first said life is but an illusion might have just laid down a copy of Vogue.
There’s also a lot of fakery in the hunting world. Generations of waterfowlers have tossed wooden ducks onto the water. And over the past few years, many hunters have begun using turkey decoys. Bird hunters regularly employ such fakes, in combination with calling, because their sharp-eyed quarry can be notoriously hard to coax into lethal range of a thimbleful of pellets.trail camera
Mimicking waterfowl and turkey sounds is something with which nearly all whitetail bowhunters can identify. Over the years, innovative deer calls for making grunts, bleats, snort-wheezes and even “roars” have become standard gear. Around the rut, few archers would think of heading afield without some sort of call in their packs. Being able to make sounds that lure bucks into bow range is often a huge advantage.
But what about the visual fakery? Where’s the deer decoy? Most bowhunters have heard of them, and even seen them used on TV hunts, but they aren’t using one themselves. If the thought of decoying has crossed their mind, it evidently was but a fleeting notion.
I don’t claim to be an expert on whitetail decoying. But maybe that’s why I’m pretty sure I can help you. Because while I don’t decoy that often, I’ve still had great success over the years. That tells me you could, too.
Decoys work for different species for different reasons. Fake ducks and geese are effective because those birds are gregarious and associate other flocks with safe places to feed and rest. A migrating flock might never have seen the pond your spread is on. They’re relying on other birds to tell them it’s a good place to land.
Of course, with a turkey gobbler it’s all about reproduction. Come spring a tom wants to mate, and few things ignite his passion the way the sights and sounds of a breeding opportunity do.
What we’re looking to do with a whitetail decoy is much closer to a setup for turkeys than for ducks or geese. Even during the rut, when many bucks roam widely, they likely know where the food sources and bedding areas are. They don’t need other deer to confirm it. But they do keep their eyes open for other whitetails, whose presence might signal a chance to reproduce.
If you’ve ever had a 3-D buck target mangled by a yard-invading buck, you know how strong the visual attraction can be. When a feisty buck sees what looks like a rival, there’s potential for an aggressive response. What influences whether or not he comes all the way in is more complex. But you need not be a master decoyer to make it work.
As with most other whitetail tactics, entire books could be written on this one. In fact, my friend the late Gary Clancy did just that a number of years ago. But you can have fun decoying, and fill tags with good bucks in the process, if you follow a few simple rules.
OK, “rules” is too rigid a term. Let’s go with “guidelines.” Which means go by them, but be willing to amend or even ignore them as conditions dictate.
You might assume that for a rutting buck, a doe standing by her lonesome, waiting for him to join her, would be the hottest ticket to success. Every nerd’s dream at the school dance, right?
That setup can work. In those rare places where the sex ratio is super tight, resulting in a short window of breeding, every doe is getting checked constantly. There, when the time is right a standing/feeding doe decoy is a real attraction. I’ve seen one of these work on mature bucks even without a buck decoy as part of the setup.
But a doe isn’t what I normally use. Most of the time, I feel, you’re better off with a buck decoy. Maybe with a doe in the setup, but often not. I’ll use a lone doe only if I don’t have a buck available.
The main reason I don’t like lone-doe setups is that real does don’t like them. Put a fake doe in a food plot or field and when the old herd doe arrives, she’s likely to freak out. She’ll often stomp around indignantly, then try to lead the rest of her clan back off the plot. If they don’t follow, she’ll become even more agitated. Prepare to listen to “blowing” for a while, as that doe prances around with her tail hairs flared. She just doesn’t like having a strange lady on her turf.
Replace the doe decoy with a buck and things tend to go better. Yes, it’s still a “new” deer, but the matriarch seems to accept that he’s an outsider just passing through. That sort of thing happens during the rut. In many cases, the boss doe quickly calms down and goes on about her business.
You might feel there’s no harm in letting that old doe lead her pack out of the area. You aren’t trying to shoot a doe anyway. But having live deer around can be helpful. They’re living decoys. Yes, too many does present can distract a buck that otherwise might have come to your decoy, but that’s when a little calling and/or rattling can come in handy.
So in most cases, I feel a lone-buck decoy is best. And in most places, a 30-day window starting around Oct. 25 often is the time to try it. After that the libido of most bucks begins to drop, with less aggression displayed.
I know of a few big deer shot over buck decoys right before velvet shedding and of a few others shot deep in the post-rut. I assume a blend of dominance and curiosity explains those approaches, as it’s unlikely they were related to breeding interest. But we can never be sure just what any buck is thinking.
Maybe because it’s often a chore to lug two decoys, few hunters use the deer equivalent of a “spread.” However, I’ve arrowed two bucks while using buck decoys standing over doe decoys. One of the fake does was a full-bodied model, minus legs and antlers, mimicking a bedded doe in heat; the other was a standing cardboard doe silhouette.
Just sticking a decoy in front of a stand is a good way to educate deer. You’ll get educated too, but it could prove costly. So let’s try to get it right the first time.
Does it matter which way a buck decoy faces? I think so. Young bucks often sheepishly approach from the rear, but a big deer rarely will. He wants to intimidate this intruder, not simply gouge him in the ham. So most big bucks will come in from the side or swing around in front. Position the decoy so that either of these approach angles eventually will result in a close broadside shot.
I always have a buck decoy face me. Maybe not straight at me, but within 20 degrees one way or the other. While broadside can work, I’d rather not set it that way. One thing you’ll never see me do is face a buck decoy away from me. Again, I want to encourage a buck to see the decoy, swing around it to make eye contact with it and, in so doing, offer a good shot angle while looking away from me. Folks, that’s about as easy as bowhunting big whitetails ever gets.
How far? I like to put a buck decoy at least 22 yards out. If picking an ideal range, I’d say 25-27. But what matters most is that it be several yards inside maximum comfortable bow range. We can’t control from where a buck will come or which line he’ll take. If he goes a few yards behind the fake and stops, it might be the best shot you’ll ever get. Make sure that distance isn’t too far.
On the flip side, if the decoy’s too close to you, there’s not much room for a buck to get in front of it. If he starts in from somewhere beyond the decoy, with a tight setup he might never turn broadside until he’s right under your tree.
Be extra careful to avoid this “too close” error if you’re on the ground, as I often am on hunts for North American Whitetail TV presented by Quick Attach. Sure, I want a chip shot if I can get one — but at eye level with a mature buck nearly in my lap, all sounds and movements are magnified. I really don’t want him close enough to spit on.
In general, the more open the habitat, the better for decoying. A roaming buck might be hundreds of yards off when you spot him, and at that point he might not yet have spotted your decoy. You can rattle and/or call to get his attention and hopefully get him to see the setup. Once I know he’s seen it and is showing interest, I call very little, if any.
Don’t assume that because a decoy is easy for you to see, it’s just as visible to deer. Not only cover but also small humps or dips in the terrain can hide it from passing bucks. Even an alert deer’s head is much lower than a person’s. When in doubt, I often kneel where I’m wanting to set the decoy, then just look around. If I can’t clearly see a certain corner or other spot from which I think a buck is likely to appear, I’ll assume he couldn’t see my decoy, either.
Is there such a thing as too open? I’m not sure there is. Naturally, it can help to place the fake so a buck will feel secure in approaching. But I’ve seen how much trouble deer often have picking up decoys in timber or brush. And when their first glimpse is at close range, it can spook them. I’ve watched even big bucks bolt upon spotting decoys they felt were too close for comfort.trail camera
Setup and takedown can be tricky. If you put up a decoy long before daybreak, you risk having it approached, and even attacked, as you wait for light. This also can happen if you leave it up too long at last light. So I cut both ends of the hunting day as close as I can.
When decoying a field or plot, I’ll wait until right at legal light to pop my decoy into place, assuming no deer are in sight. In the evening, I’ll use the same approach. (Escaping any feeding area at day’s end is easier if a friend bumps deer away with a vehicle as legal light ends.)
I’ve never found that big bucks insist on getting downwind of decoys, as many do when coming to rattling. Still, I often put scent on the ground, to reinforce the ruse. I’ve had great results with Evercalm, from Conquest Scents — but I wouldn’t hesitate to use an estrus scent or buck urine along with it.
Wildlife photographer Mike Biggs once told me that when he began using decoys in his photo setups, he couldn’t tell handling them with bare hands was a negative. He made no effort to keep his decoys clean and still got a lot of great photos of big, hunted bucks coming right up to them. My experience has been similar. Of course, there’s no advantage to pushing your luck on human odor. You can clean a decoy with ozone, a spray-on odor neutralizer or even a garden hose.
Next to spot-and-stalk, decoying is the most exciting archery tactic of all. Once you’ve seen it work, I think you’ll be hooked. But that’s why I must caution you: It can take serious self-control to keep from burning out a spot.
As with rattling and calling, constant decoying in one location tends to grow less effective. Yes, often we’re trying to intercept bucks roaming a wide area, and that can extend the life of a setup; the buck you fool today might have been two miles away yesterday. But over time, resident whitetails grow leery of seeing the same “frozen” deer standing in the same spot. The young buck you educate to a decoy in 2018 could be the giant that keeps his distance in 2020.
Last Nov. 10, I decoyed a big 9-pointer into crossbow range on my Missouri farm. He came in from an unexpected angle, and grass blocked any shot before he reached the Dave Smith Posturing Buck. He then bumped off a few steps but didn’t bolt. At that point I was able to get on him with my TenPoint, and within seconds it was lights out.
I doubt that buck had ever seen a decoy. Why? Because nobody had used one on the farm since 2009. The deer I shot hadn’t even been alive then.Find a place where deer haven’t been decoyed much. Should you have an encounter there but not fill your tag, maybe tweak the setup or move on to another group of deer. At a minimum, rotate stands often. Try to keep things as fresh as possible for as long as possible.
If you have a big piece of land to hunt, or a number of smaller ones, in theory you can decoy a lot. But if you’re hunting one small property, take care to limit the technique to the times, places and weather conditions in which you feel it’s really likely to pay off. That won’t be every day, and it won’t be every stand. But it doesn’t have to work every time.
Some bowhunters still see decoys as gimmicks or too much trouble to bother with. But a decoy is a valuable tool. For the time, effort and dollars invested, no other tactic yields as many good shots. Around the rut, I’d far rather go bowhunting with one arrow and a decoy than a full quiver but no decoy.
Figuring out what the conditions call for is the art of all deer hunting, not just decoying. The details vary by time, habitat, weather, hunting pressure and more. But decoying isn’t just some fad. It works. So if you’ve been on the fence about trying it, hop over to the “unreal” side of whitetail bowhunting. See for yourself what all the buzz is about.
|
|
Advanced Trail-Cam Tactics |
My introduction to trail cameras came quite differently than it did for most hunters. Back in the 1990s, while studying wildlife science at Mississippi State University, I was "awarded" an unpaid position by my advisor.
My goal, as a freshman student, was to gain experience working in my field. One of the graduate students was working on groundbreaking research for his master's degree employing "camera traps" to survey and monitor deer populations, and I was in charge of keeping cameras going in the field.
Although these early and crude 35mm film versions of what we now commonly call "game cameras" were not as technologically advanced as they are today, I immediately became excited about potential non-scientific uses of "camera traps." I regularly found myself imagining exactly what these cameras would reveal on the trails I grew up bowhunting back home in Pennsylvania.
Needless to say, the idea of having photographic evidence of the giant bucks I imagined was exciting. However, as I began to get involved with making my own "homebrew" versions of game cameras for personal use, I quickly realized that although my hunting spots had plenty of does, fawns, turkeys, raccoons, skunks, feral cats, coyotes, foxes, squirrels, bears, trespassers and young bucks, mature bucks were simply not there!
I suppose this is where my obsession with trail cameras and my passion for deer management met at the crossroads: it was time to grow more mature bucks to photograph and hunt!
After 15 years of intensively managing hundreds of hunting properties, I've learned that patterning
mature bucks — once they are present — is a whole new ball game. The advanced trail-camera strategies that follow have given me a competitive advantage, and they can do the same for you.
Home on the Range
Fact: when hunting a mature buck, you must get intimate with its home range, core area and how each fluctuates with the seasons. And unless you have access to GPS tracking collars, trail cameras are the tool for the job. There are many factors that affect a buck's home range and core area, and you need to develop a monitoring program to determine the behaviors of the big bucks you hunt.
Since these behaviors can change daily, weekly, monthly, seasonally and annually, your camera program should be in operation during those times. That's right, I never have camera down time on the properties I manage. If a buck is alive and establishing his routine of eating, resting and breeding, I want to know everything about it.
Most hunters pull their cameras out of the field in the "off-season," but the most successful hunters I know — the ones who consistently kill mature bucks — would look at me funny if I mentioned pulling cameras after the season's finale. When camera tracking mature bucks, there is no off-season!
There was a time when deer biologists generally agreed the home range of mature bucks was somewhere around one square mile, or 640 acres. However, dozens of popular studies have revealed bucks with home ranges even smaller and bucks with home ranges as big as 13,000 acres!
So, we now know the home-range size of a mature buck varies based on individual personality, age, habitat quality, population characteristics and more. That's where creative trail-camera deployment can provide insight on the bucks you are targeting.
About a decade ago, while working with my own property, I realized I needed to forget about the
research papers and do some things differently. So, I decided to take my own personal farm: a well-
managed 95-acre tract, formerly farmed and heavily hunted, and attempt to piece together the puzzle of individual, older age-class bucks.
I committed to five years of intelligence gathering, and no killing. Since my farm is located in Pennsylvania, I knew high hunter densities, trespassing, poaching, deer-vehicle collisions, a poor buck age structure and mortality from hunting on neighboring properties would all be sure-bet limiting factors to my ability to grow and hold mature bucks. Still, this is real-world stuff, and I had questions to answer.
When it comes to home range and core area, I find that although mature bucks are consistently inconsistent, seasonal shifts in core areas tend to be very predictable from year to year (provided the bucks survive!).
In other words, once you determine how a buck uses different portions of his home range during various seasons, you can begin to nail down his behaviors (rutting, summering, feeding, bedding) and ultimately his whereabouts during hunting season.
A buck's core area represents a much smaller area within his home range where a he spends a significant amount of time. The survival advantage is that he gets to know it very well and, in a sense, has home-field advantage when it comes to evading you! We know that when a buck is born, the likelihood of dispersing to a different habitat (neighbor's property) is likely.
Research on the percentage of yearling buck dispersal shows some variation in both the proportion of the buck population that naturally disperses and exactly how far they will go. Once a young buck establishes his "home-field advantage" he tends to stay, barring any major habitat disturbances. This doesn't mean, however, that he won't exhibit seasonal shifts within this home range.
In fact, I've found many mature bucks exhibit two totally different core areas within their home range: one for summering and one for the breeding season. Bedding and water sources also change as they make the shift.
Camera Locations
When I start "camera trapping" a property, I like to cast a wide net and then methodically narrow my focus. For example, when I purchased the 95-acre Pennsylvania farm where I live, I started with 10 camera stations.
I placed my first camera 15 yards from the edge of an inside corner with great results. Not only are inside corner food plots great killing zones, they are tremendous areas for cameras to survey a high percentage of the bucks in an area.
My second camera placement may surprise you. This camera, and the two that followed, changed the way I manage deer today and greatly enhanced my value as a deer consultant. Cameras two, three and four didn't even land within my property borders.
Instead, I strategically placed them on land owned by friendly neighbors. Think outside the box, literally! During my five-year project, I identified at least nine mature bucks that summered several miles from my farm. Even though I had a food-plot research facility within my 95 acres, these mature bucks took advantage of the large agricultural buffet several property boundaries away.
When rumors of a giant buck got back to me one summer, I decided to ask a neighbor if I could teach him how to use his trail cameras. It was a win-win situation, as the first time I pulled his SD card I realized the rumor of a big, mature buck was true. My neighbor got excited about the big buck he was sure to kill in bow season (of course, he immediately placed two stands in the area).
Meanwhile, I knew better; the buck would later die in my food plots! The more interesting part was that this buck was one I had been "camera tracking," and the missing piece of puzzle was where he summered. This buck always traveled with a much larger, older buck that disappeared from my radar.
Like clockwork, these bucks disappeared from my feeders just prior to spring greenup only to return late August/early September! Even after the older buck disappeared (I suspected poaching), the younger buck continued to exhibit the same seasonal pattern. It was evident they had figured out the best core areas within their home range to feed, rest and breed.
As a result, several law-abiding hunters in the neighborhood failed to kill either of them. The younger (7'‰½ years old) of the two was finally killed by one of my friends in one of my food plots. I'm satisfied batting .500 on a small property that represents a fraction of a buck's home range. In Pennsylvania, a 7'‰½-year-old buck is a "Powerball" buck, and I understood his habits better than he did, simply because of my trail-camera strategies.
When to Move Cameras
When using trail cameras, a particular buck of interest is found in one of two ways. First, a "known" immature buck is photographed from year to year until he reaches maturity; second, a mature buck shows up due to a shift in his home range or core area.
When a known mature buck is on the hit list, you will have enough intelligence to know which stands represent your greatest odds of success. The second situation — when a "new" buck shows up out of the blue — is worth a more detailed look. Inheriting big, mature bucks someone else raised tends to get me bonus points with my clients (and my kids).
This scenario is why I keep a few trail cameras sitting in my office as supplements to what I'm already running. I like to attract these bucks from the neighborhood when we can legally kill them! With the development of high-quality, year-round food plot programs, this technique is surprisingly easy. Well established food-plot programs, with the right forage products for the situation, make this possible by "keeping" these rut roamers around for a few more days.
As a client once commented, "Does in food plots ultimately equate to bucks on walls." Quality food plots, coupled with a savvy trail-camera monitoring program, make consistently killing mature bucks exponentially easier.
After owning and/or hunting a property for a few years, you will begin to establish known camera stations that are consistent mature buck producing sites. As a result, I don't move many of my cameras after mid-summer. I know which cameras are likely to blow up with mature buck photos when day lengths shorten, and I know which camera locations will reveal primarily does, fawns and young bucks.
The presence of heavy scraping activity does change the game. In fact, I will move a camera to a new spot when heavy scraping activity begins. A scrape is frequented and utilized by all ages and both sexes of deer from pre-rut through post-rut.
There simply is not a better place to monitor which bucks utilize your hunting property during the fall and winter breeding season. If you know your area well enough, you're already aware of specific scrapes that appear in the same location year after year. These traditional scrapes are, by far, the best locations for establishing which bucks include your "deer dirt" in their rutting travels.
Many times I hear hunters argue that a handful of photos of a particular buck at a scrape don't mean much, since he may have merely been on a journey that particular day/night. As a hunter, biologist and fan of old bucks (regardless of headgear), I can't relate to that thinking.
In fact, when I hear someone talk like that I immediately know they do not have much experience hunting mature bucks. The fact is mature bucks don't act like the photogenic Hollywood yearlings and middle-
aged bucks that flood your SD cards. They couldn't be any more different in every activity and behavior, and that includes how often they stop at your smelly, noisy box attached to a tree!
Developing fresh intel on mature bucks is guaranteed to become easier as trail-camera technology advances. New features such as wireless trail cameras and 360-degree fields of view will allow big buck hunters to uncover the habits and whereabouts of savvy, mature bucks.
As a fan of trail-camera history and technology, I'm really looking forward to having more high-tech tools to minimize my presence in areas where mature bucks lounge, feed and breed. That is, until adequate knowledge has been gleaned to suggest I should sneak into one of my well-chosen ambush sites and cash in on years of surveillance.
|
|
Summer Deer Scouting Strategies with Attractants and Trail Cameras |
With the passage of the Fourth of July on the calendar, a subtle shift occurrs in the gray matter of most whitetail hunters across the country; the countdown to deer season is officially on for another year.

With weeks remaining before the opening bell in the year's whitetail hunting campaign, many hunters are hanging treestands and conducting daily sessions of punching 3D targets to hone bow shooting skills. And as time permits, they are setting up a scouting and recon strategy on hunting properties with trail cameras to see how the local deer population is doing and which bucks will fill our autumnal dreams.
For North Texas bowhunter Jim Lillis, a retired senior regional director with Ducks Unlimited, that last chore is one of the most enjoyable parts of the deer hunting pastime each year, the first cyber-glance at what might be possible in the hunting woods later in the fall.
With a number of sizeable whitetail bucks on his wall — including a typical 10-point Boone and Crockett Club public-land giant sporting a net score of 175 2/8 inches — Lillis admits deer hunting is as much about the anticipation of chasing big bucks as it is the execution of a successful shot.
This is why Lillis starts getting excited about fall deer hunting during the hot dog days of summer.
How does he begin his autumn pursuit now when the heat is on? By getting into the woods, or more accurately, getting his trail cameras and attractants in the woods.
"Start by looking at places where you might expect to see deer on your hunting property," said Lillis. "Take a look at places where you've seen deer in the past and you'll likely see them again."
For Lillis, such spots include any known deer trails and the edges of timberline. They'll also include local food sources, either natural places like native plants and browse, agricultural crop field edges, or even warm-season food plots and feeders. And in building heat of summer, don't forget to check waterholes, which can be hidden little deer magnets.
When you've got several such spots figured out on a familiar piece of hunting ground — or you've taken some educated guesses for a new property — Lillis says it's time to let quality deer attractants and trail cameras go to work.
While he relies on a number of trail cameras each year, during summer scouting, Lillis doesn't put a camera in every corner of his hunting ground since deer movement is scattered and whitetail bucks are in loose bachelor groups. But he does put out enough to help him gather intel and gain an inventory of deer utilizing his hunting spots.
"Take a local property I hunt, one that's maybe 150 acres," he said. "As I start gathering information, I'll put out four cameras on that place, a couple on food sources and a couple on travel routes. And I'll occasionally put one out in a more random place, like a spot where a tree fell on a barbed wire fence in a storm a few years ago. It's not a normal travel route, but I discovered that bucks and does were crossing there (until the fence was repaired)."
When his trail cameras are out, Lillis relies on a good attractant to help lure in local whitetails. Though feeding, baiting and/or attracting whitetails is not legal in all places, Lillis' home state allows for the practice and he's more than willing to take advantage
While the use of yellow nuggets of corn is standard fare for many deer hunters in Texas, Lillis sweetens the proverbial pot by using attractants and mineral products like those available from Grand Island, Nebraska-based, Big & J Long Range Attractants.
Made famous over the years by the likes of Outdoor Channel hunting show personalities Michael Waddell and Travis "T-Bone" Turner among others, Big & J products like Deadly Dust, Liquid Luck, Meltdown, and Legit combine powerful deer attracting aromas that lure whitetails from considerable distances along with highly digestible protein and minerals that aid in meeting their nutritional needs.
Do they work? Waddell is certainly a believer, saying on one Big & J video that he's very impressed.
As one of the company's catchy sayings goes, "The aroma is super strong. The range is super long!"
One such product hunters might consider using is Big & J To-Die-For, which uses real sweet corn and is said to be five times sweeter than standard field corn. In addition to using the power of aroma to lure in bucks and does, the product also gives them a high level of total digestible nutrition (TDN) to assist in body growth and antler development.
Another Big & J product that can assist in pre-season trail-camera survey work is BB2 Granular, a high-level protein product that can lure bucks out into the open for summer intel gathering. It also can help establish regular travel patterns as summer turns into fall and keep bucks on their feet, even during daylight hours.
One final product to keep in mind is Big & J's The Cube, a block product perfect for hard-to-reach places, giving hunters an easy-to-carry compressed form of BB2. With more protein and less salt than other products, The Cube uses "Get Noticed" attracting aroma to lure whitetails and the power of nutrition to keep them coming back for more.

Are such protein- and mineral-rich attractants some sort of magical, aromatic silver bullet? Maybe not. But then again, they certainly don't hurt a deer hunter's reconnaissance work during the hot summer months, especially at a time when daily deer movement is not always consistent.
"When legal where you hunt, feed and attractants certainly increase your odds of seeing what's out there," said Lillis. "Animals go to food sources like we go to a plate of cookies straight out of the oven.
"Later in the year, when natural food resources have become more limited, it's easier to figure out deer movement patterns," he said. "But now in the summer months, when there is so much natural food readily available, it's a little harder to determine their daily patterns. By using feed and attractants, you can draw deer in from a pretty good distance and that can give you an idea of what you've got on your hunting property."
Keep in mind just because it's the lazy days of summer, deer hunters can't afford to become careless when putting out trail cameras and attractants.
"You can get too wrapped up in all of this," warns Lillis. "If you go every few days, you're probably hurting yourself more than you're helping. You can get so wrapped up in getting images of deer that you're leaving scent behind and alerting deer to your presence."
To avoid doing that, Lillis says to take the same precautions in summertime whitetail-survey work that you would during fall hunts. This includes playing the wind properly, choosing entrance and exit routes wisely, showering with scent-elimination products wearing clothes washed in scentless detergent, wearing rubber boots when traveling, using latex gloves when setting out trail cameras, and spraying down yourself, your gear — including cameras — with scent-elimination spray.
To that same end, hunters might also want to consider using gravity style feeders when setting out products like those from Big & J. Such feeders can help lessen a hunter's intrusion time in an area, can help keep varmints at bay when attractants are out, and can also help keep products like Big & J BB2 sheltered from the elements."

"You don't want to wade through a buck's core area," said Lillis. "Because with every encounter that a deer has with you — even now during the summer — you're continually educating him."
The bottom line for this veteran bowhunter from Texas is deer hunting revolves around a few simple principles and practices, including doing work during the summer months to achieve a desired payoff later on in the fall.
"The tools and equipment have changed over the years," said Lillis. "And I guess the tactics have changed somewhat too. We've got better bows, better arrows, better broadheads, better stands, better clothing, better attractants, you name it.
"But as they always have done, deer get smart to what we're doing over time and they adapt and keep us at bay," he continued. "They're still a wild animal that is using all of their senses to elude you. You've got to work hard to outsmart them, just like you do in winning a chess match."
While using your trail cameras wisely with good attractants is nothing more than an opening move on the chessboard, it's still an important one despite the mid-summer date on the calendar.
One that can go a long, long way during fall to you cutting a shot and hanging your bow up quietly, smiling big, and whispering "Checkmate!" to yourself moments after putting a big buck down.
|
|
Top Four Summer Trail Cam Locations |
I’m always surprised when I talk to someone who mostly runs their trail camerasjust before the deer season and into the season. I suppose not everyone is as addicted to the sport of running cameras as I am, but in addition to that, hunters who wait until the last minute to get their cameras working for them are missing out not only on a lot of great enjoyment, but also some good information that will pay off later on.

The enjoyment comes from watching the deer lazily biding their time through the summer and observing the amazing spectacle of nature that is the growth of antlers each year. The information comes in learning patterns and most importantly taking an inventory of the bucks on the properties you hunt. Knowing the potential of any property is a valuable part of deciding what areas you will hunt come fall and choosing which bucks will become your targets when the deer season rolls around.
There are four places I feel it’s critical to keep cameras operating during the summer. I may not have cameras on all four of these on each property, but I will at some time during the summer be monitoring these for at least a couple weeks. I try to let the cameras sit for at least two weeks and some of the prime spots may have a camera on them all summer. Let’s look at these four spots and examine why they are good as gold.
While deer get most of their water from the plants they eat, they will consistently supplement that with any clean water that is available on the property. This may be a natural water hole, pond, stream or swamp. The ones that are easy to cover with a camera are the small ponds where you can set the lens to take in the entire pond. Bucks will use thede day and night if they are secluded in areas which give them a secure feeling.

Deer tracks around these ponds will tell you which ones are getting the most use. Deer tracks will also offer clues as to where the deer are drinking on larger waters. Banks will be stomped down where the deer go down to the water. Creek crossings are one of my favorites because you are monitoring both a trail and water simultaneously. Deer will loiter and take a drink at the creek whenever they cross, giving you ample opportunity to get good photos of them.
I start my mineral sites in the spring as soon as the snow goes off, and the deer will hit them periodically all summer. Hunters, land managers and biologists will argue well into the night around a campfire about how much benefit the bucks’ antlers receive as a result of the minerals, but one thing is for sure, they sure bring the bucks in front of your camera.
I don’t mind a mineral with a goodly amount of salt content because the deer will stay at the site longer and the hole that develops as a result of their pawing and licking is also an attractor. A salt or mineral block can work just as well. Put them in spots where the deer feel comfortable during daylight hours and resist the temptation to check them too often. Keeping human scent intrusion to a minimum will ensure that the biggest mature bucks will visit often.

Natural foods attract deer all summer and these food sources can be excellent places to put a camera. Problems come with this as most food sources are large and difficult to cover with a scouting camera. They may be using a large soybean, corn or alfalfa field for example. You can attempt to find the access points where the deer are entering the field but they are often so numerous that you’ll be using too many cameras on each field.
I have found that it pays to use artificial food source whenever possible. A 50-pound bag of corn will last about week in most places with an average number of deer in the area. With high deer numbers it might take two. Most every deer will stop in for a bite or two of corn even when food is abundant. I have a source where I can buy 30-pound boxes of crushed peanuts really cheap and it works wonders but it also disappears much faster than corn and every bird and critter in the area will fill up your camera’s SD card so it’s a toss-up.
Many people are afraid to put a camera right in known bedding areas and there are good reasons to avoid doing so. However, there are a couple things we can do to minimize disturbing the deer to the point that they avoid the area. The first one is simply do not check the camera often and then check it right before or during a rain or at night. The rain will wash out your scent and checking the area at night allows you to sneak in and out when the deer our off feeding somewhere else.

The introduction of cell phone and wifi cameras has changed the game for those of us who like to put cameras right in the bedding areas. I have a Covert Blackhawk camera that uses Verizon towers and it only costs me $15 per month for up to 1000 photos. It will text or email me photos as it takes them. I can monitor it from an app on my smartphone so I don’t need to go get it until the app shows that the batteries are dead, and that’s usually several weeks.
I place this cell phone camera right in the areas I know the deer are bedding and it’s amazing what I have learned from it, even during the middle of the summer. I can see what times deer are entering and exiting the area. I have also noticed that they tend to use certain bedding areas with variances in wind directions and weather conditions. A camera in the bedding area is one of the most educational tools I use in the summer for learning about the deer on the properties I hunt.
So don’t wait until the cool evenings of fall get your hunting juices flowing to put those cameras out. Keep them out all summer and you will not only know much more about your deer, but you may also become addicted to the sport of scouting cameras like I am.
|
|
3 Ways to Thief-Proof Your Trail Cameras |
The sick feeling in the pit of my stomach soon turned to anger as I stood there looking at the tree my scouting camera had been attached to the previous day. I hate losing a trail camera to a thief, but trail cameras can be replaced. What really made me angry was losing the information contained on the SD card. I was hundreds of miles from home on a DIY deer hunting trip.
The cameras I put out were a huge part of my decision-making process regarding where I would hang my stands and hunt. I had just lost an entire 24 hours of information about the deer in this area. That really hurts. But I won't let my anger derail my hunt, so I get over it quickly. I look at scouting cameras as if they are overhead expenses in my hunting. You have to use them, and using them is a risk. You will lose a few, and you'll have to go buy more. But what do you do when your truck gets low on gas? You go get more gas. Same with scouting cameras.

The information gathered by these cams can be extremely valuable, and I refuse to use cheap cameras that don't have the features I need just because of the risk of losing them to some sticky-fingered low life.
I run a lot of good quality scouting cameras; it's almost like a sport in itself for me. I use them not only for deer hunting, but for bear hunting, property surveillance, wildlife viewing, even predator monitoring and control. I put some in areas where I don't expect anyone to ever find them, and at times I put some in areas where I figure others will see them and I hope they leave them alone. The number of cameras I have had stolen over the years could be counted on my fingers. It's not a huge problem, but it really can throw a wrench in the gears of your hunting plans. I have begun to take some precautions to avoid losing them to thieves. Here are three ways to minimize your losses.
One of the easiest ways to cut losses is to simply use cameras that are harder to see and hide them better. There are three primary kinds of flashes for night photos: white flash, infrared, and black flash. Black flash cameras do not have a flash that is visible to the eye. Both white flash and IR cameras have lights that can be seen by anyone who happens to be looking the right direction when they take a photo. I use mostly cameras with black flash because they are less likely to be discovered. There are a lot more than deer hunters using public lands, coon hunters come through in the night, squirrel hunters, ginseng hunters, and even metal detector enthusiasts can come across your cameras on public lands. I have the photos to prove it all.
One of the things that draws your eye to a camera strapped to a tree is the webbing. That dark vertical line stands out amongst the rest of the environment. Use a camouflage strap and put the camera in a place where the strap is hidden by brush whenever possible.
Larger cameras are easier to spot than smaller ones. Many companies are making very small camera bodies that are not much bigger than your hand. Small black flash cameras are difficult to detect, but I go one step farther. I often glue small plastic leaves and moss to the face of the camera to break up its outline. You can get this material at any craft supply store. Of course, do not cover the lens, the sensor, or the flash with anything.
The likely location of the animal you are trying to photograph will largely determine where you mount the camera, but if you can choose a spot with lots going on around the camera, it makes the unit much harder to see

at a glance. Both foreground and background cover helps. Use care when choosing a spot with foreground cover as waving branches and leaves can fill up your SD card with unneeded photos.
One of the most effective ways to thwart thieves is to put the camera up where the bad guys cannot reach it. I like to hang the camera at least 10 feet off the ground and point it downward to monitor the area. Some people might be able to shinny 10 feet up into a tree to get the camera, but most won't. If a thief is actively looking for cameras to steal or a person is an opportunistic camera thief, neither of them are as likely to see a camera that's 10-12 feet off the ground as they are one at belt level to eye level.
There are several companies that make mounts for cameras that work in this way. The two I have used are the Covert Tree-60 and the Stic-N-Pic.

Here's how I go about it. I carry a climbing stick to the location I want to put the camera. Just one stick. I can strap the climbing stick to the tree, climb up it, and reach at least ten feet off the ground to mount my camera. When I am done, I just take the stick out with me. It's not a totally fool proof way to get the camera out of reach, but it works. Remember to carry the climbing stick with you when you check the cameras. This is one of the most effective ways to protect your cameras in theft-prone areas. Plus the photos you get are often unique and pretty cool with the downward angle.
Putting cameras up high comes with another advantage: deer do not seem to notice the flash at all. I have seen some deer become alarmed by a white flash at eye level, but I have never seen a case where a deer reacted in a negative way to a flash 10 feet up.
Most camera companies are now making lock boxes for their cameras. This was at first a response to the fact that bears like to chew on scouting cameras, but it works equally well to discourage the camera thief. These steel boxes can be bolted to a tree and then the camera is locked securely inside the box.
The disadvantages of this strategy include the extra weight of carrying the steel boxes with you and the extra tools needed to fasten it to the tree. But the disadvantages are far outweighed by the fact that it's really difficult for even the most determined opportunistic thief to steal your camera. And I have never seen anyone walking around the woods with a bolt cutter, although serious camera thieves might be dumb enough to risk that.
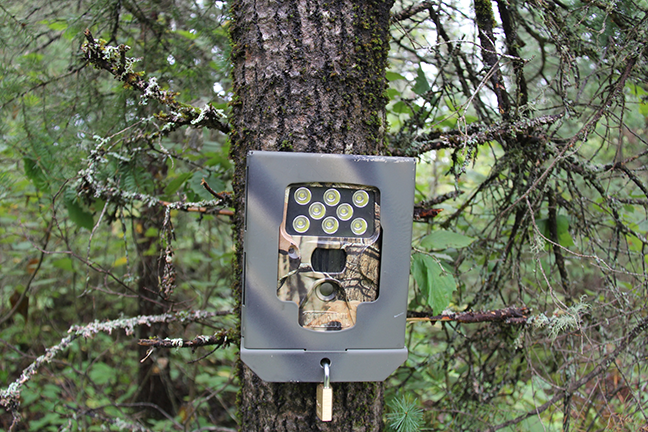
I have a separate backpack that I use which contains these boxes, lag bolts, padlocks and a cordless screwdriver with a socket. (Putting a screw in a tree on public land is not legal in some states; it is your responsibility to know the laws.)
I use the cordless screwdriver to fasten the box to the tree with lag screws, insert the camera, and then lock it up. It's really not that much extra work and makes it very difficult for any would-be
With a little extra effort, you can protect your cameras from thieves and get the photos you desire to help you learn more about the deer in the area. Each of these three methods has its time and place.
|
|
8 Trail Camera Tips That'll Produce Better Results |
For example, say that a hunter shuts his truck door and walks to a tree stand several hundred yards away for two days in a row. While en route, he unknowingly passes upwind of a bedded buck both days. Even if the wind is in the hunter's favor on the third day, the moment that buck hears the truck door slam, he'll take for granted that a human is headed into his domain, and he'll probably either sit tight or go the other way.
If an adult whitetail errs at all, it's usually on the side of caution, and that means the hunter's chance of success is near zero. Here are 8 trail camera tips that'll help you on your quest for trophy bucks.
TIP NO. 1: BE DISCREET
The most detrimental aspect of a trail camera is overuse. A new unit in the hands of a first-timer is like a toy. The owner can't wait to see results from day to day. This allows deer to program the camera owner's activity more than vice versa.
Daily intrusion into the woods or along a field edge tells whitetails more about camera owners than those hunters will ever learn about their quarry through photos.
A camera is best placed in a transitional area where it's easy to enter and exit without being detected. Avoid inspecting the unit for at least a week or more. Do not leave telltale human odor by touching the housing or mounting components with bare hands. A scent-blocking spray should be used on the unit and mount to inhibit foreign odors.
TIP NO. 2: MOUNT YOUR CAMERA HIGHER
Since the conception and subsequent heavy usage of trail cameras, there has been overwhelming proof that a flash will spook some deer from the immediate area. So what about the latest claims by manufacturers that infrared flash won't spook game. Are they legitimate?
More than half of the photos I've taken with infrared flash indicate that the subject deer knew the exact location of the camera when the infrared flash triggered. These photos often demonstrate deer movement perpendicular to the camera, yet the deer's head is almost always turned looking at the unit.
A whitetail likely first notices the passive infrared heat sensor beam and instantly turns its head toward the camera in time for the infrared flash. Though most professional trail camera users agree that infrared flash is better, they also concur that it still spooks some deer.
Seasoned trail camera user Terry Tank of Glenwood, Minnesota, was one of the first ever to address a solution for the flash problem. Terry began mounting cameras several feet above the sight plane of whitetails immediately after being temporarily blinded by his own camera. He found that this reduced the chances of deer spotting the origin of the flash or being blinded by it.
The higher mounting also prevents deer from smelling a unit at close quarters. He eventually invented the Trail-Pod, which is now marketed through many sporting goods outlets.
The Trail-Pod TM-100 tree mount model allows easy placement of any trail camera in less than a couple of minutes. Its removable universal mounting plate is fitted with a quick-detach lock for ease of camera access. The Trail-Pod has a camera-style ball head for adjusting the unit's aim. Terry also markets the TLP-200 and Deluxe Camo TLP-300 tripod mount. These units can be placed in areas with no trees and without the noise of tamping a mounting post in the ground.
TIP NO. 3: MOUNT YOUR CAMERA FARTHER AWAY
Why do I get more deer hindquarters than heads? is an often asked question by new camera owners. Most current units offer motion detection and passive infrared heat sensing. Both must trigger to record an event or photo. This ensures that each snapshot contains a warm-blooded animal on the move.
When a less expensive unit is triggered, its camera is slower to power up, focus and record the photo. A five-second or more delay is possible on some economy models. If this is your problem, set the camera farther from the trail or at a 45-degree angle from deer travel. This allows a wider photo cone.
TIP NO. 4: CREATE A BEDDING AREA NEAR A FOOD SOURCE
The shots I get of shooter bucks on my food plot are always after 10 p.m. Why? This is another quandary for many camera users. It's usually a sign that mature bucks are traveling some distance to the camera site. They likely spend the day in a less pressured area or where there's more protected daytime bedding.
Creating a better bedding area near the food source will encourage bucks to bed closer and show up shortly before or after dusk. Your odds of harvesting them during hunting season will increase dramatically.
TIP NO. 5: FIND A BUCK'S HIDEOUT, BUT BE CAUTIOUS
My food plot photos show only does, fawns and small bucks. Why am I not getting photos of mature bucks in the area? Does need nutritious food in large quantity to stay healthy and produce milk for fawns. Older fawns and yearlings also need protein-rich food for growth. Though mature bucks need protein for maintaining muscle mass and minerals for antler growth, they often bachelor up in remote areas where food is adequate and human intrusion is less.
According to most studies on deer movement, mature bucks seldom move outside 55 acres during summer months. If you find that sweet spot, don't overburden it with cameras and human scent, but by all means have some cameras in the area.

TIP NO. 6: PROTECT YOUR PROPERTY
As with tree stands, theft is a major concern for camera owners. The loss of a $100 to $800 unit can be maddening and heart-wrenching. Here's a solution that often prevents thievery. Post your property with signs that read: No Trespassing -- This Property Has Video Surveillance On Its Borders -- All Trespassers Will Be Prosecuted! The simple threat of having their photo taken causes thieves to think twice about crossing a property line.
TIP NO. 7: BE CAREFUL ABOUT CAMERA PLACEMENT AT RUBS AND SCRAPES
New trail camera owners are quick to place units over scrapes and rubs. This is OK if the flash is disabled and the camera isn't checked more than once a week. Most mature bucks in pre-rut, however, freshen their scrapes after sundown. The wisest placement of a camera is 30 to 50 yards from the scrape on an incoming or outgoing pathway. This prevents excessive flash at the scrape or rub site and gives the camera user a better idea of the direction a buck is traveling.
TIP NO. 8: BUILD IT YOURSELF
Those who are electronically inclined can build a trail camera for half-price. Several Web sites sell the components, and other Web sites detail the how-to of assembling a high-quality unit. My nephew, Jake Davenport, began building all of his cameras after becoming disgruntled with $400 units that failed within the first month of use.
WHAT'S IN THE FUTURE?
Top-end trail cameras now offer the recording of time, temperature and moon phase with each photo. Barometer reading will soon be the next option. Remote units linked to cellular phones or computers are now available, but prices are quite high. Within a short time, however, trail camera users will be offered the affordable ability to set the camera and read its photos from afar. It likely will cost no more than a new compound bow.
Although the Boone and Crockett Club will recognize entries previously caught on removable trail camera film or memory card, the club has taken a stand against remote cameras viewed off location. This is seen as a deterrent to fair chase. One can only imagine a hunter sitting in a blind with a laptop or cell phone watching for more desirable deer activity at a second or third stand site. Some states already have laws in place disallowing this, but others will need to clarify current statutes detailing the "taking of wildlife with electronic devices."
CONCLUSION
It seems there is no end to the devices man will invent to get the edge on mature whitetail bucks. Hunters rarely give this elusive animal enough credit for its innate ability to shun predators. The more we pressure them, the more they learn to avoid us. Rattling is a good example. In my area of west-central Illinois, it's almost a given that rattling will forewarn older bucks of your presence.
Once archery season begins in October, it's rare to see even a 4'‚1/2-year-old-plus buck during daylight hours. And though trail cameras have helped many users plan an effective ambush, they certainly can create a negative effect for hunters who refuse to pay careful attention to detail.
One thing is certain, though: It's much less stressful sitting in a tree stand on a cold, windy, rainy day during the rut knowing you've got a trail camera photo of the buck of a lifetime!
|
|
Hunting camera type |
Many different features are available in the remote path camera. The first and most important feature is whether you want your camera to be a digital camera or a film camera. Digital cameras can produce updated techniques in digital images of captured images. This image can be easily and quickly transferred to a computer. Film cameras must have film development in film labs and pictures printed from film. Our recommendation is that a digital camera is the best camera type to buy.
Animal tracking cameras also have two different types of methods for capturing images. Some cameras use incandescent flash to take photos and other cameras use infrared flash. Infrared flash seems to be a better photo for taking wild animals because infrared flashes don't scare animals.
|
|
Necessity of electronic product aging test |
In the production process of electronic products, the high temperature aging test of products is an important test procedure to improve product reliability and ensure stable performance under extreme conditions. Electronic products, whether components, semi-finished products, or complete machines, or equipment, are subject to testing and aging. Testing and aging are not a concept. Perform aging and functional testing first.

Almost all electronic products have become a complete product after being manufactured, which has the function of the product and has a use value. However, after the product is used, some problems may occur, and most of these problems occur. Within a few hours to tens of hours from the beginning, it is under the supervision of this, so it stipulates the aging and testing of electronic products, imitating the use status of equivalent products, and this process is completed by the product manufacturer.
Through aging and testing, the problems of the products are exposed in advance, and the defective products are extinguished on the production line. The factory is a problem-free product to ensure that the products sold to the user are reliable. This is the meaning of the aging test.

The aging test is divided into component aging and machine aging. Especially for newly developed products, it is necessary to test new components or new machine performance, and the aging test index is higher. Aging causes product defects to be exposed on the production line, such as the reliability of solder joints, and the reliability of the device. A variety of defects or defects in the design, materials and processes of the product, aging test is an effective means to find these problems, aging test to make the product performance into a stable interval after leaving the factory, reducing the repair rate. This is the need for aging testing.
|
|
New Zealand wilderness hunting |
Wild hunting has always been hailed as a noble movement.
Since many countries in the world ban hunting or control the scope and quantity of hunting, the hunting people are mainly dominated by high-end niche people, and the price of hunting is high. Hunters need to pay sales tax, hunting ground fees, professional guide labor costs and the cost of captured animals. If you want to pursue hunting with trophies, head to New Zealand, where you have the best hunting grounds. Under the guidance of a personal trainer, you can hunt a variety of animals, including different breeds of deer, antelope, wild goats, pigs, turkeys, hares, ferrets, wild cats, wallabies and goats, so that even if you have never had a hunting experience, Practice can also be done without arrows. Starting in April of each year is the best season for deer hunting. Because it is the estrus period of the deer, it has a chance to hunt the big male deer. At the same time, there are also many people who are "drinking the meaning of drunkenness is not in the wine", and more emphasis on the experience of wading in the mountains when hunting. The different original styles and unique flora and fauna of the world attract hunters to the ocean.

The only indigenous mammal in New Zealand is the bat. Therefore, European immigrants have introduced several hunting species for sports and leisure. These animals breed very quickly because there are no natural enemies. Today, the number of animals is controlled through safe, orderly hunting. Prey has deer (elk, dharma and sika deer), antelope, tal sheep, wild boar, pouch, goat and civet. New Zealand’s forests and mountains are very
|
|
How to buy hunting equipment |
Hunting is a very time consuming and labor intensive business. So how do we streamline our equipment and hunt it efficiently?
First you have to consider the following questions:
Can these equipment guarantee your safety?
Can these equipments help you survive in the short term outdoors?
Are these equipment light enough?
Can these equipment help you find your prey?
Can these equipment effectively kill and process prey?

Second, don't squander at will. Some novel outdoor products often appear in hunting equipment stores. When encountering these new equipment, first think about the scope of application of this equipment, and whether you will encounter the corresponding situation outdoors. For example, the headlights are good, but you prefer to patrol during the day, and the headlights are irrelevant to you.
Finally, carefully consider the problems that may be encountered during the hunt and select the appropriate equipment according to different situations. For example, is your hunting location in the plains or mountains? Are you driving or backpacking? Staying in the wild at night or returning to the camp? Will you climb or cross the river during the road? After you have considered it, you can pick out the most refined and effective hunting equipment.
|
|
Different Types of Trail Cameras |
Buying a trail camera is no easy feat, considering the features you have to keep in mind, like motion detectors, resolution, focusing abilities, sharpness, pixels as well as an inconspicuous nature to be carried in the woods. Therefore, we have prepared a list for you, so that you can zero in on your favourite type of camera, one that suits your needs perfectly!
Cellular cameras record images and transmit them to your phone and tabs through internet. A sim needs to be inserted in the camera’s slot and then it uses it just like a phone. Most of these cameras work on GSM networks and you need to buy a data package for the sim. These cameras are coming with the feature of motion sensor nowadays, which activates with movement in front of the lens’ span. Cellular camera is a hassle free gadget, which is very easy to install and does not have tonnes of wires running around it.
Advantages
Disadvantages
Another downside of a cellular camera is that it can be hacked through the internet that connects it to your phone. Reasonable safeguards should however, avert and protect your camera and its data from any such incident.
A motion-activated camera is an ideal indoor and outdoor camera. It is suited for a user who wants minimum remote or manual interference in photo capturing. It comes in a category where you install it and then forget about it. This type of camera is very popular for wildlife and sports photography. Both the scenarios have limited window period for the capture and need articulate timing; the motion-activated camera delivers on both the counts.
Advantages
Disadvantages
Wireless camera has an in-built transmitter, which transports images using a wireless network. You need to choose the wireless network of the receiving device in the camera to connect both of them. Wi-Fi cameras are relatively innovative but extremely user friendly and relevant to today’s times. They have fewer attachments and no wires, which is an appealing feature for an indoor or semi-indoor use.
Advantages
Disadvantages
The use of internet to transmit makes this camera vulnerable to cyber attacks. You cannot use the transmitting feature of this camera on a go unless there is Wi-Fi enabled environment. This limitation also makes it unsuitable for lonesome areas that do not have phone networks and internet.
Have you ever felt the need to track what is going on, in and around your house in your absence? You may have contemplated keeping an eye on your business establishment, office space, storage or the warehouse. This is especially applicable to those who have to put up a temporary shelter in the woods, while on their wildlife business. For these requirements, a fully enabled security camera, better known as surveillance camera is the best solution. Absolutely reliable, tamper proof and not prone to bias! If any untoward incident does take place, the camera records it in real time and you can use the footage as evidence later on. It also plays the role of a deterrent because miscreants would usually be cautious if they are aware of the presence of security camera around them.
Advantages
Disadvantages
However, there are a few points to keep in mind before a security camera is installed. Law forbids installation of recording devices in private areas like baths and toilets. So make sure that you are not standing in way of law while installing these cameras. If you have one inside your home, it is going to record all the private moments and conversations that you would not like to be shared. This is why data deletion has to be done regularly and carefully since the information, sharing is fast these days. In addition, everything invariably turns up on internet. In fact, make this a daily routine to delete the unwanted footage thereby avoiding other risks related to data leakage.
Infrared cameras are suitable in cases where tracking and recording is required in the night also. For ensuring a round the clock supply of video footage in the wild, no camera is better than the infrared. These cameras have high resolution and capture night images with a lot of clarity. They also come fitted with sensors that automatically switch the infrared function on and off. These cameras have found an extensive usage in capturing wildlife due to their friendliness towards night or dim lit shots. Scientific researchers have always used infrared cameras in their experiments due to their sensitivity and high resolution captures.
Advantages
Disadvantages
The flash camera is made for the night shots. For dark or night shots, the camera switches to flash mode for the capture. This one feature makes it usable throughout the day and night, while you are on the move.
Advantages
Disadvantages
|
|
Trail Camera Buyer Guide |
 /www.besttrailcamerareviews.org/wp-content/uploads/2014/12/image-quality-958x1024.jpg" target="_blank">https://www.besttrailcamerareviews.org/wp-content/.../12/image-quality-958x1024.jpg 958w" width="361" />
Image quality is measured in Megapixels (MP) and is called resolution. More the MP better is the picture quality. Average Trail cameras come with a resolution of 5-7 MP. The range however is actually vast; with the best cameras giving as high as 20 MP in their class and basic inexpensive ones with 2 MP only.
Point to remember is that if you have an infrared flash, then it is only black & white pictures that it will support in the night shots. In addition, for each megapixel you will have to shell out more money, so deciding on what is important is vital. In addition, if you plan to use your trail camera for Wild life photography, a high-resolution camera is recommended. Nevertheless, a camera strictly meant for game needs to be about 5-7 MP.
 /www.besttrailcamerareviews.org/wp-content/uploads/2014/12/moultrie-game-spy-inside-320x240.jpg" target="_blank">https://www.besttrailcamerareviews.org/wp-content/...ie-game-spy-inside-320x240.jpg 320w, https://www.besttrailcamerareviews.org/wp-content/...2/moultrie-game-spy-inside.jpg 400w" width="356" />
A game lasts for hours and sometimes days, so that last thing you would want to worry about is dying power in your camera, so the battery is an important feature for game cameras. You have to remember that usually you would just mount the camera and leave it there unattended. Just imagine coming back to collect it and realizing that battery died in the middle of night!
Most of the brands have a range between 6 months to a year. However, the point to keep in mind is that the actual life tends to be less for the simple reason that some features of the camera take up a lot of battery power; and if you happen to use more of them then it will be drained much faster.
 /www.besttrailcamerareviews.org/wp-content/uploads/2014/12/tn_drop_cam_with_no_hunting.jpg" target="_blank">https://www.besttrailcamerareviews.org/wp-content/...n_drop_cam_with_no_hunting.jpg 400w" width="390" />
Trigger time is the time in which the camera detects movement and captures the snap. The whole process goes something like this- The animal enters the detection zone, and the sensors activate the camera, which in turn triggers the capture, and the snap is saved in the storage.
 /www.besttrailcamerareviews.org/wp-content/uploads/2014/12/Infrared_Digital_Trail_Camera-150x150.jpg" target="_blank">https://www.besttrailcamerareviews.org/wp-content/...gital_Trail_Camera-150x150.jpg 150w, https://www.besttrailcamerareviews.org/wp-content/...Digital_Trail_Camera-65x65.jpg 65w, https://www.besttrailcamerareviews.org/wp-content/...gital_Trail_Camera-125x125.jpg 125w, https://www.besttrailcamerareviews.org/wp-content/...rared_Digital_Trail_Camera.jpg 360w" width="300" />
Buying a trail camera is no easy feat, considering the features you have to keep in mind, like motion detectors, resolution, focusing abilities, sharpness, pixels as well as an inconspicuous nature to be carried in the woods. Therefore, we have prepared a list for you, so that you can zero in on your favourite type of camera, one that suits your needs perfectly!
Cellular cameras record images and transmit them to your phone and tabs through internet. A sim needs to be inserted in the camera’s slot and then it uses it just like a phone. Most of these cameras work on GSM networks and you need to buy a data package for the sim. These cameras are coming with the feature of motion sensor nowadays, which activates with movement in front of the lens’ span. Cellular camera is a hassle free gadget, which is very easy to install and does not have tonnes of wires running around it.
Read More About That here.
Wireless camera has an in-built transmitter, which transports images using a wireless network. You need to choose the wireless network of the receiving device in the camera to connect both of them. Wi-Fi cameras are relatively innovative but extremely user friendly and relevant to today’s times. They have fewer attachments and no wires, which is an appealing feature for an indoor or semi-indoor use.
Read More About That here.
Have you ever felt the need to track what is going on, in and around your house in your absence? You may have contemplated keeping an eye on your business establishment, office space, storage or the warehouse. This is especially applicable to those who have to put up a temporary shelter in the woods, while on their wildlife business. For these requirements, a fully enabled security camera, better known as surveillance camera is the best solution. Absolutely reliable, tamper proof and not prone to bias! If any untoward incident does take place, the camera records it in real time and you can use the footage as evidence later on. It also plays the role of a deterrent because miscreants would usually be cautious if they are aware of the presence of security camera around them.
Advantages
Disadvantages
However, there are a few points to keep in mind before a security camera is installed. Law forbids installation of recording devices in private areas like baths and toilets. So make sure that you are not standing in way of law while installing these cameras. If you have one inside your home, it is going to record all the private moments and conversations that you would not like to be shared. This is why data deletion has to be done regularly and carefully since the information, sharing is fast these days. In addition, everything invariably turns up on internet. In fact, make this a daily routine to delete the unwanted footage thereby avoiding other risks related to data leakage.
Infrared cameras are suitable in cases where tracking and recording is required in the night also. For ensuring a round the clock supply of video footage in the wild, no camera is better than the infrared. These cameras have high resolution and capture night images with a lot of clarity. They also come fitted with sensors that automatically switch the infrared function on and off.
These cameras have found an extensive usage in capturing wildlife due to their friendliness towards night or dim lit shots. Scientific researchers have always used infrared cameras in their experiments due to their sensitivity and high resolution captures.
Advantages
Disadvantages
The flash camera is made for the night shots. For dark or night shots, the camera switches to flash mode for the capture. This one feature makes it usable throughout the day and night, while you are on the move.
Advantages
Disadvantages
There are two types of flashes available in trail cams- LEDs also known as incandescent flash and Infrared better known as invisible flash. Choosing right type of flash is an extremely important criterion as it can either hamper or facilitate the game.
Detection circuit of the camera refers to the range within which camera’s sensors can detect the movement and trigger the camera for capturing the picture. The range is measured in feet whereas trigger speed in seconds.
Therefore, a speed of over 5 seconds is very normal and considered fast. However, if you are hunting for a very fast-paced animal in your game then cellular camera might not fit in the bill.8.
The quality of a picture is measured in megapixels. Trail cameras have an average resolution of 5-7 Megapixels, which is usually enough; unless of course your priority is a high resolution snap. However, for hunting needs the average resolution is more than enough. Some cameras are available whose USP is high-resolution pictures.
The infrareds have invisible flash, which will not blind you like the ordinary LEDs. The only flip side is that they support only black & white pictures in the night. The quality of contrast may not be very impressive but they are best suited for night expeditions.
Most of the cameras show compatibility with 32 GB SD card. However, some can accommodate a higher storage capacity. Some cameras with memory that goes as low as 8 GB are also on the shelves, however think before you pick them; you do not want the hassle of camera stopping in between the hunt for want of storage capacity.
Stick to the recommended brand and storage capacity to get the best of the camera and for the safety of your recordings and captures.
Trail cameras are not exactly cheap and therefore, they themselves can become victims of theft or be dislodged in the wilds due to frequent movements! Though trail cameras are sturdy in their built considering their extensive outdoor usage; they can be damaged easily especially in cases of vandal and where cameras are not exactly covert.
Not all trail cameras come with a viewing screen, but it is an important feature of the camera without any doubt. Viewing screen can play an important role in setting up the camera in the right direction and height. You can also review the pictures taken immediately if your camera has the viewing screen.
It all comes down to your pocket after all! If your pocket allowed, you would buy the best that is available. The game or trail cameras come in a wide price range of $80 to an eye popping $10K! Therefore, as we mentioned it does really come to your pocket. This is why your priorities have to be very clear before you step out to buy a trail camera. The first point is to put yourself in a category of a beginner or a Pro.
You can spend as much as you want when it comes to a trail camera. The features are appealing and accessories are innumerable so there really is no limit. However, do not get overwhelmed or lose yourself with the flow. Prepare a budget and stick to it. A few dollars here and there is all right, but if you are deviating by hundreds then just stop and think if this is really what you need.
|
|
Identify Critters and Vandals with Trail Cameras |
Discovering damage on your property can be frustrating. The vulnerability people feel when they discover damage from trespassers is real – whether they be animal or human. The right approach to dealing with it depends a lot on who or what the trespassers are. Animals can be a nuisance. People can be a threat. The perpetrator’s identity dictates the appropriate course of action.
More and more, property owners are turning to trail cameras to help them identify offending critters or vandals. A motion detection camera is often the simplest solution to a host of security problems. It can get you undeniable proof of what is happening on your property – day or night – so you can sleep in peace.
A trail camera is a motion activated camera housed in tough, waterproof cases. Like a digital SLR camera, most of these critter cams store pictures on SD cards. Users then retrieve the SD card later to see what’s been happening on their property. Most trail cameras even stamp the photos with useful information such as date and time.
Some people respond to acts of vandalism or animal damage by installing a security system, which is a permanent but expensive solution. Depending on the location of the property, a full security system may not be feasible. What these people really need is a critter camera.
Unlike surveillance systems, trail cameras are not always recording. They work on an outdoor motion sensor. Essentially a critter camera, they record only when they detect motion.Once triggered, they begin shooting pictures or recording video. They then go back to being a sentinel until they detect more movement.
Security systems also require electricity, so the property must be on the grid. Trail cameras typically use AA batteries, so their installation is as simple as possible. The decision to use a trail camera for security may be a matter of simplicity, but choosing which trail camera to use is a little more complicated.
This type of trail camera uses a bright white light to illuminate the area being photographed. White-flash cameras produce clear color photos day or night. On the downside, the white light is easy to see, and animals are usually startled by it. While it may serve as a deterrence temporarily, they soon acclimate to it and return.
The problem is worse where unwanted human guests are concerned. People easily see the light and know where it came from. They then have incentive to turn their activity toward eliminating the trail camera. Hopefully the camera will be mounted in a way that makes it difficult to access, but it is always better if it doesn’t attract attention.
Also known as red-glow cameras, a low-glow trail camera uses infrared light for night photos. The infrared light is nearly invisible to most creatures, including humans. People are not likely to notice the infrared light illuminate the vicinity, but these cameras still announce their presence.
The problem with using low-glow trail cameras for security purposes is the tendency of their LED emitters to produce a soft red glow. The light is faint and is typically only visible on the camera itself. Objects will not usually appear illuminated to the subject in the frame, but the glow is noticeable and may attract the attention of humans, who will then realize they have been photographed.
If you read a lot of critter camera reviews, you’ve heard of this one. Just like red-glow cameras, no-glow cameras emit infrared light when taking pictures at night. What makes these cameras different is that they use “black” LED lights, which are invisible when the camera is working. The telltale glow that gives away the position of red-glow cameras is missing, so no one is the wiser that photos or videos are being taken.
Without the red glow, neither animals nor humans will have any indication that they are on camera. They won’t adjust their behavior and can be captured in the act – criminal or otherwise. Human subjects also will have no cause to suspect they’ve been incriminated, so the trail camera will be safe from damage or theft. Animal intruders won’t get skittish.
There are a few different variations of these technologically advanced trail cameras, but the basic function is mostly the same across the market. Cellular trail cameras usually work just like any other trail camera, except they offer the ability to send the pictures they take directly to your cell phone. Your camera then effectively becomes a security alarm, silently notifying you of motion detected on your property and beaming you an image of the perpetrator.
Of course, these functions come with limitations, some of which are the same ones that affect cell phones in general. The quality of the cell service in the area will make or break these trail cameras as an option. Unreliable service might make camera triggers go unnoticed, though they will still be recorded by the onboard SD card. False triggers might also have your trail camera sending pictures of nothing to your phone.
False triggers are a problem for even the best trail camera. These annoying glitches occur when some random object – a branch blowing in the wind perhaps – sets off the trail camera’s detection circuit. The resulting picture will be empty of anything interesting. False triggers can cause a lot of wasted time sifting through pictures. They also waste SD-card space and battery power. Let’s look at a few tips for setting up your trail camera to help eliminate false triggers and to keep your camera safe from theft.
This step prevents outright theft, but it also helps catch a culprit in the act. Using a camera with a camouflage case in a discrete location can make it hard for trespassers to spot your trail camera before they can trigger it. When they don’t know they’re being filmed, animals and people go about their normal activities.
Place the camera in a location where a thief would need a ladder to reach. How can you be sure it’s high enough? If you need a ladder to install it, a vandal will need one to reach it. It isn’t about making it impossible to steal the trail camera. The point is only to make it difficult, which is usually deterrent enough.
There is a cone of passive infrared (PIR) that extends out from the trail camera. The motion of animals or humans passing through the PIR – or the difference between their body heat and the surrounding air temperature – is what triggers the camera to take a picture. Action that happens outside of this cone will not be recorded.
The detection zone may be wider or deeper for one camera than for another, which is why it is important to know this information for the model of trail camera you are using. A wide detection zone or one that reaches out particularly far (some models can extend past 100 feet from the camera) are perfect for surveying large areas like back yards. A more narrow detection zone may work better in an alley way or high-traffic area.
False triggers can drive a trail camera owner crazy, but they are often the result of one or two common mounting mistakes. First, avoid pointing the camera in a direction where it will face direct sunlight, the heat from which can play tricks with the camera’s PIR detection. Secondarily, the light from direct sunlight can wash out photos. Try not to set up the camera so that it faces east or west; try to face it north or south instead.
Another tip is to mount the camera on a solid, sturdy object. There is nothing wrong with mounting the trail camera on a tree, just be sure the tree is strong enough to not sway in the wind. If a trail camera is allowed to sway, it will trigger repeatedly as everything in frame appears to be in motion.
Once you have selected a location for your trail camera, take some time to secure it properly. Most trail cameras offer several options for attachment. Most have loops for straps or connections for theft-prevention cable locks. Again, it isn’t as important how you mount your trail camera as it is that it have some form of theft deterrent.
The means you choose to secure your trail camera do not need to be bulletproof to be effective. It is okay if thieves would be able to remove it with tools, but they should at least need tools. The most important thing is that you force them to take time to do it, and time is not something trespassers usually like to take – especially if they know they’ve been recorded.
If you’re having trouble with animals or people damaging your property, the first step to standing up is to identify the culprit. Dealing with the perpetrators may be best left up to the proper authorities, but their detection and identification are in your hands. An outdoor motion activated camera can get you the proof you need while you and your gear remain safely undetected.
|
|
Why is My Trail Camera Not Taking Pictures? |
If you’ve ever gone to check your trail cameras in the field only to find an empty SD card (or one full of useless images), then you know the definition of frustration. After all, you bought your game camera to help you accomplish a task. It had one job to do.The time that it sat on your property is now wasted, and you are no more informed about the movement of game animals on the property now than you were before.
Honestly though, there are really only so many things that can be wrong. So go through this quick checklist of problems before you go out to set up your trail cam, and all should be well when it’s time to check the images. It is far more common for a trail camera to take unusable images than to not work at all. We’ll get into fixing those creepy ghost images in a bit, but first let’s make sure everything is working okay.
When a game cam doesn’t work at all, the problem is most often related to the SD card, so let’s start there.
 /www.besttrailcamerareviews.org/wp-content/uploads/2019/02/Why-is-My-Trail-Camera-Not-Taking-Pictures-1.jpg" target="_blank">https://www.besttrailcamerareviews.org/wp-content/...mera-Not-Taking-Pictures-1.jpg 667w" width="200" />Digital image storage, like all other aspects of digital technology, is constantly improving. SanDisk unleashed the first one-giga byte SD card on the market way back in 2004, using a then-unique process of stacking files on the disk to keep its physical size the same. Storage capacities continue to grow, from a maximum of 512GB in 2014 to as much as two tera bytes as of this writing. The important thing to understand is that not all SD cards are compatible with all cameras or card readers.
All SD cards with capacities under 2GB use the FAT16 format.From 4GB to 32GB (SDHC cards), the FAT32 format is standard, and the ex FAT format is used from 64GB to 2TB (SDXC cards). Cards using these formats are not backward compatible with devices from previous generations. So, a device that specifies SDHC cards be used will not record on an SDXC card, though a device that specifies SDXC cards should be able to use SDHC cards. For best results and to remove uncertainty,use only the type of SD card your trail camera specifies.
Like any other digital storage device, SD cards only have so much space available. When the card has reached its limit, it can no longer record new information. Many trail cameras have a feature that allows them to continue taking pictures even when the SD card is full. These cameras will start over at the earliest recorded images and begin recording over them you’re your trail camera does not have this function, you will have to make space.
If a full SD card becomes a recurrent problem, there may be something else that you can do about it. Some trail cameras allow users to select between different levels of image quality. Selecting a lower resolution will mean that each image takes up less space on the SD card, effectively increasing the amount of images they can store. The resulting pictures may not make it in a nature magazine, but they should still be quite usable.
 /www.besttrailcamerareviews.org/wp-content/uploads/2019/02/Why-is-My-Trail-Camera-Not-Taking-Pictures-4.jpg" target="_blank">https://www.besttrailcamerareviews.org/wp-content/...mera-Not-Taking-Pictures-4.jpg 668w" width="200" />It is always a good idea to format a new SD card before installing it. Formatting clears any images or other data from the card and sets up a new files system that the camera will use to organize and safely store new images. It is also the only sure way to delete the images from the card and make room for new images, although it is not always 100 percent effective. The images or fragments of the data may remain on the card.
Format the SD card using the type of computer onto which you intend to transfer or store your images. Mac users should format using a Mac, and PC users should use only a PC. There is no need to repeatedly format an SDcard unless the files have become corrupted in some way. That said, if you’re having trouble storing new images on an older card, reformatting the SD card is a simple step you can try.
There is no frustration quite like the sensation you feel when, after trekking out to check your game camera, you discover it is dead as a door nail. Those missed images are just not coming back. If you’re lucky, the camera will have only recently died, and the SD card will have plenty of recent images. But if those images are older than a week or two, they may not tell you anything about the movement of game through your property. Luckily, there are several things you can do about this issue.
The first thing to do is to make the change from alkaline batteries to lithium batteries. Lithium batteries last considerably longer than alkaline. When changing batteries, be sure that there is no corrosion presenting the battery bay from a previously malfunctioning battery, and clean the(white, powdery) corrosion out if present. There are also external batteries and solar panels available that you can use to either eliminate or supplement onboard batteries.
 /www.besttrailcamerareviews.org/wp-content/uploads/2019/02/Why-is-My-Trail-Camera-Not-Taking-Pictures-3-74x55.jpg" target="_blank">https://www.besttrailcamerareviews.org/wp-content/...ot-Taking-Pictures-3-74x55.jpg 74w, https://www.besttrailcamerareviews.org/wp-content/...t-Taking-Pictures-3-111x83.jpg 111w, https://www.besttrailcamerareviews.org/wp-content/...-Taking-Pictures-3-215x161.jpg 215w, https://www.besttrailcamerareviews.org/wp-content/...-Taking-Pictures-3-990x743.jpg 990w, https://www.besttrailcamerareviews.org/wp-content/...mera-Not-Taking-Pictures-3.jpg 1000w" width="300" />The settings on any given trail camera can be complex and confusing, even for people who have used trail cameras for years. If you’ve gone through and adjusted any settings, only to find that your camera won’t take pictures or takes only blurry, useless pictures, it’s best to start from scratch. Most manufacturers include a simple method for returning their game cameras to the factory default settings. Start there and see if it makes a difference.
Some cameras also allow users to adjust the detection zone,which is the triangular area emanating from the trail cam’s motion sensor. Try to match this zone to the topography. Also, ensure that the camera is in the mode required for it to trigger on motion detection. Sometimes when a trail camera fails to take pictures, the culprit is simply that the camera is in one several other modes available.
 /www.besttrailcamerareviews.org/wp-content/uploads/2019/02/Why-is-My-Trail-Camera-Not-Taking-Pictures-5.jpg" target="_blank">https://www.besttrailcamerareviews.org/wp-content/...mera-Not-Taking-Pictures-5.jpg 667w" width="200" />If the SD card is properly functioning and battery power or settings are not the issue, there may be a problem with the triggering mechanism. If the issue is mechanical, there may be nothing you can do other than contacting the manufacturer for a warranty concern. But before you take that step, consider the possibility that the air temperature may be interfering with the senor’s ability to detect motion.
Trail cameras utilize infrared and motion to instigate a trigger. The sensors in trail cams detect the difference between the body heat of a target and the surrounding air or foliage. When temperatures drop, the difference between the body heat of a deer and the cold air is greater, increasing the chance that the sensor will detect the target and trigger a picture. The warmer it gets the less likely it is that the sensor will detect movement. Some trail cameras have a sensitivity setting, which can be made more sensitive when temperatures rise.
If the problem isn’t that the camera is not taking pictures,but rather that the pictures it does take are useless, there may be a couple of things you can do about it. Users often complain that their trail cameras take fuzzy photos, when it is actually glare from the sun that is causing the problem. Sometimes, the heat and glare from direct sunlight can even interfere with the camera’s detection sensor, leading to missed pictures.
If these issues sound familiar or seem likely, examine the area that you chose to place your camera. When possible, choose a shaded area with lots of trees around to cast constant shadows on the trail cam. Also consider the cardinal direction that business end of the camera is facing. Try never to face a trail camera so that it is facing east or west. Position your trail cam so that it faces north or south instead to avoid the sun’s glare.
Placing a trail camera high above the ground is an excellent way to prevent theft, but it can lead to its own set of issues. Cameras placed10 feet above the ground must be angled downward precisely to ensure passing animals can still trigger the detection circuit. The surestway to increase the likelihood of a detection is to place the camera at eye level. If theft is a concern, consider using a lock box or a Python locking cable.
Another positioning issue that sometimes arises when users place their cameras too far away from a game trail. Never trust a manufacturer’s claims of detection distance, and try not confuse that number with the camera’s flash distance. If a manufacturer claims a 70-foot detection zone, for example, it’s best to reduce that down to no more than 50 feet.Sometimes too the detection angle may be a bit wider than the image angle. Placing the camera in places where vegetation funnels game movement through a central point can defeat that problem.
If your camera is giving you lots of pretty pictures of the scenery on your land, but comparatively few pictures of animals, it’s time to take a closer look at the area. Make sure the tree you mounted the camera on is stout enough that it doesn’t simply sway in gentle breezes. Pointing a trail camera at an area with lots of loose, dangling vegetation can likewise cause false triggers.
If you are still getting empty images but are pretty certain it isn’t a foliage problem, look further into the distance. Is there a clearing or an alley through the vegetation? If so, what’s out there? Many things in the distance can cause these types of problems, from the sun glinting off a distant pond to foot or vehicle traffic on a distant path or road.
The very first things you should suspect if your trail camera does not seem to be working properly are battery issues or a problem with the SD card. It’s always best to discover these types of issues at home, before you go through the trouble of installing the camera in the field. Start out with a brand-new, freshly formatted SD card that matches the manufacturer’s specification, and do the same thing with batteries. Don’t assume that what worked for your old trail camera (or your buddy’s trail cam) will necessarily work this time.
|
|


