(� ��� 18355 ������� �� ����� ������������ ����� �����)
������ ����� ������������ ↓
����� �������������� �������� ����� ����� ����� �� ������ ����� ������� ������ ������� ������� ������� ������� ������� ������� ������� ������� ����� ������������� ������� ������� ������� ������� ����� ����� ��������� ������� ����� ��������� ����� ����� ����� ����� ����� ��� ������ ��� ������� ������ ��� ����� �������� ����� �������� ������� ��������� ��������� ���������� ������� ������ ����������� ����� ����������� ����� ������ ��������� ����� ����� �� ������ ����� �� ���� ����� �� ����� ������� �����
��� ����� �������� ��������� �� ����� |
������� |
| ����� ������: | 4 ���� |
��� ����� ��������� ����� ����� ������ ������. ��������� ����� ��������������, ������� ��� ������� ����� ������� ��������, �������� � ���������� ���������� ��������� � ������ ����� ����� ������� ��� �����������.
��������� ����� ������� ����� ��������. ������ ���� ������� 25�7�4 ��.
��� ������������� ��������� � ������������ �������� �������. �� ������ ������������ �� � ����� ������ �������� (������ �������, �������, �������, ������ � ��.).
����, ��������� � ������������:
1. � ����� �������� ������� �����, ���� ������. ����� ��������� � ����������������� ���������. � ��������� �� ������� ������� ���������� � ������� ��� ������� ��������� � ���������.
2. �������� ������� ������� ������� ��������� �������� ��������.
3. �������������� �� ���������� ������� � �������� �������� �� ���.
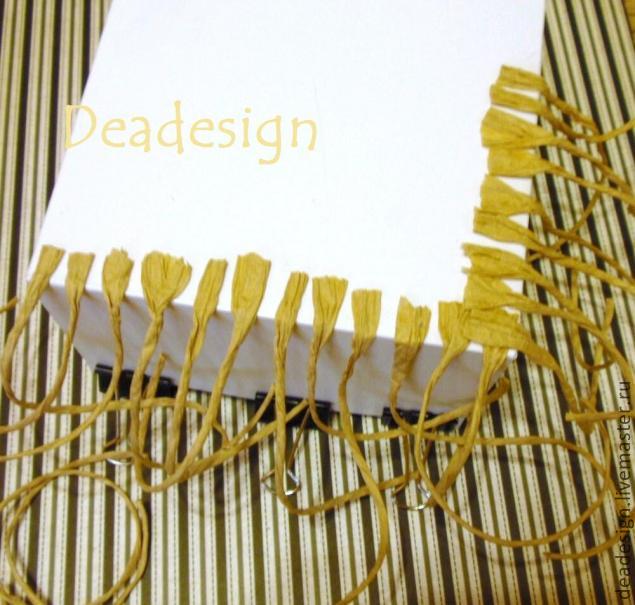
4. �� ������ ������������ ������� � �������� ������� ������ � ��� �������. �������� �� ����� �� 5 �� ������ ����� ������. � ��� ������� ����� ������� ����.

5. �������� ����� �� ������������ ���������. ���� ����� ����� ����� �������, �� ���������� ������� ������ �������� � ���������.
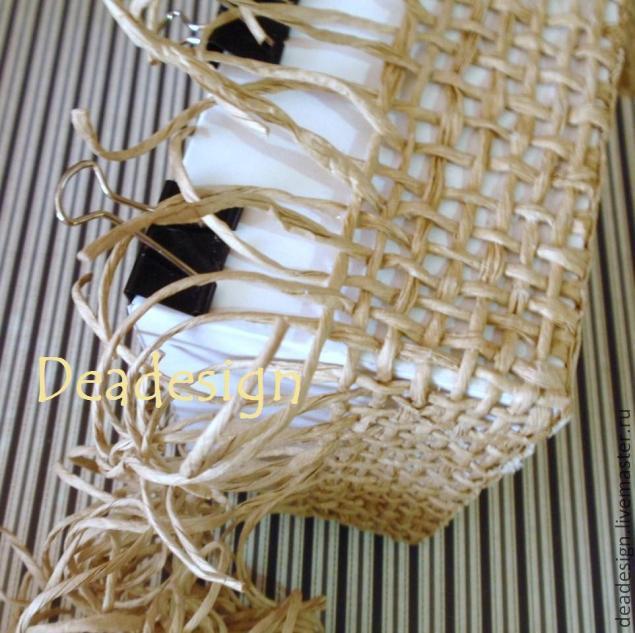
6. ���������� ���������� ����� �������, �� �������� ����� ����������� � ������� ������ � ����������. � ����� �� �� �����, ��� � �������.

7. �������� �������������� �� ����� � ������� ��� ��������. ����� ������� ������� � �� ������� � �� ��������, ��� ��� ���� ��� ��������. � ������� �� ����, ��� ���� ��� �����. ������� ��� ����� �������. ����� 4 ��.
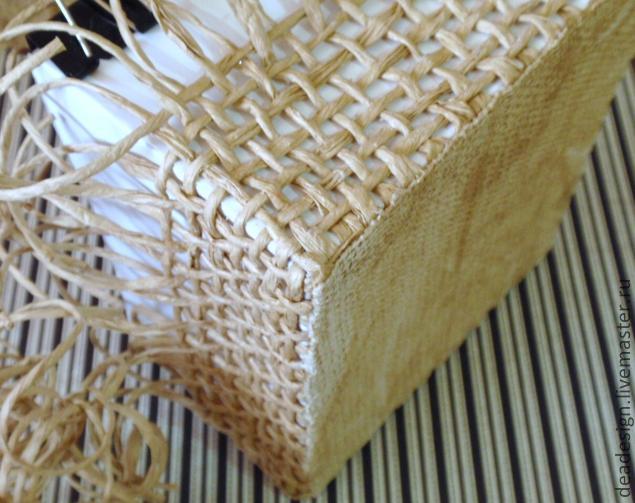
8. ��������� ������ ����� ������� � ������� ������� ������� ���������. �� ��� �� ������� ������ � ���� (����� ���) �� �������� ������.
9. ������� ���������� � �������(�������) ����� ����� ���� � �����. �� �������� �������� ������ ������� ����� ����. �� ������ ����� �������� ����� �� �������������, ����� ����� ����� ���� ���������.
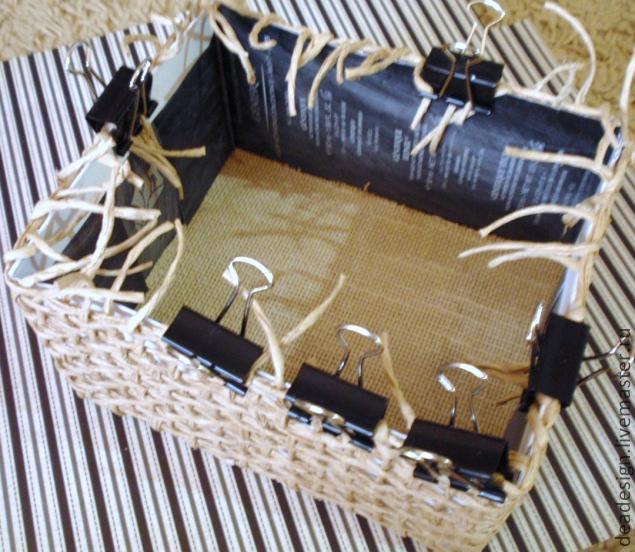
10. ������� ������ ��������. ��������� ���� �� �������.
11. ������������ ����� ����������� ���������, ��������� ���������� ��� ����.
12. ����� ����������� ��������� ���������� �� ����� ������ ������� ����� � ������ ������������ ����� �� ������ ����� �������. ��������� ���������� ����� ������� � ������. ��������� ����������� ���������, �������� ������� �� ���� ������. � ����� ��������:
13. ������� ������, ����������, ��������� �������. ��� ��� � ��� ����������.
�����: ��������� ������� ��������� |
���������. �� |
������� |
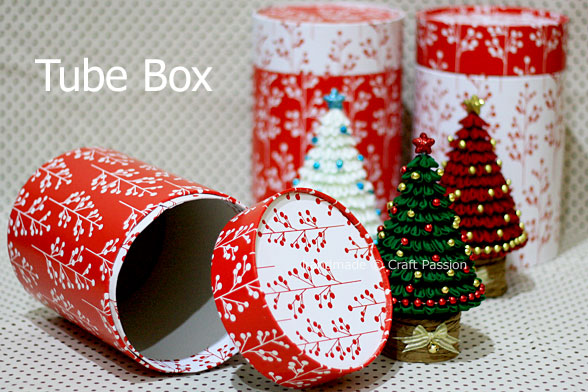
I have been experimenting of how to make a sturdy tube box to store the Kanzashi Christmas Tree. The box must be strong enough to be able to withstand all the rough handling during shipping and reach the winners’ hands in good condition.
I used cardboard, folded 2 layers, no, not strong enough!
I used a thick cardboard, no, I couldn’t fold it in round!
I shopped around but all I saw were rectangle boxes and they are rather huge for the small tree I made, which means I have to include more bubble pack in the package, no no I don’t want that either!
I want it to be light weight yet strong….. I was grumbling to my technical staff about it during a casual talk while they were having their tea break. The chief showed me a UPVC pipe and said: “Use this!”. Yes, it is the perfect material that I want, why I never thought of it!!! More brains is always better than 1 ![]() as long as we are not the cooks and won’t spoil the soup lol!!!
as long as we are not the cooks and won’t spoil the soup lol!!!
Remark- UPVC pipe / white pipe (mainly use as rain water down pipe from roof) with large diameter has thinner wall compare to normal PVC pipe (grey color), hence the weight is lighter.
Like many Chinese, I love tea, and I have some nice small tube boxes that store tea leaves. So, I stole its idea to make this box.
Not only can it be used for storage, if you change the dimensions a little, it could turn out to be your treat box during festive season. Just add some seasonal decorations on it ![]()
 Material:
1. UPVC pipe (150mm diameter and 350mm length)
2. 2mm thick cardboard
3. Wrapping paper of your choice (I got this from Ikea)
4. Craft glue
5. Craft knife, steel ruler and cutting mat
6. Scissor and a pencil
7. A saw with a suitable blade to cut plastic material (I used electrical saw in my workshop)
8. Sand paper
Cut the Pipe to your desire length, a body and a cap (200mm and 50mm). Sand-off the sharp edges from the cut.
Trace the outer diameter of the pipe on the 2mm cardboard, make 2, cut them out for the top and bottom cap.
Cut 2 pieces of 30mm wide and 1 piece of 10mm wide strips from the 2mm cardboard. The length must be
Cut wrapping paper for the top and bottom caps.
 Apply glue on the pipes surface. Wrap the wrapping paper around it and seal the open end in by putting some glue there.
Fold the top end of the body and both ends of the cap in and glue it.
 Glue the 10mm strips at the end of the body (inner part). Since the strip is thick, you need to roll it so that it curved before gluing it, this applies to the 30mm strips too. Cut off extra length.
Fold in the wrapping paper and glue it.
 Glue the top and bottom caps to the wrapping paper. cut off extra wrapping near the curve after the glue has dried.
Wrap one of the 30mm strips with wrapping paper too.
 Glue the unwrapped strip on the inner surface of the cap with 5mm below the top border. This should make the bottom end has more than 10mm allowance for the cap to sit properly on the body. Cut off extra length.
 Apply glue at the outer ring of the top (wrong side) and bottom (right side) caps. Insert them carefully into the pipes so that they sit on the stopping strips.
 Glue the wrapped strip on the inner surface of the top body. Leaving it about 10mm protruded. Cut off extra length.
Cover the cap to the body and check if they fit properly. They should fit, by right!
Brush a round of glue on the caps that they seal better, both inside and outside.
Wait till they are completely dry and you can start storing your favorites in it.

�����: ��������� ��������� |
������������� ��� ������������ |


�����: ��������� ���������� ����������� �������� ����� ��������� |
���������� ��������� � ��������� |


������ ����������� ��������� ����� �������������, ��� ����� ���� �� ������ ����������, �� � ����������, ������� � ���������.
�����: ��������� ����� ��������� ����������� |
�������� ����-����������:) ������, ������-����� |
���� ������!
���� ������� ������������ �������� ���������� �������� ��������� ������� �������, ��� � ���� ������������ ���������� ��� ������� �������������:) ������ � ������ �����. ����� - ��������� ��������, ������ Happy Hour Projects. ��������� ���������!

�����: ��������� �������� �������� ������� ��������� |
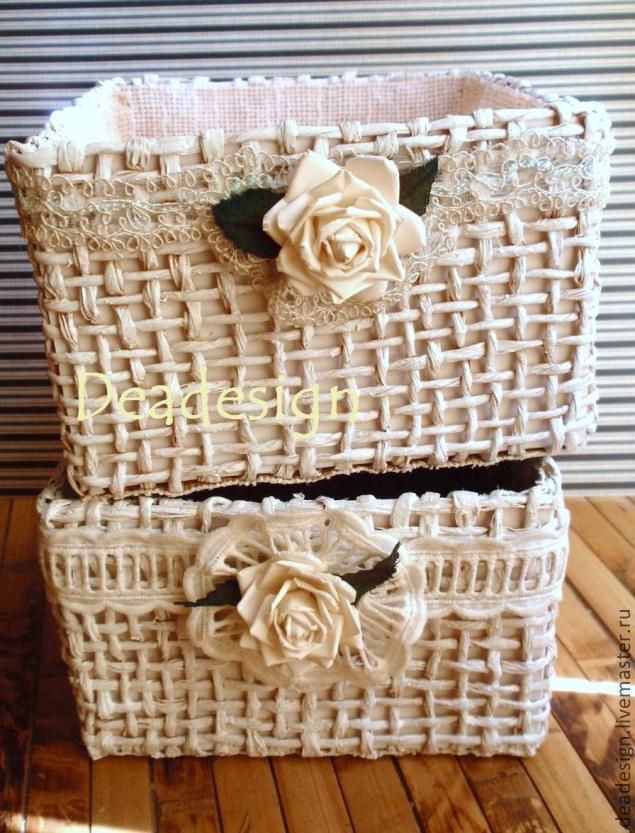
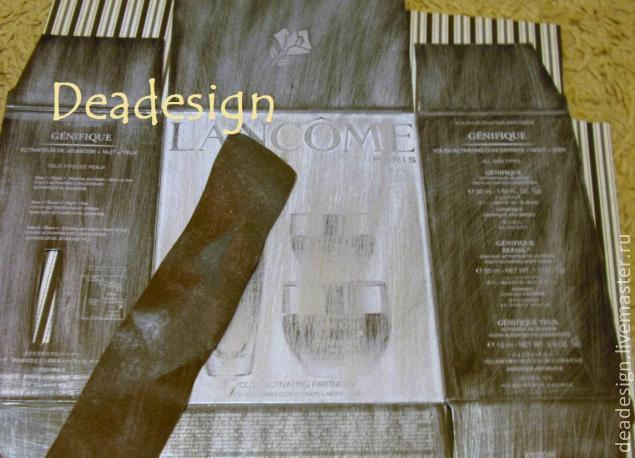
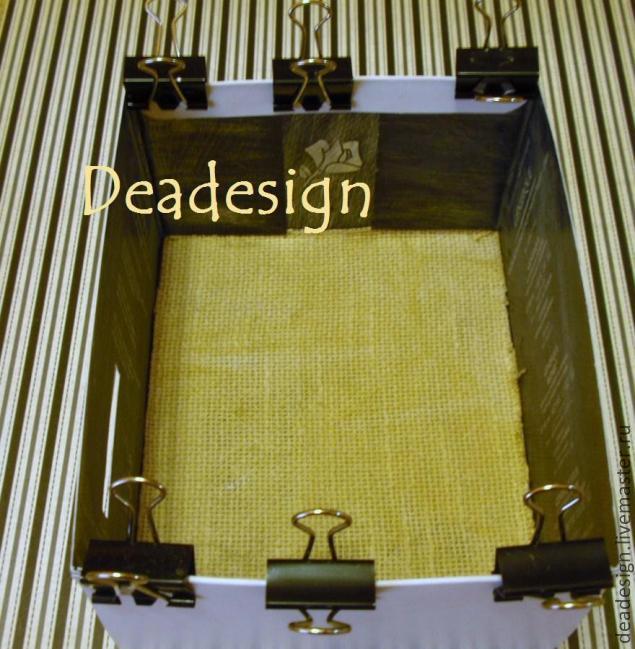
����������� ����������� ��������-��������� ��� �������� �����. ������-����� |
��� �������� �������� �� ��� ��������� ������������ ���������� ,������� ���������� � ���������. � ����� � ��������� �� ������, ������, �� �������� ���� ��� ������� ������� �������� �����������. ��� ���, ����� ������� ����� ����� ��� � ������������ ����������� ������������. ������� ����� ������� �� �������� �������� �����, � ��� �������� � ����� ���������� ���������. �� ������� �� ����� �������� � ������������ :). �� , �����, �� ��� ��� ��� ����� ������������ � ����� ������� ������ :))))
������� ������� ���������� ���������� � ������ , � � ����� ����� �� ������ ���������� ������-����� ���� �������� :)


�����: ��������� �������� ��������� ���������� |
�������� �������� �� ��������� ������� |
������� |
�������� �������� �� ��������� �������

�������� ���-�� ����� �������� (12�� �� 16��) ��� �������� ��������. � ���������� ������� �������� ���������. � ���, ��� ����������
������� ��������� � ��������� ��������� ���� ��������� ����.
�� �� ������� ���� ������� ��� ���������.
����� ��������� �� ��� - ������, ������������ ����, ���������. (���� ���, ����� ����� ����� �����)
�����������, ��������� �������� ������.
...��������� ��������� ������..
�������� �������� ������ �������, �������� ��� ��������� � ���������� � ��������� ������
�� ��� ��������� ��������� ( ����� ��������� ������� �������� �����������).
��������� ��� ����� ������� � ������� ������
������ - ��������� ��������� ���
������ - ��������� ����� ������� (����������������)- ����� ����� ������, ����� ����������� �������� ���, ���������, ������� � �������� ��������� ��������������.
�������� �������� �� �� �������.  astoriaflowers.blogspot.com/2012/01/blog-post_7452.html ����� ���������� ������� ��������� � ������� ����� ������� ����� ���-���� �������. � ��������, ���� � ��� ������� ���������, �������� ������ � ������ �������, ����� ������ ��� ������� �� ����� ��� ��� ���-����.
�����: ��������� ������� ��������� �������� ���������� |
�������� �� ��� ������, ��������� ������-�����. |
�����: ��������� �������� �������� ������� ��������� |
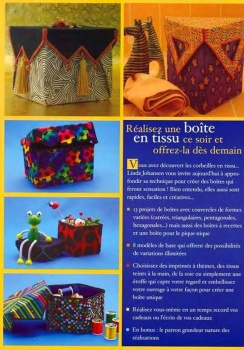
������ MAGIC PATCH. BOITES EN TISSU ��������� |
�����: ��������� ������� ����� ��������� |
������-����� ��������-������ |
������� |
3 ����
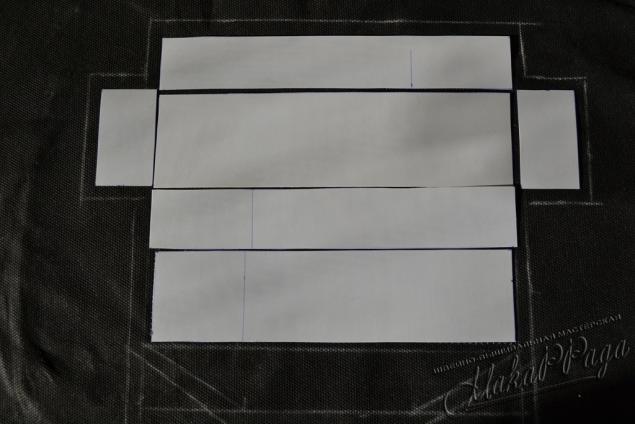
1. ������������ � ������ �������� � ������ ��� �� ������� ������� ����� ������. ������ ������.

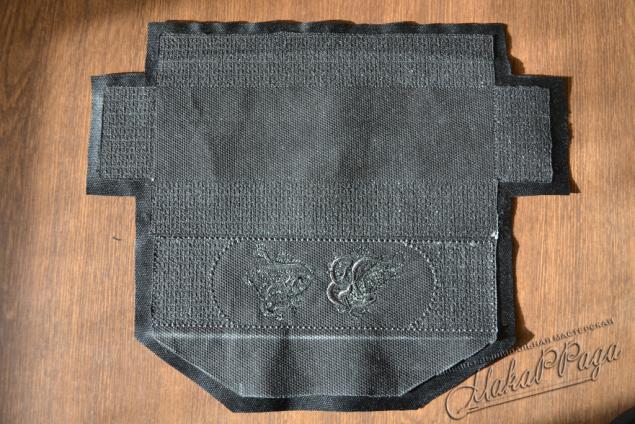
2. �������� ������. � ������� ��� �� ����� ����� ������� ������� ������. ������ �� ���� ���������� ����� (��� �������) �� ���������� 3 �� �� ����. � �������� ����� ��������, ������� ����� ���� ������ ��� ����������. ������ � ��� ���� ��� ���������� ������� ������. ��� �� ������ ������ ������, �� ��������� �� ���� ��� 5 ��. � ���� ��������. ����� ��������� ��� ������ �� ������� ��������.


�����: ��������� �������� ������� ��������� |