МК обувь для куклы в стиле гладиатор
Make Your Own Gladiator (Celtic Warrior) Boots
Copyright © 2010 Martha Boers, All Rights Reserved
Many people asked me about the boots I made as part of my Arwyn, Celtic Warrior Maiden outfit
for my Ryung (by Elfdoll), so I'm posting the instructions.
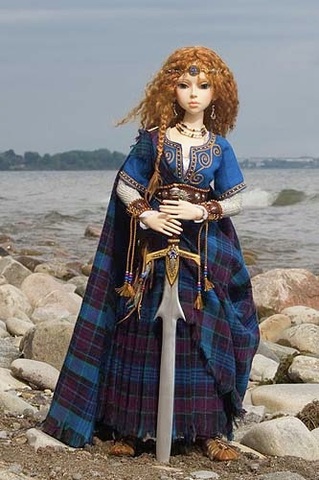
Arwyn, Celtic Warrior Maiden
|
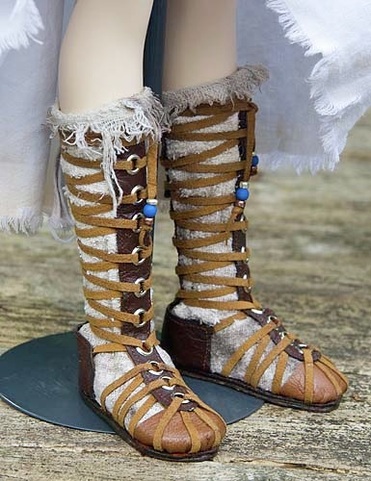
Celtic (Gladiator) Boots
|
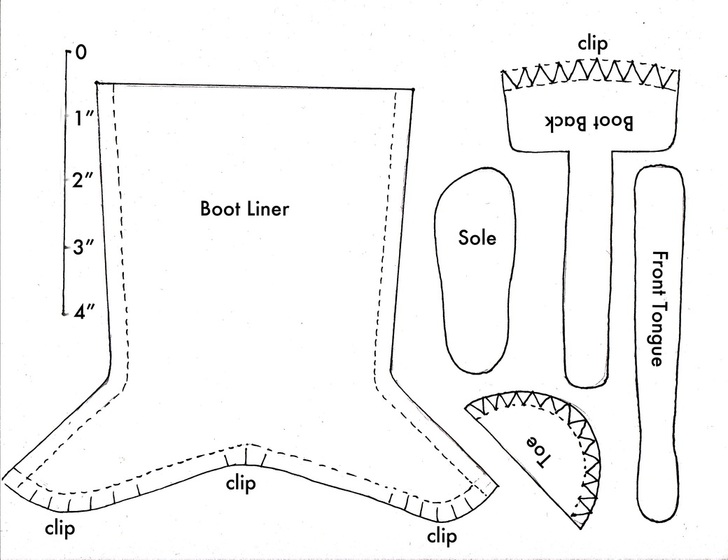
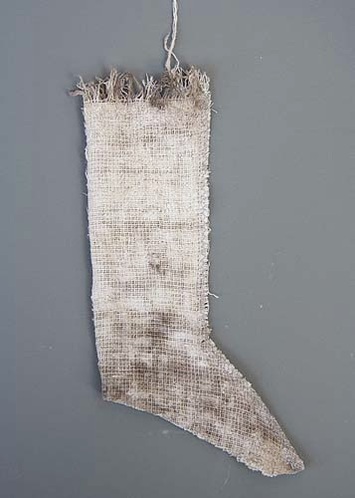
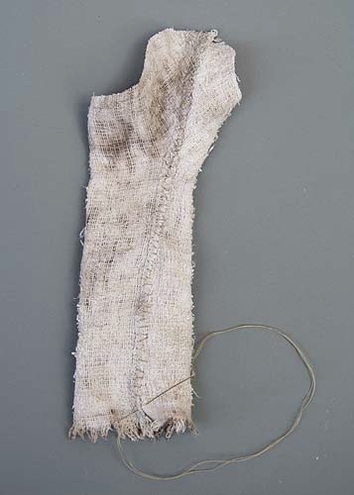
1. Here's the pattern - enlarge it to the proper size - see ruler on pattern. The liner pattern is so wide at the ankle in order to accommodate the doll's heel.
*these patterns were made to fit Ryung by Elfdoll, who is 58 cm tall, with 7.2 cm long feet. If your doll is a different size, you will need to shrink or enlarge the patterns.
2. Cut out the liner and sew up the front seam. Test to make sure it goes on and off your doll's foot easily - if not, make the pattern wider at the ankle and redo. I used a very worn out dish cloth with frayed edges for my liner. I first stained the fabric with diluted acrylic paints, and after letting it dry completely, then heat set the paint with an iron, and then washed it with laundry detergent to remove any excess paint.
3. Hand-stitch the front seam down on the inside.
2. Sew liner
|
3. Hand-stitch the front seam down on the inside
|
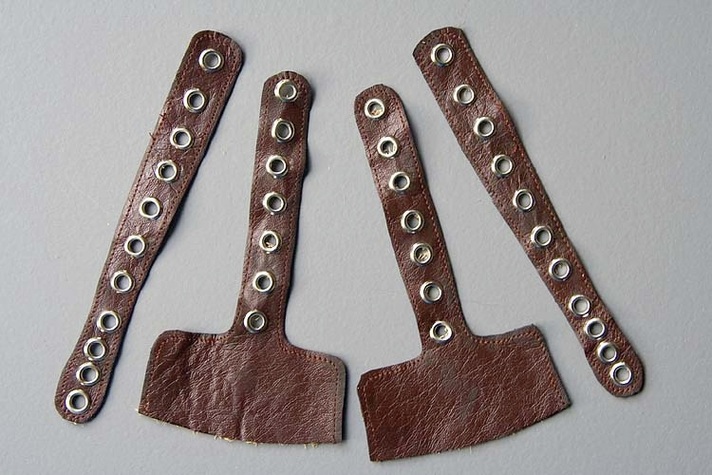
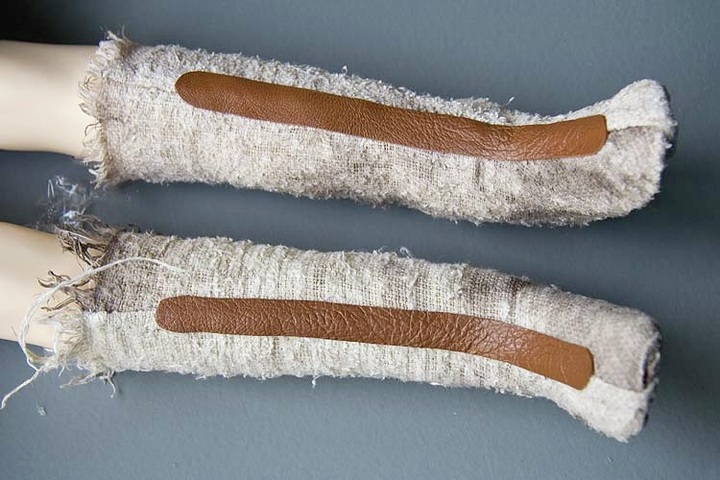
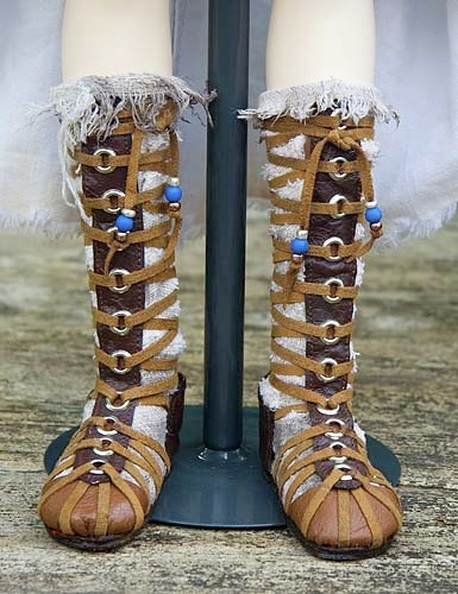
4. Cut out the leather pieces (I used fake leather) and machine stitch around the edges.
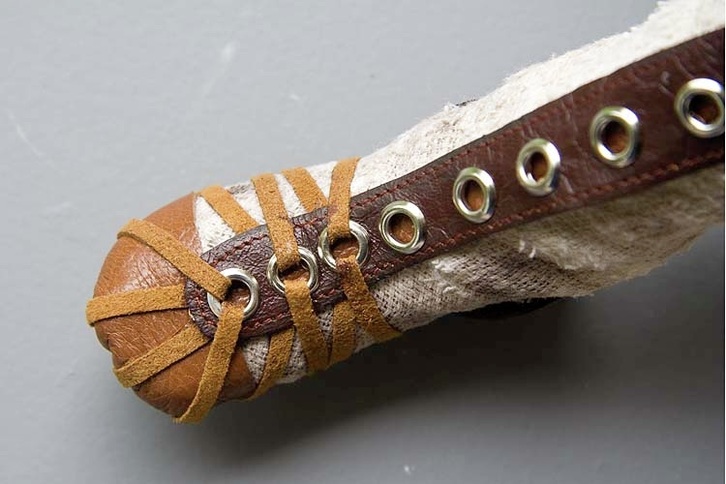
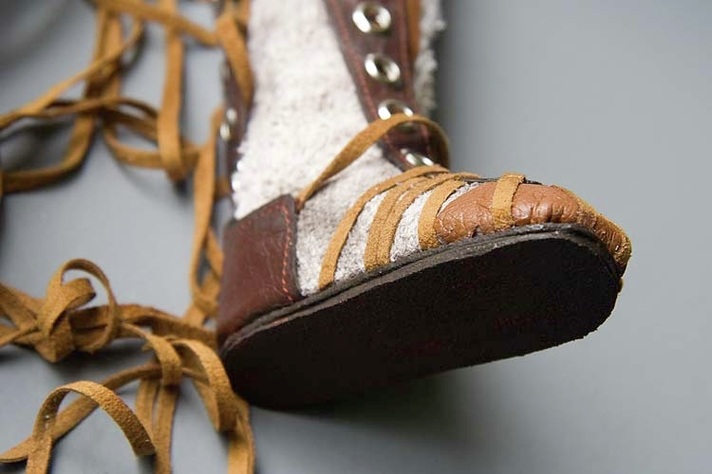
5. Insert 1/4" eyelets up the front and back pieces as shown. The four lower eyelets, which are close together, are for the top of the foot. The other seven are for lacing up the leg.
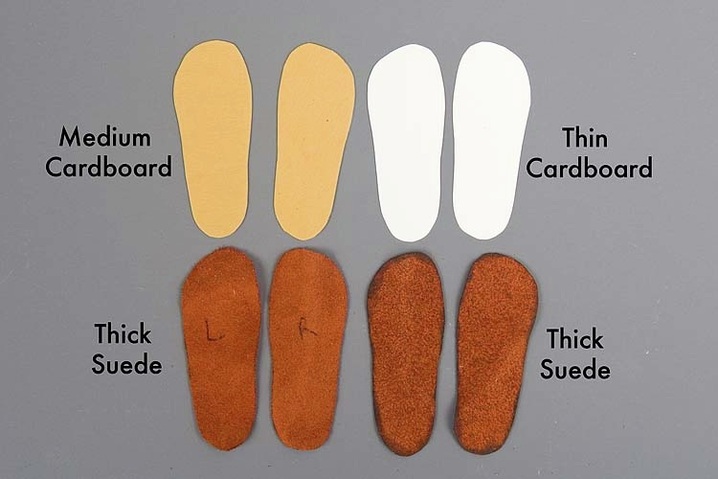
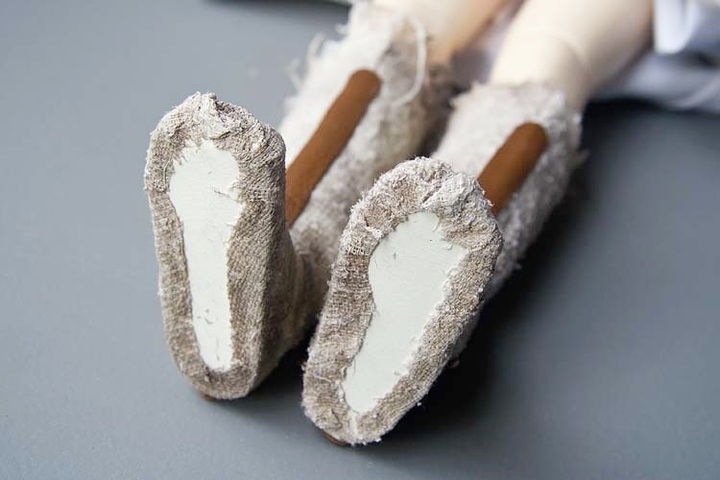
6. Cut out four sets of soles; one from white card (so it won't stain the doll's foot), one from thicker cardboard, and two from thicker suede. Paint the edges of one set of suede soles dark brown.
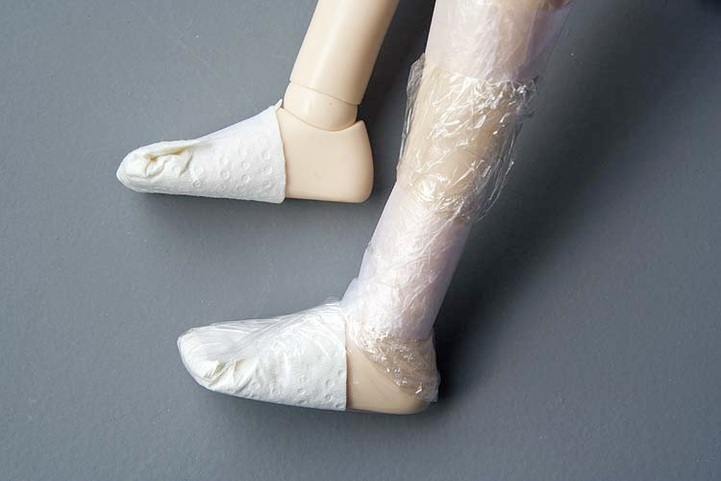
7. Take half a paper towel and wrap it around foot and fold back on top of foot to build up toe area. Cover entire leg with plastic wrap and tape into shape. *This is to make the toe area of the boot bigger than the small actual foot of the doll, and to protect the leg from glue in the next steps.
8. Position the white cardboard soles under the doll's foot, and glue the bottom of the liner all the way around as shown.
9. Cut two thin leather strips and glue up the front and back of liners (sorry, no pattern). These are to protect the liner from the backs of the eyelets (which may be a bit sharp), and it 'fills in the holes' when looking through the eyelets.
10. Glue the leather toe piece over the front of the liner, with the clipped edges going under the sole. Measure a length of ultra-suede lacing to fit from under sole, up through the first eyelet and back down under the sole. Cut and glue into position. Repeat as shown for all three upper foot eyelets. *If I did it again I would use a darker leather for the toe upper.
Underside of sole showing all the glued-under parts.
11. Cut 34" lengths of ultra-suede lacing and glue one end onto boot back, then glue boot back onto liner and sole. Glue the leather sole with painted brown edge onto bottom of sole, then the thicker cardboard sole, then the last suede sole.
12. Paint the sole dark brown. *This is why you first painted the edge of the upper suede sole brown - so you wouldn't get paint on the liner.
After the paint has dried completely, give the entire sole a coat of satin or matte varnish.
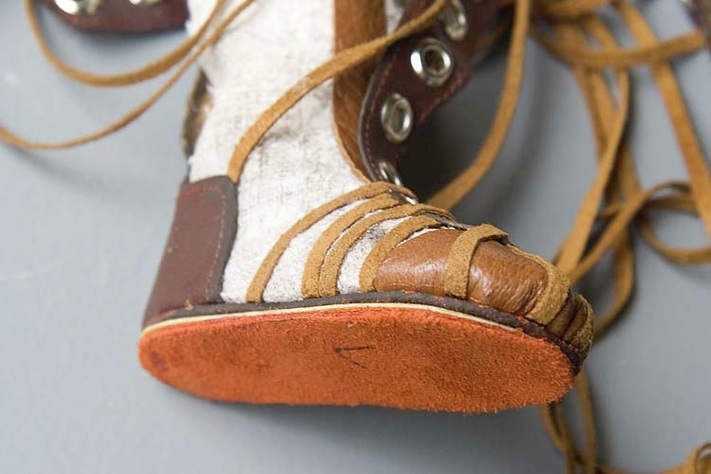
13. When the boot has completely dried, carefully pull it off the doll's foot. Then remove the plastic wrap and paper toweling. Lace up the boot as shown, going from front to back. The ends of the laces will be too long, so wrap them around the top of the boot and tie them. A few small beads on the ends of the laces will keep the laces from being pulled out of the eyelets.
Источник