МК волосы для куклы |
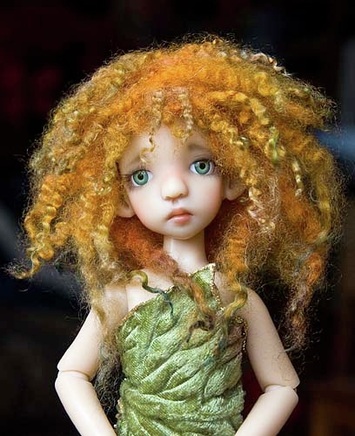 |
I make all my own mohair doll wigs, and in this tutorial I will share my technique so you can create your own one-of-kind wig.
The instructions in this tutorial are for making a wig using separate mohair curls, which will be sewn into strips of 'wefting, then attached to a crochet cap. The mohair curls I used for Cinnamon's wig were a rough texture and very tightly curled, perfect for the 'wild' look I had in mind. I create the caps for my wigs by crocheting with very fine baby wool or heavier gauge crochet thread. The instructions in this tutorial will make a size 6 wig cap, and assume you already know how to crochet. By experimenting you could make a larger wig cap to fit a larger doll. |
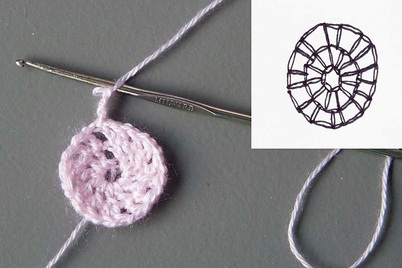
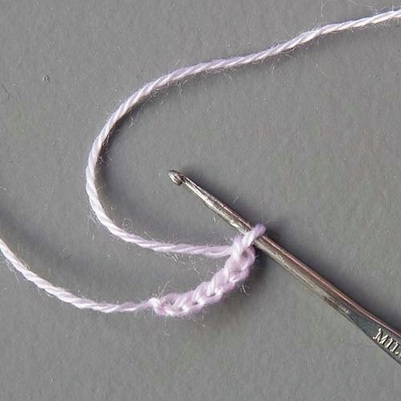 1. Using fine baby yarn and an appropriate sized crochet hook; chain 6
|
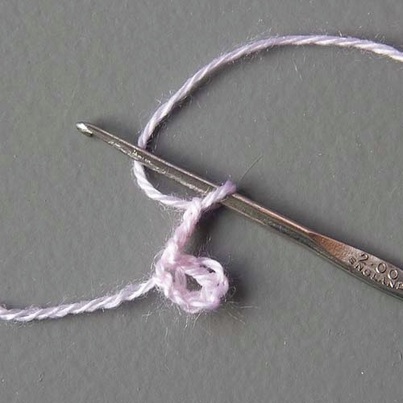 2. Make loop, chain 4
|
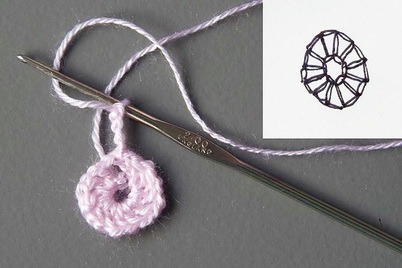 3. First Row: double crochet, chain one, 11 times. Connect at start and crochet 4. (12 spokes in circle)
Chain 4. |
 4. Second row: repeat 'double crochet, chain one' pattern, increasing 4 times as shown in illustration (16 spokes in circle). Chain 4.
|
 5. Third Row: continue with 'double crochet, chain one' pattern increasing twice at opposite sides (18 spokes in circle) Chain 4.
|
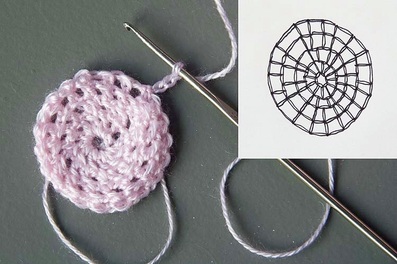 6. Fourth Row: continue with 'double crochet, chain one' pattern increasing twice again (20 spokes in circle) Chain 4. Crochet two more rows without increasing. Cut thread and work away loose ends.
|
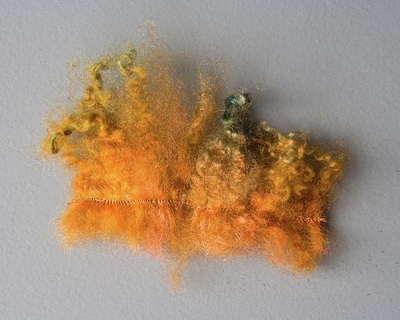
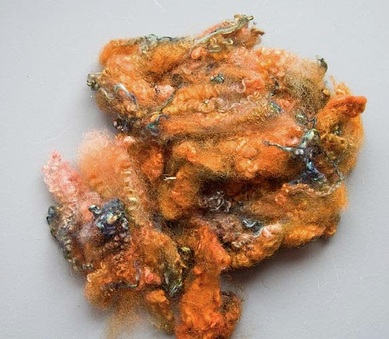 Dyed, sheared mohair
|
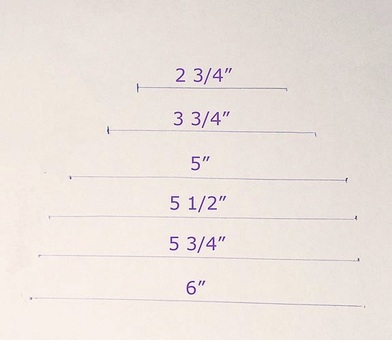 7. On a piece of paper, draw lines the length shown. The lines correspond to the circumference of each of the crocheted lines on the wig cap.
|
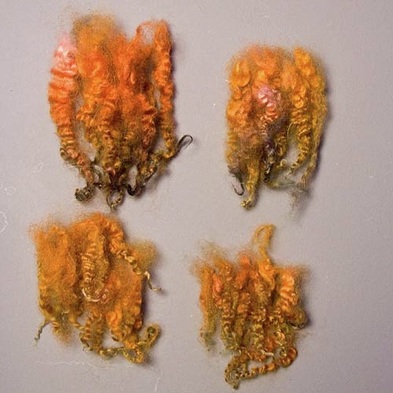 8. Separate the mohair into separate piles of long, medium and short locks.
|
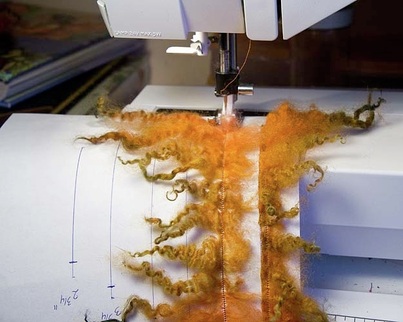
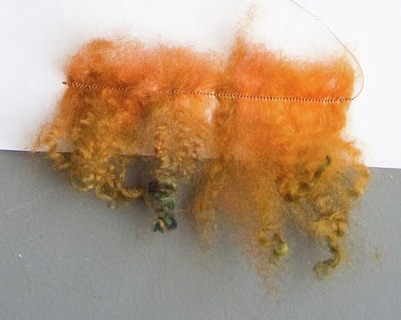
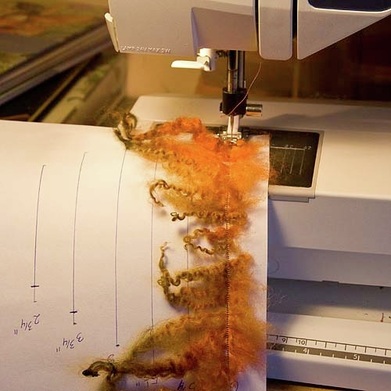 9. Starting with longest line on the paper, insert sewing machine at beginning of line, then take one of the longest mohair locks, spread out the top (sheared end) and stitch with matching coloured thread. The two ends of the sewing line correspond to the back of the wig, the front is in the middle, so decrease lock length towrds middle of line with shortest locks in the center, as shown.
|
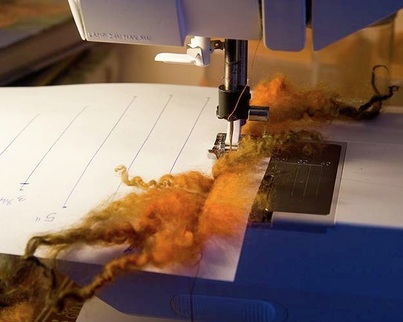 10. When you get to the end of the sewing line on the paper, turn paper around, fold mohair back over the first sewing line, and sew a second line 1/8" from first line.
|
 11. Lift presser foot and position needle at top of next row. Spread tops of mohair locks and proceed as in step 9.
|
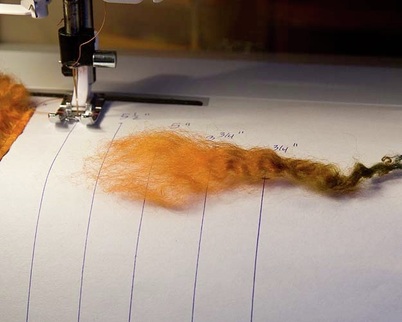
 12. When you get to end of second row, turn paper, and fold mohair back on itself and sew another row of stitches 1/8" from first row.
|
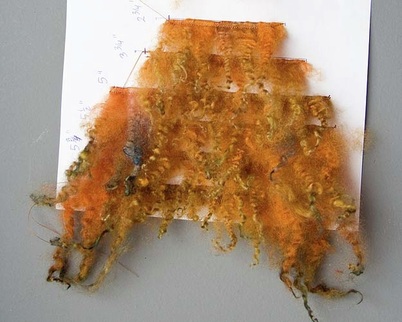 13. Continue sewing mohair locks onto all the lines on the paper remembering to use longest locks on sides, and shorter locks in middle.
|
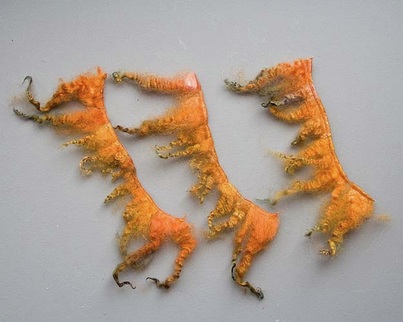 14. Carefully remove rows of mohair wefting from paper
|
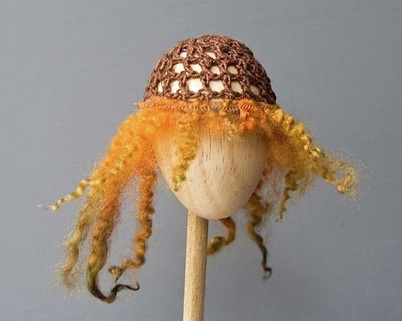
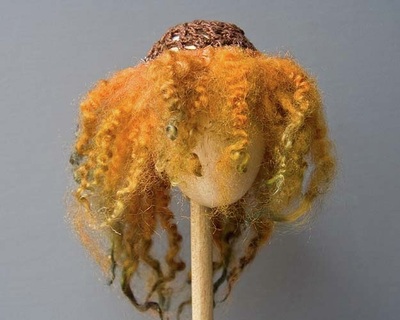
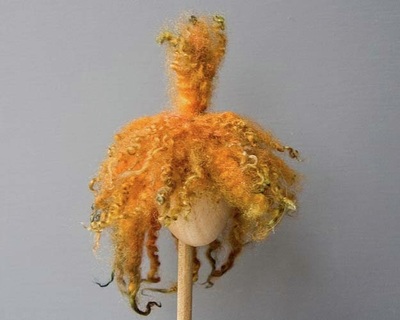
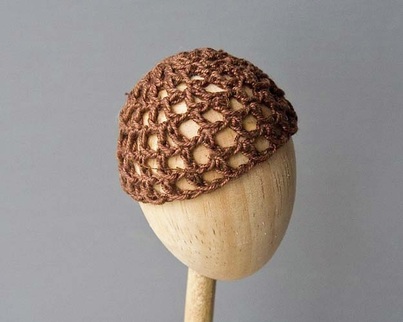 15. Wig cap made with brown crochet thread, on a wig stand made from a 6" circumference wooden egg.
|
 16. Apply bead of hot glue along top edge of mohair wefting, and glue onto bottom edge of wig cap. *Cover wig stand with foil to prevent glue from going through crochet cap and sticking to wig stand. ( I forgot, and ended up with hot glue all over my wooden egg)
|
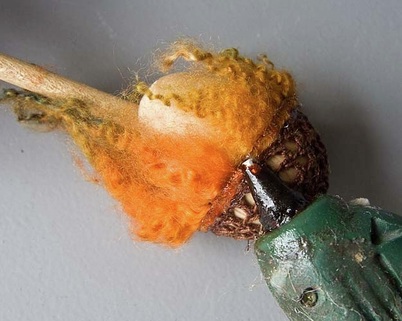 17. Apply a thin bead of glue on outside edge of mohair wefting and with hot nozzle of glue gun slowly melt the glue into the top of the mohair to help hold all the fibers permanently into place.
|
 18. Repeat steps 16 & 17 for next row of mohair, making sure to keep shorter locks in front.
|
 19. Apply all the strips of mohair wefting to the corresponding crocheted rows on the wig cap.
|
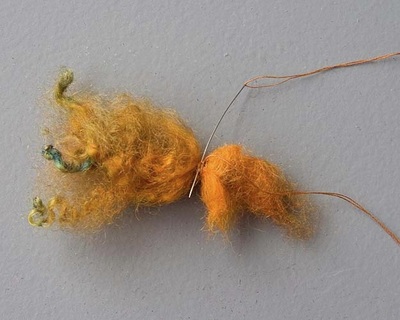
 20. To make crown, draw a 5" line on paper, and sew a single line of stitching along edge of mohair. *Do not fold over and sew a second row.
|
 21. Carefully remove sewn strip from paper.
|
 22. With needle and matching thread, start rolling mohair strip and sew along sewing line.
|
 23. Completed roll of mohair. Wrap with thread several times and secure with stitching.
|
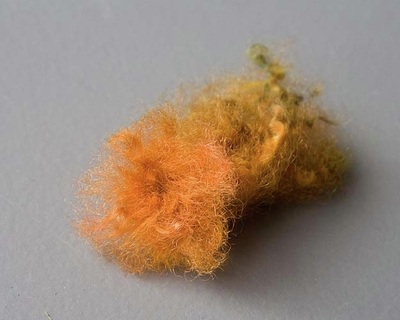 24. With fingers carefully flare out the base of the crown.
|
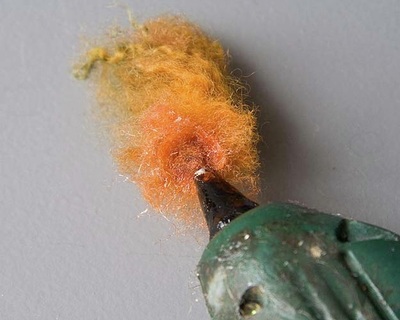 25. Carefully work hot glue into the base of the crown.
|
 26. Hot glue the crown onto the space at the center of the wig. When glue has cooled, carefully spread the mohair out .
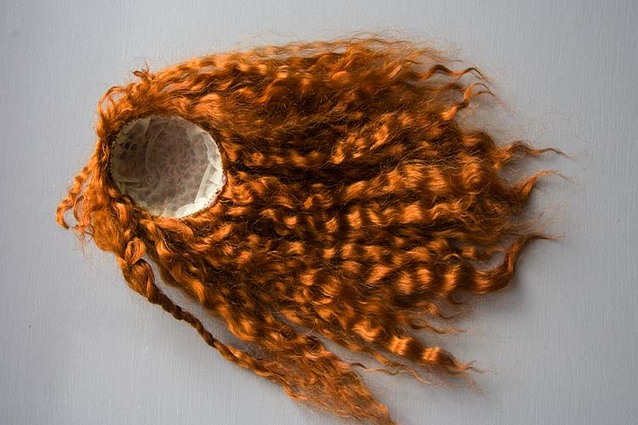
|
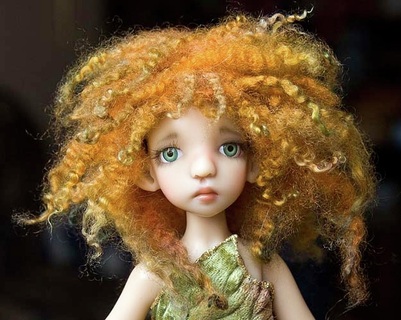 27. Finished wig. I wanted the rough fuzzy look so haven't styled the wig in any way.
|
 Measure diameter over curve of cap, add seam allowances and draw a circle pattern. Cut out of nylon tricot. Turn under edges, pin into place and hand stitch to cap while it's inside out.
|
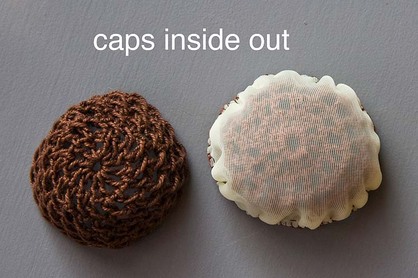
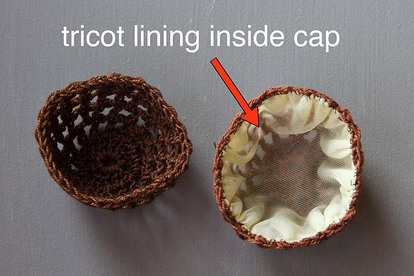 Cap with nylon tricot lining
|
| Рубрики: | Рукоделие Игрушки |
| Комментировать | « Пред. запись — К дневнику — След. запись » | Страницы: [1] [Новые] |


