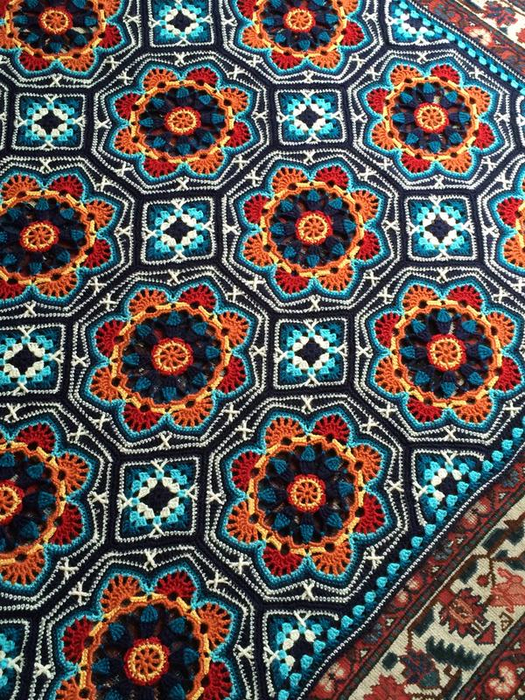
Очень красивый и красочный плед из мотивов!! |
Это цитата сообщения тануля [Прочитать целиком + В свой цитатник или сообщество!]
|
|
МК Галстук-брошь - форма очень гармоничная и удачная!! Спасибо мастеру! |
Это цитата сообщения Valentina_iv [Прочитать целиком + В свой цитатник или сообщество!]
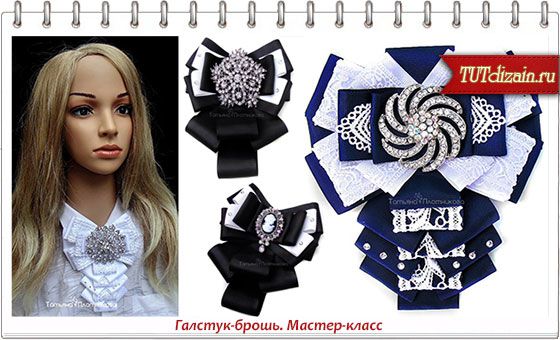
Для изготовления галстука-броши потребуется:
- атласная лента шириной 3,8 см;
- кружевная лента шириной 3,8 см;
- брошка, стразы, полубусины и другой декор;
- горячий клей;
- ножницы, зажигалка;
Галстук-брошь шаг за шагом:
Обычно я не придерживаюсь размеров и режу все на глаз, просто для МК решила все замерить.
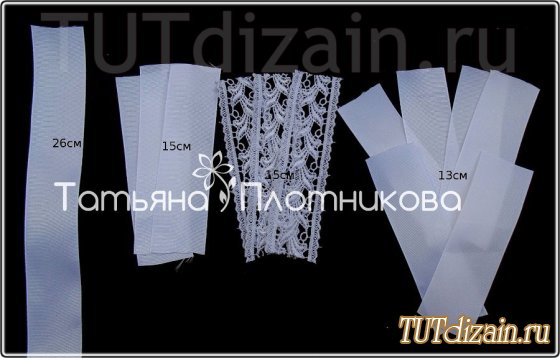
Подготовьте заготовки для ХВОСТИКА. Один отрезок длинной 26 сантиметров, три отрезка ленты и три отрезка кружева по 15-ть сантиметров, шесть отрезков для самых мелких деталей по 13-ть сантиметров.
|
|
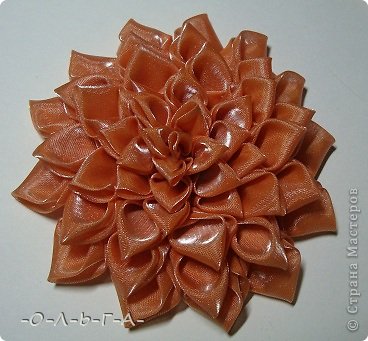
ГЕОРГИН и органзы МК |
Это цитата сообщения Режевлянка [Прочитать целиком + В свой цитатник или сообщество!]
Цитирую автора!!!
Здравствуйте дорогие! По просьбе девочек делаю МК цветка. Мне он напоминает георгин. Складывание листочков как-то видела в просторах интернета, попробовала сделать и мне понравилась. Присвоением авторского права этих листочков я не собираюсь заниматься, просто хочу показать саму сборку цветка.
|
|
Плед Калейдоскоп! Очень ярко и красочно! |
Это цитата сообщения Аннушка1707 [Прочитать целиком + В свой цитатник или сообщество!]
Вязание крючком: "Детский плед от Dedri" (подробная пошаговая инструкция)
|
|
Очень интересный узор для квадратного пледа! |
Это цитата сообщения Синтез [Прочитать целиком + В свой цитатник или сообщество!]


How to download Mypicot patterns?
The MyPicot patterns are free and do not require any site registration. All patterns and diagrams are presented as PDF documents and require Adobe Acrobat Reader™ to view.
Almost all crochet patterns of MyPicot are presented as diagrams and have not written instructions. If you have some problems with reading diagram look for our tutorials How to follow crochet a diagram. Please use this link to download pattern.
If you would like to sell things that you have designed using mypicot patterns, please read our Conditions of Use for MyPicot stitch patterns.
Instruction:

Techniques used in this stitch (British term / American term):
Chain stitch – ch
Slip stitch – sl.st
Double crochet / Single crochet – dc / sc
Double treble / Treble – d.tr / tr
Front Post dc / sc – FPdc / sc
Shell: work 3d.tr + 2ch + 3d.tr in the same space.
Stitch - st
For more information about the stitches please visit the page of Textured Bubble Stitch:
Make 6ch and sl.st in last ch.
Round 1: Make 5ch, 2 d.tr/tr in ring of 6ch, * 2ch, 6 d.tr/tr in ring; rep from * 2 times more, 2ch, 3 d.tr/tr in ring, sl.st in 5th ch, turn.

Round 2: 1ch, 1FPdc/sc over each of the next 3d.tr/tr below, * 7dc/sc in space of 2ch, 1FPdc/sc over each of the next 3d.tr/tr below, 2ch, 1FPdc/sc over each of the next 3d.tr/tr; rep form * 2 times more, 7dc/sc in space of 2ch, 1FPdc/sc over each of the next 2d.tr/tr below, 1FPdc/sc over 5ch, 1ch, 1dc/sc in 1st FPdc/sc of the round, turn.

Round 3: Make 5ch, 2 d.tr/tr + 2ch + 3 d.tr/tr in space between 1ch and dc/sc below, * work 1dc/sc through 1st and 7th sts below: insert your hook from front to back under the top 2 loops of 1st dc/sc, then from back to front under the top 2 loops of the 7th dc/sc and work dc/sc, 2 shells in space of 2ch; rep from * 2 times more, 1dc/sc through 1st and 7th dc/sc below, shell in space between 1ch and dc/sc below, sl.st in 5th ch, turn.

Round 4: 1ch, * 1FPdc/sc over each of the next 3d.tr/tr below, 7dc/sc in space of 2ch, 1FPdc/sc over each of the next 3d.tr/tr below, 1ch, 1FPdc/sc over each of the next 3d.tr/tr, 7dc/sc in space of 2ch, 1FPdc/sc over each of the next 3d.tr/tr below, 2ch; rep form * 2 times more, 1FPdc/sc over each of the next 3d.tr/tr below, 7dc/sc in space of 2ch, 1FPdc/sc over each of the next 3d.tr/tr below, 1ch, 1FPdc/sc over each of the next 3d.tr/tr, 7dc/sc in space of 2ch, 1FPdc/sc over each of the next 2d.tr/tr below, 1FPdc/sc over 5ch, 1ch, 1dc/sc in 1st FPdc/sc of the round, turn.

Round 5:
Work next steps:
1 - "Beginning of the round #1": 5ch, 2 d.tr/tr + 2ch + 3 d.tr/tr in space between 1ch and dc/sc below.
2 - "Middle stitches #1": 1dc/sc through 1st and 7th dc/sc below, shell in space of 1ch, 1dc/sc through 1st and 7th dc/sc below.
3 - "Point #1": work 2 shells in space of 2ch.
Repeat steps: 2 – 3 – 2 – 3 – 2.
4 - "Finishing of the round #1": work shell in space between 1ch and dc/sc below, sl.st in 5th ch, turn.

Round 6:
Work next steps:
1 - "Beginning of the round #2": 1ch, 1FPdc/sc over each of the next 3d.tr/tr below, 7dc/sc in space of 2ch, 1FPdc/sc over each of the next 3d.tr/tr.
2 - "Middle stitches #2": 1ch, 1FPdc/sc over each of the next 3d.tr/tr below, 7dc/sc in space of 2ch, 1FPdc/sc over each of the next 3d.tr/tr, 1ch.
3 - "Point #2": 1FPdc/sc over each of the next 3d.tr/tr, 7dc/sc in space of 2ch, 1FPdc/sc over each of the next 3d.tr/tr , 2ch, 1FPdc/sc over each of the next 3d.tr/tr, 7dc/sc in space of 2ch, 1FPdc/sc over each of the next 3d.tr/tr.
Repeat steps: 2 – 3 – 2 – 3 – 2.
4 - "Finishing of the round #2": 1FPdc/sc over each of the next 3d.tr/tr, 7dc/sc in space of 2ch, 1FPdc/sc over each of the next 2d.tr/tr below, 1FPdc/sc over 5ch, 1ch, 1dc/sc in 1st FPdc/sc of the round, turn.

Round 7:
Work next steps:
1 - "Beginning of the round #1": see Round 5.
2 - "Middle stitches #1": * 1dc/sc through 1st and 7th dc/sc below, shell in space of 1ch; rep from *, 1dc/sc through 1st and 7th dc/sc below.
3 - "Point #1": see Round 5.
Repeat steps: 2 – 3 – 2 – 3 – 2.
4 - "Finishing of the round #1": see Round 5.

Round 8:
Work next steps:
1 - "Beginning of the round #2": see Round 6.
2 - "Middle stitches #2": * 1ch, 1FPdc/sc over each of the next 3d.tr/tr below, 7dc/sc in space of 2ch, 1FPdc/sc over each of the next 3d.tr/tr; rep from *, 1ch..
3 - "Point #2": see Round 6.
Repeat steps: 2 – 3 – 2 – 3 – 2.
4 - "Finishing of the round #2": see Round 6.

Repeat rows 7 - 8 until you have reached your desired size of square.

Colors & rounds: * 1 & 2 – blue, 3 & 4 – light blue, 5 & 6 – white, 7 & 8 – beige*.


Color combination with blue & white

Colors & rounds: 1 - light blue, 2 – white, 3 – blue, 4 – white, 5 - light blue, 6 – white, 7 – blue, 8 – 11 – white, 12 - light blue, 13 – white, 14 – blue.


|
Метки: плед крючком квадрат узор от центра |
Очень красиво!!! |
Это цитата сообщения ttalu [Прочитать целиком + В свой цитатник или сообщество!]
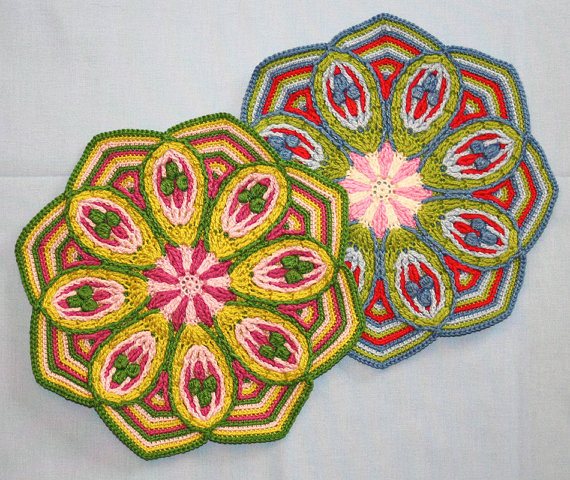
Смотрела некоторые иностранные сайты и очень понравились идеи для вязания мандал, но к сожалению, ни мастер классов, ни схем не нашла. Взяла несколько идей, которые Вы можете попробовать связать крючком.

|
|
Нежные и ажурные салфетки и скатерти крючком |
Это цитата сообщения alocka13 [Прочитать целиком + В свой цитатник или сообщество!]
|
|
Интересная вязка и очень простая... |
Это цитата сообщения angel_devid [Прочитать целиком + В свой цитатник или сообщество!]
 Необходимо набрать на спицы чётное кол-во петель. 1 ряд (лицевой) - 1 кром.. *провязываем сначала вторую лицевой , затем первую лицевой, снимаем со спицы и так до самого конца ряда*, кромочная. 2 ряд (изнаночный) - 1 изн., * провязываем сначала вторую петлю изнаночной, затем первую и снимаем со спицы*, 1 изн., кром. Получается как плетёная корзинка. Этот узор -легкий и эффектный. | ||
|
|
Самые "ленивые" и "быстрые" рецепты |
Это цитата сообщения Оленька_Коваленко [Прочитать целиком + В свой цитатник или сообщество!]
|
|
Платье туника, вязанное крючком |
Это цитата сообщения tancha1259 [Прочитать целиком + В свой цитатник или сообщество!]


|
Метки: платье туника крючком ажур белое шишечки |
НАТУРАЛЬНЫЕ КРАСИТЕЛИ ДЛЯ ПАСХАЛЬНЫХ ЯИЦ |
Это цитата сообщения держи_меня_крепко [Прочитать целиком + В свой цитатник или сообщество!]
|
|
Брюггское кружево. От простого к сложному. |
Это цитата сообщения marisha54 [Прочитать целиком + В свой цитатник или сообщество!]
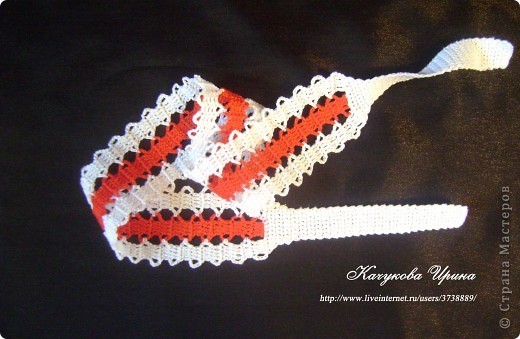 Летняя повязка на голову (брюггское кружево). Крючок
Автор Ирина Качукова
МК ЗДЕСЬ stranamasterov.ru/node/194484
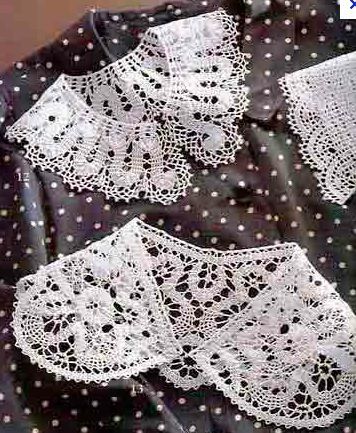
Брюггское кружево, воротнички.
Модели со схемами ЗДЕСЬ gaanna.ru/vjazanie-krjuchkom/bryuggskoe-kruzhevo-vorotnichki/
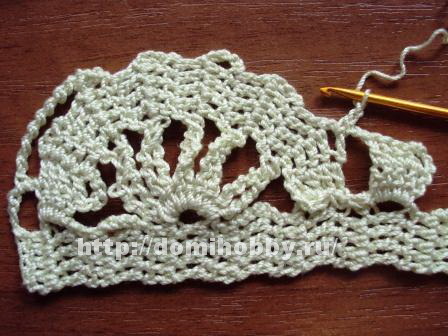
Узор вязания крючком с элементами брюггского кружева.
Мастер класс ЗДЕСЬ
domihobby.warezboom.ru/672-uzor-vyazaniya-kryuchkom-s-elementami-bryuggskogo-kruzheva.html
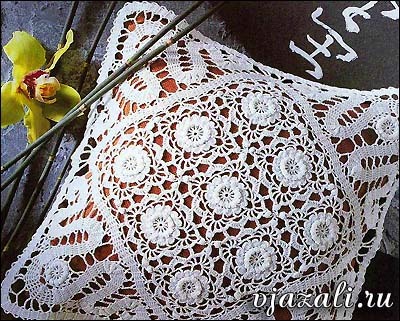
ДЕКОРАТИВНАЯ ВЯЗАНАЯ ПОДУШКА.
Схемы ЗДЕСЬ www.vjazali.ru/crochet/dekorativnaya-vyazanaya-podushka-861.html
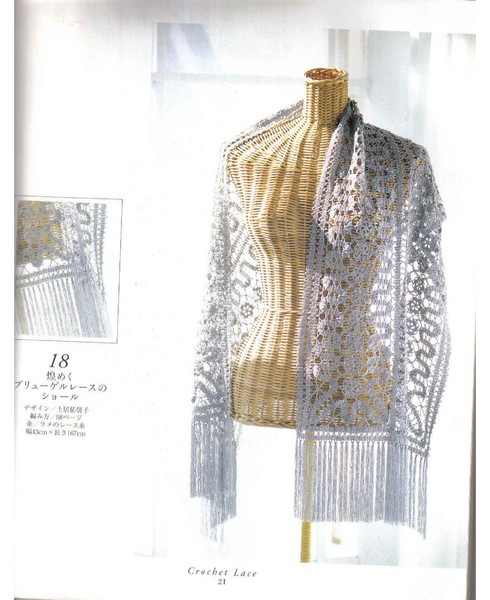
Палантин.
Схемы ЗДЕСЬwww.liveinternet.ru/users/4601042/post225511074/
|
|
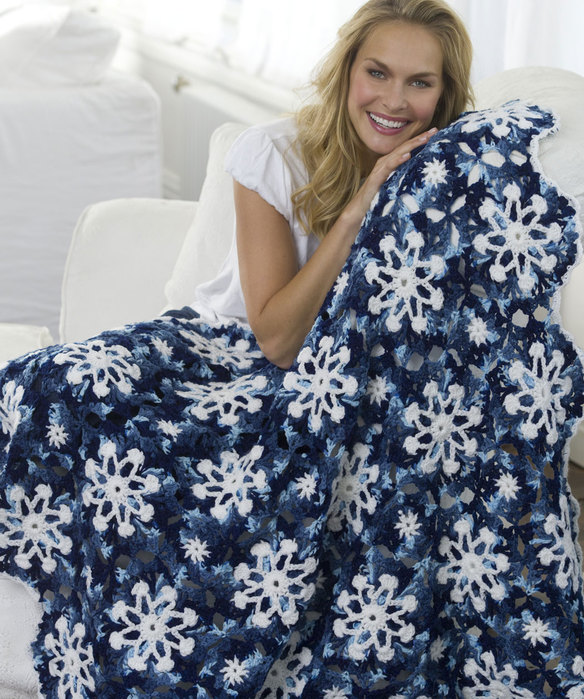
Плед со снежинками |
Это цитата сообщения Юлия_Трефилова [Прочитать целиком + В свой цитатник или сообщество!]
|
|
БОЛЕРО КРЮЧКОМ "КРОКОДИЛОВА КОЖА |
Это цитата сообщения Мила-2010 [Прочитать целиком + В свой цитатник или сообщество!]

МАСТЕР-КЛАСС И ВИДЕО НА http://www.stranamam.ru/post/3251401/>>>
|
|
Узор "клубничка" тунисским крючком. Видео |
Это цитата сообщения Иримед [Прочитать целиком + В свой цитатник или сообщество!]

![]() Иримед: увидела здесь этот узор, но не очень его поняла. Нашла видео с титрами на английском языке, но, по-моему, все понятно и без перевода.
Иримед: увидела здесь этот узор, но не очень его поняла. Нашла видео с титрами на английском языке, но, по-моему, все понятно и без перевода.
|
|
Плед крючком из круглых мотивов, вписанных в квадрат.Подробный фото-МК мотива |
Это цитата сообщения Лада_Германовна [Прочитать целиком + В свой цитатник или сообщество!]
|
|
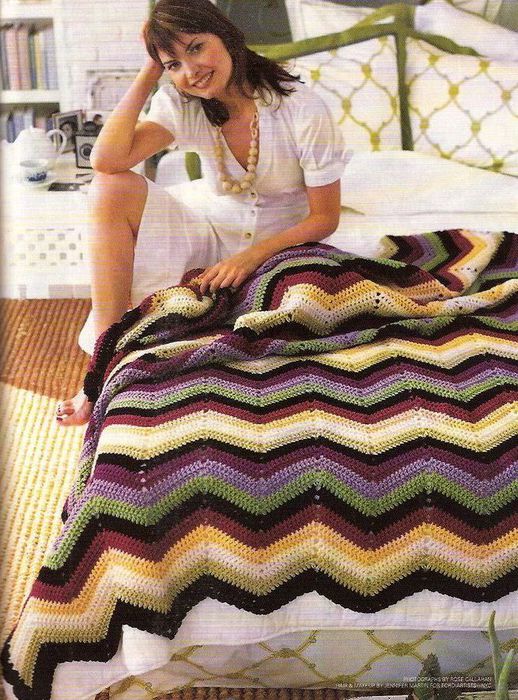
ПЛЕД - ПОКРЫВАЛО "ЗИГЗАГ |
Это цитата сообщения Ирина-ажур [Прочитать целиком + В свой цитатник или сообщество!]
|
|
СКАЗОЧНЫЙ "БАБУШКИН КВАДРАТ"!! |
Это цитата сообщения candra [Прочитать целиком + В свой цитатник или сообщество!]
|
|
ПЛЕДЫ КРЮЧКОМ И СПИЦАМИ. ИДЕИ2 |
Это цитата сообщения candra [Прочитать целиком + В свой цитатник или сообщество!]
|
|
ПЛЕДЫ КРЮЧКОМ И СПИЦАМИ. ИДЕИ |
Это цитата сообщения candra [Прочитать целиком + В свой цитатник или сообщество!]
|
|
Ленточная пряжа Bolero от Yarn Art и Lanos Stop. |
Это цитата сообщения Olia2010 [Прочитать целиком + В свой цитатник или сообщество!]
Эта очаровательная и необычная пряжа, лучше всех подходит для создания рюш и воланов. Сочные расцветки просто созданы для оригинальных идей.Свяжите из ленточной пряжи Bolero жабо, воротник или манжеты, планку для кармана или декоративный элемент для украшения одежды. Результат Вас удивит и порадует. Хотелось бы особенно отметить, о расходе данной пряжи. Из одного моточка "Bolero Yarn Art" можно связать необычный и милый шарфик 90Х15см!!!
Ленточная пряжа Bolero Yarn Art
Страна производитель: Турция
Теперь могу показать как и обещала очень простой способ вязки, научили прямо в магазине "не отходя от кассы".
Пряжа выглядит вот так:


Ленточная пряжа Bolero от Lanas Stop.является новинкой сезона 2010-2011 года. Будет сочетаться с мериносовой пряжей.
- Длина: 28 м
- Вес мотка: 50.00 г;
- Состав: 47% шерсть, 47% акрил, 6% полиамид;
- Спицы: 4,0-5.0
- цена 338,00 руб.

Нанизываем на спицу нужное кол-витков \петель\ Для шарфика-жабо я брала около 30 петель.Переворачиваем спицу и начинаем вязать как обычно лицевыми петлями захватывая не всю ленту, а только верхнюю тоненькую нить.


Первую петлю не снимаем как обычно а тоже провязываем лицевой! Фсёёё 
Источник: myblogfortyna.blogspot.coml (орфография и комментарии автора)
А, вот что можно связать из такого богатства)))


Серия сообщений "О пряже":
Часть 1 - Что может рассказать о пряже этикетка?
Часть 2 - Вязаные полезности. О пряже.
...
Часть 15 - Какую выбрать пряжу для ручного вязания?
Часть 16 - Новая оригинальная пряжа. А мне так шарфик хочется из такой )))
Часть 17 - Как вязать ленточной пряжей? Ленточная пряжа Bolero от Yarn Art и Lanos Stop.
Часть 18 - Шарф "ФИОЛЕТОВАЯ ОСЕНЬ" ленточной пряжей
Часть 19 - Новые виды пряжи! Шарфик за 3 часа!
...
Часть 47 - Пряжа "Фокус"_покупать не рекомендуется
Часть 48 - Шапка снуд и варежки_спицы
Часть 49 - Вязальный рай в Германии: фабричная продажа пряжи от Rowan, Schachenmayr, Regia
|
|
ФИОЛЕТОВАЯ ОСЕНЬ, шарфик из Дантеллы |
Это цитата сообщения Valusha_Alex [Прочитать целиком + В свой цитатник или сообщество!]
Цитируя, не забываем говорить спасибо автору!
Привет всем. Я уже в Москве. Вхожу в новый ритм и привыкаю к холодам.
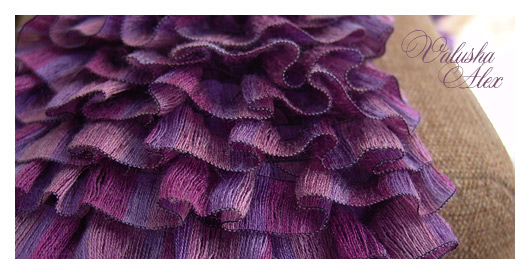
Сегодня покажу вам одну штуковинку, которая создалась, буквально, за несколько часов. Легко и просто, а главное результат – шикарная вещь на осень ;) Итак.
|
|
Вязаные изделия крючком в гобеленовой технике |
Это цитата сообщения Garmonija_duschi [Прочитать целиком + В свой цитатник или сообщество!]
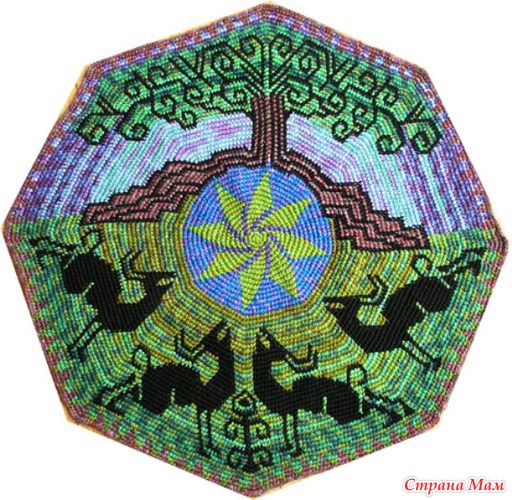
Мандала - восточный религиозный геометрический символ, отображающий модель вселенной, чаще всего - круг с вписанными в него фигурами. А неискушенные в таинствах восточных религий мандалой называют просто круг с красивыми узорами, который, например, можно связать гобеленовой техникой, тогда коврик получится плотным.,двусторонним.
Если говорить кратко,то гобеленовая техника вязания это вязание многоцветное,наподобие жаккарда,только выполняется исключительно стобиками без накида.

|
|
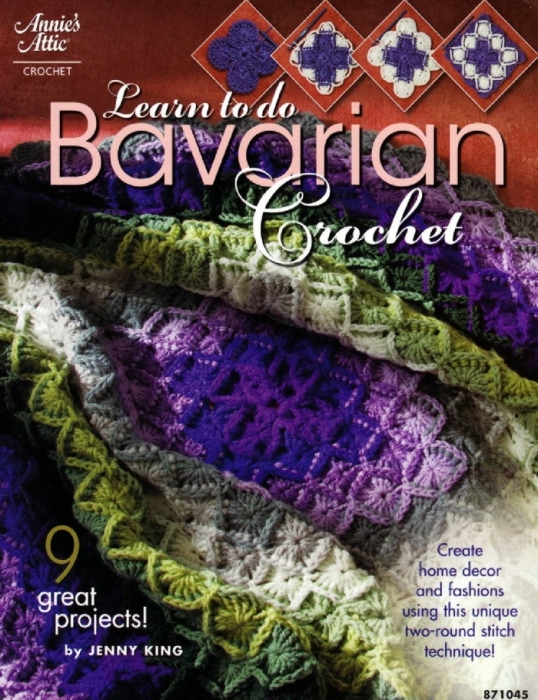
Баварское вязание! Необыкновенная красота:) |
Это цитата сообщения Ananta [Прочитать целиком + В свой цитатник или сообщество!]
|
|
Вязаные сердечки! |
Это цитата сообщения Yarni [Прочитать целиком + В свой цитатник или сообщество!]
|
|
Многофункциональный "Кот в мешке" |
Это цитата сообщения Лидия_Каламбет [Прочитать целиком + В свой цитатник или сообщество!]
Этот маленький Мастер класс я посвящаю всем своим друзьям, друзьям друзей, моим гостям и просто прохожим, всем тем, кто голосовал за меня всё это время и кто отдал свой голос только один раз.
Я очень тронута той солидарностью и отзывчивостью, которую я ощутила здесь, на ЛИ. ру.
Нам часто жизнь преподносит КОТА В МЕШКЕ, не так ли?.
Вот я и решила создать шуточный сувенир, который можно подарить на любой праздник, любому человеку независимо от возраста. Сделать его совсем не сложно, а вот покласть в него можно всё, что угодно и дарите, дарите, дарите! Одним словом КОТ В МЕШКЕ.
|
Метки: кот в мешке кот шитье мешок подарок душистый мешочек кофе корица мастер-класс котик |
ЛЕНТОЧНОЕ КРУЖЕВО... много... |
Это цитата сообщения милена70 [Прочитать целиком + В свой цитатник или сообщество!]
|
|
Новый год. Обои, фоны. |
Это цитата сообщения Inmira [Прочитать целиком + В свой цитатник или сообщество!]
Новый год не за горами :-) Готовимся потихоньку :-)


Все изображения кликабельны. Размер - от 1280-1024 пкс.
Дальше > > >
|
|
Пончо -свитер |
Это цитата сообщения [Прочитать целиком + В свой цитатник или сообщество!]
A poncho designed in panels of mitered diamonds and triangles. Some experience with mitered diamonds is recommended. For detailed video instructions on making miters see: http://vimeo.com/6832500
For excellent miter written instructions see: http://megan.kiwi.gen.nz/MitresArticle/
For simplicity here the directions for individual miters are reduced to just the specifics.
Noro Kureyon or other worsted weight yarns:
Needles: US 10 for body and US 8 dpns or circular needle for collar
Note: Slip first stitch every row.
Sized Medium, for a wingspan of 60”. (For taller wearers increase the size of the larger diamonds by 10 stitches, or 70+1. Follow the math to increase the smaller diamonds to half or 35+1.)
Center panels back and front are knit the same: Cast on 60+1stitch to make mitered diamond #1. Knit every row, alternating two contrasting yarns.
For triangle #2 pick up 30+1 stitches on the edge of first diamond. Knit every row, alternating yarns, and at the end of the rows on the right side decrease K2tog, K1. After triangle is decreased to last stitch, break yarn. For triangle #3, pick up 30+1 stitches along other edge of diamond #1. Knit every row and alternate yarns. At the beginning of right side rows, K1, k2tog, k to end.
Diamond #4 is the same as #1 and the stitches are picked up from the previous three modules. #5 and #6 are the same as #2 and #3.
Neck Triangle #7: Pick up 30 stitches from between triangles #5 and #6. Make triangle: Right side only: K1,k2tog, knit to center three stitches, make decrease, knit to last three stitches, k2tog, k1.
Make back panel the same as front panel.
Join front and back panels with triangles made the same way as triangle #7.
Center Sleeve panel.
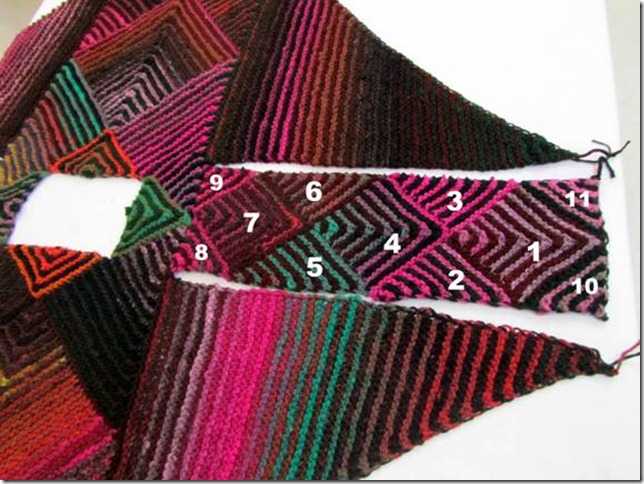
The center sleeve panel is based on a diamond of 30 +1 stitches and triangles of 16 stitches picked up on the edges of the diamonds. The diamonds # 1,4,and 7 are based on 31 stitches, while the triangles #2,3,5 and 6 are 16 stitches. The tiny triangles #8,9,10 and 11 also pick up16 stitches but have been decreased (k2tog) the beginning and ending of every front row.
The sleeve sides are then sewn to the center sleeve panel.
Sleeve side triangles
Pick up 57 stitches along edge of front or back panels. One or two extra stitches are OK, whatever makes it look like every edge stitch is included. Decrease on right sides by k1, k2tog on bottom edge to match the direction of the front or back panel bottom diamond. Carry up contrasting yarn on opposite side.
Make four sections, two on each side for sleeves. Sew sleeve sides to sleeve center panel.


Collar. Pick up stitches around the square neck opening, using smaller dpns, or a circular needle #8 and a single yarn, join in a circle. For a cowl collar: Knit with a single yarn, alternating one row knit and one row purl. Bind off at desired height. If desired, the collar can be split and knit flat after then initial six rows are knit. To do this, knit six rounds, find center front stitch, turn and knit to end, slipping first stitch of each row. If buttonholes are desired, make a simple one with yo, k2tog.
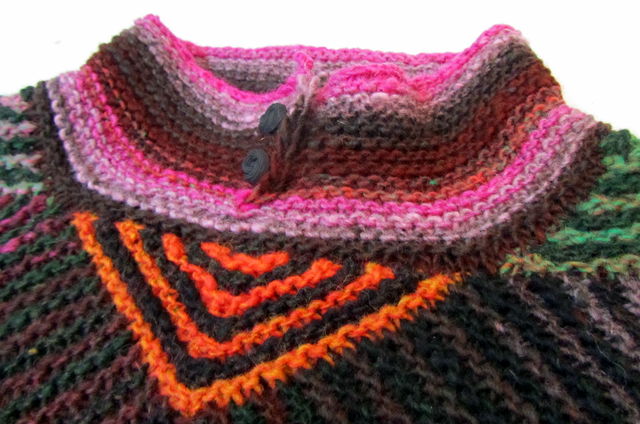
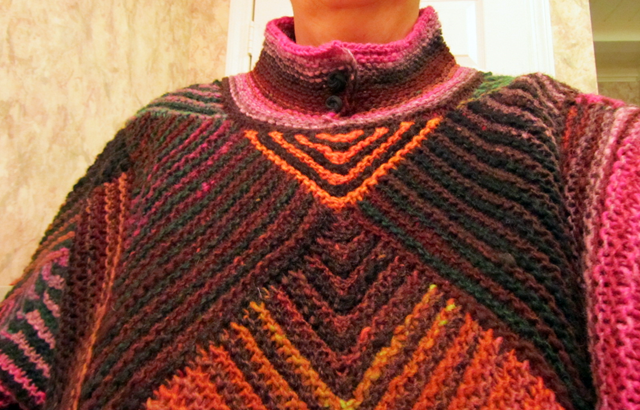
Collar. Pick up stitches around the square neck opening, using smaller dpns, or a circular needle #8 and a single yarn, join in a circle. For a cowl collar: Knit with a single yarn, alternating one row knit and one row purl. Bind off at desired height. If desired, the collar can be split and knit flat after the initial six rows are knit. To do this, knit six rounds, find center front stitch, turn and knit to end, slipping first stitch of each row, alternating one row knit and one row purl. If buttonholes are desired, make a simple one with yo, k2tog.
Optional cuffs. Pick up stitches all around bottom of sleeve and join in a circle. Knit 1 row, Purl 1 row alternately for 12 rows or six ridges, bind off.
Blocking really helps this yarn lie flat and drape best.
1.
![image_thumb[5] (640x480, 365Kb)](http://img0.liveinternet.ru/images/attach/c/7/94/531/94531612_image_thumb5.png)
2.
![image_thumb[20] (556x480, 631Kb)](http://img1.liveinternet.ru/images/attach/c/7/94/531/94531613_image_thumb20.png)
Серия сообщений "Кофты":
Часть 1 - Шраг крючком Berenguela с переводом
Часть 2 - По греческим мотивам
...
Часть 17 - Болеро
Часть 18 - коралловое пончо
Часть 19 - Пончо -свитер
Серия сообщений "ВЯЗАНИЕ-4":
Часть 1 - Симпатичные блузочки
Часть 2 - Из архива Мурмур Шапки
...
Часть 14 - Красивое простое болеро крючком
Часть 15 - Вяжем носки крючком
Часть 16 - Пончо -свитер
|
|
Носки-следки спицами |
Это цитата сообщения nadinrom [Прочитать целиком + В свой цитатник или сообщество!]
Носки-следки спицами
Взято с сайта Уфамама.ру автор ![]()
![]() Линара
Линара

Для выполнения носков-следков 37-го размера потребуется 80г шерстяной пряжи, 5 чулочных спиц или кольцевые спицы диаметром 2,5-3,5 мм. Для прочности изделия, к основной нити лучше присоединить тонкую синтетическую нить.
Описание:
|
|


