 |
|
Плетеное пико
Очень популярный стежок в
технике бразильская вышивка.
Таким стежком можно вышивать
листья, лепестки.
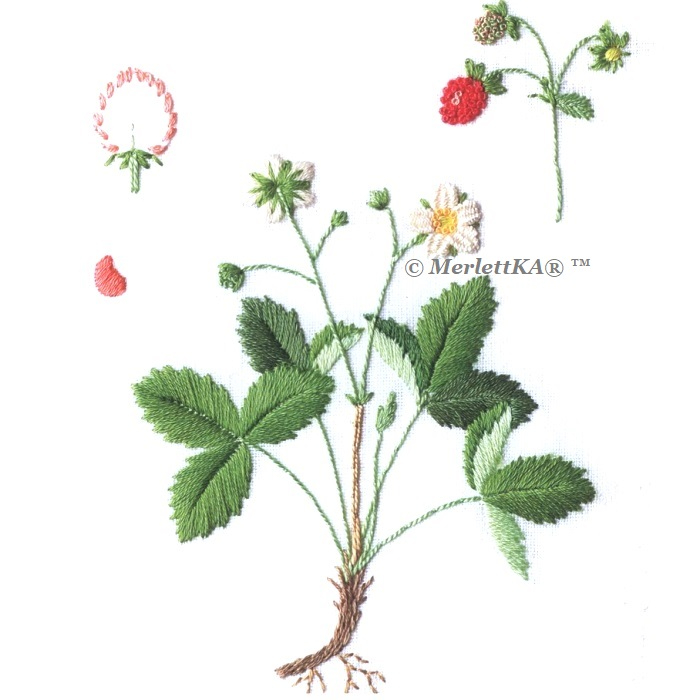
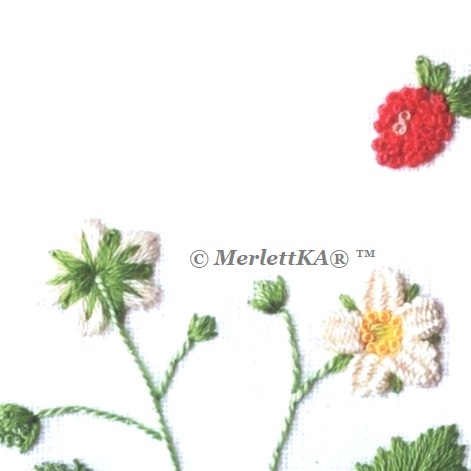
Для вышивки лепестков такой шов
закрепляют только у основания
мотива, чтобы он свободно свисал
на ткани.
|
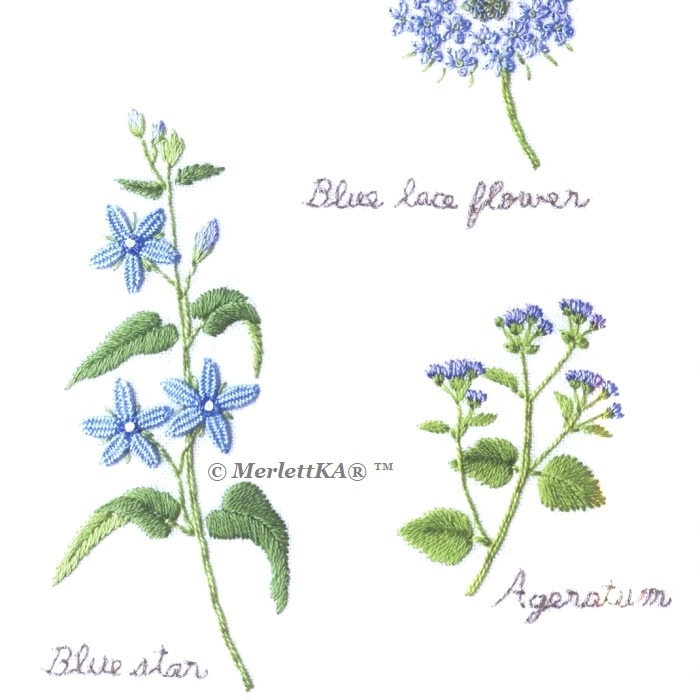
Woven stitch
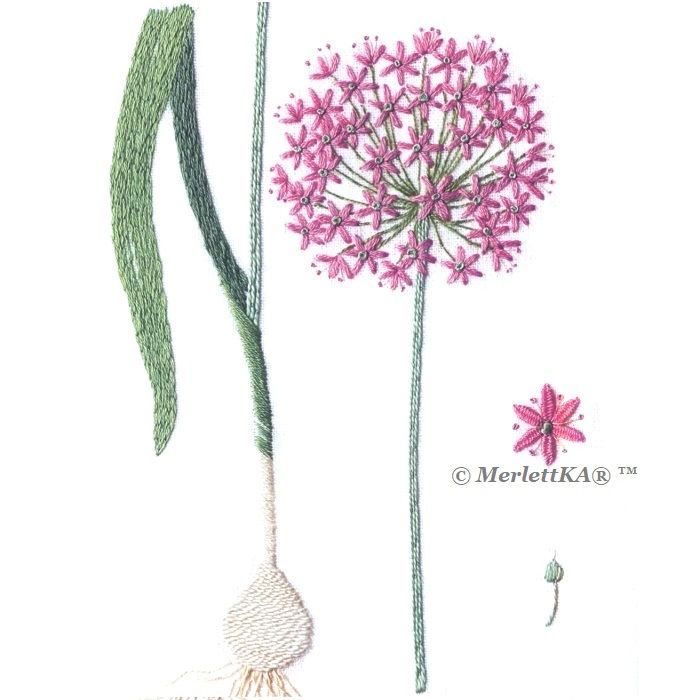
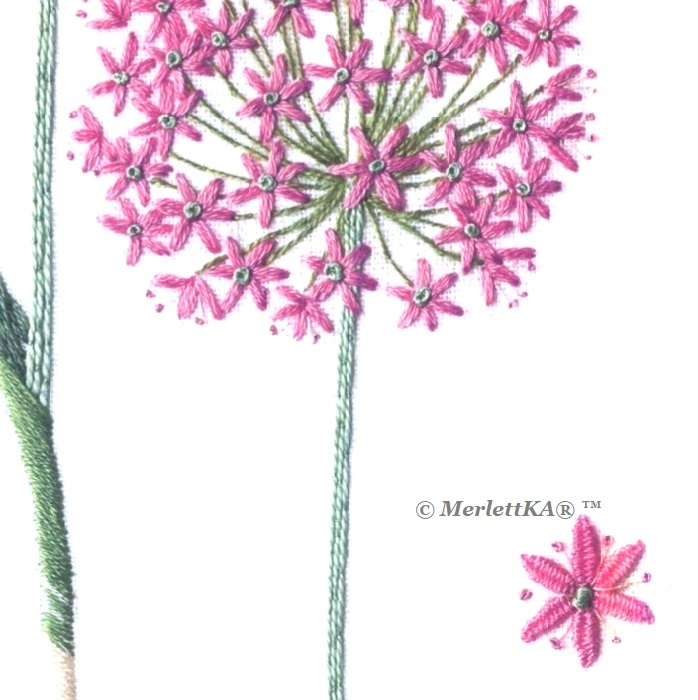
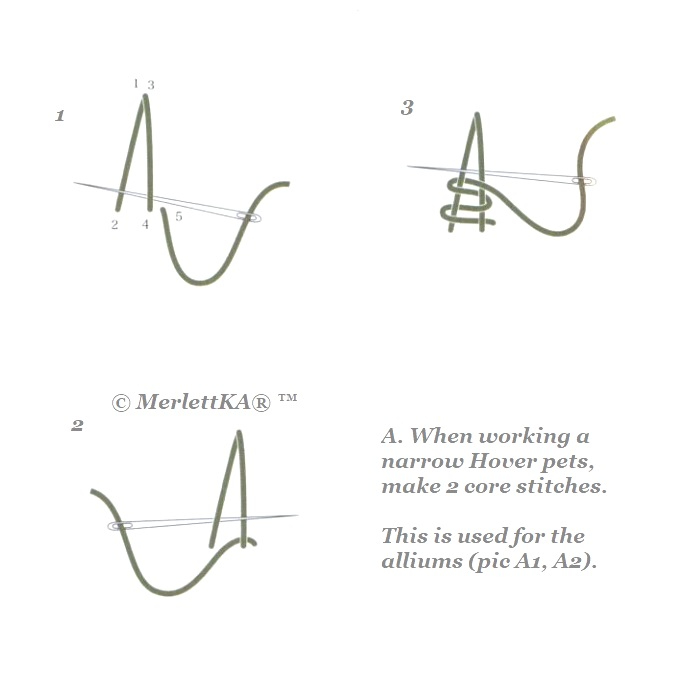
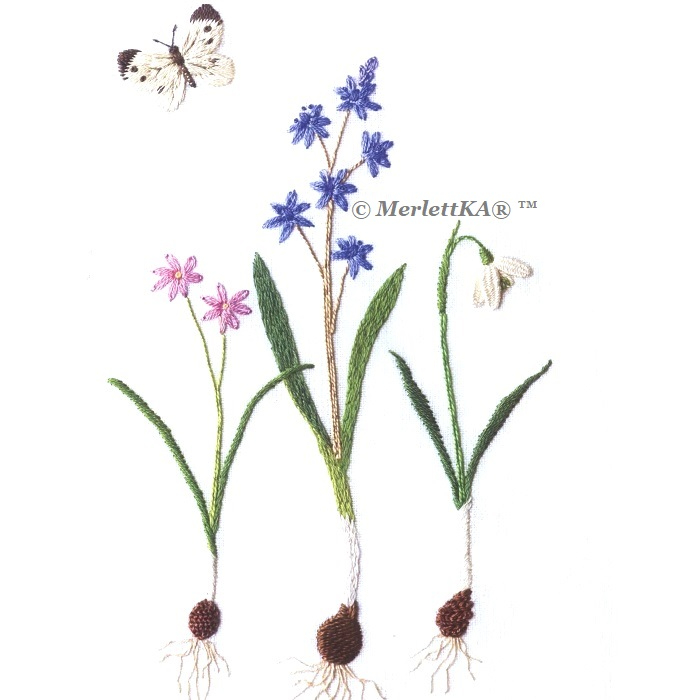
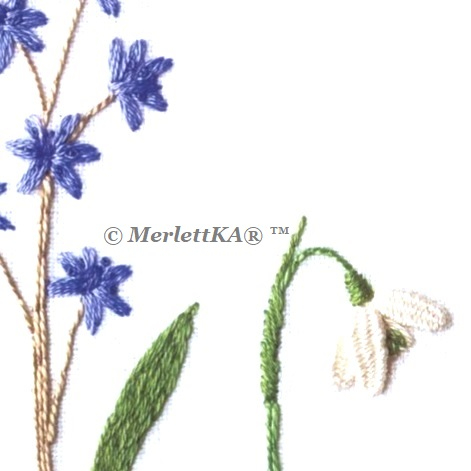
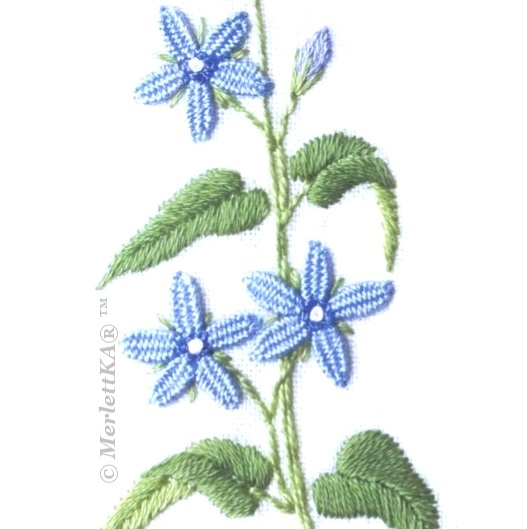
A. When working a narrow Hover pets, make 2 core stitches. This is used for the alliums (pic A1, A2).
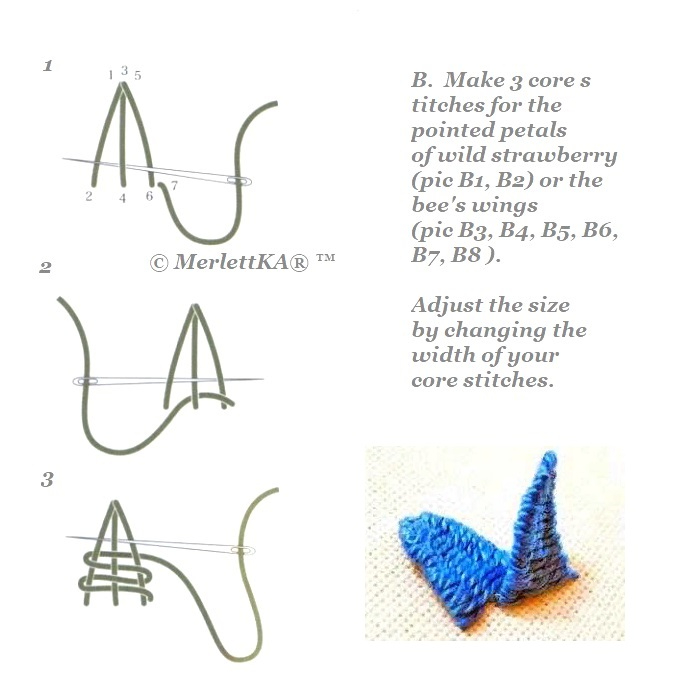
B. Make 3 core stitches for the pointed petals of wild strawberry (pic B1, B2) or the bee's wings (pic B3, B4, B5, B6, B7, B8 ). Adjust the size by changing the width of your core stitches.
Плетеное пико
Очень популярный стежок в технике бразильская вышивка. Таким стежком можно вышивать листья, лепестки. Для вышивки лепестков такой шов закрепляют только у основания мотива, чтобы он свободно свисал на ткани.
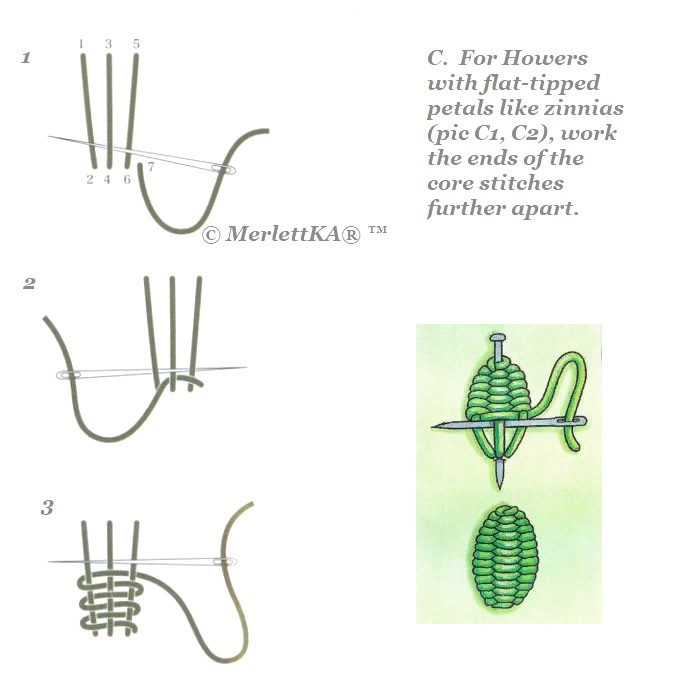
C. For Howers with flat-tipped petals like zinnias (pic C1, C2), work the ends of the core stitches further apart.
Свободное пико
Вколите булавку вертикально вдоль средней линии вашего рисунка.
Из нижней точки начала вашего рисунка выпустите нить и обведите ею булавоную головку. Затем воткните иглу рядом с точкой выхода. У вас получились контуры вашего рисунка. В нашем примере это лист.
Далее протяните нить посередине и оберните ею булавочную головку.
Затем, не прокалывая ткань, начните проводить рабочую нить справа налево последовательно. Начинайте сверху, потому что этот край у вас будет не зафиксирован. Сначала под правой нитью, затем поверх центральной, и, в конце, под левой.
Продолжайте в такой последовательности, пока не заполните весь рисунок. Ряды вашего плетения должны плотно прилегать друг к другу и закрывать вертикальные нити основы.
После того, как вы закончите обшивать мотив, закрепите нить в нижней точке ткани. Вот и готов ваш листик.
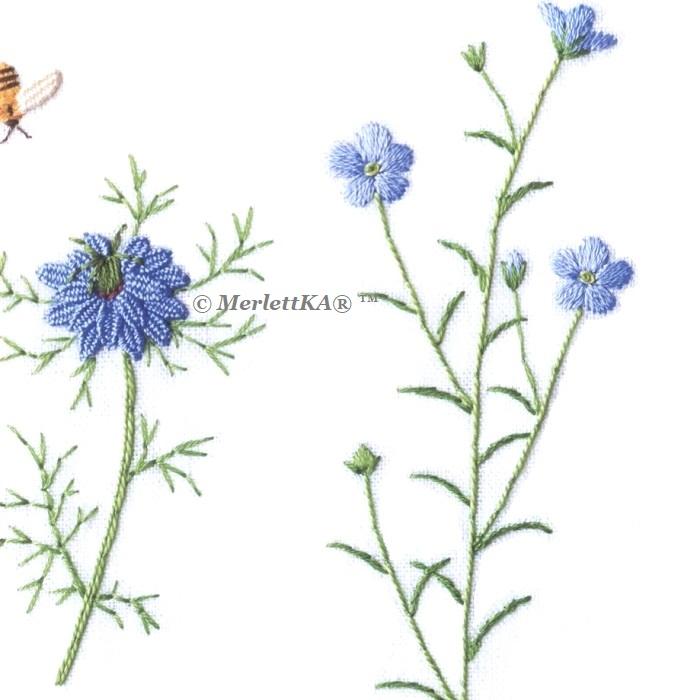
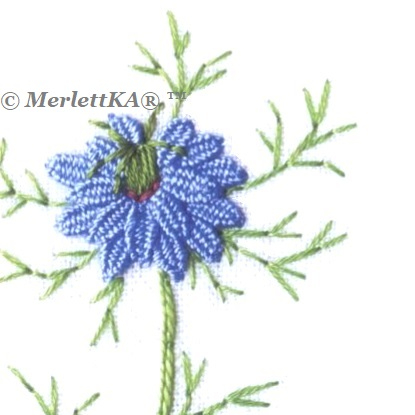
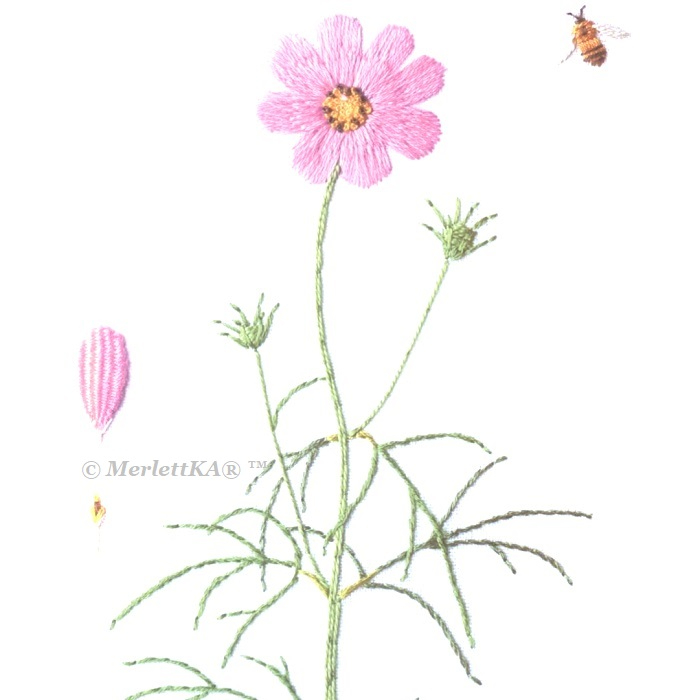
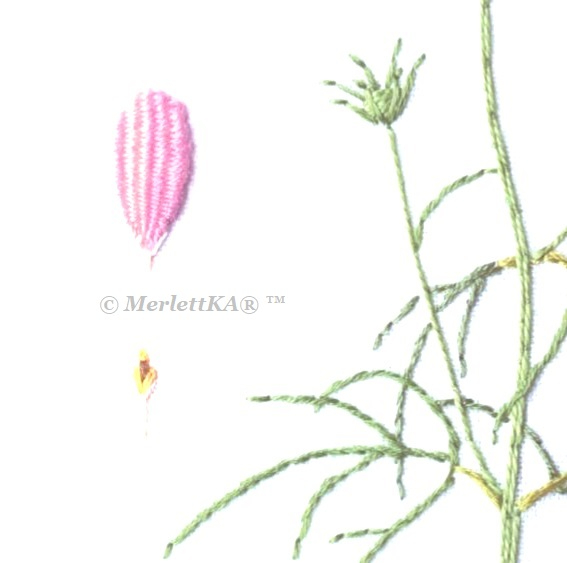
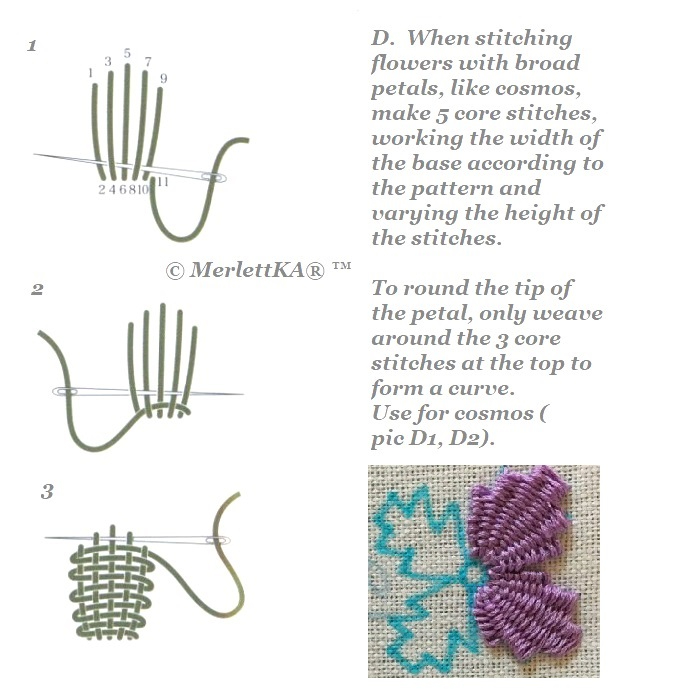
D. When stitching flowers with broad petals, like cosmos, make 5 core stitches, working the width of the base according to the pattern and varying the height of the stitches.
To round the tip of the petal, only weave around the 3 core stitches at the top to form a curve. Use for cosmos (pic D1, D2).
Обычное пико
Такой стежок выполняется гораздо проще своего предыдущего собрата.
Для этого просто прошейте нити основы для плетенки вашего рисунка на равном расстоянии друг от друга.
2.
3.
4.
5.
6.
7.
8.
9.
10.
11.
12.
13.

14.

15.
16.
17.
18.
HOW TO MAKE - when working in embroidery
EMBROIDERY FLOSS AND THREAD
I mainly use DMC embroidery floss.
For DMC No. 5 and No. 8 and for linen thread, I embroider with a single strand.
DMC No. 25 is sold loosely plied in 6 strands, so first I out it to the length I will use (I Find about 20 to 25 inches is easiest to work with) and then I pull out the number of necessary strands, one by one, and reassemble them.
I embroider with 3 strands, unless noted otherwise here and in the individual instructions.
For instructions that use the term "variegated," I embroider with 2 or more colors threaded on the same needle.
Blending colors is an effective way to add intensity and depth.
For projects in this book that call for a couching stitch, I use 1, 2, or 3 strands of No. 25 unless specified otherwise; sometimes I call for No. 5 or linen thread.
So as not to call attention to the No. S laid thread, I use a single strand of No. 25 in the same color to fasten it in place. When using linen thread for the laid thread, I use a single strand of No. 25 in a similar color to fasten it in place.
EMBROIDERY NEEDLES The correlation between embroidery thread and needle is very important. Choose an appropriate needle according to the weight of the thread, and always use sharp needles.
DMC No. 5, single strand
French embroidery needle No. 3 or 4
DMC No. 8, single strand
French embroidery needle No. 5 or 6
DMC No. 25, 2 or 3 strands
French embroidery needle No. 7
DMC No. 25, single strand
Thin sewing needle
Linen embroidery thread, single strand French embroidery needle No. 7
EMBROIDERY FABRIC For projects, I worked in the center of a 12 x 15 inch piece of 100% linen.
You can finish each proj-ect in various ways, but if you plan to insert the Final embroidered piece into a panel or frame, then leave a margin of at least 4 inches around the pattern.
Always apply single-sided fusible inter-facing (rnidweight) to the reverse side of the fabric before embroidering.
This application reduces the amount the fabric stretches, prevents the stitches on the reverse side from pulling on the front, and dramatically improves the look of the finished product.


