 |
|
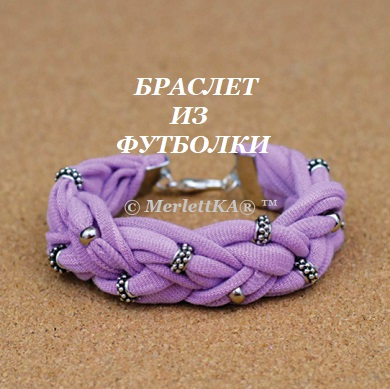
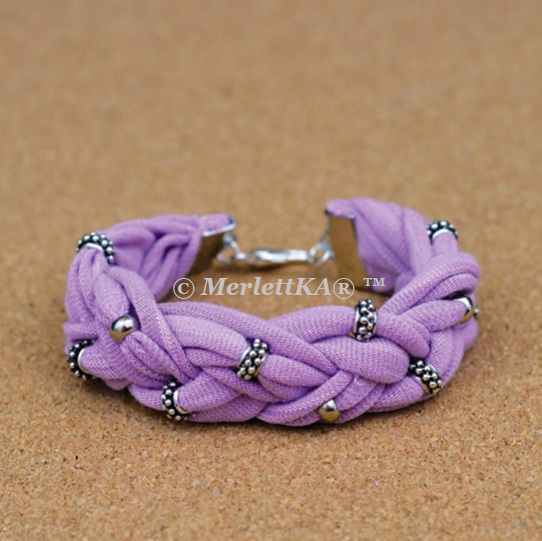
Braided Boutique-Style Beaded Cuff
Превратите старые футболки
в модные аксессуары - за 60
минут или меньше!
The jersey fabric in T-shirts makes
for great jewelry cord, because it’s
soft with a little bit of stretch—just
like your favorite tee. This bracelet
design may look intricate, but it
doesn’t involve any special weaving
techniques!
It’s just a basic braid, with a few
well-placed accent beads that give it
the wow factor it needs to look like a
boutique piece.
|
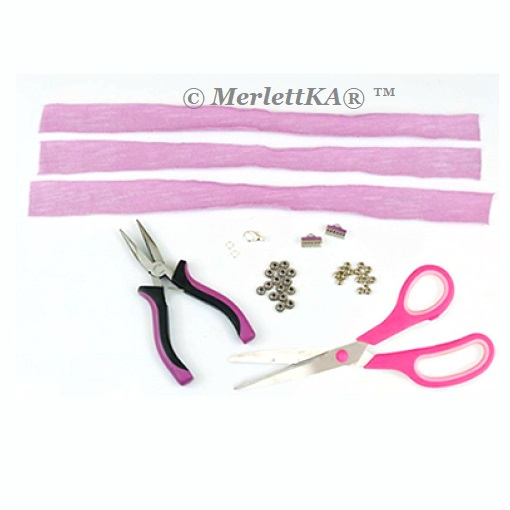
Materials
3 strips of 1"-wide T-shirt fabric, 18" long each
Flat-nosed jewelry pliers
2 crimp-on ribbon ends
15–20 large-hole metal spacer beads (with an interior hole
of at least 2 millimeters)
Scissors
2 (7-millimeter) jump rings
1 (18-millimeter) lobster clasp
Optional, but helpful: Bead reamer or toothpick
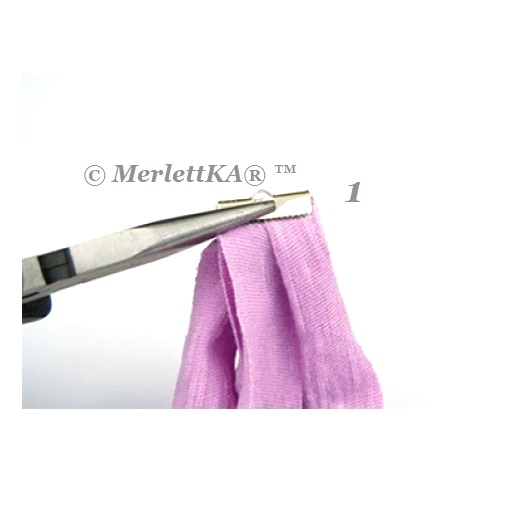
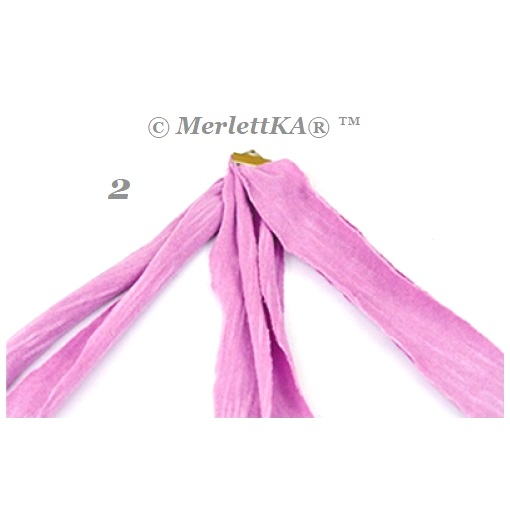
1. Take your fabric strips, and lay them down on top of one another. Find the center point of the strips, then fold them in half, to create 6 strands of 9" each. Then, use your pliers to crimp a ribbon end onto the fold, making sure that all 3 strips are securely within the teeth of the ribbon end.
2. Separate your strands into 3 sections of 2 strands each.
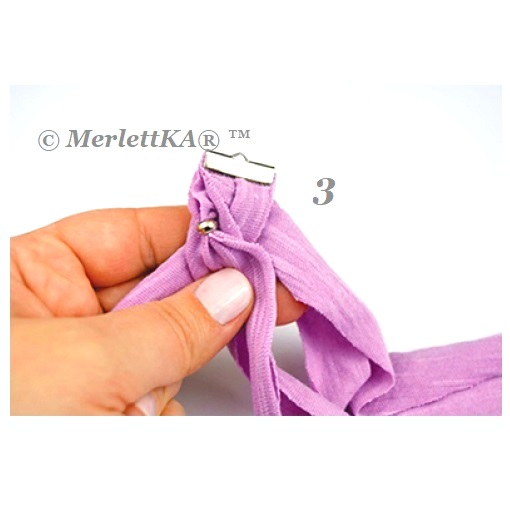
3. Begin braiding, adding a bead to one of your two strands each time you pull one of the three sections to the center—by adding it to the same strand each time, your piece will be more uniform from start to finish. If your beads have especially small holes, you may find that you need the aid of a bead reamer, toothpick, or other small tool to press the fabric through the hole to get it started. Then you can pull it from the other end to add the bead. It’s normal for it to be a tight fit! Once you get the first bead on, the rest will be easier as the cord stretches. The strand that gets stretched by adding beads will get thinner, but the other strand will stay fluffy, keeping the width the same from start to finish. The exact number of beads you need will depend on how tightly you form your braid; a looser braid will require fewer beads.
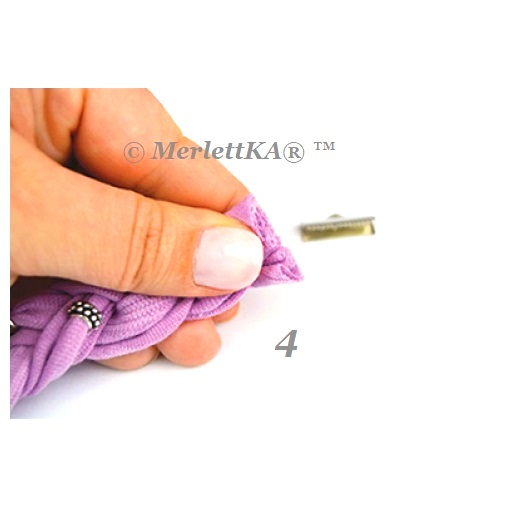
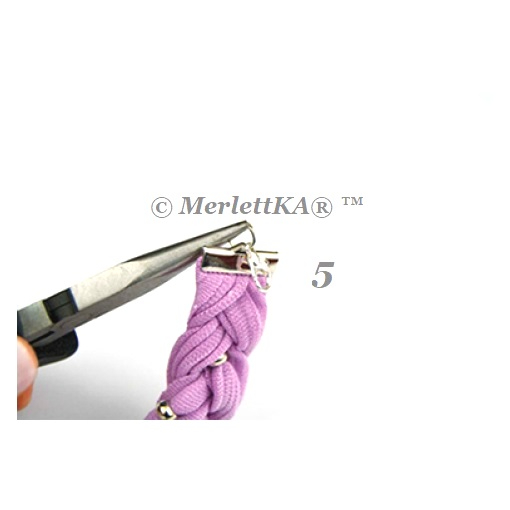
4. When you have braided for a length of 7", gather all the ends together tightly, and use your scissors to cut them so they’re even. Crimp the other ribbon end on with your pliers, making sure all edges are tucked into the crimp before closing it securely.
T-Shirt Tips!
When choosing your beads, try mixing different shapes and textures of beads in the same color family. Using beads that are approximately the same size, but different in other ways, adds interest without detracting from the overall style.
5. Finally, twist open your jump rings with your jewelry pliers, and attach them to both ends of the bracelet. On one of your rings, add the lobster clasp before twisting the ring closed again to finish your bracelet.