-

 -

  •     , , , 24 . !
  •     - - . : Internet Explorer 6, Fire Fox 1.5, Opera 9.5, Safari 3.1.1 JavaScript.
  • , . , , , , , , -, ,

 - -

 -

   M_A_G_D_A

 - e-mail


 -

 LiveInternet.ru:
: 13.01.2010
:
:
: 4255

:

(0)

restyle a flip flop

, 03 2012 . 01:12 +
maak [ + !]

dekor shlepancev

ABERTURA - MODA EXCLUSIVA (283x425, 122Kb)
...
FASHION/Shoes

:  
(1)

re style old shirts

, 31 2012 . 01:34 +


 http://wobisobi.blogspot.com/2011/06/mens-shirt-to-halter-diy.html
 

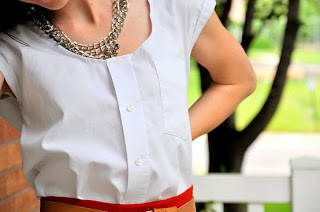
Customização de duas camisas masculinas de cores diferentes, tanto que dá para observar que no encontro das duas no abotoamento da frente elas desencontram, o ultimo botão está desaotoado porque desencontrou.

 
msmadelyn.blogspot.com
Isso é para a garotada, a camisa virou uma saia, neste site cada uma deu sua versão para a camisa.

FASHION/Re-fashion
RECYCLE/Blankets, jeans,leather....etc

:  
(1)

Men's t shirt to------>

, 31 2012 . 01:29 +


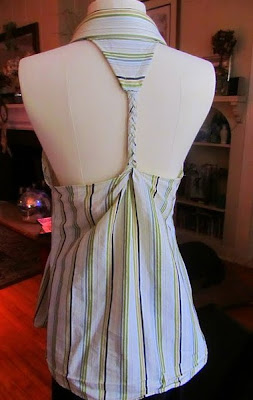
Men's Shirt to Halter, DIY

 
After I made my Re-Style this week,  I was left with a pitiful, sleeveless, men's shirt.  I went directly to the internet and started to search ideas.   Then I remembered that Keira, from the Blog A Pretty Penny, had posted a Re-Style about a Halter made out of a men's shirt,HERE. She, in turn, got this fantastic idea from, Christina, and her cute  blog~ 6 petals, Here.   I thought this would be an excellent idea for my poor over sized, sleeveless shirt. Just look how sad my shirt looks, down below, before the Re-Style. 
Seriously, it needed some love.

 Tutorial
Things You Need.
1. Men's shirt
2. Scissors
3. Sewing Machine
4. Large safety Pins
 
 
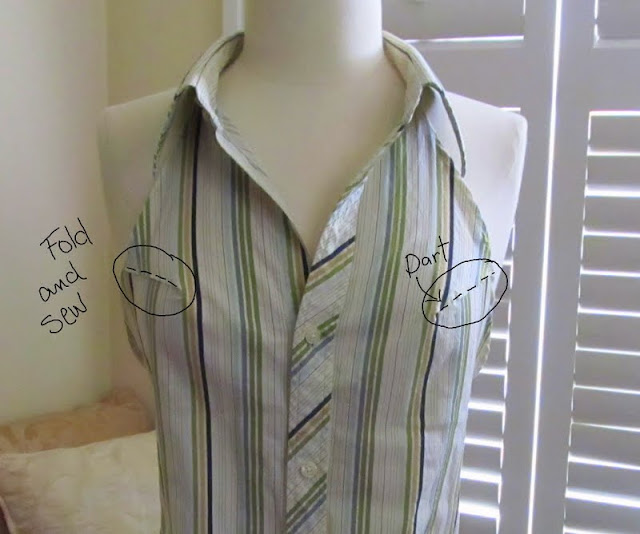
 Take your scissors and cut from the arm pit to the top collar, like the picture above.

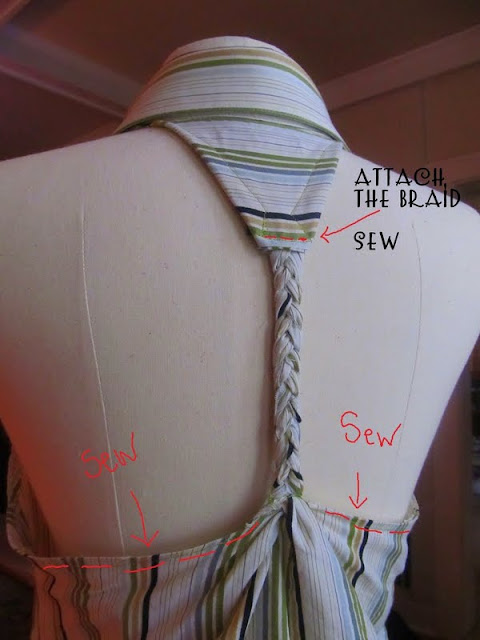
Then on the back, cut out  from the arm pit straight across to the middle leaving a 5 inch band, do that on both sides.


 Try on the shirt inside out and pin under your arms to make the shirt fit, then pin all the way down. I darted on the chest area, to take out extra material.
Try on the shirt again after you have sewn it to make sure it fits.  Now is the time to make any corrections.
Once you like how everything looks, you can trim all the excess material.
and Iron.


Then I attached the braid to the top.
  I ironed and hemmed the arms, to make it have a finished look.
 
FASHION/Re-fashion

:  
(0)

converted t shirts

, 24 2012 . 02:22 +
_ [ + !]

FASHION/Re-fashion
FASHION/Embllishment
FASHION/T-shirts transformation

:  
(0)

refashion your clothes

, 14 2012 . 00:51 +
maak [ + !]

FASHION/Re-fashion
FASHION/Embllishment

:  
(0)

sweater refahsion

, 11 2012 . 01:19 +


Posted: 26 Jan 2012 07:49 PM PST

I shared this sweater refashion at Me Sew Crazy last week. I am posting this here today just in case you missed it! 


{You will need}

Sweater
Fabric 
Laces, Ribbons and buttons
Matching thread

{How to}

1. Wear the sweater and decided how high you want the triangles to go. For example, just below the bust line or a few inches below the bust line. Also, mark the center with a pin.

2. I made a triangle template out of a cereal box and cut 8 triangles out of the fabric. The size of the triangles all depend on how long you cut into the sweater. If you want a more flared look, make sure that the triangle has a wide bottom. If you want a subtle flare, the triangle needs to have a narrow bottom. 


3. Start making the cuts to the sweater. I made 8 cuts in all. In the center on the front and back, just to either side to those center cuts, and the sides of the sweater. They are about 4" apart, but you need to adjust that according to the width of the sweater. Just make sure that they are equal and well balanced.


4. Fold the bottom of the triangles and sew.


5. Sew the triangles to the sweater using a Serger or zigzag stitches.


6. Since the sweater was one size bigger than my size, I cut off some fabric from the sides and under the arm. 


7. Pin, and sew the side. Make sure to sew in the fabric triangle to the sides at this step.


8. Make sure to mark the center of the neckline. I wanted the neckline to be slightly lower, so I drew the line and made the cut around the neck.


9. Make bias tape for the neckline. I cut mine 1 3/4" wide.


10. Sew the bias tape around the neck with zigzag stitches.


11. Start adding lace & ribbons between the triangles. Cut them to random lengths and seal the ends with fray check. Pin them in the desired places to check the balance and sew.


12. I didn't care for the long sleeves, so I cut them... I made the cut at the ribbed part, and took 6" off.


13. Sew the ribbed part back to the sleeves. I made it into 3/4 sleeves.


14. I thought it was a little bare around the neck, so I decided to decorate a little.

I made some yo-yo's, leaves, and flowers out of lace. Pinned all the embellishments onto the sweater to decide where I wanted everything.


* Sizing for the embellishments

* Yo-yo's: (S) cut 1 1/2"circles, (L) 2 1/2" circles (here is the link to how to make yo-yo's)

* Leaves: use 3/8" wide velvet ribbon. Cut 2" and fold it in half and lay both ends together and sew.

* Lace flowers: (I used 5/8" wide lace.) Cut a piece 5" long and gather the top and make a flower.

15. I wanted a little something at the back of the neck too. So, I added a tag with ribbon. 


It is all done. All I needed to do was to try it on...


LOOVE it!


http://tearosehome.blogspot.com

FASHION/Re-fashion

:  
(0)

decorate with marker and ink

, 12 2012 . 01:00 +


DON’T THINK IT, INK IT!


  1. Supplies: stamp ink and a shirt
  2. Drop ink randomly on the shirt
  3. Let the droplets soak in
  4. Once you are happy with the look, wash it in cold water to set the

DIY: TRENDY MARKER PRINT


  1. Supplies: A marker and a shirt over a cutting board
  2. Draw lines on the shirt
  3. Continue drawing lines until your happy


http://madeinpretoria.wordpress.com/
 
FASHION/Re-fashion
FASHION/T-shirts transformation

:  
(2)

natural dye

, 23 2011 . 00:56 +


DIY NATURAL DYES with FREE PEOPLE

 
I've been a fan of Free People for ages, mainly because of their perfectly bohemian aesthetic and super cool warehouse headquarters (thanks instagram for reminding me daily of where I DON'T work). I always tune in for their WednesDIY on the Free People blog, so when they asked me recently if I wanted to guest post for today's DIY I couldn't say no - check out the DIY Fishtail Skirt I made for them.
 
We also thought it would be lovely to feature one of their DIYs here.  Free People blogger Julia (um, best job ever?) did this amazing natural dyes project which I knew you would love. 


I have always wanted to experiment with natural dyes and on a gloomy day in September I decided that it was time. This is such a fun, environmentally friendly project that takes a little bit of time, but very little cash.

There are a number of plants that can be used to make natural dyes, but for my first go-round I chose to use fruits and vegetables that I picked up at a local market.

 
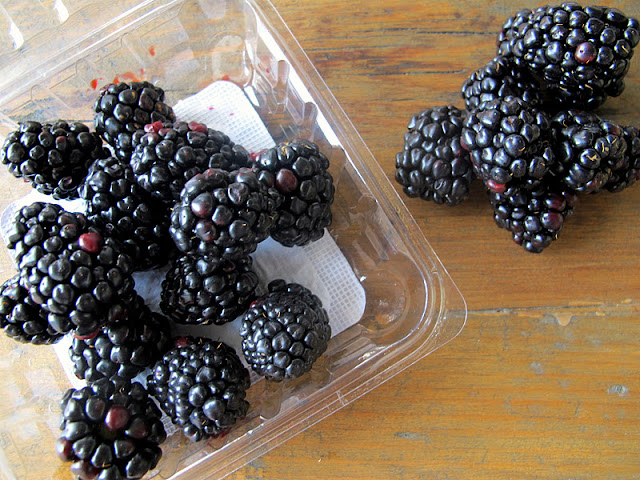
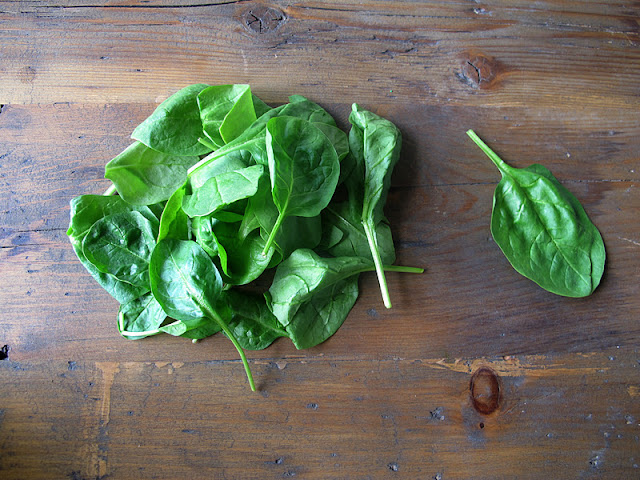
What I got: red cabbage, lemons, oranges, beets, yellow onions, blackberries, blueberries, spinach.
 
*It’s important to remember when working with natural dyes that experimentation is key – depending on the amount of ingredients you use and how long you leave a garment in the dye, the color you get can vary.

For pinkish/red dyes:
Beets and blueberries can make a really lovely dusty rose color.
 
 
For bluish/purple dyes:
Blackberries and red cabbage can be used to make bluish/purple dyes.  
  
For copper/orange dyes:
I never realized what a beautiful color yellow onions can have! Their skins can make an alluring mustard yellow, coppery color.
 
 
For yellow dyes:
Orange and lemon peels can be used to make a soft pale yellow dye. 
 
 
For green dyes:
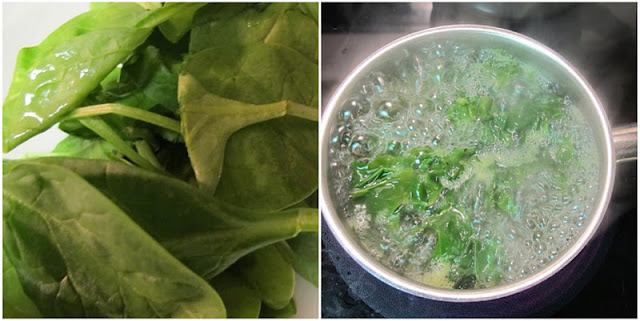
Finally, spinach can be used to make a beautiful shade of green. 
 
 
Now what?
To make the dye, chop up your ingredients and put them in a pot with twice as much water as ingredients.  Bring the water to a boil and let simmer for an hour.  For deeper colors, you can leave the ingredients in the water (without heat) overnight.
Remove the hard materials from the mixture with a strainer, leaving you with the liquid dye.
 
 
The beets were such a beautiful deep red color! I chopped them up and added water and when I started boiling the water turned red almost immediately.
 
  
For the onions, I peeled off the skins and used only that part – I have seen other examples of this online that yielded really nice results but I was actually doubtful that this would really work.  Turns out I was pleasantly surprised!
 
 
I had high hopes for the spinach… if anyone has tried this with spinach and gotten good results let me know what your secret is :)
 
 
After bringing each ingredient to a boil, I let them simmer for an hour while I prepared the fabrics to dye.
 
 
Before dying, you will also need to create a fixative, which will help your fabric hold the dye.
When working with berries, use a salt fixative – put 1/2 cup of salt in 8 cups of water, put the fabric in and simmer for one hour.
When working with vegetables, use a vinegar fixative – mix one part vinegar and four parts water, add your fabric and simmer for one hour.
When you remove the fabric, rinse in cold water.
The fabric is now ready to dye! 
 
 
I put the fabric in the dye and let it sit for a little while – the longer you let it sit, the deeper your shade of color will be. I removed the fabric when I felt like it had reached a nice shade of reddish pink – such a pretty color:
 
  
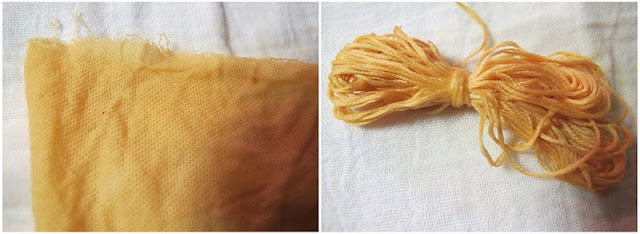
I was happiest with the color I got from the onion skins – a beautiful amber that worked so well on the fabric.
 
  
Wouldn’t it be cool to make friendship bracelets using naturally-dyed string?!
 
 
By the next day, the fabric dyed with the beets faded into more of a light pink color, but it was still really pretty! I think next time, though, I would leave the fabric in the dye for longer.  The fabric dyed with onion skins actually held out really well, and I LOVE the color it created. I loved it so much, I tried it out on one of my Free People bras:)
 
 
FASHION/Re-fashion

:  
(4)

one piece blouse

, 13 2011 . 19:02 +


et me begin with my inspiration. While skimming vintage ads I ran across this:

Find more of the “wrapped clothing” series in the LIFE Archives.
 
    You Will Need:

1. Fabric (Mine measured 56×34 inches. However, you can judge this based on your size and the length you prefer. This was more than enough for the shirt and strap.)
2. Sewing Machine
3. Scissors
4. Fabric Marker or pencil
5. Something round for the neck-

http://freshlygiven.com/blog/


FASHION/Re-fashion
FASHION/Sewing patterns

:  
(0)

scarf vest

, 05 2011 . 02:57 +


DIY: Scarf Vest


One step DIY's are the best. Am I right or am I right?

I recently made this scarf into a more wearable piece of clothing, by simply cutting two slits. It's all about where you cut the slits. The best part: you can still wear it as a scarf if you wanted to. 

Some of you might also recognize it from the pictures I posted from the ReadyMade Magazine Party. My style is more on the casual side, so this scarf vest is a perfect way to dress up an otherwise plain t-shirt. 


I used a 30x30 vintage square scarf. It's already on the bigger side of scarves, so I'd recommend finding the largest square scarf you can find. For reference - I'm about 5'2", and you can check out the pictures above to see how a 30x30 scarf vest fit me. It'll all depend on your height, your preference, and the scarf you use, but the pictures above will help you gauge how your finished piece will look.

Supplies:

- Large square scarf or fabric
- Scissors
- 3 minutes of your time


First and only step: cut two diagonal slits on either side of the scarf's midpoint.
That's it!
 
 
Don't worry about making everything perfectly straight. You can tell just by looking at the above picture that I didn't even cut them straight, either. When worn, the scarf will flow and fold within itself - so being a few inches off won't matter at all.

I eyeballed this and didn't measure anything before hand, but I understand that's not everyone's style. SO if you're still hesitant, check out the diagram below. I included measurements for my particular vest, but keep in mind that it was done on a 30x30 scarf. You can always adjust accordingly depending on the size of your scarf.


(Click to enlarge)

You don't even have to use a scarf if you don't want to. If you have a large piece of fabric laying around...by all means, make that into a vest, too!

studs&pearls

"Scarfs":
1 - Just tie it on!!!
2 - All from SCARFS
...
17 - easy knitted scarf
18 - one scarf many styles
19 - scarf vest
20 - scarf in 5 min.
21 - scarf fashion
...
26 - quick tops from scarfs
27 - blouse from piece of fabric
28 - coat

"No-Sew":
1 - tie a scarf
2 - Night dress from a cloth
...
4 - super simple pattrens
5 - easy pattern
6 - scarf vest
7 - blanket edging
8 - fun towel
...
13 - cat house
14 - no sew
15 - circle vest

FASHION/Re-fashion

:  
(2)

an apron out of old shirt

, 20 2011 . 00:44 +

user posted image

DECOR/Kitchen

:  
(1)

refashion

, 15 2011 . 01:21 +
_ [ + !]


! , . , , , , .

, . , .

, , . , . , , , - .

...
FASHION/Re-fashion
FASHION/T-shirts transformation

:  
(0)

t-shirt refashion

, 19 2011 . 23:55 +
_ [ + !]

.,


FASHION/Re-fashion
FASHION/T-shirts transformation

:  
(0)

refashion with crochet

, 19 2011 . 00:28 +
Miss_SV [ + !]

FASHION/Re-fashion
FASHION/Knitting

:  
(0)

refashion

, 10 2011 . 20:04 +
lj_handmade_ru [ + !]

FASHION/Re-fashion

:  
(0)

refashioned flip flop

, 16 2010 . 22:12 +


. – Annekata.


:

-
-
-
-
-
-
-
-
- ( )


http://trendario.djournal.com.ua/
FASHION/Re-fashion
FASHION/Shoes

:  
(0)

jeans skirts

, 20 2010 . 23:58 +
FASHION/Re-fashion

:  

 : [2] 1