List of materials:
The materials listed are for the pictured candle holder with 2 lotus tealights.
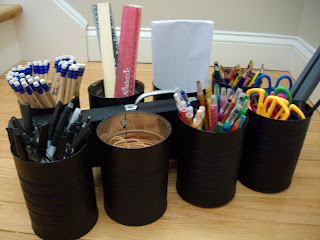
4 – tea cans (or other cans if you like)
2- tealight sized washers with an opening small enough to be held down by wood screw
1 – 1/2″ wood screw
1 – 10″ piece of scrap wood
2 – cinnamon sticks or small sticks from your backyard for feet
2 – tea lights
wood stain or paint
clear coat spray
general purpose, “strong-hold” glue
sharpie and rubbing alcohol
aluminum tape (found in the ducting section of the hardware store)
Tools
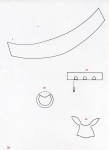
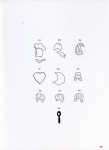
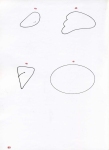
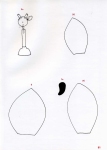
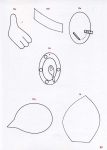
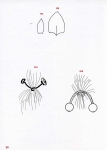
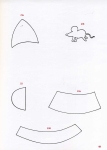
make your own pattern or download my Lotus Tealight pattern
tin snips
scissors or light duty shears
gloves to protect hands when cutting metal
hand saw
screw driver
drill and drill bit sized for your wood screw
Step 1 – Prepare cans
Make sure to rinse cans before cutting. Wear gloves when cutting. I store my cans in flattened sheets and have been cutting tea cans and saving them. So, I used this Guiness can for this demonstration only.
a. Use tin snips to cut through thick top part of can
b. Switch to scissors or shears and cut around top of can
c. Cut down the side, cutting along seam
d. Cut around bottom
You are left with a flat (ish) sheet and a top and bottom. Set aside or recycle top and bottom of can.
Step 2 – Cut and shape bottom layer of lotus petals
To cut first layer of lotus petals:
a. Trace Lotus Tealight pattern onto can using a sharpie. I like to mark on the front of the can so I can get the placement that I want. The sharpie can be removed after cutting using isopropyl rubbing alcohol.
b. Use tealight to trace a circle in center of flower. This ensures your tea light will fit and gives you a guide as to how far in to cut your petals
c. Cut petals to the circle
d. Remove sharpie ink using rubbing alcohol
To shape first layer:
a. Use a pencil and straight edge on a mouse pad to emboss lines into the petals
b. Fold petals down, also pinch and shape petals until they take a pleasing shape. **Aluminum is fairly malleable and strong but if you fold and refold too many times you will break the petals off
Step 3 – Cut and shape inner layer of Lotus
a. Mark, cut and clean the same way you did for the previous step
b. Emboss petals and fold bottom edge of petals in
c. Fold in between petals to form a circular shape, tape ends together on inside of flower using aluminum tape
Repeat for second lotus.
Step 4 – Prepare wood base
a. Cut scrap wood to desired length, mine was 10 inches
b. Sand edges and clean with a damp rag
c. Stain or paint as you like, spray with topcoat. I also sprayed the sticks to protect and seal them
d. Glue sticks onto bottom of base to act as feet
Step 5 – Attach flowers to base
To attach:
a. Puncture a hole in the center of the bottom layer of the lotus
b. Place and mark on base, using punctured hole. Drill a starter hole in wood.
c. Put flower together. Place inner layer into the bottom layer of the lotus . Next, place washer and screw into both layers of lotus flower
d. Screw into place
e. Insert a candle
Repeat for other flower
Step 6 – Display and marvel at your creation!





 FOR VANITY


