-Метки
-Рубрики
- DECOR (1018)
- Frames, wall art, mirror (204)
- Kids Rooms (97)
- Box & basket (95)
- Painting, stamp (85)
- Walls (77)
- Kitchen (70)
- Miniatures (70)
- Cushions (69)
- Curtains (58)
- Baby Stuff (51)
- Storage (46)
- Candles (41)
- Toys & dolls (36)
- Gifts (34)
- Shelves (34)
- Salt Dough, Mold, clay (33)
- Vase (32)
- Furniture (32)
- Bedroom (29)
- Clocks (29)
- Kids Pillows (27)
- Rugs & floor (26)
- Chair Cover (26)
- Bathroom (23)
- pouffe (15)
- Pin Cushions (14)
- Jewelry Display (14)
- Table Setting (14)
- Foil (11)
- Felt & mesh (11)
- Shadow-Box (11)
- Tissue Box (10)
- Table (9)
- Butterfly (8)
- Napkin Folding (5)
- Soap (4)
- Tassels (3)
- FASHION (818)
- Sewing patterns (170)
- Accessories (158)
- Embllishment (150)
- Re-fashion (98)
- Knitting (89)
- Bags (83)
- Beads (71)
- Shoes (65)
- T-shirts transformation (52)
- SRE (52)
- Scarfs (28)
- Buttons (21)
- Zipper (19)
- Shawl (19)
- No-Sew (15)
- Dye, stamp (14)
- Chinese Knots (11)
- Mending (9)
- Zig Zag (9)
- MultiWear & Infiniti Dress (8)
- boho (7)
- girl dress (3)
- Kids (2)
- Beauty (1)
- RECYCLE (694)
- Paper & newspaper (97)
- Plastic Bottles (86)
- Decorative Bottles (79)
- Thread, Rope & Wire (55)
- Blankets, jeans,leather....etc (55)
- Carton (54)
- Kitchen Items (38)
- Branches (32)
- Pipes & Tubes (30)
- Molding (27)
- Tins & Cans (22)
- CDs (19)
- Socks (14)
- Egg Carton (14)
- Sea Shell (14)
- Cloth Pin (14)
- Egg Shells (11)
- Pasta (9)
- Feather (8)
- Tires (8)
- Plastic Spoons (5)
- Towels (5)
- Coat Hangers (5)
- Wooden Spoon (4)
- Drinking Straw (4)
- Books (4)
- Light Bulbs (4)
- Hangers (3)
- China & Kitchen ware (3)
- Dried Flowers (3)
- glass bottles (2)
- IceCeam Sticks (2)
- light bulb (1)
- Corn Husk (1)
- COOKING (310)
- Dessert (140)
- Decorative Serving (111)
- Chocolate (46)
- No-bake (37)
- Egg (33)
- Bread (23)
- Puff Pastry (20)
- Food Decoration (20)
- Potato (18)
- Apple (18)
- Stuffed (17)
- Rolls (17)
- Meat (16)
- Salad (15)
- Sausage (15)
- Chicken (15)
- Marrow (13)
- Ice Cream (12)
- Banana (10)
- Cheese (10)
- Loaf (7)
- Pasta (6)
- Pizza (5)
- Cabbage (5)
- Eggplant (5)
- Fish (5)
- Mushroom (4)
- Rice (4)
- jello (3)
- yogurt (1)
- Toast (1)
- coconut (1)
- Grape Leaves (1)
- Tuna (1)
- LIGHT (148)
- Lamps (107)
- Chandelier (73)
- Baby Lights (8)
- Flower Making (115)
- USEFUL (103)
- health & beauty (67)
- GARDEN (63)
- Vertical Garden (13)
- WEDDING (44)
- Glass (26)
- Pillows (5)
- Baskets (1)
- Backgrounds (42)
- VICTORIAN (35)
- Victorian Lady (10)
- Cushions (7)
- Box (5)
- Bags (2)
- Beautiful Places (32)
- Cats (29)
- LINKS To Crafts (22)
- in minutes (17)
- Computer & internet (12)
- Games (7)
- Alphabet (5)
- PRIVATE (3)
-Приложения
 Дешевые авиабилетыВыгодные цены, удобный поиск, без комиссии, 24 часа. Бронируй сейчас – плати потом!
 Я - фотографПлагин для публикации фотографий в дневнике пользователя. Минимальные системные требования: Internet Explorer 6, Fire Fox 1.5, Opera 9.5, Safari 3.1.1 со включенным JavaScript. Возможно это будет рабо
 ОткрыткиПерерожденный каталог открыток на все случаи жизни
- Настольные игры онлайнМы предлагаем Вам сразиться в любимые настольные игры со своими друзьями, не отходя от компьютера. У нас вы сможете поиграть в дурака, преферанс, тысячу, нарды, шахматы, шашки, крестики-нолики, точки,
-Я - фотограф
-Поиск по дневнику
-Подписка по e-mail
-Друзья
-Постоянные читатели
-Статистика
Jute-Wrapped Lampshade |
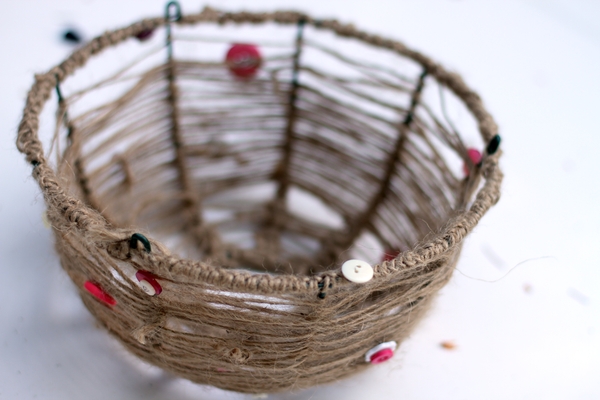
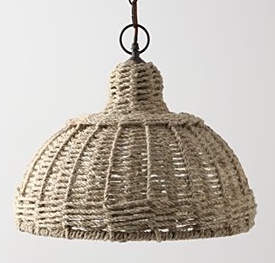
The dollar store hanging basket light fixture strikes again! I made this on the same day I made the beaded chandelier, but this project went in a totally different direction. I used jute string to wrap a dollar store basket and make a rustic lampshade. The aha moment occurred when I saw the Bimini Pendant Lamp for $398 at Anthropologie. I had jute on hand, I had a dollar store hanging basket in almost exactly the shape of the Bimini lamp, so I hunkered down and tried it, having no previous experience with basket-weaving or hemp/jute tying.
Project Estimate:
- Hanging basket, $1
- Jute twine, $1
- Embellishments (like buttons), on hand
- Crochet hook (helpful!), on hand
- Hot glue and glue gun, optional
Total: $2

Here's the inspiration lamp. It looks like they used thicker strands of jute, so if you are patient, you could twist or crochet some jute together to make it more substantial before you start wrapping your basket.
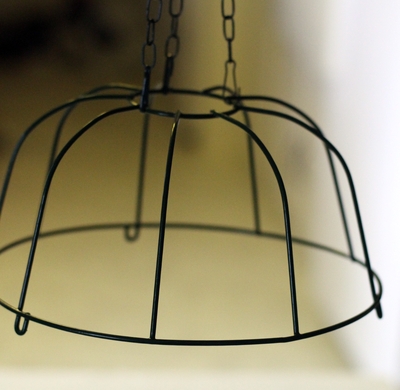
Here's what a dollar store hanging basket looks like when you reposition the chains to the bottom of the basket and hang it upside-down. Pretty good silhouette, eh?
To Make:
1. Wrap jute around base. I macramed (badly), but it would be a lot simpler, and neater looking if you crocheted around the wire. I couldn't find my crochet hook, so I did it by hand. If you want to simply wrap it, I suggest wrapping a small ball of jute first, and then working with that, as it will be easier to pass around and around your wire frame. You probably want to secure it with a little hot glue just to keep it from sliding around on the wire.
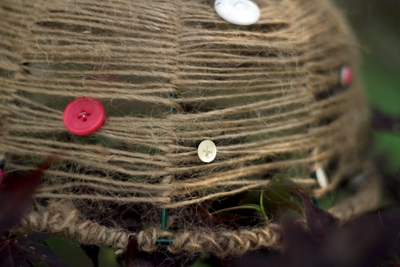
Here's a closer view of the bad macrame and the wrapping action.
2. Tie jute to one of the side spokes, and then begin to weave in and out of all the spokes. On the "under" spokes, I wrapped the jute around the spokes to keep the jute right up against the wire. You could also save yourself some heartache by just wrapping the jute around the outside of the basket. Again, you'll probably want to use some hot glue to anchor the jute and keep it from slipping. It might even work if you just put hot glue on the outside of the spokes and let it dry. It might provide a little grip for the string.
I kinda like the look of the wrapping, though, so I'm not sorry I did it my way.
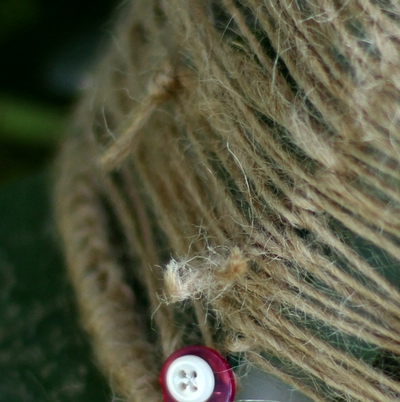
Jute-Wrapping Tip: Cut lengths of jute (about 8-10 feet long) to work with, because it's too cumbersome to work with the entire ball of thread at once. I wanted to go rustic, so I just attached the ends together with a simple knot and let the knots show wherever they happened to.
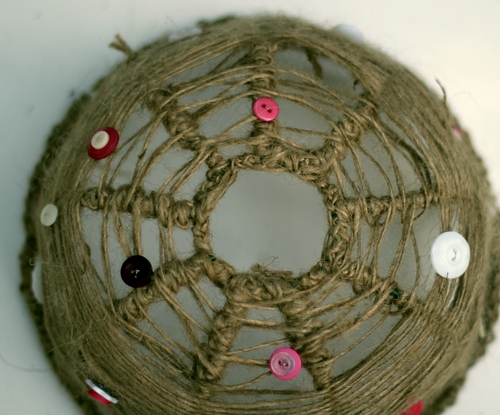
3. If you are unable or unwilling to make the weaving work on the top part where the spokes get narrower, improvise. I did a looping thing (kinda like crochet with really long stitches). I wanted to vary the wrap style a bit at the top just for visual interest.
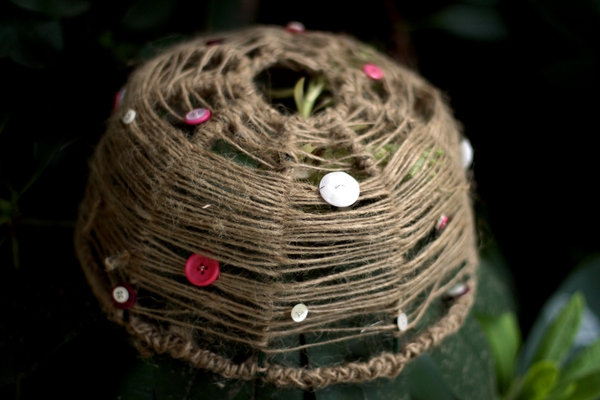
4. Macrame, crochet, or wrap around any other exposed wire.
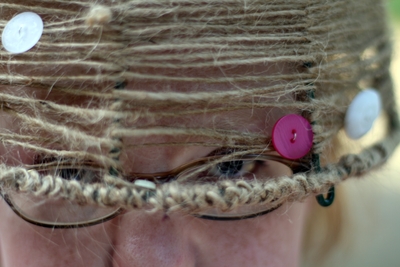
5. Embellish, if desired. Since I was just playing when I made this, I added buttons in white and pink. I threaded light gauge wire through the button holes and twisted the buttons onto the jute.

Alternate Idea: This method would also work if you just wanted to dress up your hanging basket and use it for a, well, hanging basket. Check out what Ali did at Found it in the "Ali" -- a Better Homes & Gardens-inspired basket.
AND HERE'S ANOTHER ONE
I saw this cute little hanging basket in a magazine. I can't remember the price but I thought "I can make that for cheaper" as always :) So I stopped by the Dollar Tree to pick up some of those hanging baskets I've seen recently. I had two different kinds of twine on hand but they have it at the dollar tree for a dollar. So total this project will cost you $2.
Better Homes and Gardens:
Mine:
Read on for a Tutorial!
First of all I would like to say, make sure that you have at least and Hour... and a good movie/show on. Cuz this project gets a little tedious. I know.. not what you want to hear. But if you have thicker twine or rope it will go much faster.
You will need:
-twine
-basket
-hot glue gun
ONE: Flip your basket upside down. My basket had a clips so i could take off the chain which made things a little easier. Start with one end of your twine and glue it to the bottom of the basket. Continue to glue and wrap in a spiral around the basket. I started with one but ended up doubling up and wrapping two strands at a time to speed things up.
you can switch up the twine colors if you want so its striped looking or do the top inch in the different color twine. Whatever you like :)
http://foundintheali.blogspot.com/
Серия сообщений "Kitchen Items":
Часть 1 - spoon shade
Часть 2 - Cool lampshade
...
Часть 4 - Cute tray re-style
Часть 5 - Make a Beaded Chandelier
Часть 6 - Jute-Wrapped Lampshade
Часть 7 - The greatest idea ever!!
Часть 8 - frames with seeds
...
Часть 36 - coffeeeeeeeee
Часть 37 - with coffee bean
Часть 38 - kitchen ware
| Рубрики: | LIGHT/Lamps DECOR GARDEN RECYCLE |
Процитировано 7 раз
Понравилось: 1 пользователю
| Комментировать | « Пред. запись — К дневнику — След. запись » | Страницы: [1] [Новые] |


