 Дешевые авиабилетыВыгодные цены, удобный поиск, без комиссии, 24 часа. Бронируй сейчас – плати потом!
 Я - фотографПлагин для публикации фотографий в дневнике пользователя. Минимальные системные требования: Internet Explorer 6, Fire Fox 1.5, Opera 9.5, Safari 3.1.1 со включенным JavaScript. Возможно это будет рабо
 ОткрыткиПерерожденный каталог открыток на все случаи жизни
Toddler Dish Towel Bathrobe ! |

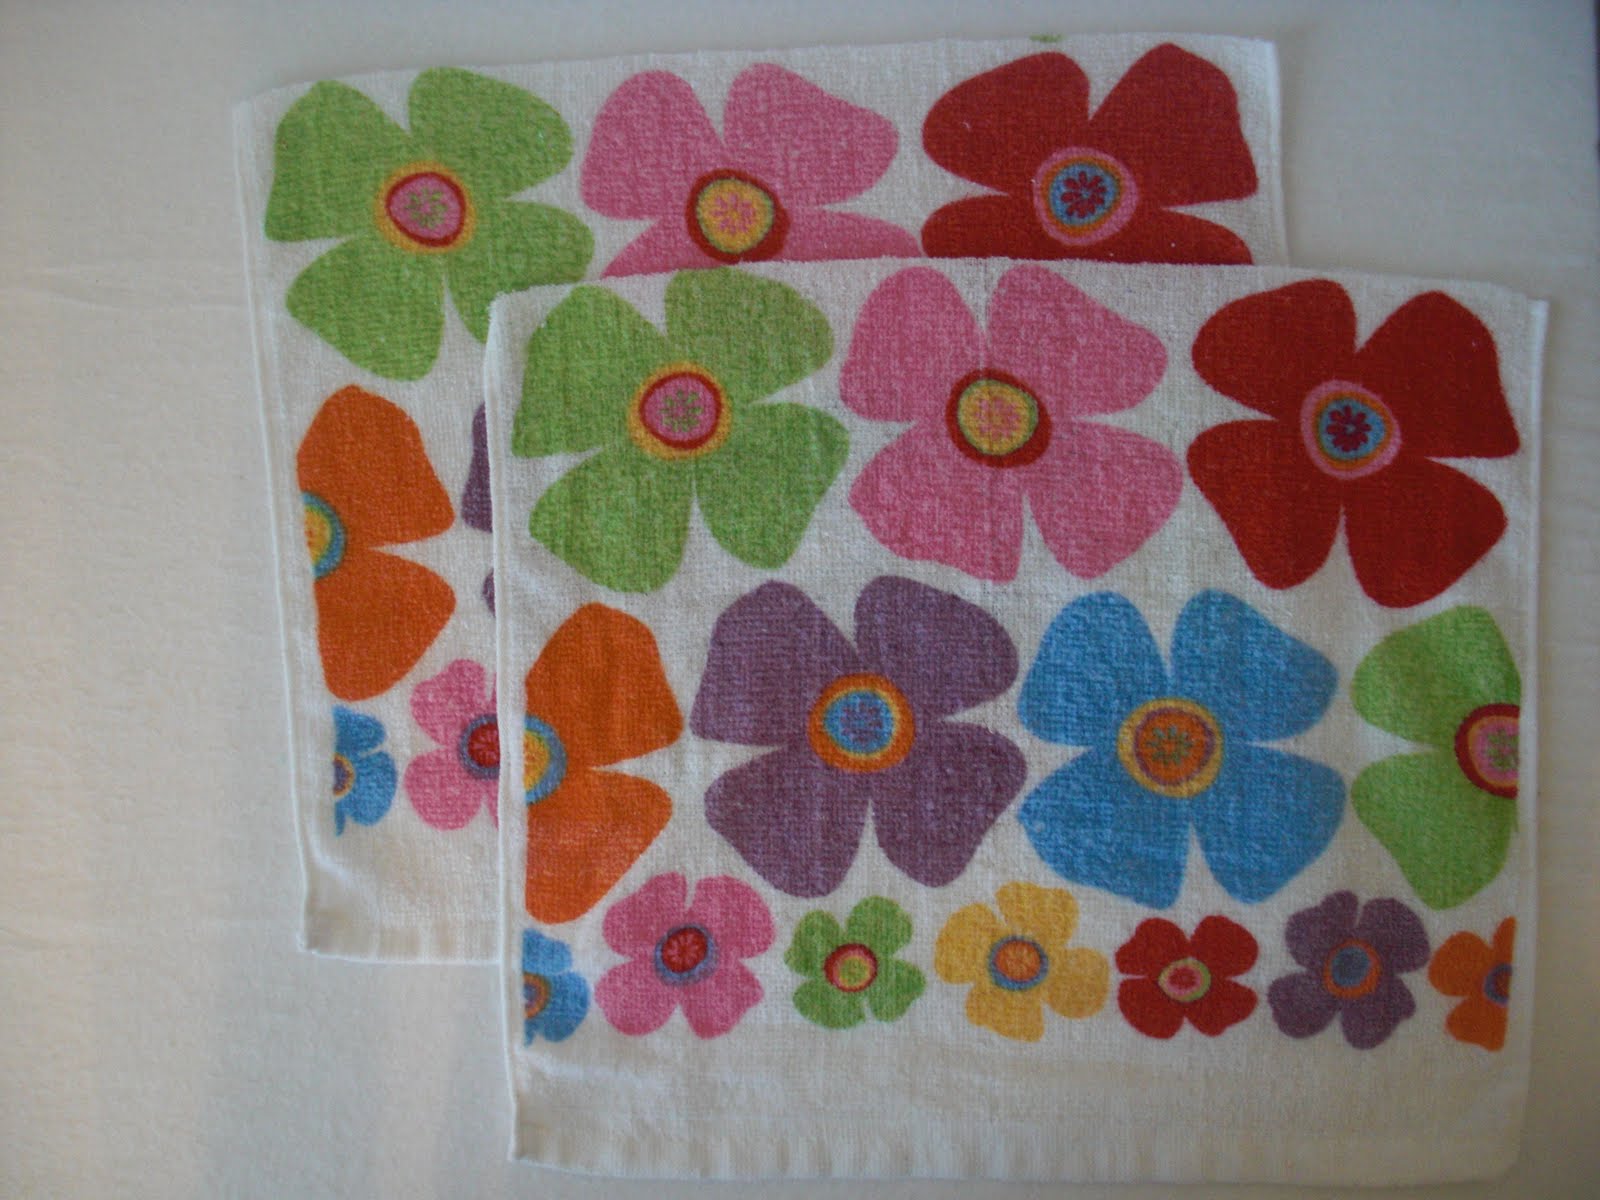
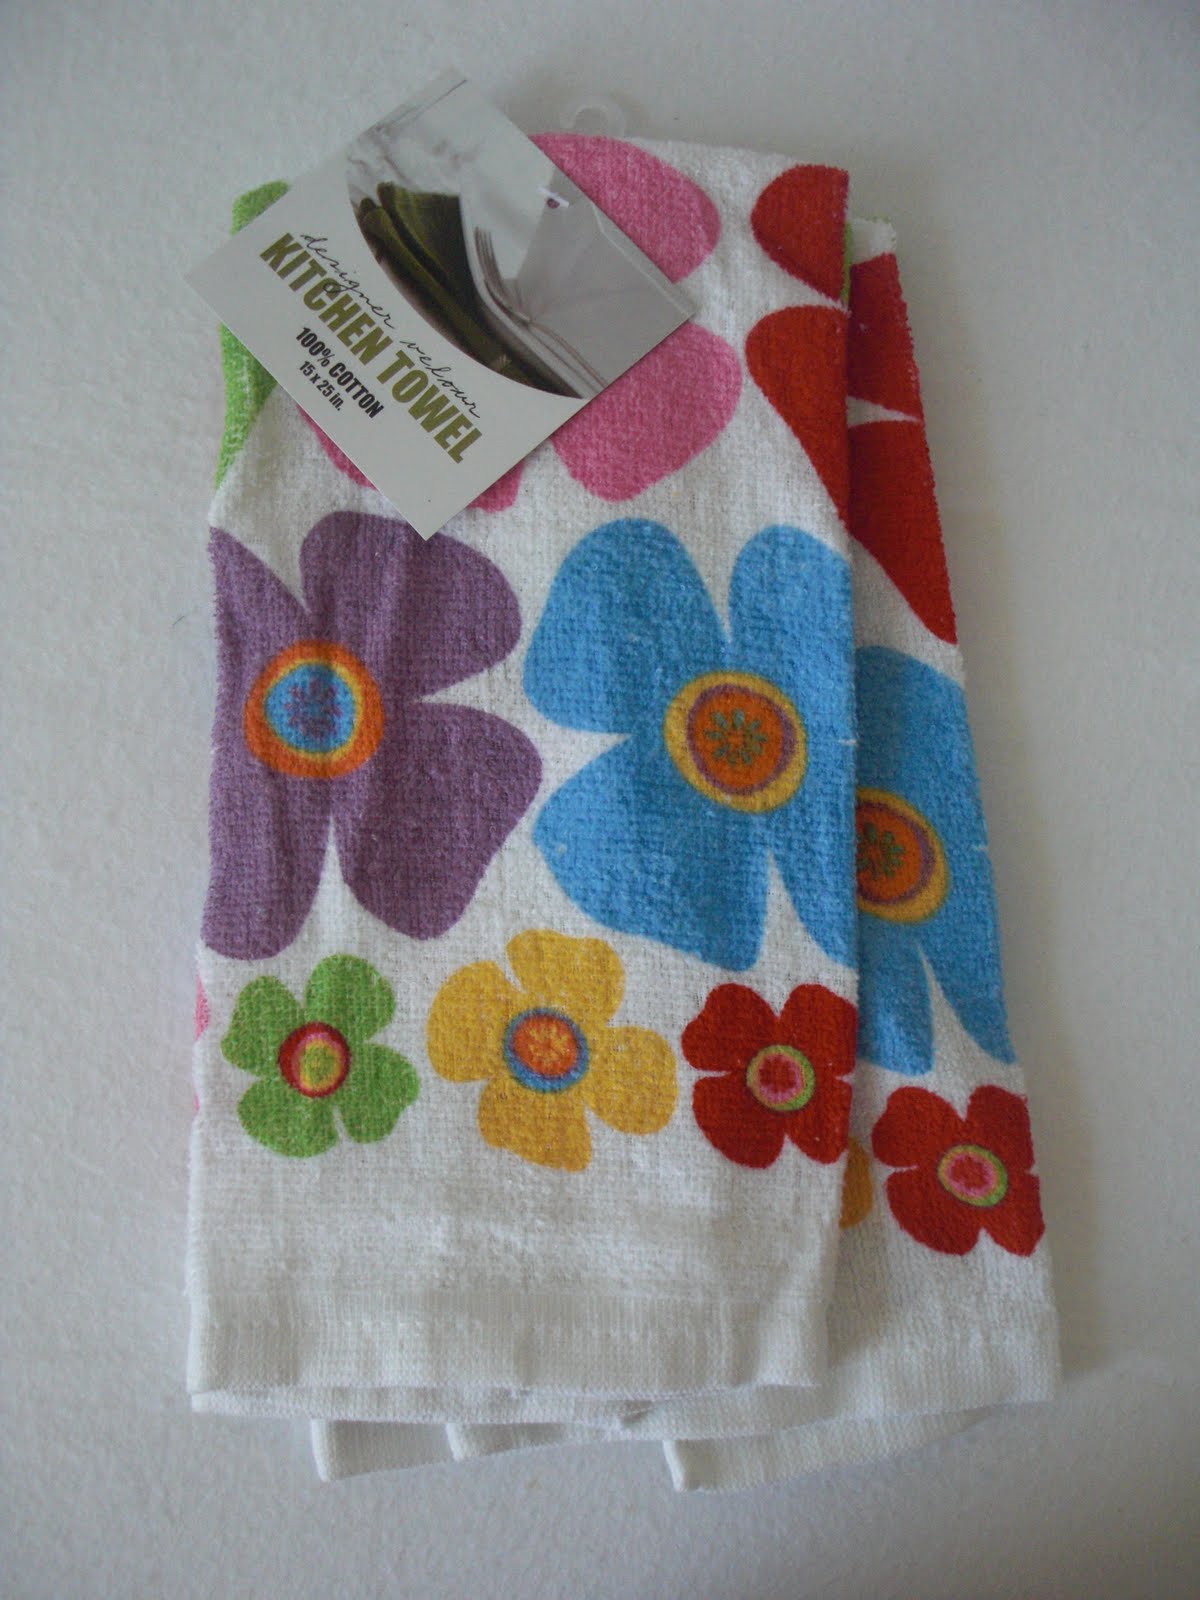 SUPPLIES: SUPPLIES :
 STEP TWO: Fold one towel in half from hem to hem and cut along the fold, as shown. STEP TWO: Fold a towel in the middle of the ring with hem and cut along the fold, as shown.
 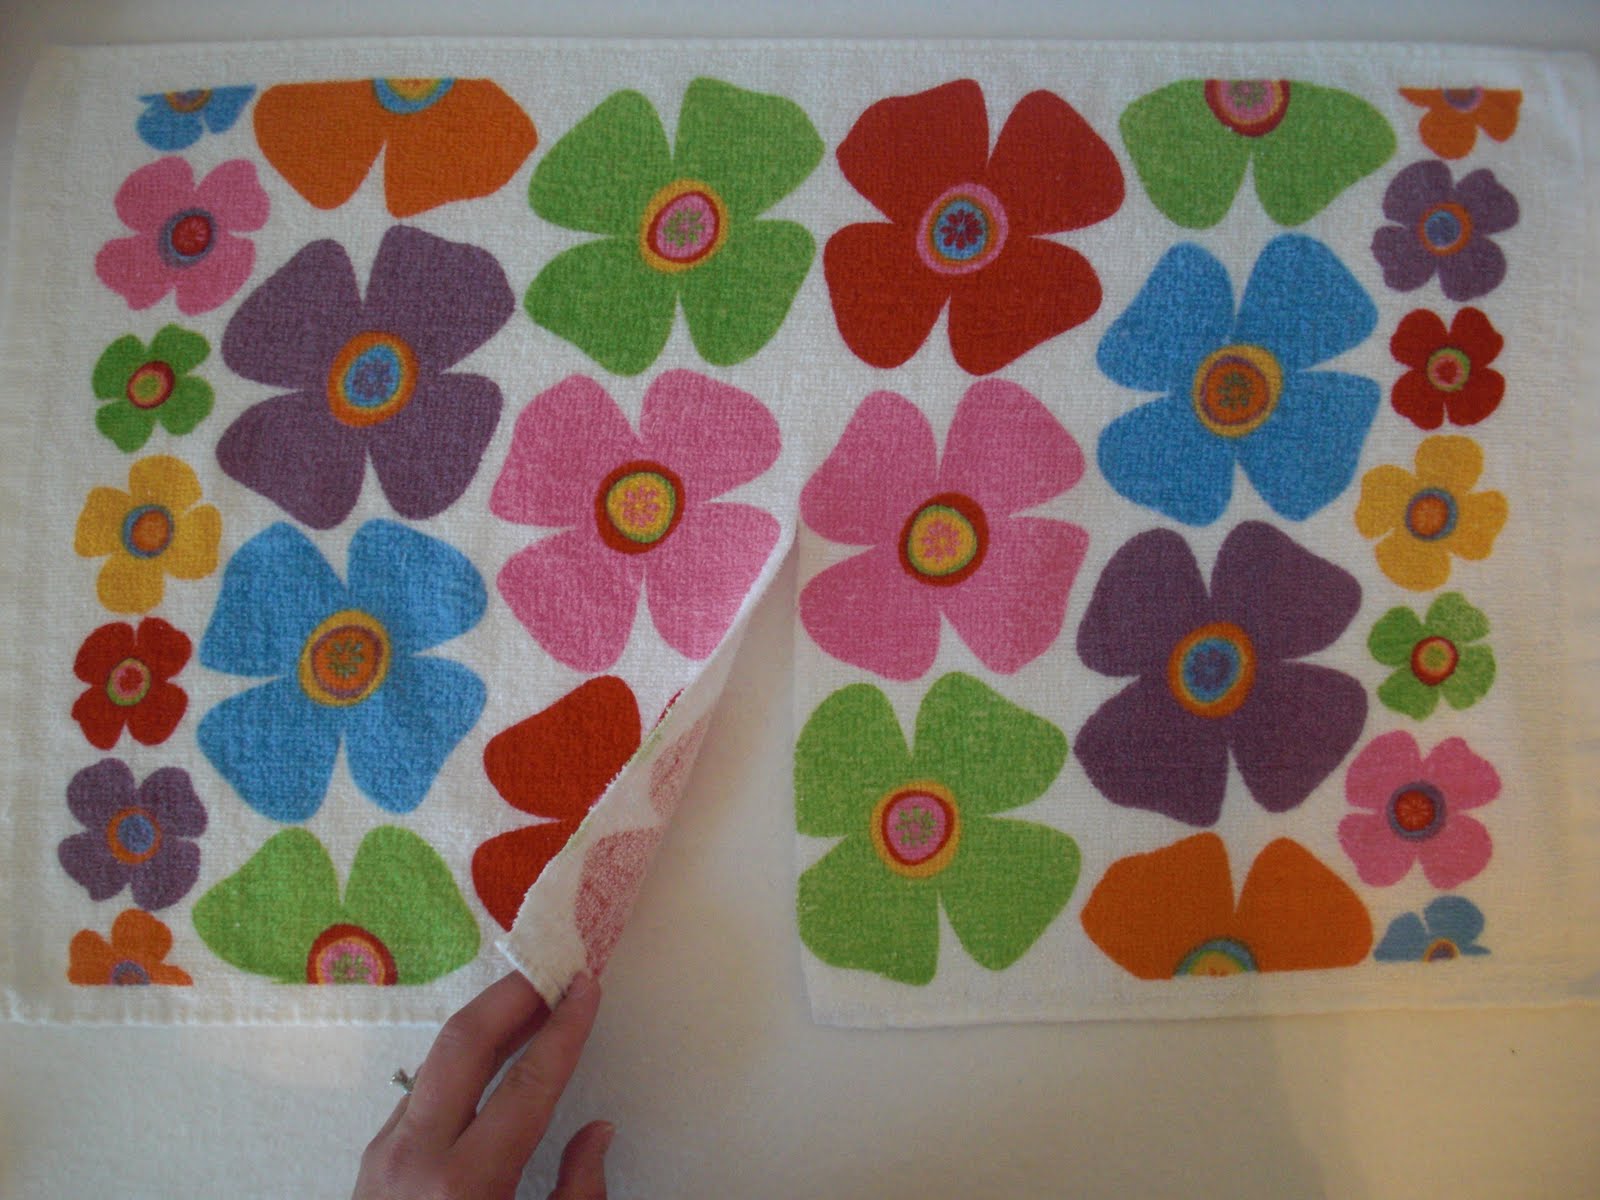 STEP THREE: Fold your second towel in quarters to find the center and mark. STEP THREE: Fold the towel in the second quarter to find the center and the brand. Fold from hem to hem and cut from one edge to the center, as shown. Double hem hemming and cutting edge to the center, as shown.
 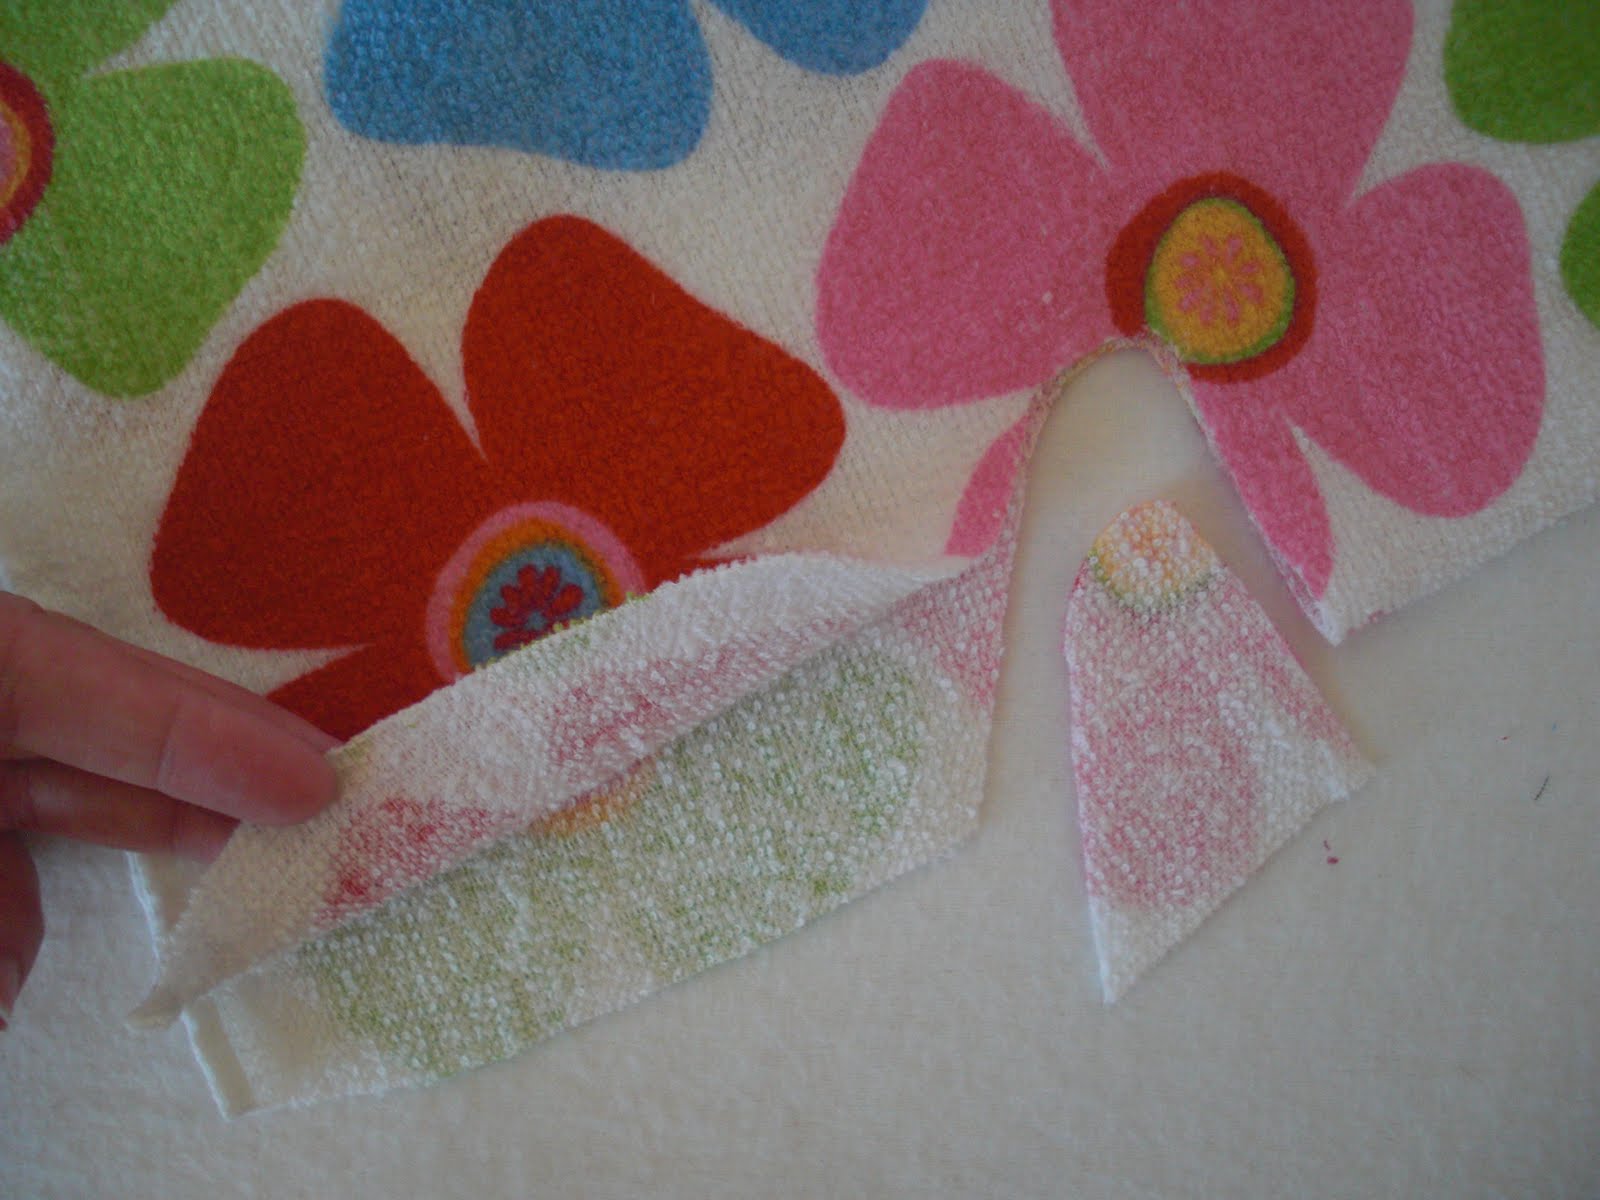 STEP FOUR: With your towel still folded cut a small neck opening, as shown. STEP FOUR: With a folded towel still cut a small opening in the neck, as shown.
 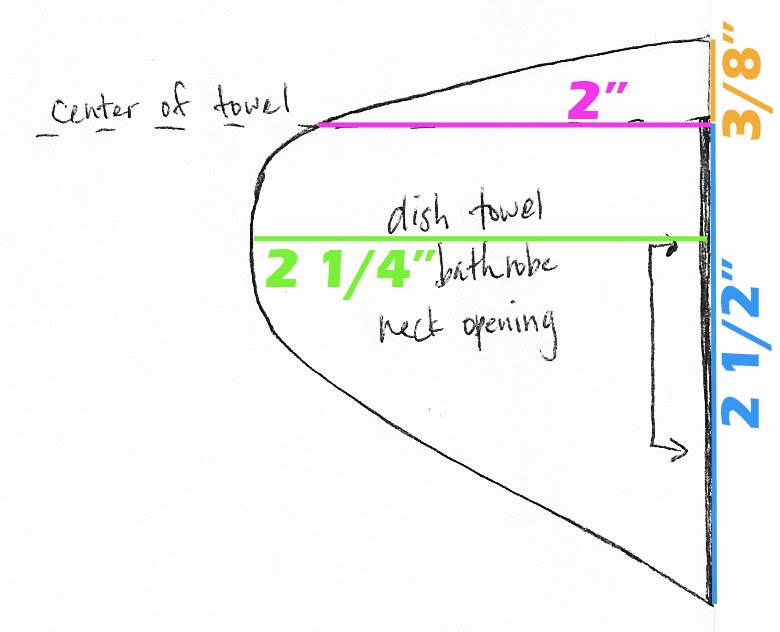 (I don't know if this diagram is helpful or confusing!) (Do not know if this chart is helpful or confusing!)
  STEP FIVE: Lay your towel with the neck opening on a flat surface. STEP FIVE : Support the towel with the neck opening on a flat surface .
  STEP SIX: Lay one of your dish towel halves on top, right sides together, with the raw edge centered on the edge. STEP SIX: Place a dish towel in half , top right sides together , with the edge of the fabric centered on the edge. Pin, being careful not to stretch the towels. Pin, taking care not to stretch the towel. Sew with a 3/8" seam allowance. Sew a seam 3 / 8 " .
 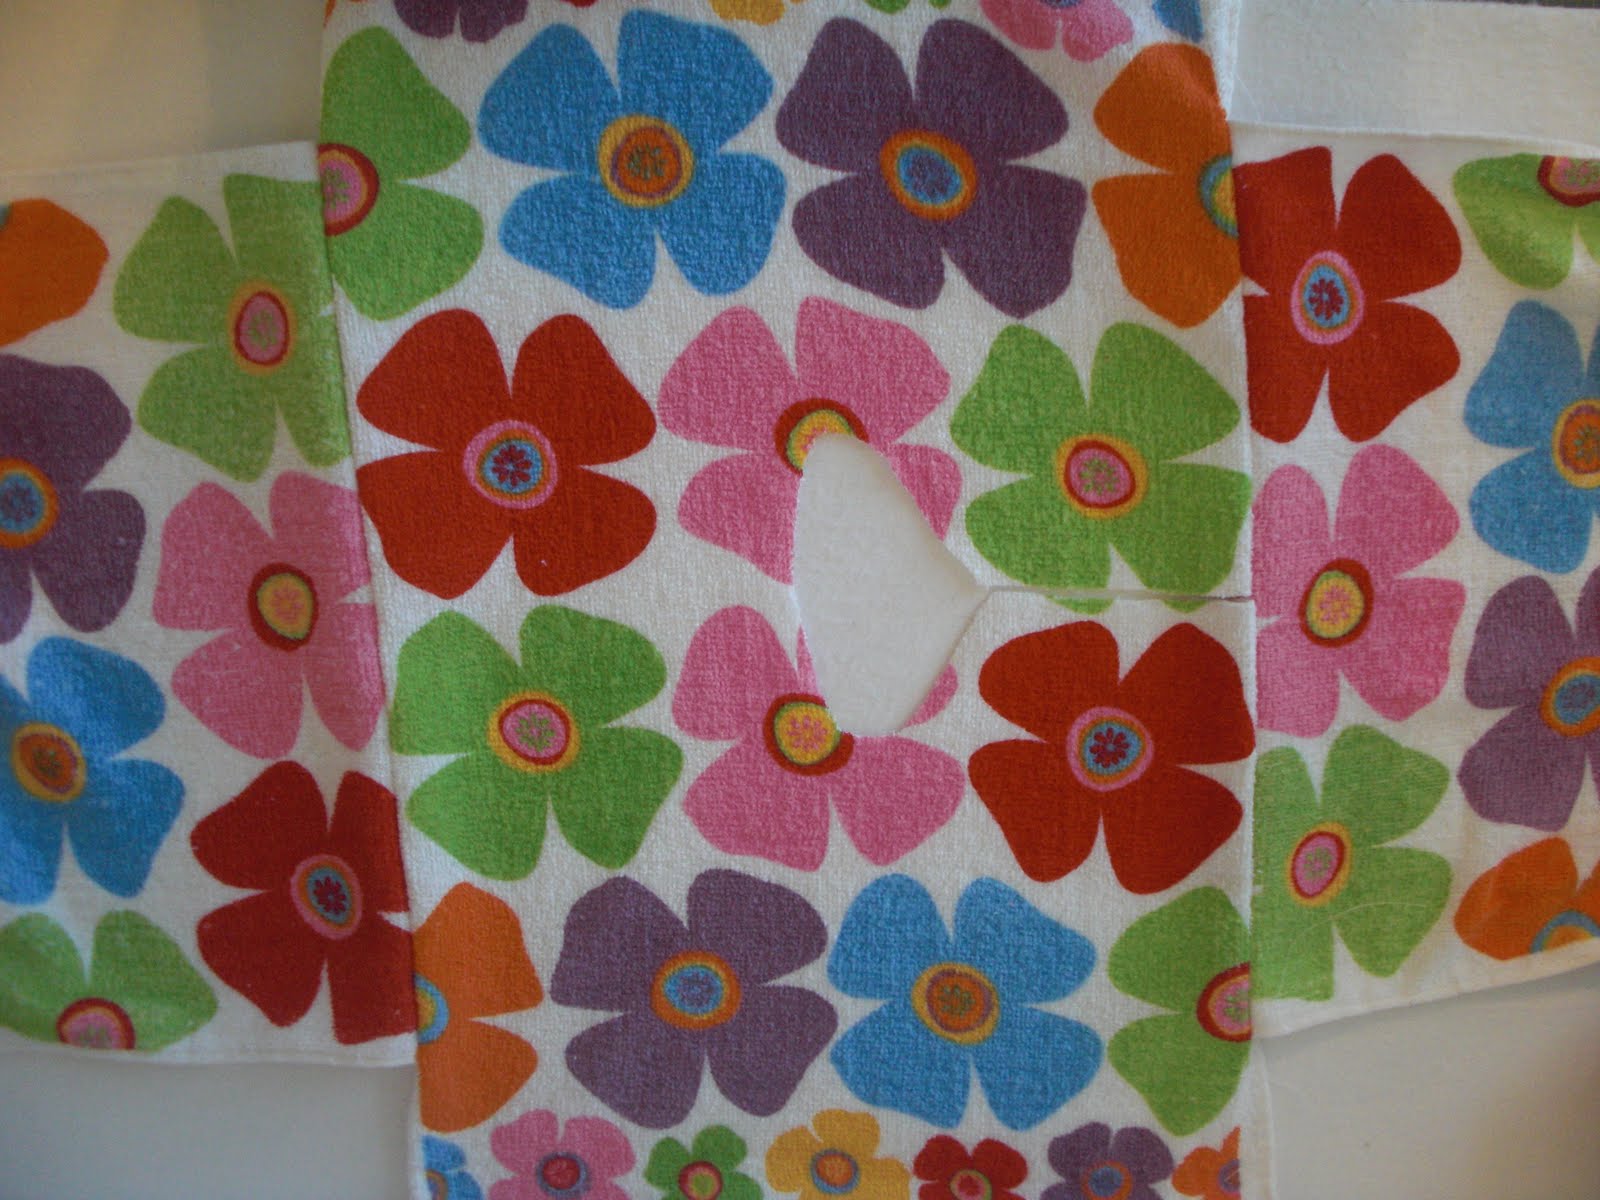 Repeat Steps Five and Six for the opposite side of your towel, as shown. Repeat steps five and six to the other side of the towel, as shown.
  STEP SEVEN: Continue the center front cut line through the hem of your towel, as shown. STEP SEVEN: Stay on the line to cut the center front edge of the towel, as shown.
 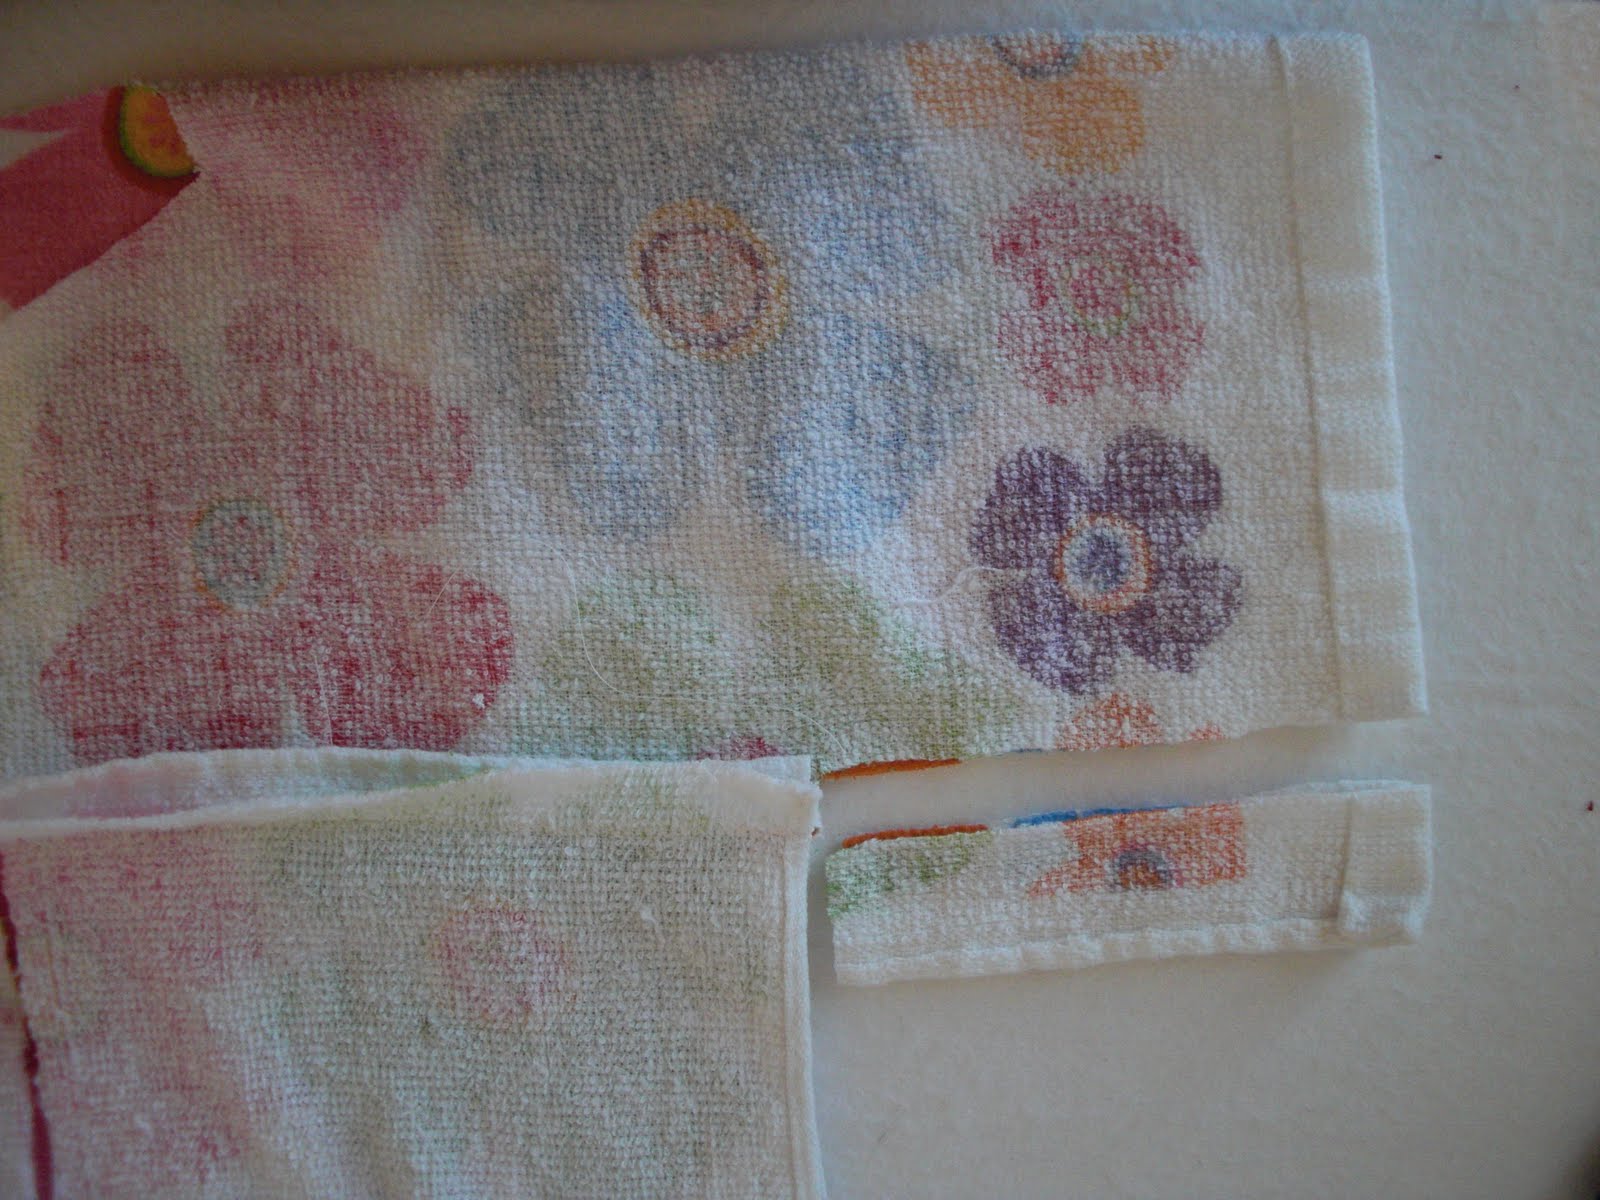 STEP EIGHT: Remove a small amount from the "underarm" area of the robe. STEP EIGHT: Remove a small amount of " under the arm " of the gown. Fold your robe right sides together and cut away a 1 1/4" width rectangle. This makes the sleeves narrower and more fitted, and also eliminates the bulky finished edge of the towel. Double robe right sides together and cut a 1 1 / 4 " wide rectangle . This makes the sleeves narrower and equipped, and also eliminates the bulky finished edge of the towel.
  STEP TEN: Cut a 1 1/2 yard length of twill tape and press it in half lengthwise, as shown. STEP TEN: Cut a half yards of length 1 twill tape and press in half lengthwise, as shown. This will be the binding for the raw edge opening of your robe. This is the link to open raw edge of your robe .
  STEP ELEVEN: Carefully bind the robe opening, starting at the hem on one side (finish the ends of the twill tape by folding them inside before you sew), and continuing all the way around to the other hem. STEP ELEVEN: care to bind the coat opening , starting at the hem of one side ( finishing the ends of the tape cross by folding them inside before sewing ), and continuing all the way around the hem of others. This finishes the edge of your robe beautifully, without the need for bias tape or a facing! This completes the edge of your robe beautifully , without the need for bias tape or a face!
  STEP TWELVE: Cut your remaining twill tape into two 1 yard pieces. STEP TWELVE : Cut the twill tape remaining two pieces of 1 yard. Layer them together and sew all the way around. Layer them together and sew all around. This is the tie for your robe. This is the tie of her robe .
http://obsessivelystitching.blogspot.com
Серия сообщений "Towels":
Часть 1 - Toddler Dish Towel Bathrobe !
Часть 2 - A Bath Pouf from an old towel.... I like it!!
Часть 3 - Baby stuff
Часть 4 - Paper hat
Часть 5 - recycled towel
| Рубрики: | FASHION/Sewing patterns FASHION/Kids RECYCLE |
| Комментировать | « Пред. запись — К дневнику — След. запись » | Страницы: [1] [Новые] |


