When I was putting together the Breaking Hearts Sock pattern, I wanted to find a good reference for knitters to go to for the twisted garter cuff. I was surprised to find that there’s really nothing out there other than the google books preview of the tutorial from The Sock Knitter’s Workshop (excellent book. Buy it). I was less than pleased with the tutorial presented in the book. It’s mostly ok, but it failed to tell you what to do with the working yarn at all. Do you leave it in back as you twist? Do you move it with your knitting as you twist? What exactly should it be doing? I’d end up with a tangled mess, so I gave up and twisted the left hand needle instead. It works fine, but the twist isn’t quite as crisp as the tutorial below will net you. Let’s begin.
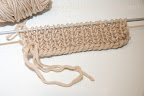
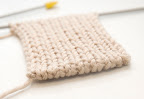
1. Cast-On 64 stitches using the Long Tail Cast-On
2. Knit 5 rows
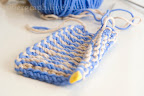
3. Knit 4 stitches
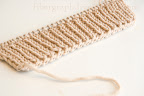
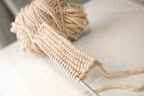
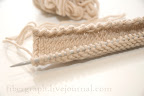
In the figure below, I have already completed several twists. In this case, the twists are done every 4 stitches. You can play around with how often you twist. The number 4 is not set in stone.

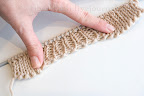
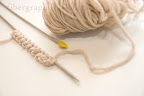
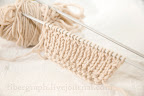
4. Bring yarn to the front as if you are preparing to purl
This is the key. If you do not move your yarn to the front, you will end up with a yarn over where you don’t want one.

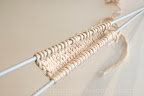
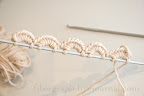
5. Rotate the right hand needle clockwise around the knitting. This will keep the working yarn to the back of the work, in ready position to knit.

(I don’t knit continental. I am right handed and had to use the camera without dropping it.)

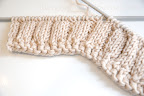
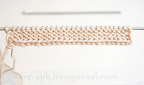
You’ll notice that the working yarn is now hugging the garter cuff, wrapped around the outside of it. This is what you want. You’re going to pull the yarn tight when you take the next step.
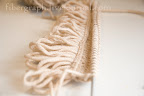
6. Repeat from step 3 until all stitches are worked. (So you don’t have to scroll back up, you’re just knitting 4 more stitches.)

Once all your stitches are worked, don’t join in a round right away! You have to work 1 more row. You can either knit a row or start your ribbing (I recommend starting in P1 K1 ribbing as it flows right into the 4 stitch twist). After you’ve done one row, then you join in a round and start your sock.