-Рубрики
- Вышивка (1567)
- Шитье. Выкройки. (277)
- Вязание спицами для маленьких (199)
- Узоры спицами. (184)
- Журналы по вязанию (172)
- Полезные советы (131)
- Разное (91)
- Вязание для девочек (86)
- Послушать аудиокнигу (65)
- Журналы по шитью. (60)
- Вязание спицами для мужчин (57)
- Путешествия... (56)
- Вязание крючком (52)
- Вязание для мальчиков (49)
- Это интересно! (45)
- Прекрасное! (41)
- Больной вопрос. (38)
- Повеселило (36)
- Сад, огород, цветник (35)
- Куда же без них. (31)
- Шали и шарфы спицами (27)
- Консервация. (26)
- Кино старое и не только... (18)
- Интерьеры. (13)
- Почитать книгу... (2)
- (0)
- Вязание спицами (199)
- Вязание спицами для женщин (1497)
- Кулинарные рецепты (217)
- Шитье (51)
-Музыка
- Високосный год - Метро
- Слушали: 1595 Комментарии: 0
- Александра Стан - Mr.SAXOBEAT
- Слушали: 123 Комментарии: 0
- SCORPIONS --" MAY BE I, MAY BE YOU" ...
- Слушали: 237 Комментарии: 0
- Джо Дассен-- Красивая лиричная музыка
- Слушали: 2656 Комментарии: 0
-Поиск по дневнику
-Подписка по e-mail
-Постоянные читатели
-Сообщества
-Статистика
Sewn Linen Jacket/Шитье |


MATERIALS
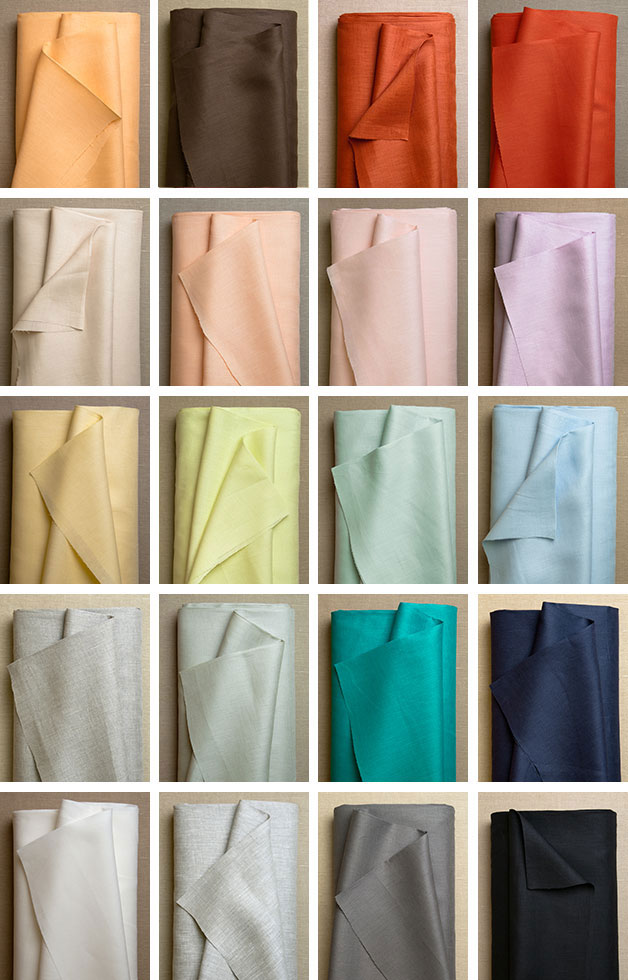
- 1 ¾ (1 ¾. 1 ¾, 2, 2) yards of Purl Soho’s Handkerchief Linen. We used the color Hippo.
- 1 (1, 2, 2, 2) spool(s) of Gutermann’s Cotton Sewing Thread in a color to match the fabric. We used color 3630.
- A free Sewn Linen Jacket Neckline Template, printed and cut out.
Recommended tools (optional) …
- Purl Soho’s Rotary Cutting Tool Kit, which includes …
- An 18mm bias tape maker
SIZES

Finished Garment Measurements

NOTES
Prewash and press all fabric before starting.
Backstitch at the beginning and end of all seams.
For the sake of clarity our instructional photos use Robert Kaufman’s Botanics + Architextures in Tangerine Hatches, a fabric with a clear right and wrong side. When you are working with a fabric without a clear right or wrong side, choose either side as the right side for the first seam and follow this precedent for all subsequent steps.
PATTERN
CUT
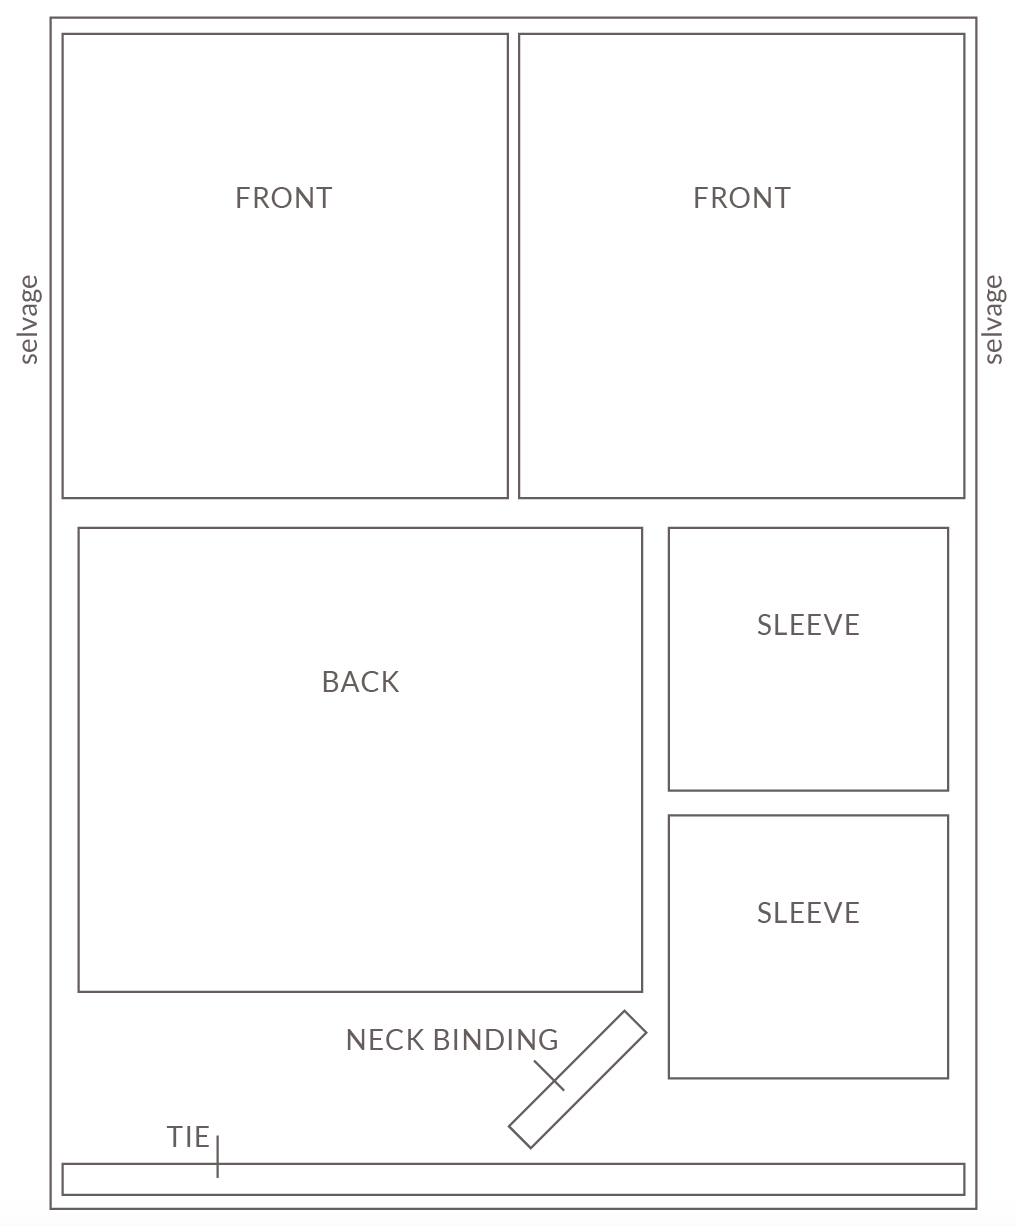
Use the chart below to cut 1 Back, 2 Front, and 2 Sleeve pieces from the fabric. (All measurements shown in inches.)

Also cut …
One 2 1/4 x 10-inch rectangle on the bias (at a 45-degree angle to the selvage). This is the Neck Binding.
One 1 5/8-inch strip from selvage to selvage. This is the Tie.
Use the chart below for help with the layout of the pieces on the fabric.
PREPARE THE BACK NECK
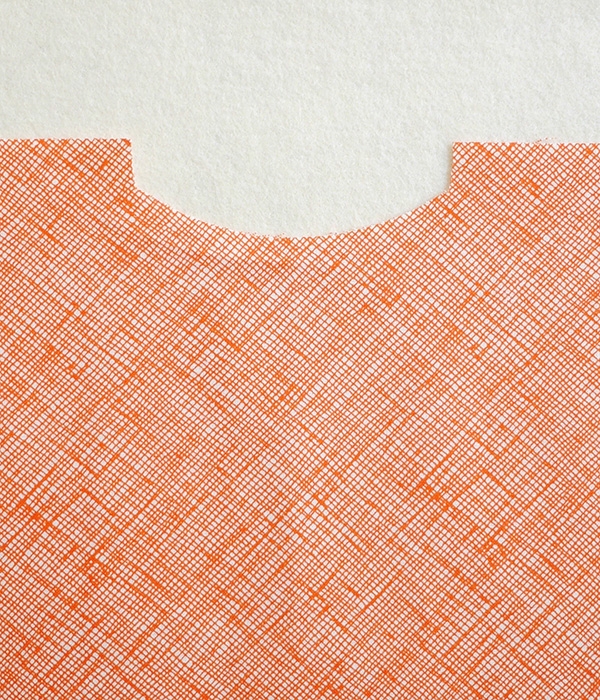
Fold the Back piece in half so that its two short sides meet.
Place the prepared Neckline Template on the fold, lining up the top edge of the Template with the short raw edge of the fabric. Cut out around the Template.
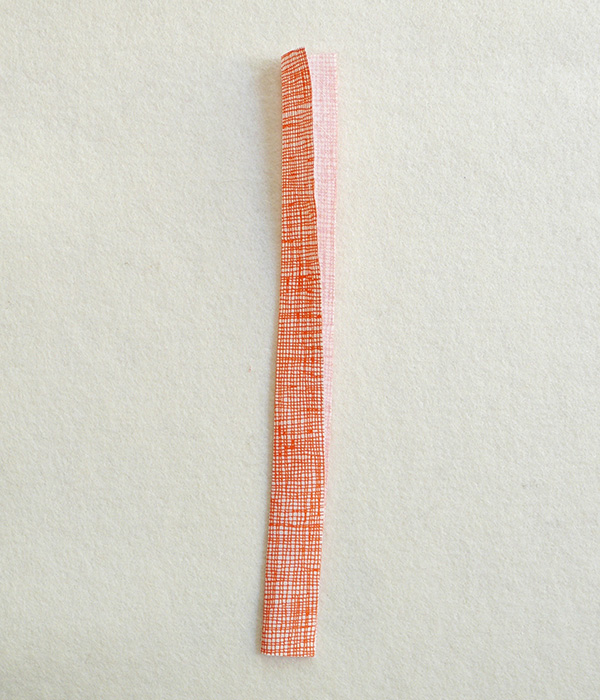
Fold the Neck Binding in half so that its two long sides meet. Press flat.
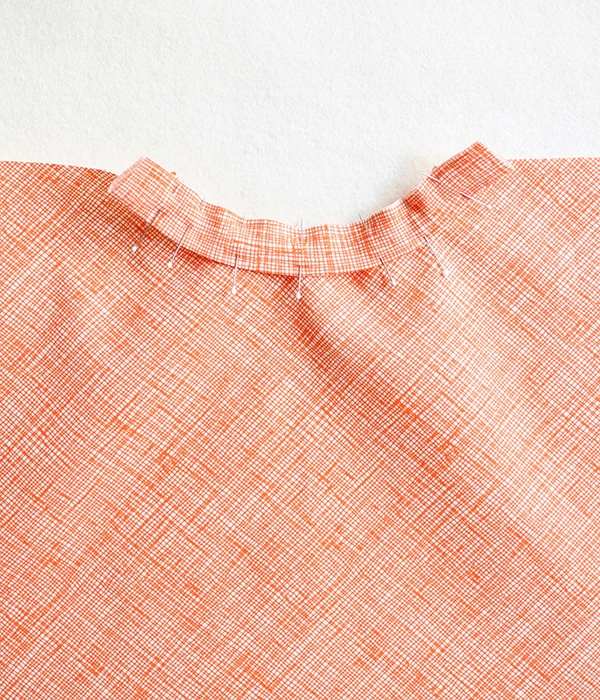
Pin the Neck Binding to the right side of the Neckline edge, lining up the two raw edges of the Binding with the raw neck edge and leaving a 1 inch overhang on both ends of the Binding.
Sew the Binding to the neck edge with a ¼-inch seam allowance.
Fold the Neck Binding along the seam line to the wrong side of the Back. Press and pin. Sew the Binding down with an edgestitch.
Trim the remaining overhang at both ends of the Binding so they are flush with the edges of the Back.
SEW THE SHOULDER SEAMS

Lay one Front piece out flat with its wrong side facing up and its short sides running along the top and bottom.
With the right side facing up and the Neck opening at the top, place the Back on top of the Front. Line up the top straight edges and one side edge.
Pin the two pieces together along the top straight edge. Stop when you reach the neckline curve.
Sew along the pinned edge with a ¼-inch seam allowance.
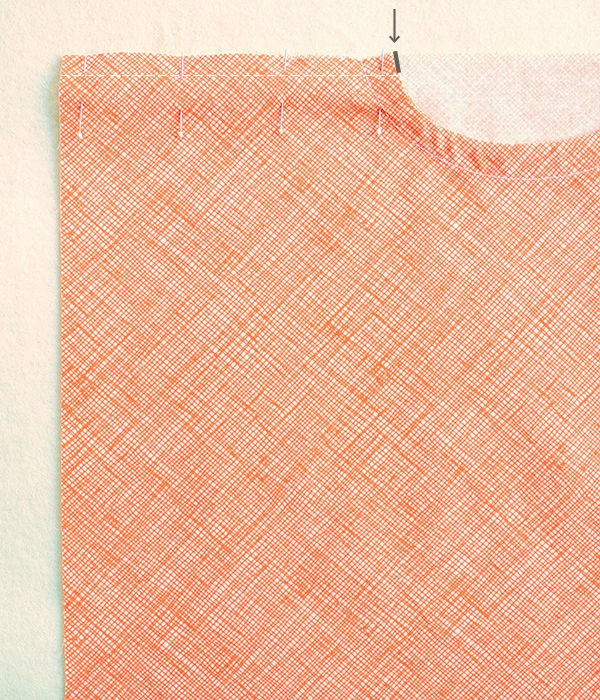
Make a small ¼-inch clip into the seam allowance of the Front piece, right at the neckline edge. Make sure not to cut past the seam line.
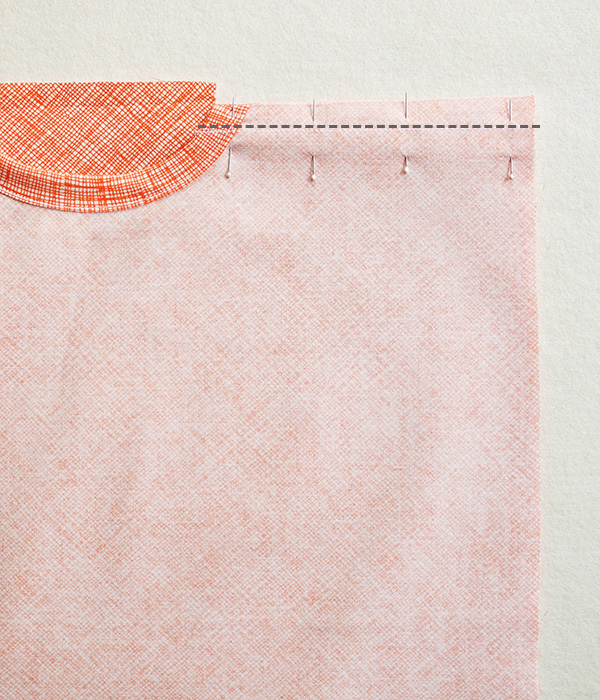
Fold the garment along the seam line so that the right sides of the Front and Back are facing. Press flat and pin along the fold. Sew across the pinned edge with a ½-inch seam allowance.
This is the Shoulder Seam.
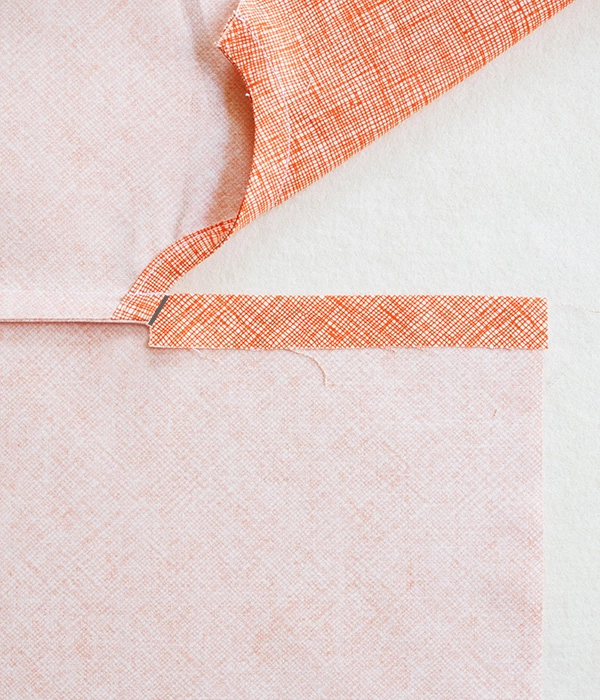
Press the seam allowance towards the Front.
The Front fabric that overhangs past the edge of the Shoulder Seam is called the Front Flap. Press the top edge of the Front Flap ¾ inch toward the wrong side (following the Shoulder Seam line). Make a ½-inch clip into the fold of the Front Flap, following the curve of the neckline edge. Do not clip past the fold’s crease.
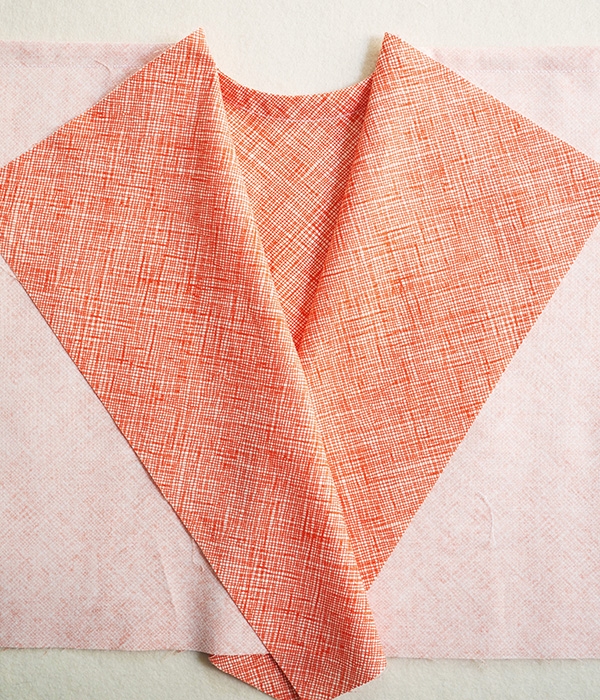
Use the second Front piece to repeat these steps at the other side of the Back.
This is the now the Body.
ATTACH THE SLEEVES
Note: The 13 ½ (14, 14 ¾, 15 ½, 16 ¼)–inch side of the Sleeve is the Shoulder Edge.
Fold each Sleeve in half at the Shoulder Edge. Press to create a crease and then unfold.

With wrong sides together, pin the Shoulder Edge of one Sleeve to a raw shoulder edge of the Body, lining up the center crease of the Sleeve with the Shoulder Seam.
Starting ¼ inch before the Sleeve and ending ¼ inch after, sew along the pinned edge with a ¼-inch seam allowance.
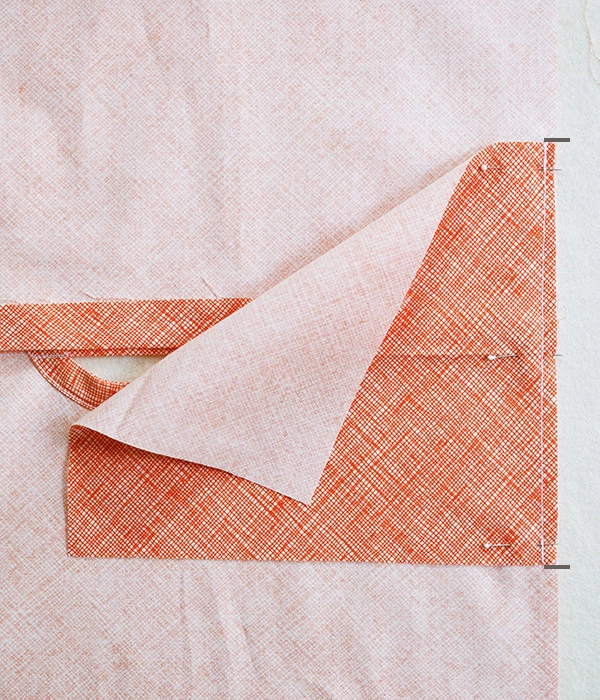
Make a ¼-inch cut into the Front and Back pieces at the edges of the Sleeve. Do not cut past the seam line.

Now, fold the garment at this seam so that the right side of the Sleeve is facing the right side of the Body. Press this fold flat and pin.
Sew with a ½-inch seam allowance. This is the Sleeve Seam.
Unfold the garment and press the seam toward the Sleeve.
Repeat with the second Sleeve on the other side of the Body.
This is now the Jacket.
SEW THE SIDE SEAMS
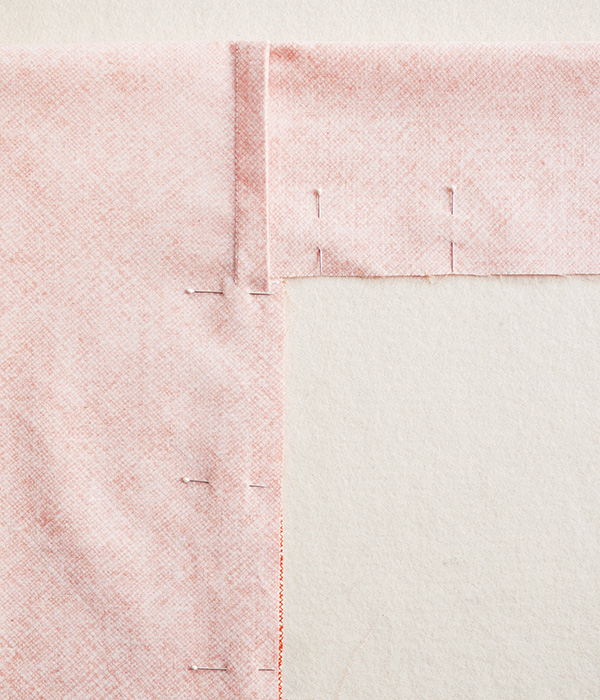
With the wrong side facing out, fold the Jacket at the Shoulder Seams so that the raw edges of the Sleeves, as well as the long sides and bottom edges of the Front and Back, meet.
Pin all the sleeve and side seams.
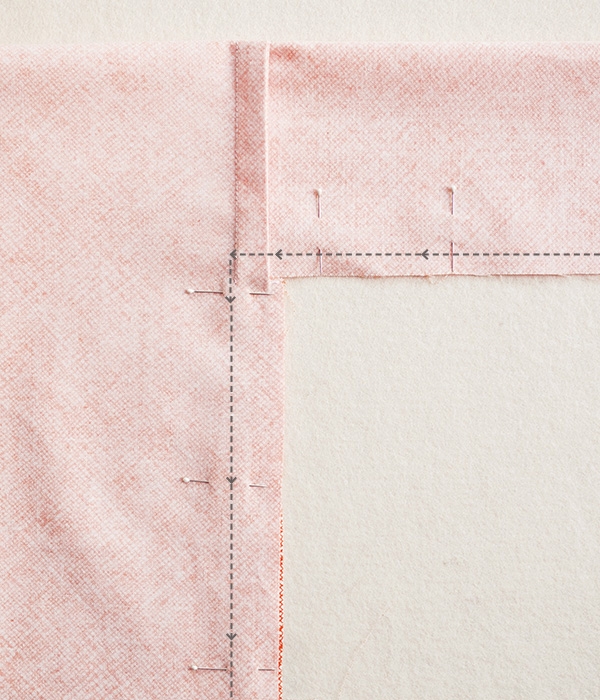
Starting from the end of one Sleeve and working toward the underarm, sew along the pinned edge with a ¼-inch seam allowance.
When you reach the Sleeve Seam, backstitch ½ inch, and then sew forward again, stopping at the Sleeve Seam line. Insert the needle and pivot the Jacket. Sew forward ½ inch, backstitch, and then continue to sew down the side of the Body with a ¾-inch seam allowance.
Repeat on the other side.
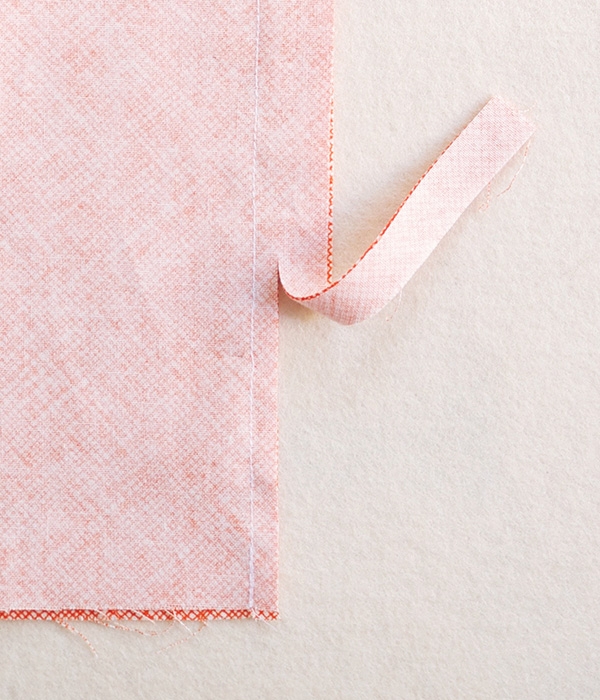
Trim the seam allowance of the side seams to ¼ inch.
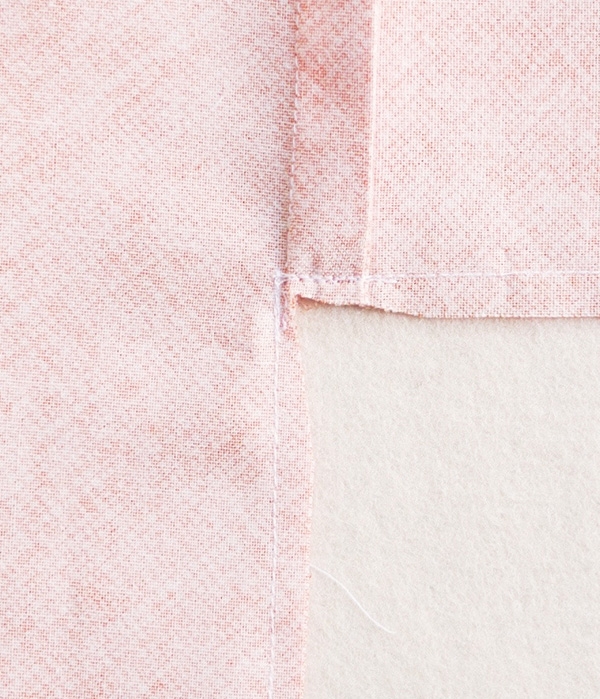
Cut a small notch into both underarms, making sure not to cut past the seam line.
Sew along the raw edges of the seam allowances with a zigzag stitch. Press the seam allowance to one side.
HEM THE SLEEVES
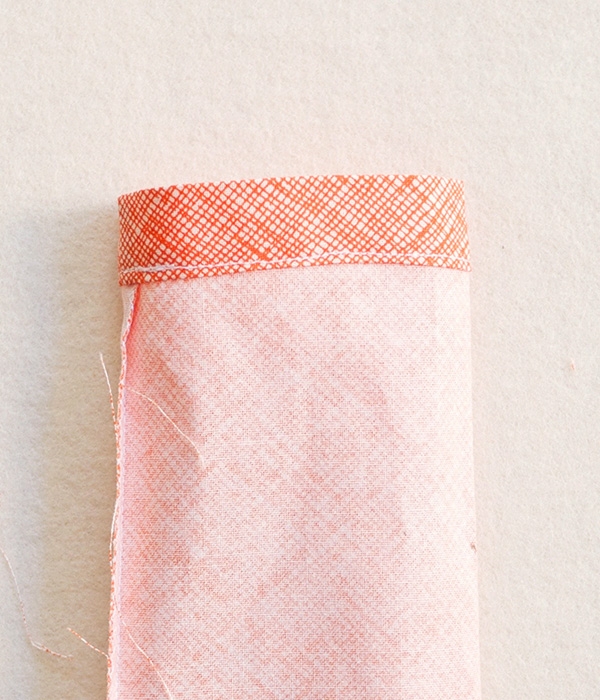
Fold the raw edge of one of the Sleeves ¼ inch towards the wrong side and press. Now, fold the edge 1 inch towards the wrong side. Press and pin. Sew the hem down with an edgestitch.
Repeat with the other Sleeve.
SEW THE FRONT FLAPS
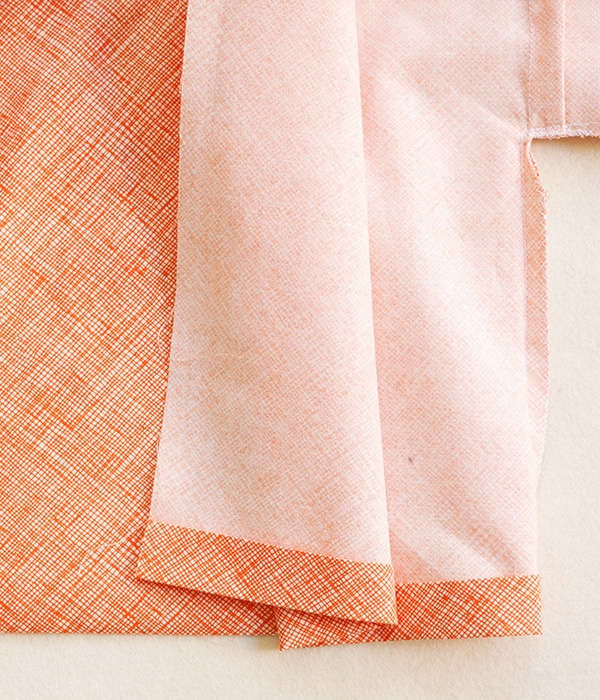
Fold the bottom raw edge of the Jacket Body ¼ inch towards the wrong side and press. Now, fold the edge 1 inch towards the wrong side and press again. Don’t sew the hem down yet; just be sure to make a nice, sharp crease with the iron.
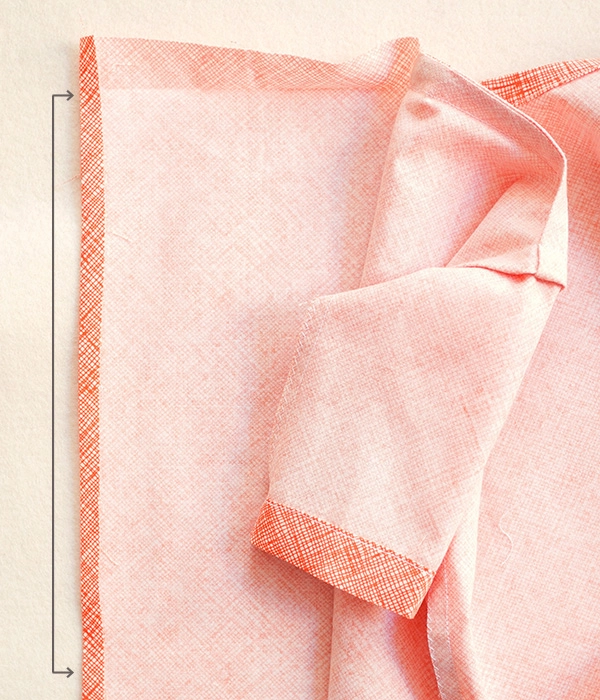
Open the folds at the top and bottom edges of one Front Flap. Now, fold the long raw edge of the Flap ¼ inch towards the wrong side and press.
Repeat on the other side.
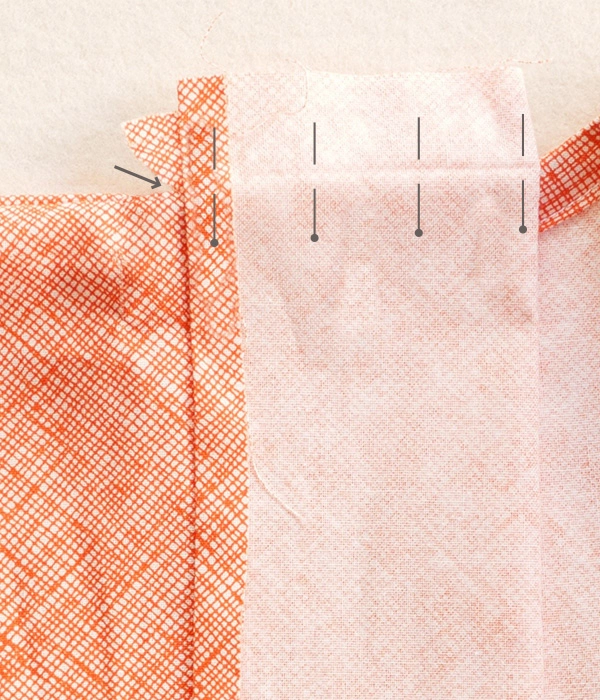
Turn the Jacket so that its right side is facing out. Fold one Front Flap towards the right side so that its outer folded edge meets the Back neck edge. Pin the Front Flap together along the top crease, making sure the creases on the front and back of the Flap are aligned.
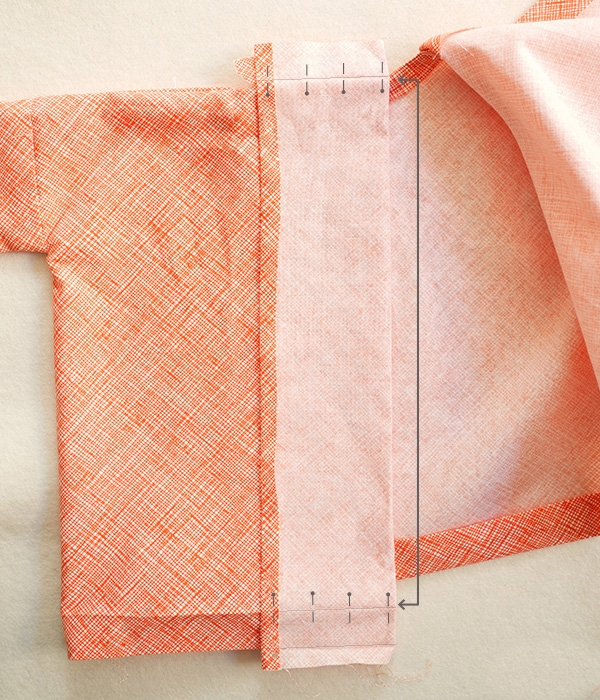
Continue the fold all the way down the Front Flap. Pin the bottom edges of the Flap together along the upper crease mark of the bottom hem.

Sew the two layers of the Front Flap fold together along the pinned creases.
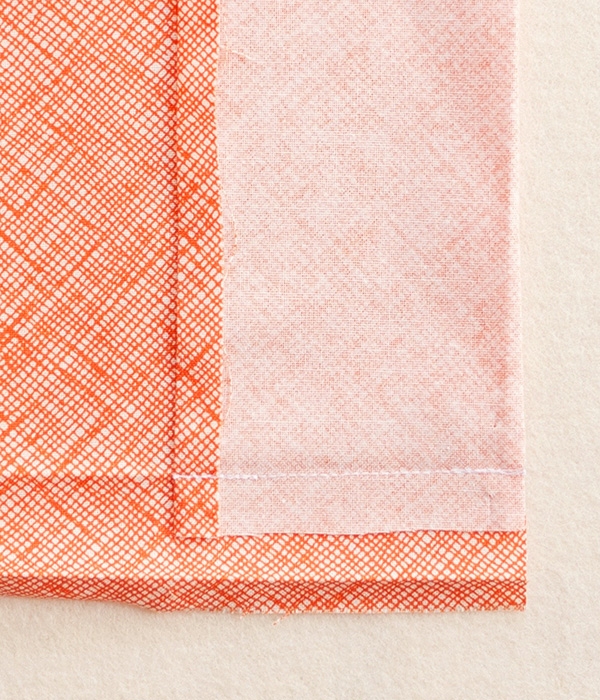
At the bottom edge, trim the seam allowance of the top layer of the fold to ½ inch.
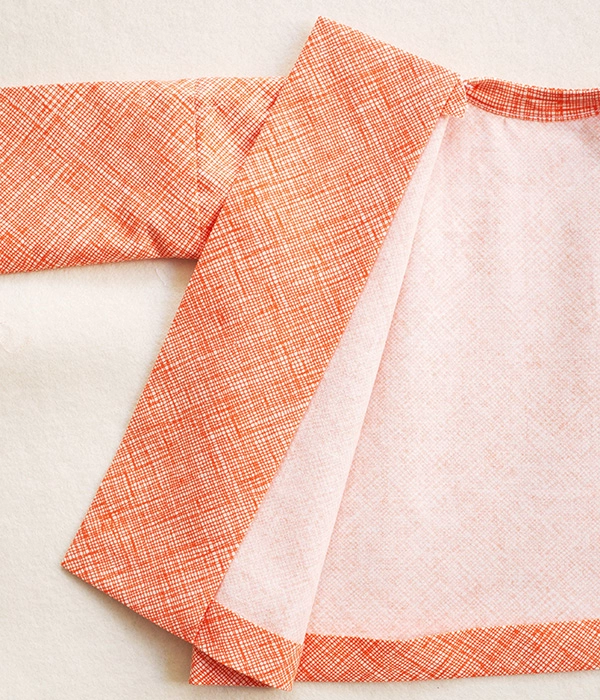
Turn the Front Flap’s entire fold so that the right side of the fabric is facing out. Poke the corners out neatly.

There will be a small flap of fabric that sticks out close to the neckline edge. Fold this piece so that it is hidden within the Front Flap fold.
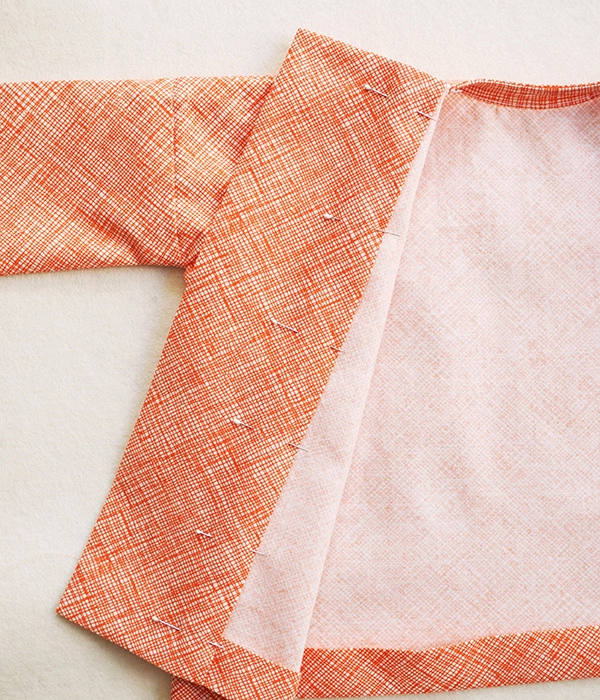
Press the Flap flat along all folds and pin the unsewn edge in place. Sew down with an edgestitch.
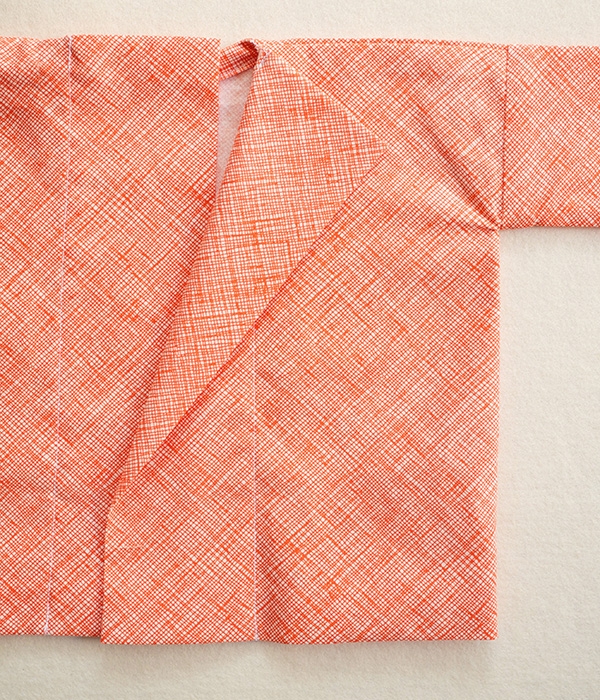
Repeat on the other side.
FINISH THE HEM
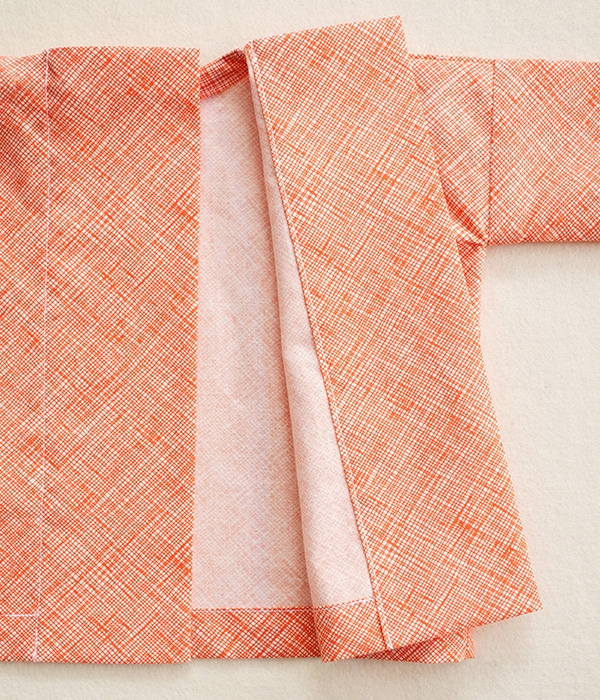
Refold all of the bottom hem creases. Sew the hem down with an edgestitch. Start and stop the seam at the Front Flap seam lines.
PREPARE AND ATTACH THE TIE
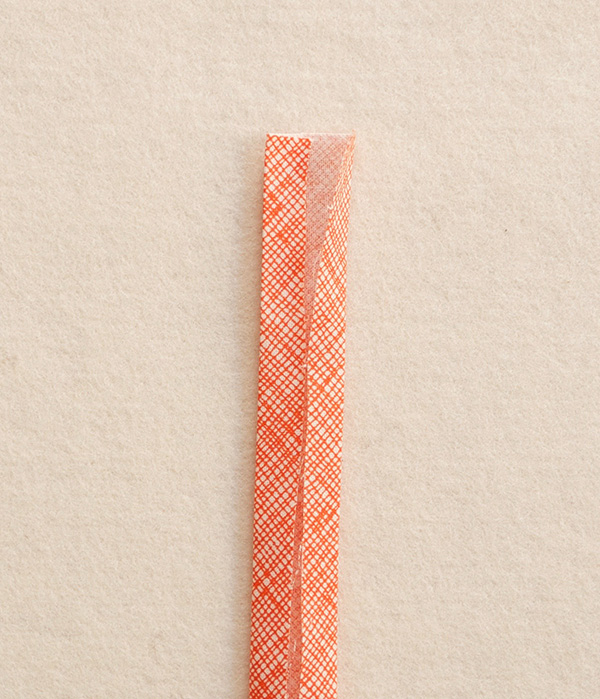
Fold the Tie piece in half lengthwise and press to create a crease. Open up the fold. Now, fold in the two long raw edges to meet the center crease and press. Refold the center crease so that the raw edges are encased in the fold.
Alternatively, you can create these folds using an 18mm bias tape maker.
To prevent fraying, finish the two short ends of the Tie with a fold-over finish. Here’s how …
Open the folds of the Tie at one end and fold over the short edge ¼ inch. Press flat. Refold the Tie and press. Repeat on the other side.
Sew the folded edges of the Tie together with an edgestitch.

Lay the Jacket out flat with the right side of one side seam facing up.
Measure 16 ½ (16 ½, 16 ¾, 17, 17 ¼) inches down from one Shoulder Seam and place a pin at this point, perpendicular to the seam line.
Now, fold the Tie in half to mark its center. Measure 7 (7 ¼, 7 ¾, 8 ¼, 8 ½) inches to one side of this center point and place a pin to mark.
Pin the Tie to the Jacket, matching up the marked spot on the Tie with the side seam of the Jacket and the marked spot on the Jacket with the top of the Tie.
Starting 1/8 inch before the Tie and ending 1/8 inch after, sew the Tie to the Jacket along the seam line three times: First sew the seam forward, then backstitch over the length of the seam, and then sew the seam forward again.
Repeat with the other side seam and the other end of the Tie.
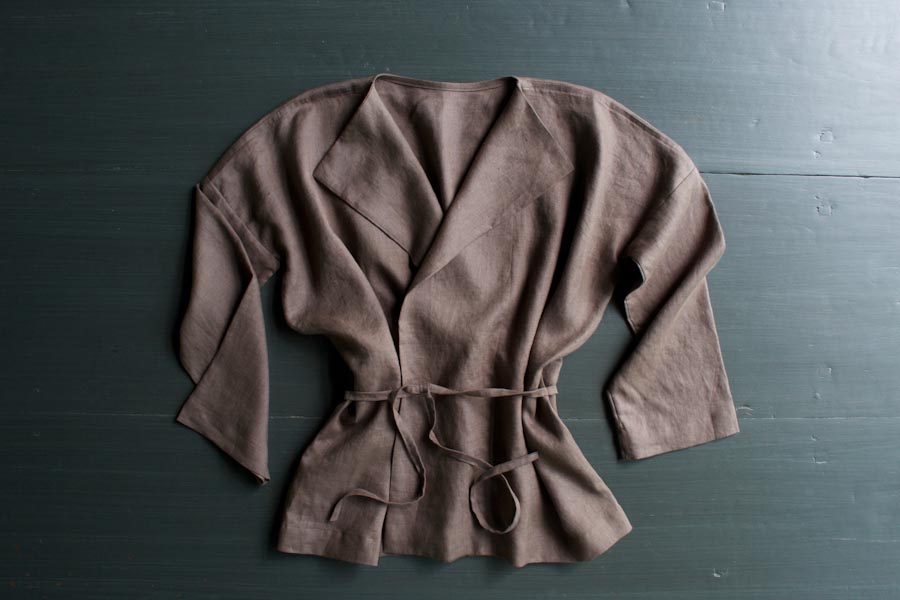
Your Sewn Linen Jacket is ready to wear!
https://www.purlsoho.com/create/2015/08/24/
| Рубрики: | Шитье Шитье. Выкройки. |
| Комментировать | « Пред. запись — К дневнику — След. запись » | Страницы: [1] [Новые] |
