[
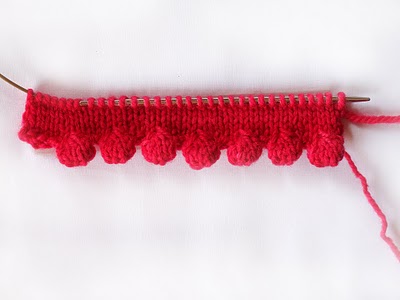
Ok, you can pretty much do this Bobble Cast On in any yarn, although perhaps laceweight yarn won't make a bobble, more of a full stop. That being said, the technique is the same irrespective of yarn weight.
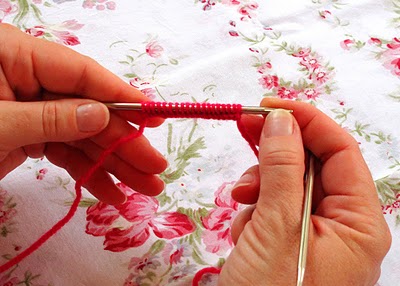
Cast on the number of stitches that you need. I left two side stitches, as you will see later, because it gives the work a little bit of an edge before the fat little bobble appears, and just looks better.
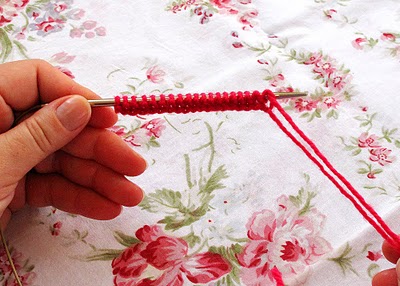
Knit one row, and turn your work around. Above you can see that I have done just that.
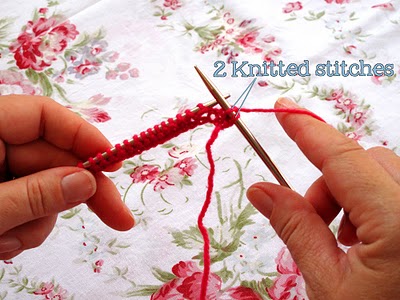
Knit 2 stitches. Throughout the tutorial I will refer to the left hand needle as the LHN, and the right hand needle, as the RHN.
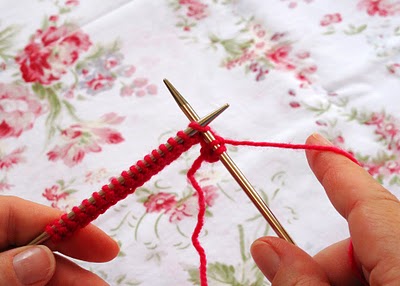
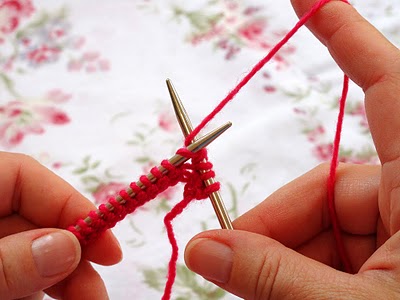
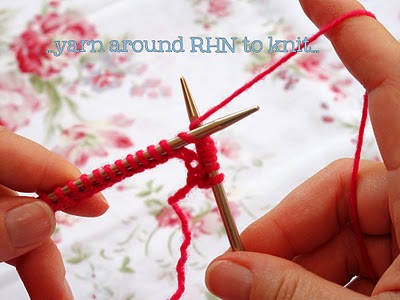
Insert the RHN into the next stitch on the LHN. You are going to knit into this stitch as you would normally, but you don't drop the stitch you have knitted into from the LHN. Just leave the loop of yarn on there .
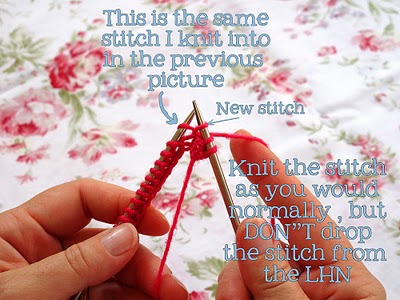
Above, you can see that the new stitch has been made , but the loop of the old stitch is still on the LHN.
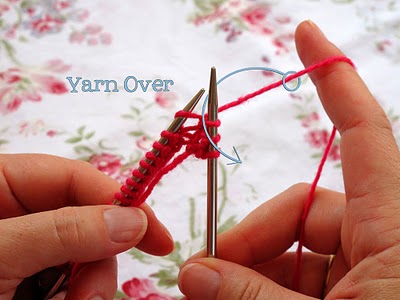
This knit stitch you have just made on the RHN, is the FIRST stitch of your bobble. You will now do a YARN OVER. What this means , is that you aren't going to make a real stitch, more of a little cheat by just wrapping the working yarn around the RHN, in the direction as shown above.

Above, you can see how your work should look once the yarn over has been done. It is so easy to do...it is essentially just bringing your yarn towards you through the two needle points...
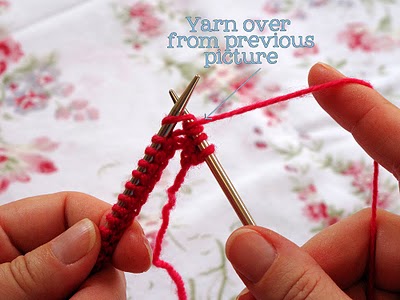
Insert your RHN tip into THE SAME STITCH as in the previous photos, and make a new regular knit stitch. (Notice, how the yarn over will created a clearly seen stitch once you have knitted a stitch after it)
Knitting a new stitch as normal....
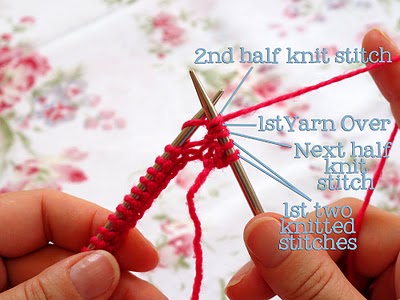
New knit stitch pulled through , but again DO NOT DROP the LHN loop. In the picture above, I have labelled the new stitch a "half knit" stitch because I haven't completed the knitting motion, by dropping the loop form the LHN. You have now made 3 stitches of your bobble.
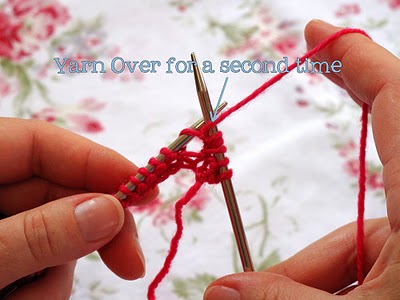
Do a second Yarn Over, just like before....
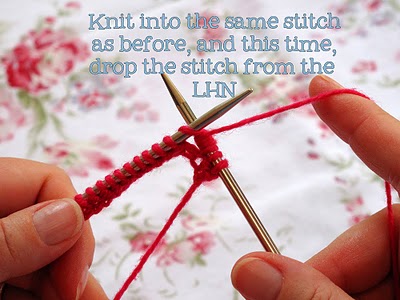
Knit into the same loop on the LHN as before...insert RHN into same loop on LHN...
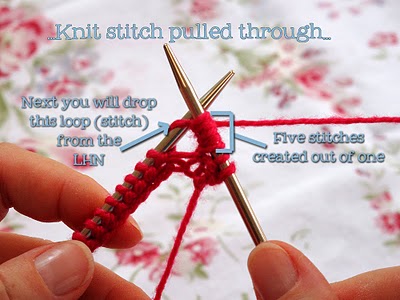
Pull the stitch through but this time, drop the loop from the LHN. You have made 5 stitches for your bobble.
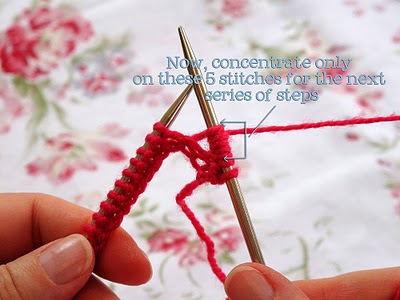
You have 7 stitches on your RHN, of which 5 stitches make up your bobble... You will concentrate only on these 5 stitches for the next rounds, making the bobble come alive :)
Turn your work around...it should look like the picture above...
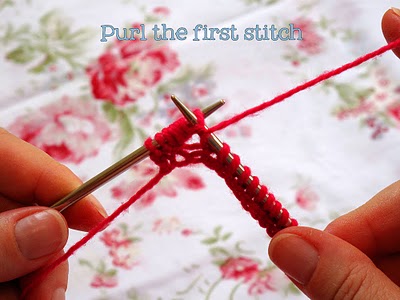
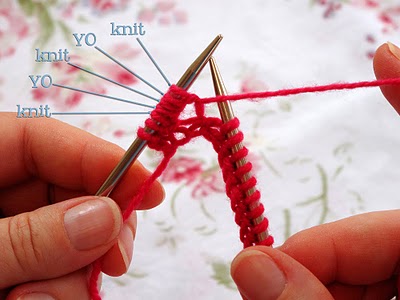
Purl the first stitch.
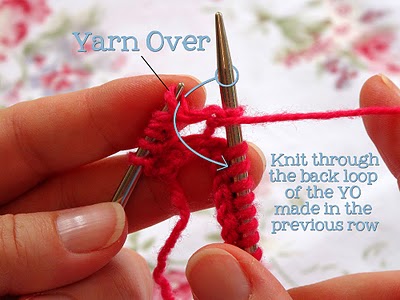
The next stitch was made in the previous round, by a Yarn Over, so I like to knit through the back of it, to give it a little twist . This " through the back loop" purling only happens on this row
, and only on the two stitches that were made by the Yarn Overs in the previous round.
Purling through the back loop...
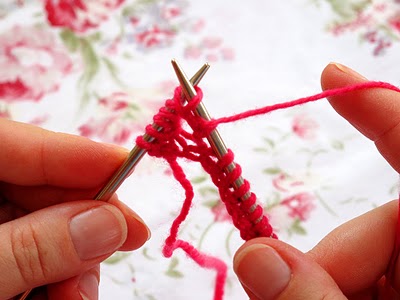
Purl the next stitch as normal, then purl through the back loop of the following stitch and finally purl the last stitch of the 5 stitches that make up your bobble.
Your work should look like the picture above.
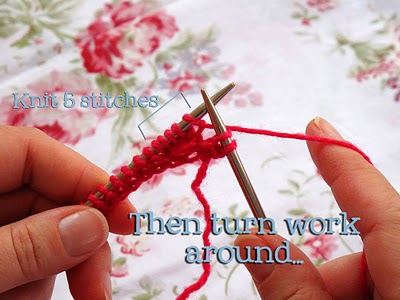
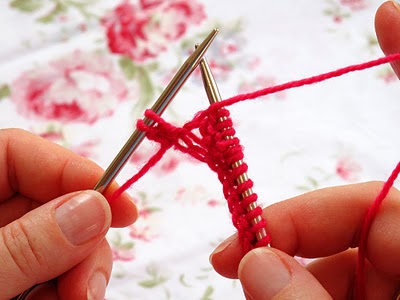
Turn your work around, and knit all 5 stitches. Turn your work around.
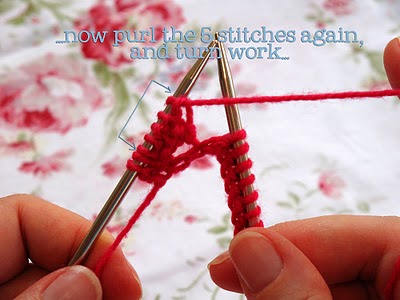
Now purl all the stitches of your bobble again., and turn your work around for the last time.
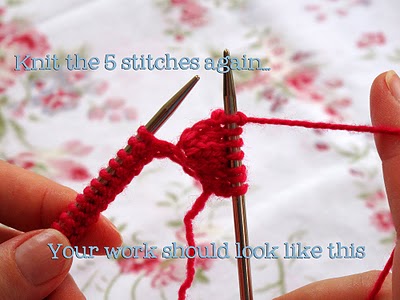
Knit the 5 stitches for the last time. If you push your finger into the back of the bobble to pop it out a bit, you'll see how nice and fat it is
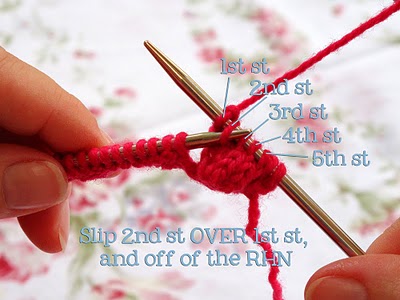
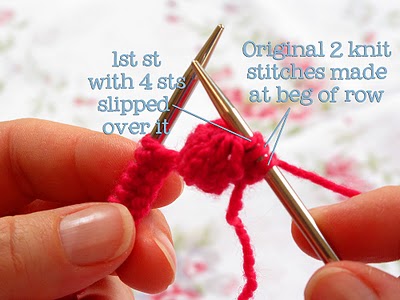
Using your LHN, slip the 2nd st of your bobble, over the 1st st, as seen above.
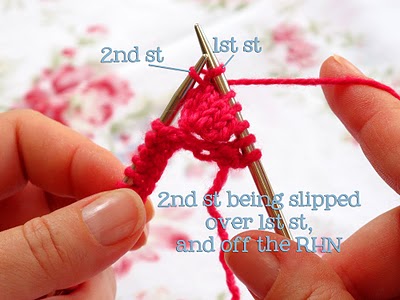
You have a little gap that has formed where the 3nd stitch has been slipped over the first.
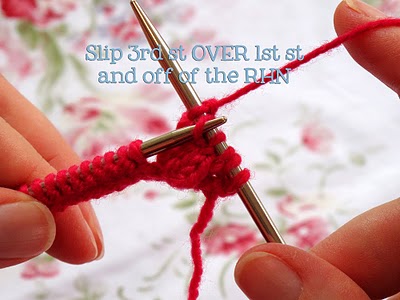
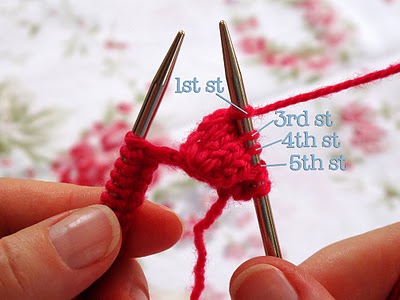
Slip the 3rd st of your bobble, over the 1st st, as before...
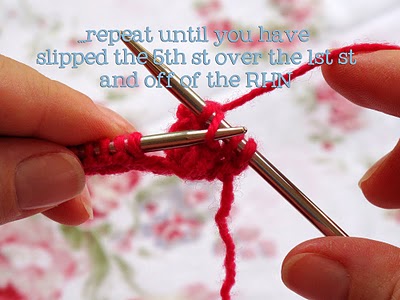
Repeat the above process until you have slipped the 5th st of your bobble over the 1st st. You should have 3 stitches left on your RHN, 2 knit stitches from tight at the beginning of the row, and the single stitch (1st) of your bobble.
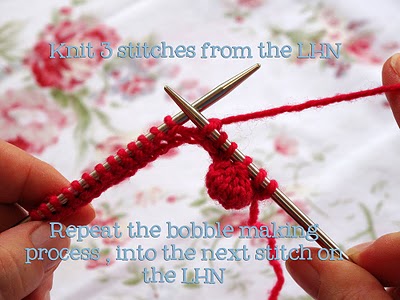
Knit 3 stitches from your LHN, and repeat the bobble making process into the next stitch on your LHN. Repeat until the right amount of bobbles have been made. Carry on with your pattern.
I must say that I really love this bobble cast on (although strictly speaking , it isn't really a true cast on , as you have knitted one row before starting to make bobbles).
Hope you all make many stunning items using this cute Bobble edge, :)
Взято: http://heidibearscreative.blogspot.com/2011/02/bobble-cast-on-tutorial-and-some.html . ]