���� �� ������. ������� ���������. 2007-01 //s017.radikal.ru/i427/12...
��� ��������� - (0)�������. ����� �������� ���������: ����� ��� - ���� ���� ��� ������ ������ - ��� ���� �����...
��� ��������� - (0)������� ������� ���������, ��� ����������� ������. ����� 1 - ������ ��������: ���� ��� ��������...
�������� ������ �� ������ - (0)�����: �������� ������ �� ������. �������� �������, ��������� ����. 1. 2...
������.��������� ������� � �������� �� ������ - (0)������.��������� ������� � �������� �� ������. https://www.liveinternet.ru/users/6020430/post438...
(� ��� 136773 ������� �� ����� ������������ ����� �����)
������ ����� ������������ ↓
PNG ����� �������������� ���� ����� ������ ������ ������� ���� ������� ������� ����� �������� �������� �������� ������� ��������� ������� ����������� ������� �������� ������� ������� ����������� ������� ��������� ����� ������-����� �������� �� ������ ��������� ���������� ����� ��� �������� ���������� ���������� �������� ������ ������� ����� ����� ������ ������� ��������� �����-����� ������ ����� ��������� ����� ������ ������ ���� ���� ���������� ������� ������� �������� ����� ����
������-����� ����� ������ �� ��������� ������� |

������� �����: ���� http://ingener-48.ru, ������� ���������� ������� ������� �� ���� ������, �������������� � ���������������� ������ � �������. ��� ��� ������ ���� �� ������ ��������� ������! ������������ � �������� �������� �� ���� �� �������� ���������!
�����: ��������� ����� �������� ������ ������ |
������� ������������� ��������� ������� ��� ������ ������� |
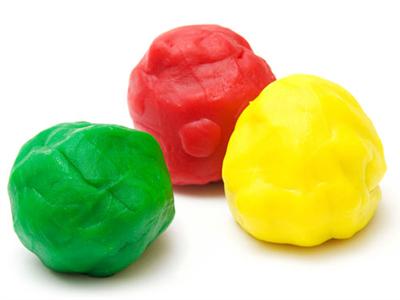
������ ��������� ������� ��� ����� ����� � �������� � ���� �������, ���� ��� � ��������. ������ ��� ���������� ����� ��� ����� ������� �������� �� �� �������� � ������ ��������. ������� � ���� ����� �������, ��� � ��������� ������� ����������� ��� �����������, � �������� � ��� �����, ��� � ���������� ����������� ��� �����. �������� �������� ��� ���� ����� �����, ��������� �� ����� � ���������. ���� ��������������� �������� ����� ������ � ��������� ��� ����������. ��������� — �� 50 ���� �� ��������. � ����� ����������� ��������! ����� ���� �������, ���� �������� 500 ������ �� ��������������� ��������� ��������� ���� ���, � ����� ����������� ����� ������ ���������. �� ����� ����������. ������-����� ��� ������� ������ ����� ��������� ������� ��� ����� � �������� ��������. ���� ����� �������� �� ������ ��� �� ���� �����������. ��������� �������� �������, �������, �������, ������� �����, �������, ����� ���, ������ �������, �������, ������� ���� ��� ���� ��� ���… ��� ��� ������� ����� ��������������� ����� � ����� ��� �������, ����� ��������� � ������� ��� ���� ����������� �������.
�����: ��������� ����� ������� ��������� ������� |
�������� ������ ������ ����� ����� ������ |
�����: ��������� ����� ����� ������ �� |
������-����� �� ����� ������. ������ � �����. |

� ����� ���� ����� ������� ���������, �������, ����� ������� ���� ����� � ��� ���� ��������). ����������� ��������� ������� ������ ��������� ����� ���� �� ����� ���������� ���������, ������� ��������� � �� ���������, ������ �� ��� �������, ����� ���������� �����, ��� ����� ����� �� �����������. ������� � ��������� ���� ���� � �������� ���������. ������� �� ����� ������.
�����: ������ ������ ����� ���������� ����� |
����� �� ���������� �����. "������ � ��������� ������" |
�����: ������ ������ ���������� ����� ����� |
���������� Forever! ����, ��������, ����� � ������ |


����� ��������� "�����":
����� 1 - ����� �� ������. ������-�����
����� 2 - ����������� �������-�������� ������.
...
����� 8 - ������� �������� (����� ��� �������)
����� 9 - ������-�����. ����������� �������� �� ������
����� 10 - ���������� Forever! ����, ��������, ����� � ������
����� 11 - ����� �������� ������� �������� (���������) �� ������ ������ ������.
����� 12 - ������� �������� (����� ��� �������)
...
����� 23 - ��� ���������
����� 24 - �������� ������ �� ������
����� 25 - ��� ���������
�����: ��������� ����� ����� |
�������� ������� (��������) - MK �� ���������� ����� |
�����: ��������� ���������� ����� ����� ����� �������� �� |
������� �� ������� (��) |
�����: ��������� ����� ����� |
������� �� ��������� �������. �� |
�����: ��������� ����� ����� |
����������� � �� ������ - ������� � �.�. |
����������� � �� ������ - ������� � �.�.
���������� ������� http://www.manga.ru/doll/view.php?id=96:3
������������ ����������: http://manga.ru/doll/view.php?id=96
�� ������������: http://manga.ru/doll/view.php?id=7400
������. ������ ���������: http://manga.ru/doll/view.php?id=4952
��� ������ �����: http://manga.ru/doll/view.php?id=1813
���������� �������� ������ : http://manga.ru/doll/view.php?id=1392
�������� ����������� ������ : http://manga.ru/doll/view.php?id=3
���������� ������ : http://manga.ru/doll/view.php?id=2
������ �� ������ � ��: http://manga.ru/doll/view.php?id=5126
�������� �����, ��� �� �����
How to �ake haru`s Doll: http://www.ne.jp/asahi/haru/doll/make/makeindex.htm
Work Room: http://www012.upp.so-net.ne.jp/futoyama/Htm/Howto/workroom.htm
���� ��������, �� ����� �� ����������� �� �������.
������� �������. ��������!!!
http://gorod.crimea.edu/librari/ist_cost/�������
��������� (���������) ������ ������ http://www.chen-la.com/
(������� ������ �� ����� � ��������)��� �� �������
http://www.x-worldcomics.com/
������� �� �������� ������ MARVEL � ������.
�����������-��������� ����.
http://www.ljplus.ru/img/deedl/page1.jpg
Deedlith (������� �� �������) � �� �������� ����� ������� ��������� "������� ����� �����" - �������� ����� �� ����������� �������� � ����. ����� ������ ������ ������� � 1 �� 66. ����� �������� ���������, ����� ���������� �������, ��� ��� ����� ��� ������������ ������� (1000 ���) � ����� 600 ���. ������� ������, ������� �����������.
www.artdolls.ru
������ ���� � ������
http://www.n-collection.ru/master.htm
������-����� ������� ����������
http://puchimadam.com/pages/lab_saran.htm
������ �����. ����� ���������
��� ������ �� ������������ ����, ��� ����������� ������������ ����� �� �������.
�����, ����� ����, ����������, �� ��� ���������� ��������.
http://naokodoll.altervista.org/howtosc.htm
��������� ����� / ��������� �����-�������������:
�����: ��������, ����������
http://doku.bimyo.jp/
http://daveandheidi.com/pages/fita/index.html
� ��� ����-
http://www.patriciarosestudio.com/html/home.html
http://kukladom.nm.ru
����� ������ ���������� ������� ����� �����
�������� � ������������
http://www.natahaus.ru/2006/09/08/e_kunina__kharakternye_kukly_iz_polimernykh_mass.html
����� ����� ������� "����������� ����� �� ���������� ����". ������ ���������� �� �����, � ��� ����� ������� ������, ����� �������� 37 ���������������� ������ ����������, ���������� �����, ��� � ���, ���-��: ���������� �������, ���� �� ������, ����� �� ��� ������� � �.�. �� � ���� ������ �� ���������, �����, �������� � �������������. ����� �������! ����� � ������� DejaVu.
��� �� �� ��������� ���� ����� ���������, ����������� � ����������� �������.
http://white.sakura.ne.jp/%7Efirst_fast/Column/Column.htm
����, ����������� ������������ �����-�������. ������������ �������� ��������, ������������, ����������. �� ��������.
http://www.dollbooks.ru/
����� � ������ � ������ �����. ������� �����
http://www.dollery.ru/gallery_kv_2.html ����� ������������� �����.
http://nasedkina.com/blog/?p=18
��������� �����
��� ������� ����� �� ��������.�������� ���� �� ����������:)
http://www2d.biglobe.ne.jp/~dhnoah/make_00.htm
����� ����� �� » ��������� ������������� ����� � ������� » ���������� ����� http://forum1.kukly.ru/forums.php?forum=24&PHPSESSID=f5571f0b1743d116d0d926bf3c2f88f6
http://ceramic.narod.ru/doll.html ����� �������� ������������.
http://putkioto.narod.ru/DressGallery.html �������� ������ (�������� ��������. ��� ������� - �� ������)
http://ring.gerdesdesign.com/cgi-bin/list.pl?ringid=artdoll
����� �����������
http://www.fadeeva.com/Russian/animals_ru.html ���������� ������ �������;))))
http://junegoodnow.com/artistdolls.html �������:)
http://www.studiowillich.com/SDpage.htm
http://www.bonniesdolls.com
���� � ����� ��������� �������: http://www.illness-illusion.com/main/main.htm
� ���:http://dream.gothiclibrarian.net/
http://members.jcom.home.ne.jp/hizukidoll/
�������� ���� � ������� (����� ������)
http://www.dollart.ru/rus/artists/
http://www.alexandra.ru/
http://www1.linkclub.or.jp/~hisaba/zzz/dl_top.html
http://home.tula.net/amr-museum/bogoroditsk/russ/exibit.htm
����� ������ ���������, �����-����
http://www.dolly.aaanet.ru/gallery56.html
����� ������� ����, �����-����.
http://www.blastmilk.com
��� ����� ���������� �����
���������� ������ ���� ���������� - �����������:
http://gal-gri.narod.ru ������ ���������
http://orlomarina.narod.ru ������ ������
����������� �����, ����� ���������� ���:
http://www.bambola.ru
����������� ������������ �����
http://www.camilleallen.com/
http://www.n-collection.ru/
������������������ ������ �� ��������� �����
�����, �� ��� ������?
http://vavi.ru/img/dolls/01.jpg
http://www.cosplay-land.narod.ru/konkurs.html - �������� �������.... ����� ��� ������� �������������... :)))
����� ���������� �������� �����!!
http://www.jttk.zaq.ne.jp/higuri/dtig/kira/kira.htm
http://www.kiradoll.com/
http://www.faeryhaven.com/gallery.html ��� ���� ���� ��� ���������� �����
http://www.libraryreference.org/index.php?c=Arts/Crafts/Modeling_Compounds/Polymer_Clay/Dolls ����� ���������� ������ ��� ���������� �����
���������� �� ������
http://www.masterovoy.com/mario.htm
http://www.sarahniemela.com/gallery/gallery.htm
http://www.beck-vostok.de/dmoz.php3?/Shopping/Crafts/Dolls/Art_Dolls/
� ����� ������ ���� ���������� ������ �� ����
http://www.n-collection.ru/shop/
��������-����� ��� �����������. ��������, ���������� ����������, �������� ��������. ���������, ����������, �������
�������� !!!
http://www.marilynstivers.com/
� ��� ��� ����� ���������
http://www.ruthmarks.com/NIADA%20for%20web/NIADA%20for%20web.html
"�������� � ��" http://www.toptgin.narod .ru/ �������� ������ ��� ����������,�������������� � ��������� ��������� � ������������� ������ ������� - ���������� �����!
http://www.patriciarosestudio.com/html/tutorial.html - �� ���� ���������� :)
http://www.zephyr.dti.ne.jp/~runo/eng/eindex.html
http://www.mindstorm-inc.com/pages/vid/sc01.html
http://www.mindstorm-inc.com/pages/vid/sc02.html
http://www.toymania.com/columns/spotlight/psycholdd.shtml
��������� �����: �� ��������, ������ ���������... �� ��� �����������))
http://doll.mda.or.jp/~naruto/ ����� �� ������ (���� ������� ��������.)
http://www.ventsel.ru/Gallery9.html - ����� ���������� �����, ������� ������ ���!!!
http://www.ozzdollsfactory.com/galerie.php
�������� ������, �������� ��� ��������� ������
http://kukladom.nm.ru
���������� ��� ����� �� ������� �������� � ������������
�����: ��������� ����� ������� ������ |
������ ��������� pawy
����� �� ��������������� �������� |
������ |

6509 ���������� |

|
����� �� ��������������� ��������
����� �� �������������� ��������
�����: ��������� ����� �������� ����� |
����������� (0) |
������ ��������� pawy
����� �� ���������� �������� |
������ |
|
6955 ���������� |

|
����� �� ���������� ��������
����� �� ���������� ��������
�����: ��������� ����� �������� ����� |
����������� (0) |
����� �� ���������� ����� |
����� �� ���������� �����
http://garmoniavdome.ru/lepka/
�����: ��������� ����� |
�����-���� |
������ �������� �� �, � �� ������ ����������� � ��������� ����, ����� �� ��������.
������� �������� � Mail.ru - ������ ��� � � ����� ����� ��������� ������ - ����� � ��������.
�����-���� - ��� ������������ �������, ����������� ������� ��������� ������� ��� ����������� ��������.
http://c-a-m.narod.ru/techno/papie-mashe.html
http://www.papiermache.ru/
http://www.remstroi.biz/text/text78_papmashe.html
http://remeslo.okis.ru/12-papiemashe.html
http://community.livejournal.com/master_klass/91314.html
http://dances.nsk.su/library/masks-create.html
http://blogs.privet.ru/community/YARMARKA/40393386
http://www.kengurenok.ru/needlework/papier-mache
http://www.prazd.info/master/106
http://rukodelienn.forum2x2.ru/forum-f34/tema-t40.htm
http://www.sdelaysam.info/paper/papier.shtml
http://www.manga.ru/doll/view.php?id=2554
http://www.mukhin.ru/besthome/lepka/60.html
http://art.phi.co.il/blog/2009/04/19/2936/#more-2936
http://community.livejournal.com/textile_design/11976.html �� http://ankhin.livejournal.com/
http://minchanka.by/hometheater/venetsia.html
http://minchanka.by/sami/ritsar2.html
http://www.liveinternet.ru/showjournal.php?journalid=1248732&keywordid=427451
��� ������ ������� ����� �� �����-���� http://www.rochonsculpture.artspan.com/links.php?5319 ���� ������������, �� ������� �������
���� ��������� ������� ��������� http://art.phi.co.il/blog/category/%d0%bc%d0%b0%d1...d0%bb%d0%b0%d1%81%d1%81%d1%8b/ ������ ������� ������-�������, ������ � ��������
������������� ���� �� ������ «������ ������» http://handmade.idvz.ru/forum/forum_posts.asp?TID=83&PN=1&TPN=15
|
�����: ��������� ����� |
������������ ���� ��� ����� |
����� ����� ���������� � �������� ������ �� ������������ ��������� ����.
"� ���� ���������� ��� �������� ������������ ����, ����������� �� ������.
���� ����� �������, ��� ��� �� ������, � ������������ ������� ���, �� ������ ���������� ���������� (�� ������� ������ �������� � �������).
�� ����� �������� ������ � ������, ������ t°120 �������� ��� ������������ ��� ����� ��� �� ��������� �����, �������������� ������ �� ���������� �����.
��������: Puppen Fimo, ������ "������" �1 ��� ������ "�����" �6 ��� ������ "�������", ��������� �� ����������� ���������� �������� t° ���������� ��������, ���. �-���������, http://www.anles.ru. ��� ������� �������� ��������, ����� ����������� ��� ����������, ��������� ������ ��������. ����� ������ ����������. ������ ��������� (�������� �������� � �����������, ��������� � �.�.) �����, ���������� (����������), ������� ������ �������� (�������, �� ���������������, ��� �������), ������ .
�������...
|
�����: ��������� ����� ����� ����� |
�� �� ����� �� ��������� �������. ������� |
�� �� ����� �� ��������� �������. �������

�����: ClayART
��� ���������� ������ ������ ��� ����������� ��������� ��������� � �����������:
- �������� ������ ��� ������� ��� �� �������� ������
- ��������� � 28
- �������� ������
- ������� ���� � ��������� ����
- ���� ���
�����: ��������� ����� �������� ������ ����� ������� |
����� ��������� �� �� ��������� �����! |
����� ��������� �� �� ��������� �����!
������� ������ http://members.home.nl/asrai/cursus-en.htm
|
The foot in this tutorial is from heel to big toe about 1.8 inch long. Always use the head as a comparison for the size of the feet. The length of the feet is equal to the size of the head. |
 |
 |
|
In this tutorial I will only make the right foot. Try to work simultaneously on both feet because it is hard to make an equal looking foot afterwards. You start off by making a 2.5 inch long cylinder shaped roll of clay, about 0.8 inch thick (pict. 1). Bend the roll of clay in an angle like in pict. 2. The top will become a part leg and the other part the foot. |
|
 |
 |
| Flatten the clay by pressing it together between thumb and point finger towards the 'toes'. Be careful not to make it too flat. (pict. 3 + 4). | |
 |
 |
|
Now it is time to form the heel. Push/smear some clay from under the foot backwards (towards the heel) and push/smear some clay from the lower leg down (towards the heel) (pict. 5). This way you'll get more clay on the heel and a better shape at the sole of the foot. Press the clay with your thumb on the inside of the foot to make it more hollow (pict. 6). |
|
 |
 |
|
Before you can make incisions for the toes, the front of the foot needs to be reshaped a bit. Cut off a piece of clay slantwise starting at the 'big toe' (pict. 7). After this smooth the edge with your fingers (pict. 8). |
|
 |
 |
|
Look at the foot to see if it's not too thick, if it is you can make it thinner by smearing the clay from the instep to the leg. You can also smear clay upwards just above the heel towards the leg, this way the foot will become slimmer (pict. 9). Sculpt as smooth as possible, use a damp finger to rub the clay for a smooth finish. Now you can make incisions for the toes with the help of a sharp tool. Don't forget the big toe needs to be bigger than the other toes (pict. 10). |
|
 |
 |
|
Spread out the toes gently so you have more working space (pict. 11). Hold the toes one by one between your point finger and thumb. While warming the clay by the warmth of your hands, very gently roll the toes slightly back and forth, so the inside of the toes will also become round. This will probably make the toes become too long but that doesn't matter (pict. 12). When the toes have the right thickness and are nice and round, you can cut them off at the right size. Smooth the edges of the toes with your fingers. |
|
 |
 |
|
You can use a sculpting tool for the areas that are difficult to reach, like between the toes (pict. 13). If everything is nice and smooth, we are ready to make the nails (pict. 14). |
|
 |
 |
|
You could use the small hollow chisel again as I used in the hands lesson, but this time I will sculpt the lines by hand. For this I used a sharp sculpting tool, the one in pict. 10. You could also use a small knife (not too sharp). Press left and right from the 'nail' a straight line in the clay (pict. 15). Now you have to connect those two lines, this is a very precise work. You could also use a sharp wooden toothpick for this (pict. 16). They start to look more and more like real nails. |
|
 |
 |
|
Some polymer clay brands can become overworked, it can become too soft. So at this time I gave the nails some rest and focused on the sole of the foot. Halfway each toe I draw a line on the inside, except the small and the great toe (pict. 17) The nails weren't finished yet. We also have to connect the lines at the front of the toe with a sharp tool, as you can see in pict. 18. |
|
 |
 |
|
Draw lines on the 'knuckle' area of the toes with a small sculpting tool or toothpick , the same way as I did in the hands tutorial. This makes it look more natural (pict. 19). The sole of the foot needs some more modeling. Place 3 slices of clay on the heel, ball and big toe, like in pict. 20, carefully blend the seams with your sculpting tool or fingers until the seams are blended in with the sole. |
|
 |
 |
|
Moisten your finger and polish everything smooth.This also works for removing unwanted fingerprints. At pict. 21 you can see a sideview of the foot, it looks much better now because of the modeling we did at the sole of the foot. Use a sculpting tool or rubbertip brush to add lines to accentuate the tendons/bones of the foot (pict. 22). |
|
 |
 |
|
Rub the lines with a wet finger to blur and make it look more natural (pict. 23). Now it's time to make the knuckles on the ankles. Before you start check out the foot from all sides to see if it still looks okay (pict. 24). |
|
 |
 |
|
Pay attention to the ankle area that it is not too fat. If it is you still have the chance now to sculpt it slimmer (pict. 25). Place a small slice of clay on both sides of the ankle where the knuckle should be. Study your own foot to see how this looks (pict. 26). |
|
 |
 |
|
Blend the seams with a sculpting tool (pict. 27), don't blend it too wide because it wouldn't look like bone anymore. Just blend only the edges. Gently rub over the knuckles with a slightly wet finger to make it smooth (pict. 28). |
|
 |
 |
|
The foot is almost ready now. Before curing check the feet from all sides and correct any mistakes, don't forget the sole of the feet (pict. 29 + 30). |
|
 |
 |
|
Cut off the leg at about 1.40 inch. Use a wooden toothpick to make a hole in the leg, make sure it's deep enough, about 0.80 inch. Twist the stick a little to make the holes wider so it will fit the armature. I use a small wooden board with big nails through it, as a stand to place the feet on (pict. 31). I pre-heat the oven at 220-266 Fahrenheit and bake the feet for about 30 minutes. Always use an oven thermometer to make sure the oven is at the right temperature, because if it gets too hot the polymer clay may turn yellow/brown. Leave the feet to cool in the oven before you take them out (pict. 32). |
|
 |
 |
|
After cooling down I made it a little smoother by sanding the clay with a polishing sponge. Sometimes rubbing it with a soft cloth is enough. If there are any small scratches visible, you can gently touch them with some acetone on a brush and usually they disappear. Use very little acetone because too much can give white spots on the clay! Next step is painting and coloring the foot. This can be done by either acrylics, watercolor paint or water- or oil based patina. For this foot I use watercolor paint and acrylic paint (pict. 33). First I rub the clay in with some skin powder make-up to give it a warmer tone. The color of the nails was created by blending different shades of watercolor paint. I use a thin paintbrush to apply the paint, I paint the nails several times, letting it dry in between coats. This paint is transparent and doesn't really stick to the clay. So you need to do this a few times, some of the paint's pigment will be absorbed by the clay, just enough for a natural color (pict. 34). |
|
 |
 |
|
I mix white acrylic paint with a bit black or yellow to get an off-white shade. With a very thin painting brush I paint the 'half moons' and the 'nail borders' (pict. 35). After the paint is dry I add some Fimo gloss varnish (not the water-based one) to finish the nails (pict. 36). I like this varnish a lot, it will not turn yellow and even after several years it will still look glossy. Now the foot is finished...! (pict. 37) |
|
 |
|
|
You can now attach the feet to the armature. If the hole in the leg is too wide you can add some papertape to the wire for a better fit. Later on you can use some glue (for instance hot glue gun) to attach them permanently.
|
|
 |
|
| The best moment for this depends on the kind of clothes he or she will be wearing. Sometimes it is easier dressing the doll, if the feet can still be detached from the legs. | |
 |
|
�����: ��������� ����� ����� |
����� ��������� �� �� ��������� �����!! |
����� ��������� �� �� ��������� �����!!
����� � ������������ �����! �� ����� ��������!!!!!!!! ������� ������! �������� ���� �� ������! http://members.home.nl/asrai/cursus-en.htm
|
The hand I made for this lesson is from the palm of the hand to the finger tips about 1.80 inch. It is a bit bigger than I usually make, smaller gave some photographic problems 'cause I don't have a macro lens. |
 |
 |
|
The size of the hands depend on the size of the head. The length of a hand is equal to the length from chin to halfway the forehead. A face is usually about 2 hands wide. This can always vary a bit depending on the kind of doll. You start off by making 2 cylinder shaped rolls of fimo, in this lesson they are about 2.6 inch long and 0.60 inch thick (pict. 1). Sculpt one end in a kind of spoon shape by pressing the clay with your thumb. Sculpt the hand thinner to the "finger tips' by pushing it more flat (pict. 2). |
|
 |
 |
|
For this lesson I'll continue with the making of the right hand. Try to work simultaneously on both hands because it is hard to make an equal looking hand afterwards. To make a wrist, roll the clay between thumb and point finger like pict. 3 You now have a roughly shaped hand with a part arm. Make the arm thinner if necessary. Smooth the hand nice and round. The hollow part is the inside/hand palm of the hand (pict. 4). |
|
 |
 |
|
At pict. 5 you see the back of the hand. You will now make 3 incisions with a knife for separating the fingers. The thumb will be added later. Because this will be a right hand, the incision for the little finger is cut a little further than the other incisions, take your own hand as example. Bend the 2 outer fingers gently side wards so you have more space (pict. 6). Hold the fingers between your point finger and thumb. While warming the clay by the warmth of your hands, very gently roll the fingers slightly back and forth, so the inside of the fingers will also become round. You can use a sculpting tool for the areas that are difficult to reach. |
|
 |
 |
|
When the two outer fingers are smoothed, you start with the middle two. Bend them slightly apart and again roll them gently back and forth to round off the edges on the inside of the fingers (pict. 7). Do this very slowly, it is important that while you are doing this, the clay will be warmed by your fingers so they don't rip at the beginning. Use a sculpting tool to smooth the areas that are hard to reach (pict. 8). |
|
 |
 |
|
Because of the smoothing of the fingers they usually will get a little too long, cut them off at the right size (pict. 9). Round off the finger tops again (pict. 10). |
|
 |
 |
|
The fingers of the hand should now look something like pict. 11 We will now continue with the inside of the hand. Make the dimple of the hand a little more distinct by pressing the palm slightly with your thumb and smudging clay towards the wrist. (pict. 12). |
|
 |
 |
|
Press the clay on the wrist like in pict. 13, so you will clearly see the difference between the wrist and where the handpalm begins (pict. 14). |
|
 |
 |
|
Next step is making a thumb. Sculpt a pear shape piece of fimo, make an incision in the broad part of the thumb' (pict. 15) Pull the parts a bit side-wards and place the thumb on the hand as in pict. 16. |
|
 |
 |
||||||||||||||||||||||||||||||||
|
Push the thumb firmly against the hand, blend the seams on all sides with a sculpting tool and smooth with your fingers (pict. 17-18). When the thumb is too long or thick, cut off a piece and re-shape the thumb. |
|||||||||||||||||||||||||||||||||
 |
 |
||||||||||||||||||||||||||||||||
|
Nails can be made in many ways. You can draw lines with a knife or other sharp tool. You can also slantwise cut off a piece of a lemonade straw and use this to make an indent of a nail. For this lesson I used a little hollow chisel. They are normally used for chiseling wood but they are also very handy (when you turn them around) for making nail prints on clay fingers (pict. 19). Use a sharp tool to correct the lines if necessary (pict. 20). |
|||||||||||||||||||||||||||||||||
 |
 |
||||||||||||||||||||||||||||||||
|
Don't forget to attach the lines at the fingertips, so the nails will look like they lay on the finger (pict. 21). This is very precise work. We will now continue with the palm of the hand. You can make it as detailed as you like, it also depends on the pose of the doll and if the palms of the hands are visible or not. If they are not visible you can keep it more simple. Place a C-shaped slice of fimo on the palm and an extra slice at the beginning of the thumb (not too thick) as in pict. 22. |
|||||||||||||||||||||||||||||||||
 |
 |
||||||||||||||||||||||||||||||||
|
Press the slices and the seams firmly, gently blend the seams using a sculpting tool (pict. 23) make sure the palm looks natural. When all the seams are blended (pict. 24), moisten your finger and smooth the hand palm by rubbing it with your finger. |
|||||||||||||||||||||||||||||||||
 |
 |
||||||||||||||||||||||||||||||||
|
Now it is time to add some lines to the hand palm, you can use a thin sculpting tool for this (pict. 25). Look at your own hands where the lines should be. Add some lines at the beginning of the fingers using a mini tool or a toothpick (pict. 26). |
|||||||||||||||||||||||||||||||||
 |
 |
||||||||||||||||||||||||||||||||
|
Also draw lines on the inside of the fingers, again watch your own hand closely to see how this looks. (pict. 27). The inside of the hand is finished now, we turn the hand around and continue with the back. It depends on the kind of hands you want, how you will proceed. If you want real smooth elegant hands, you better not add big knuckles. Just a few 'knuckle lines' at the place of the knuckles will look nice too. If you want more detailed hands you proceed like this. Place thin slices of fimo in the middle of each finger and slices just under the fingernail. You also add slices fimo on the knuckles of the hand (pict. 28). |
|||||||||||||||||||||||||||||||||
 |
 |
||||||||||||||||||||||||||||||||
|
Carefully blend the seams with your sculpting tool until the seams are smoothened. (pict. 29-30), don't forget the sides of the fingers. Try to hold on to the shape of the knuckle, don't blend too wide, or it might end up looking more like a tumor than a knuckle... ;-). This is very precise work that will take some time. |
|||||||||||||||||||||||||||||||||
 |
 |
||||||||||||||||||||||||||||||||
|
It still looks a bit rough at this point. Moisten your finger and 'polish' the fingers to make them smooth, without fading out the knuckles (pict. 31). Between the knuckles on the hand, you draw some lines with your sculpting tool towards the arm, to accentuate some of the muscles (pict. 32). Rub the lines with a finger to blur and make it look more natural.
|
|||||||||||||||||||||||||||||||||
�����: ��������� ����� ����� |
��������� �� ��������� ������� |
�����: ��������� ����� �������� ������ ����� |
���������� �� ���. �����. �������� ������-����� |
���������� �� ���. �����. �������� ������-�����.
��������. ����� ����� ������.

���������� ��� ���������� ������ ������ ����������� ���������� �� ������ ��� � ������ ������� ����� �� ���������� �����. ��������� ��������� �������� � ������� ��������� ����� � ����� ����� ���������� �������� ������ ��� ��������
�����: ��������� ����� ����� |