(� ��� 173706 ������� �� ����� ������������ ����� �����)
������ ����� ������������ ↓
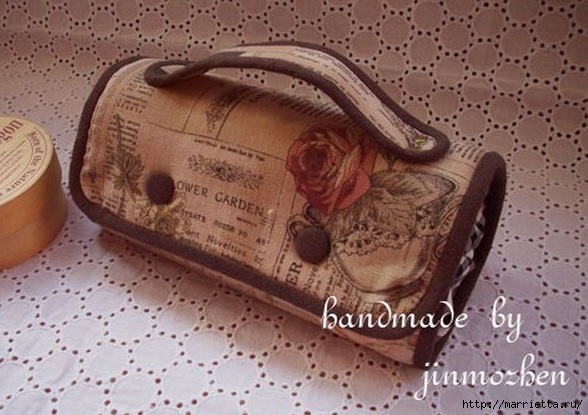
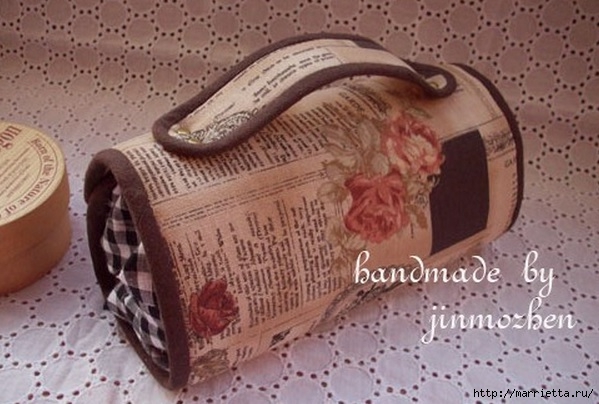
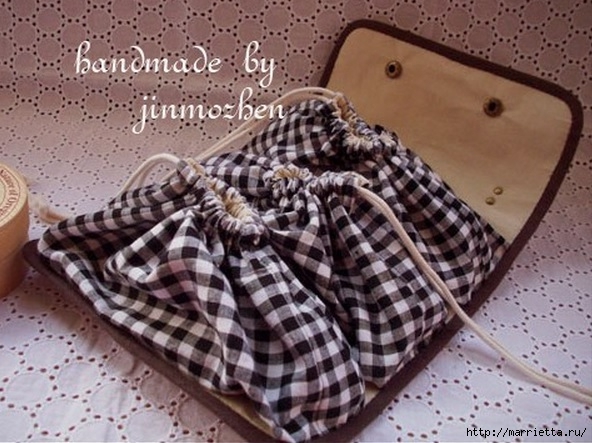
������� ������ ����� ���� ���� ����� ��������� ����� ������ �������� �������� ������� ������� ������� ��������� ���� ��� ������� ����� ������� �������� ����� ������� ����� ���� ����� ����� ����� ���� ����� ������� ����� ������ ��������� ������� ���� ����� ������-����� ������������� ���� ����� ������� ����� �������� ������ ������� ������� ������� ������� ��������� ����� ������������ ����� ����� ������ ������ ���� ����� ����� ��� ������� ������ ���� ��������� ���� �������� ����� ���� ����� ����� �������
��� ����� ������� �����. �� ������ ������������ |
��������� ��� �������� ������ ��������� ������� � ������� ��������. �����, ���������� ����������.
� ������ ����������� ������. ��� ����� �������� �� ������� �����, ��� ������-������ ���������� ���� �� ����� ����� �����. � ���� ������ �� ������� �������� ������, � �� ��� ��� ����������� �� ����. ���� ��� �������� �� ���������� �������, ���������� �������������� ��� ������� �� �������� ������.
�����: ����� ������-����� |
���� �������-����������: ��������� ���� � �������� |
����� ������� ����� ��������� ����� - ��� �������������, ����������� � �������� �� ������ ������ �������. ��������� ���� � �������� �������-����������� � ����������� ��� � ���� �����. �������, ��� �� ����� ������ ��� �����, � ���� ������ ����� ������� ������ ��������� ������.
�����: ����� ������-����� |
������� ����� ������� � ��������. �� ����� ���������� |

����, ������ :) ���� �� ����, ��� ��� �� ���� �����? �� �������� � ������ ��...
�������, ��� ������ ������ � �������� ����� ������� ������ �������.
������� � �������� "������� ����� �����". ������, ������� �������� :)
����, ��� ��, ��� ��� ����� ������������ � �������� "��������".
�����: ����� ����� ������-����� |
���������� ������� �������� �������-���������� |
�����. ���������� ������� �������� �������-����������
�����: ����� |
������� �������� �� ������ � ����� ���������� �����? �����! |
������ ����� ���������� �����? ����������) ����������� ������ �������� ���� ������-����� �� ������ ���� ���������� ����� - ���������� � �������� �������. ����� ����������, ���� �� ��������� � ������ ������-������ - ��� ���, ������ ������ ������� �� ������ ������� �������� ��� �����
�����: ����� |
����� � ��������-�����������.�� �� ������ |
��������� �������,������� ������ � ������, �� ������ � ������� ��� ����� ����������� ����� �������� �������. ��� ����� ������� ����� ����� �����-�����������, ������� �� ������� ����� �� ��������� ���������� ������������ � �������� ����� ��� �������.


�����: ����� ������-����� |
��� ����� ���������� �����. ������-����� |
������� ������������) ���� ��� ���������� ����� ����� ���������� �����. ������ ����� - ������������� � ������, ��� ����� ������ ��� ��������� ��������� ��� ������� � ������. ������� ������-�����?


�����: ������-����� ����� |
��� �����: ������ ��� � ����� ����� |
�����: ����� |
����� ������ |
������� |

Can't you picture Harrison Ford slinging this amazing duffle over his shoulder as Indiana Jones?! We blended heavy canvas and faux leather with webbing and brass zipper accents for the dashing exterior. Inside is a tough rip-stop nylon lining. Even if you're not a world-renowned archeologist and adventurer, this bag is is great way to pack your stuff, whether you're heading across town to the gym or getting away for the weekend. Father's Day is coming up, and this would make a very nice gift for your personal action hero. The combination of fabrics, colors and textures has the perfect feel – a little bit retro and a whole lot cool (just like Dad).

Our finished bag looks like you could have grabbed it off the shelf at Eddie Bauer®, but don't let the professional finish scare you off. Achieving a polished end result is often easier than you might think. Read through the project a few times before you start, then if a particular part has you stumped, try doing it with scraps to get the hang of it before moving on to your final fabric. And of course, we offer our trademark S4H details and photos to help you through each step.

We do strongly recommend the heavy canvas and faux leather combo to insure your duffle has the stability and durability you want for active, on-the-go (safari style) use.

The bag finishes at approximately 22" wide x 11" high.


NOTE: As mentioned above, we used the built-in AcuFeed Flex™ system on our Janome MC8900 QCP with the optional narrow foot VD throughout the entire project. If you don't have a built-in feeding system, attach a Walking foot or similar. It helps keep all the layers involved in this project feeding more smoothly.


Contributors
Project Design: Alicia Thommas
Sample Creation and Instructional Outline: Michele Mishler
�����: ����� ������-����� |
������� ��� ������� HELLO KITTY. �������� |
�����: ��� ������� ����� ������-����� |
������� ��� ���������� ������ � ������ |
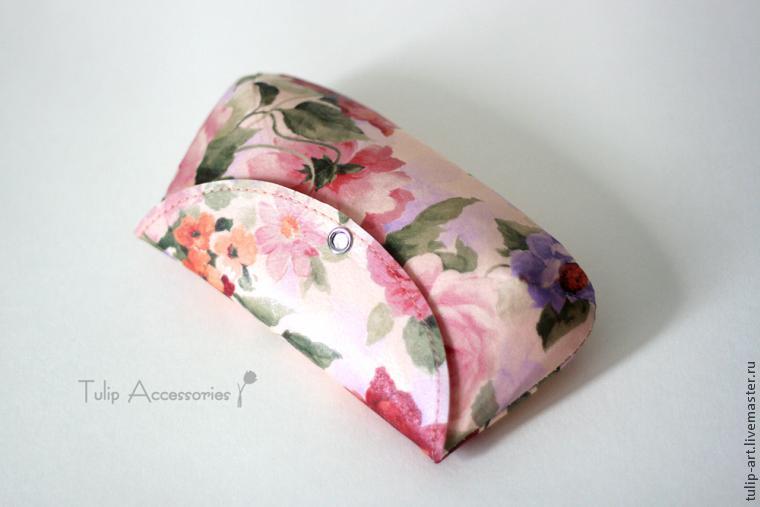
���� �����: Tulip Accessories (�������)
 ������ ���� ����� ��� ����� ���������� ������� ���-�� ������ � ���������, � �������� ���� ���������������� ��������-������ ��� ������� � ����� �������, ������� ����� ������� � 5 ������� ����� ��������� �� 15-20 �����. ������� ���������� �����������, �� ����� ������������ ��� ����������, �����, ������� ��� ������ ��� ����-������ ���. ������� ����� ��������� � ����������� �� ���� ������, ����� ��������� ������� ��������, ������� ������ ����� ������ ������������� ����������� ��� ���� �������.
�����: ����� |
���� ������ ������� �� ������. ������-����� |
���� ������ ������� �� ������. ������-�����
�����: ����� ������-����� |
������-�����: ���� ����������� ��������-����������� |
 ���� ���������� ������ �������� ������-����� �� ������ «���������» ��������-������������!
������ ��������?
�����������, ������� ����������� ����� �� �������� ��������� ��� ��������� ��������� � ���������? �� ������? �������� 5-10 ���� � ���� �� ������� ��������, � � ����� � ���� — ��������� ���������� ���� � ����! �������� — ����������� ����������� ��������: �� ������ ���������� ����� ������� �� 1000 ���. ���� ��� ���������� �������������� �������� �� ������ �������� — ��� �� ����������� �� �����, � ������ ����������� �� ������� ���������. �� ���� ������� ��������������.
�����: ����� ������-����� |
��� ����� ����� - �������. ���� ������-����� |
��� ����� ����� - �������. ���� ������-�����

�����: ����� ������-����� |
��� ����� ������ ����� - �������- �� �� ������ �������� |
������ ������� ���� �������� �����-������ ���������� ������� � ����� ������������� ������-�����.
� ����� ������������� ���� �� �� ����, �������� ����� ������������� ��� ������� �����.
������� ��.
���� ������� ������ �������� 18 ����� (� ������� ��������� �� �����, ����, ���).
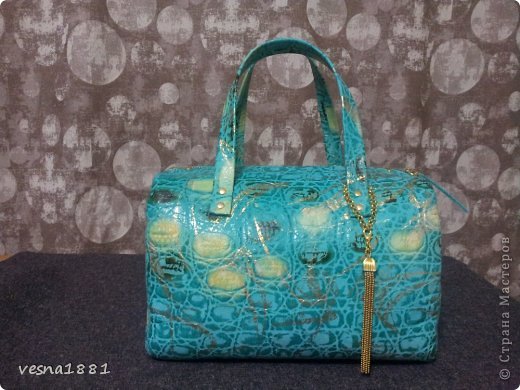
������ �� ������ ������������ ����� ������� ����� VESNA
����, ������� � ��� �������� ��� � ��� ����� �� ����. �������� ������� ���� �� 2014�. ������� ������ � ���� ���� ������ ������� - �������, �������� ���-����� ��������� ��������� � ��������� � ������. ��� ������ ��� �����������: ���� (����������� ������ ����������� � �������� ��������), ����������� ������� ��� �������� �������� ����� �����, ����� ��� ��������� � ���������, ������ ��� ����� � ���������, ������, �������� �����, �������, ��� ��� �������, �������� ��� ����, ����, ������� ��� ����, ����, �������, �������, ������� , ������� ������, ������� ��� ������� ������ � �������.
�����: ����� |
������ ������� ����� � ���������� ������ (������) |
���������� � ����� ������� ������ ������� � ����������� ��������. ��� ����� ������������� � �������, �������� � ��� ������ �� ����, � �� ���������. �� ���������� Drops.
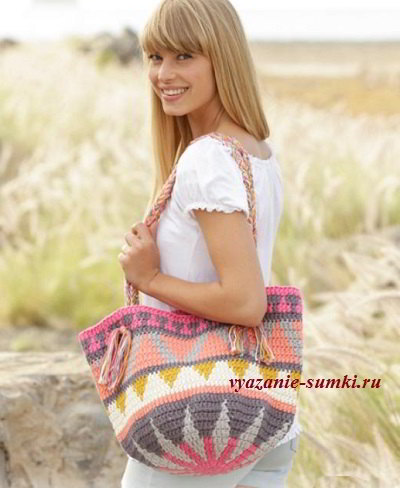
������� �����: ������ — 43 ��, ������ — 33 ��.
��������� ��� �������: ��� ����� DROPS PARIS (������������� ������, 75 � �� 50 �) ��������� ������: 200 � �����-����� (�24), 150 � ����������� (�01), 100 � ������-����� (�23), 100 � ����-������� (�06), 100 � ����� (�17), 50 � ��������� (�41); ������ 4,5 ��.
����������: ���� �� ������ ������� ���������� �����, �� ��� ����� 600 � ����� DROPS PARIS.
��������� �����: 13 �� � 6 �����, ��������� ������� �����, �������� ������� 10 �� 10 ��.

�����: ����� |
����� ��� ����� �������. ������-����� + 2 ����� |
http://robertacrocheecia.blogspot.com/2011/01/pass...cas-de-croche-para-bolsas.html
�������, ��� �� ��� ����� ��� ���������� ������ �����, �������� ���������� ��������: ��� ������ � �������? ������ �� ������ ��,��� ���� � ������� (���� ����) �������� �� ����� � �������. ���� ������� ���� ������� ����� ����������������. �������� ����!
�������� ��� ![]() ������
������


�����: ����� |
����� � �������� ������� |
��������� ����� - ������ � ���� �������� ��������:
1.
2.

�����: ����� ����� |
�����-���������� ��� �����-"�����������" ��� ������� |


�����: ����� ����� |
�����-������ � ������� ���������. �� |

")
")
")
")
")
")
")
")
")
")
")
")
")
")
")
")
")
")
")
")
")
")
")
")
")
")
")
")
")
")
")
")
")
")
")
")
")
")
")
")
�����: ����� ����� |


