-–убрики
- ’≈Ќƒ ME…ƒ (967)
- ƒл€ ребенка (280)
- Ўитье (135)
- ¬€зание крючком (119)
- ”крашени€ (95)
- ƒл€ рукодели€ (88)
- ÷веты (85)
- ¬с€кие мелочи (84)
- ∆изнь старых вещей (83)
- Ћепка - глина, фарфор, пластика (82)
- ƒл€ дома (79)
- ƒекупаж (72)
- Ћенты, кружева (71)
- »з картона, коробки (53)
- »з бумаги (41)
- ƒл€ кухни (35)
- ¬итражи, роспись (32)
- ¬ышивка (25)
- ћыловарение (22)
- ѕлетение из газет (22)
- ¬€зание спицами (21)
- “ильды, куклы (18)
- —крапбукинг (18)
- Ѕутылки, банки (18)
- ѕеределка одежды (17)
- Ўкатулки (16)
- ћешковина (14)
- Ѕисер, бусины (13)
- ‘ото дл€) (9)
- »з пласт. бутылок (8)
- —умки (7)
- оврики (7)
- √ипс (7)
- офейное (6)
- онфетное (6)
- —оленое тесто (6)
- ‘етровое (5)
- ожа (4)
- ¬ал€ние (4)
- яичные лотки (3)
- »з пакетов (3)
- “рафареты (3)
- —иликон (3)
- ћозаика (3)
- артины (3)
- —вечи (2)
- виллинг (2)
- “опиарии (1)
- ѕапье-маше (1)
- ¬ыжигание (1)
- ƒ≈“— ќ≈ (523)
- ”крашени€ (141)
- «аколки, обручи (84)
- »грушки (79)
- –азвитие (68)
- ƒл€ детских игр (67)
- остюмы (64)
- ¬€зание (41)
- –исование (36)
- јппликаци€ (31)
- „тение (30)
- ”роки (26)
- Ўапочки (25)
- Ћепка (24)
- ѕрописи (16)
- ѕлать€ и нар€ды (12)
- ѕриродные материалы (9)
- ѕоделки (8)
- »з пласт. бутылок (6)
- јнглийский (5)
- ќпыты (3)
- ѕрически дет€м (3)
- Ѕисер (3)
- –≈÷≈ѕ“џ (315)
- ¬ыпечка сладка€ (115)
- ƒетское (69)
- ƒесерты (65)
- «акуски (58)
- ¬ыпечка несладка€ (46)
- ”крашени€ (34)
- ¬торые блюда (31)
- ћолочное (19)
- ќвощи (17)
- «аготовки (15)
- –ыба (11)
- урица (11)
- ‘арш (10)
- ѕельмени, вареники (10)
- Ќапитки (9)
- —винина (5)
- ѕикник (3)
- √арниры (3)
- ѕервые блюда (1)
- ѕ–ј«ƒЌ» » (230)
- Ќовый √од (106)
- ѕодарки (81)
- ѕасха (40)
- –ождество (26)
- ¬алентина (24)
- ƒень –ождени€ (12)
- ѕодарки мужчине (7)
- 23 феврал€ (6)
- 8 ћарта (5)
- ќткрытки (1)
- Ћ≈ѕ ј (185)
- ћ (121)
- ƒл€ работы (51)
- »деи (33)
- –ецепты (19)
- »нтересное (140)
- »ллюстрации (111)
- ѕрирода (12)
- Ќостальги€ (11)
- ћилашки (7)
- ѕрикольные (4)
- реатив (4)
- расивые места (4)
- ѕсихологи€ (3)
- –еклама (2)
- ƒЋя ƒќћј (133)
- —амоделки (74)
- ’ранение вещей (46)
- ƒомоводство (22)
- ћебель (20)
- ƒизайн (20)
- ѕолки (9)
- ÷ветоводство (3)
- –ј—ќ“ј (63)
- ƒл€ лица (32)
- ЌатурCosmetics (18)
- ƒл€ волос (18)
- ƒл€ тела (13)
- ѕохудение (10)
- “ренировки (6)
- ћаки€ж (1)
- «ƒќ–ќ¬№≈ (16)
- —редства (10)
- —осуды (2)
- ќчищение (1)
- ћќ» “¬ќ–≈Ќ»я (5)
- ‘отошоп (3)
- омпьютер (2)
- ‘отограф (1)
-ѕоиск по дневнику
-ѕодписка по e-mail
-»нтересы
-ƒрузь€
-ѕосто€нные читатели
-—ообщества
-—татистика
—оседние рубрики: яичные лотки(3), Ўкатулки(16), Ўитье(135), ÷веты(85), ‘ото дл€)(9), ‘етровое(5), ”крашени€(95), “рафареты(3), “опиарии(1), “ильды, куклы(18), —умки(7), —оленое тесто(6), —крапбукинг(18), —иликон(3), —вечи(2), ѕлетение из газет(22), ѕеределка одежды(17), ѕапье-маше(1), ћыловарение(22), ћозаика(3), ћешковина(14), Ћепка - глина, фарфор, пластика(82), Ћенты, кружева(71), офейное(6), онфетное(6), ожа(4), оврики(7), виллинг(2), артины(3), »з пласт. бутылок(8), »з пакетов(3), »з картона, коробки(53), »з бумаги(41), ∆изнь старых вещей(83), ƒл€ ребенка (280), ƒл€ кухни(35), ƒл€ дома(79), ƒекупаж(72), √ипс(7), ¬€зание спицами(21), ¬€зание крючком(119), ¬ышивка(25), ¬ыжигание(1), ¬с€кие мелочи(84), ¬итражи, роспись(32), ¬ал€ние(4), Ѕутылки, банки(18), Ѕисер, бусины(13)
ƒругие рубрики в этом дневнике: ’≈Ќƒ ME…ƒ(967), ‘отошоп(3), ‘отограф(1), –≈÷≈ѕ“џ(315), ѕ–ј«ƒЌ» »(230), ћќ» “¬ќ–≈Ќ»я(5), Ћ≈ѕ ј(185), –ј—ќ“ј(63), омпьютер(2), »нтересное(140), «ƒќ–ќ¬№≈(16), ƒЋя ƒќћј(133), ƒ≈“— ќ≈(523)
ќснова дл€ венка своими руками. “ермофлекс. |
Ёто цитата сообщени€ Lira73 [ѕрочитать целиком + ¬ свой цитатник или сообщество!]
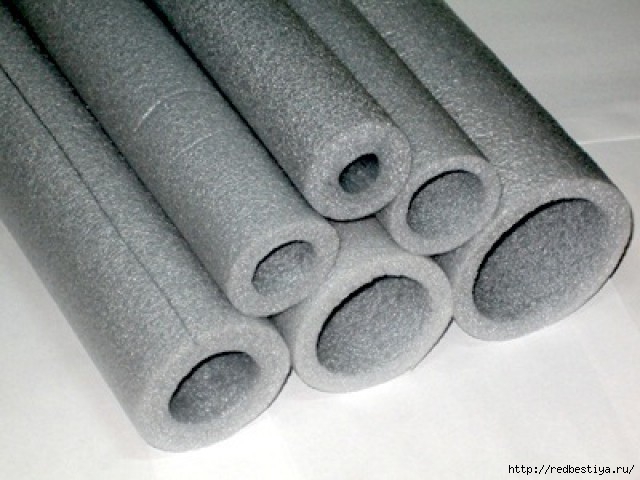
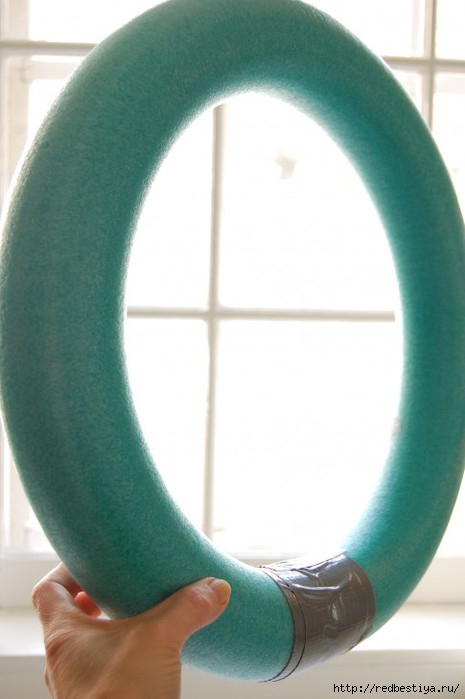
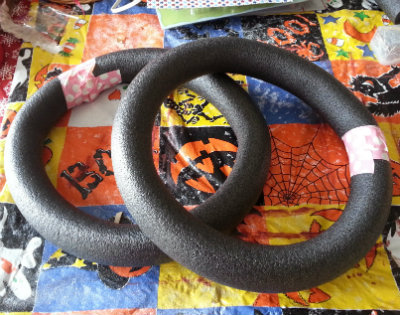
ѕриближаетс€ —ветлое ’ристово ¬оскресение, и кажда€ хоз€йка заранее обдумывает праздничное меню, закупает продукты и уже задумываетс€ над праздничным декором. ѕару лет назад € столкнулась с проблемой приобретени€ пенопластовых основ дл€ венков, тем более, что мне их надо заказывать из иева на перефирию. ќзадачившись этой проблемой € нашла на зарубежных сайтах маленький мастер класс о том, как сделать основу дл€ венка из подручных материалов - в нашем случае из термофлекса - изол€ции дл€ труб. “ака€ изол€ци€ разного размера продаетс€ в любом магазине хоз€йственных товаров или товаров дл€ ремонта, она не дорога€ и всегда есть в наличии. ”же пару лет € использую термофлекс в самых разных своих работах, предлагаю и вам попробовать!
¬от он, герой нашей романа - термофлекс!!!
1.
» основы дл€ венка из него.
|
ќбложки книг дл€ творчества |
Ёто цитата сообщени€ ќльга-¬ [ѕрочитать целиком + ¬ свой цитатник или сообщество!]
|
ƒекоративный чесночок из капрона. ћастер-класс |
Ёто цитата сообщени€ ћарриэтта [ѕрочитать целиком + ¬ свой цитатник или сообщество!]
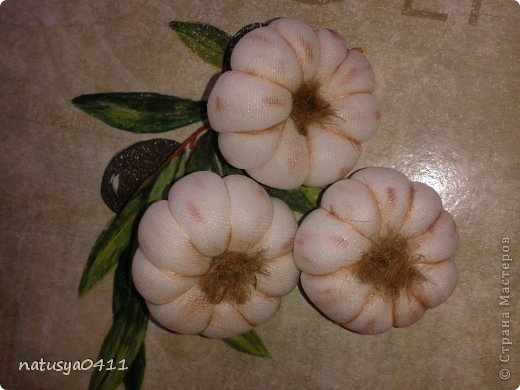
ћетки: чеснок капрон из капрона |
ћастер- ласс: ѕереводим изображение на ткань |
Ёто цитата сообщени€ irin69 [ѕрочитать целиком + ¬ свой цитатник или сообщество!]
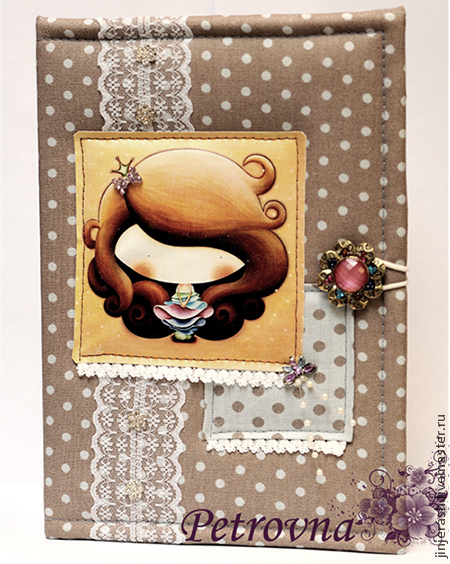
Ќам понадобитс€:
1. усочек ткани.
2. артинка.
5. исти.
3. Ѕела€ акрилова€ краска.
4. јкриловый лак.
1) –аспечатываем картинку. я распечатала картинку ≈катерины Ћукащук (√лавное не забыть, что она будет зеркально отображена. ≈сли есть слова, то эту картинку надо в фотошопе или в другом редакторе отобразить!).
2) ќбильно смазать ткань художественной белой акриловой краской. (Ћучше подложить под ткань файл).
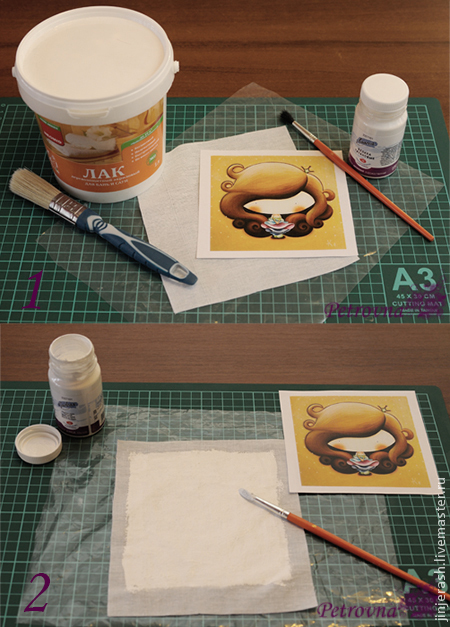
|
ћастер-класс "Ўкатулка-игольница" |
Ёто цитата сообщени€ Veh07 [ѕрочитать целиком + ¬ свой цитатник или сообщество!]
|
Ўьем корзиночки,коробочки.» украшаем |
Ёто цитата сообщени€ TomaMos [ѕрочитать целиком + ¬ свой цитатник или сообщество!]
|
ѕомпоны |
ƒневник |
Pom Pom Fruit


»з этих фруктов помпонами, мне удалось шаг за шагом учебник фотографии дл€ клубники, киви, лимона и арбуза с некоторыми диаграмм и обрезки советы. »звините за не включа€ Tuts за все, но € думаю, что это сообщение будет очень длинный ......
лубника помпон, веро€тно, самый простой, так что вы можете сделать несколько в мгновение ока, и дети будут любить горсть них. ’орошо, давайте начнем!
ак вы можете видеть, € все еще с помощью картонную помпон производител€ € сделал за предыдущие помпонами, и это в насто€щее врем€ ищет решительно потрепанный в фотографи€х. я получаю один сделанный из дерева на данный момент, и это будет здорово. —мотреть это пространство, если вам интересно! ;)

ак обычно, € пропуска€ повтор€ющиес€ основные шаги, как положить две половинки помпон производитель вместе, резки и св€зыва€. огда € говорю «завершить свои помпонами" я имею в виду выполните следующие действи€. ƒл€ получени€ дополнительной информации, пожалуйста см. это как сделать цветок помпонами пост.
ак сделать лубника Pompoms

2. ƒобавить небольшой пучок зеленого пр€жи на одном конце свободно. —делать вторую половину вашего помпоном таким же образом и свести их вместе, таким образом, зеленые части удовлетворени€ на том же конце.
4. ƒл€ обрезки, удерживать всю зеленую пр€жу на вершине вместе и обрезать красную часть только в аккуратный шар на первый взгл€д. “еперь обрезать нижний конец в остроконечной формы, чтобы напомнить клубнику.
5. “еперь сгладить верхнюю зеленую пр€жу и отделка некоторые нити короткие, чем другие, в звезду-образную форму. ¬ы можете обрезать их гораздо меньше, если хотите, € просто так листовые верхней части клубники, поэтому € попыталс€ дать некоторые функции там. ƒержите несколько нитей длинные в середине как стебель. Yum!


How to make Kiwi Pompoms

я сделал немного диаграммы в левом верхнем углу углах каждого изображени€, которые показывают часть € упаковка в каждой фотографии р€дом с ним. Ќадежда, что помогает!
1. ќберните пару слоев белой пр€жи, охватывающих около 1/3 от помпон производител€ в средней зоне.
2. ƒержите смесь белого и черного пр€жи вместе и обернуть сверху дл€ сем€н.
3. ќберните зеленый пр€жи во всем на вершине и по бокам сем€н, но не весь путь до самых краев помпон производител€. ќставьте немного места с обеих сторон. —м. изображение выше.
4. ќберните коричневый пр€жи на всем прот€жении дл€ внешней цвета кожи. Ќа этот раз, покрыть всю площадь помпон производител€ от кра€ до кра€. Ёто теперь одна половина вашего киви помпоном.
5. ƒл€ второй половины, обернуть полностью только в коричневом цвете кожи. ѕоложите две половинки вместе и отделка.

огда вы режете его открытым, вы будете иметь зеленый дизайн киви в середине окружении коричневой внешней цвета. ќбрежьте зеленый внутренний фруктовый участие, чтобы сделать плоскую вершину. „тобы сделать это место ваши ножницы горизонтально поверх него как на фото выше и отхватить пушистый верх. Ѕудьте осторожны, чтобы не обрезать слишком близко к нити, что подв€зки весь помпон в середине. ѕричина, почему мы обернуть дополнительный коричневый пр€жи на вершине зеленого в первой половине помпоном, чтобы держать центр помпоном от зеленой части таким образом, это не произойдет, но это все еще стоит проверить, что вы не резки слишком близко к центру, как вы отделкой.
ѕосле того как вы обрезаетс€ сверху довольно плоский, обрежьте кра€ зеленого круга, чтобы привести в пор€док. “огда отхватить всю коричневый пр€жи торчит р€дом с зеленым, как на фото выше. ќбрежьте остальную часть коричневого нити с другой стороны, чтобы сделать длинноватое киви, как формы. √отово!


я закончил с массивной помпоном дл€ этого. я использую один-размер-подходит-всем картон помпон производител€ дл€ каждого помпоном до сих пор. ≈сли € хочу сделать большие помпоны, € стараюсь, чтобы обернуть больше пр€жи. »ли наоборот обернуть меньше пр€жи, чтобы сделать меньшие помпоны. ≈сли вы заинтересованы в советов, как сделать разного размера помпоны, € постараюсь новые методы в следующий раз и сообщить разницу.

»так, дл€ арбуза помпоном :
1 . ¬ первый помпон половине , обернуть розовый пр€жи и разброс немного обернуть черной пр€жи в случайных местах , как вы идете . “ак же, как выше клубники. «акончить всю первую половину помпоном , как это.
2 . “еперь на вторую половину , начать , обернув смесь двух зеленых нитей - светлых и темных - друг р€дом с другом , чтобы создать зеленые полосы на внешней обшивке . ¬ы можете покрыть 3/4 на помпон производител€ с этим ( это то, что € сделал, см. выше) или по всей длине , если вы хотите , чтобы сделать большую зеленую зону кожи.
3 . ќбертка тонкий слой белой нити на верхней части зеленого цвета.
4 . Ќа вершине этой белым слоем , оберните розовый цвет , использованный в первом помпон половине , с или без сем€н частей.
5 . “аким образом, одна половина помпоном полностью розовый, друга€ половина состоит из слоев зеленый, белый и розовый. ак вы видите на фото выше , закончил в розовом на вершине. ѕоложите две половинки вместе и отделка .
6 . “еперь он будет выгл€деть последнего изображени€ выше. ќбрезать его , как вам нравитс€ , в круглый шар или клина с заостренной конце, как € и сделал. —очный !

ƒын€ & Ћимон груша хорошо вместе! ^ ^
ак сделать лимон пом пом
ќп€ть же, € добавил крошечные диаграммы в левом верхнем углах, чтобы показать, кака€ часть обернута. Ќадеюсь, это поможет!
1. ќберните тонкий слой белого первым, но не весь путь от начала до конца. ак вы можете видеть на диаграмме и фото, необходимо оставить некоторое пространство на обоих концах.
2. ќберните некоторые желтый пр€жу как на картинке вверху справа. “олще на обоих концах и тоньше по направлению к центру с зазором в центре.

3. ќберните еще один тонкий слой белого на вершине. ак вы можете видеть, форма это уже, в середине, как песочные часы.
4. ќберните более желтый пр€жи на вершине, заполн€€ узкую среднюю область.
5. ќп€ть же, обернуть тонким слоем белого на вершине.
6. “еперь оберните приличное количество желтого на всем прот€жении. Ёто ваша перва€ половина лимона помпоном.
7. ƒл€ второй половины, просто оберните только сплошной желтый цвет.

“а-да! ѕри открытии, вы получите этот желтый грубый м€ч некоторые белые линии происходит через. ак и в киви, обрезать верхнюю сторону с белые линии плоским. ƒержите ножницы плоским к поверхности и держать обрезки.
—оберите кра€ к середине в руке и обрезать белые кра€ круга аккуратно. ѕосле того, как вы счастливы с плоской вершиной, отделка остальную часть желтого тела в аккуратнее форме лимона.

я хотел сделать большой большой ананас, поэтому € сделал это от 2 помпонами. ¬ы видите, что нижн€€ половина акций методы лимона и топ немного похож клубники с листь€ми.

я планировал начать, сделав €блока и груши помпоны но почему-то не сделал €блоко, получил слишком увлекатьс€ с тропическими фруктами. Ёто собиралось быть пом ѕомм. (ѕредложение брата Ћейла автора в. ^ ^) ¬место этого € сделал англичанина гранат на этот раз. “еперь наслаждатьс€ —умасшедший большие пушистые ‘руктовый салат!
ѕс. я знаю, что было бы полезно иметь больше некоторые советы и видео, но сейчас € просто не имеют времени, слишком много проектов планируетс€! я стараюсь включать столько, сколько € могу в каждой должности. ≈сли вы любите пом јнгличане я многое другое планируетс€ (с более советы!) ѕоэтому, пожалуйста, зайти снова. Ѕлагодар€!


ћетки: помпон помпоны из ниток |
–амка из плинтусов |
ƒневник |
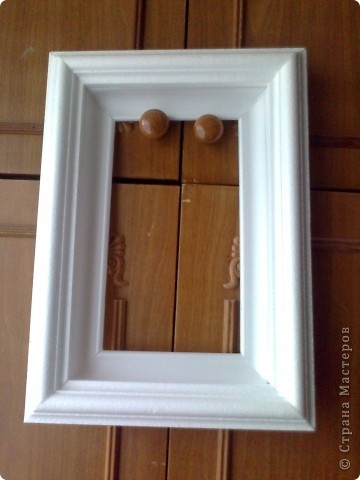
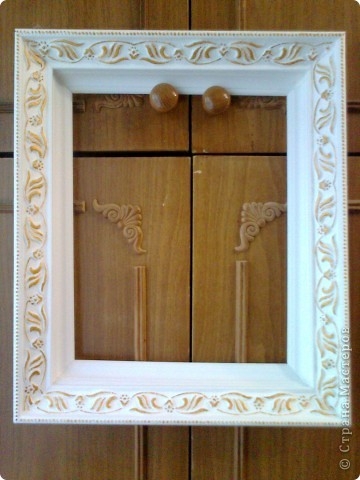
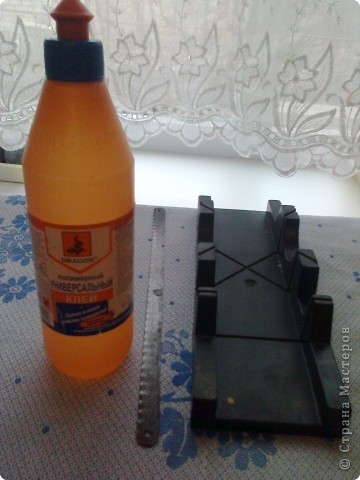
“екст автора “ать€ны ¬екленко: ѕлинтуса бывают угловые (они приклеиваютс€ между стенкой и потолком), настенные (с обратной стороны они плоские). — узором и без узора. ‘антази€ подскажет, как их можно скомбинировать. ƒл€ работы нам понадоб€тс€: стусло, ножовка по металлу и клей полимерный. —тусло можно купить в любом строительном магазине
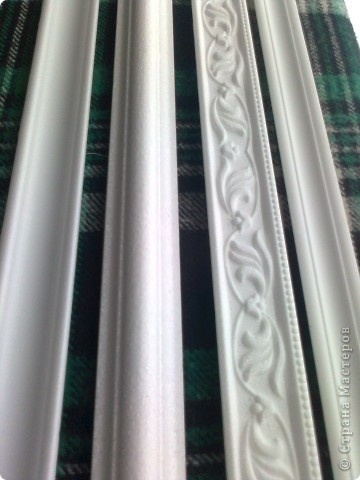
ЅерЄм угловой плинтус, отпиливаем кончик. —формировали первый уголок. ќбратите внимание, плинтус в стусле лежит, как ему и положено лежать. ќдна часть горизонтально расположена, друга€- вертикально. ќтмер€ем нужную длину (например, более длиной стороны) от первого уголка и обрезаем встречным углом. ƒелаем копию второй планки. “очно также вырезаем (выпиливаем) две других планки, меньших по размерам.
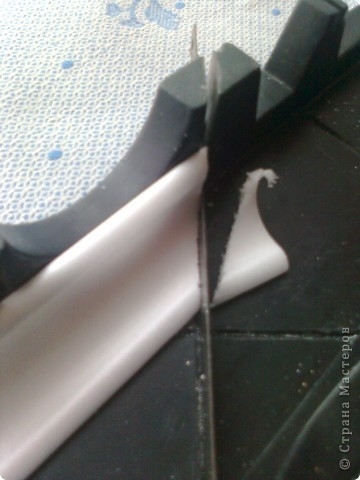
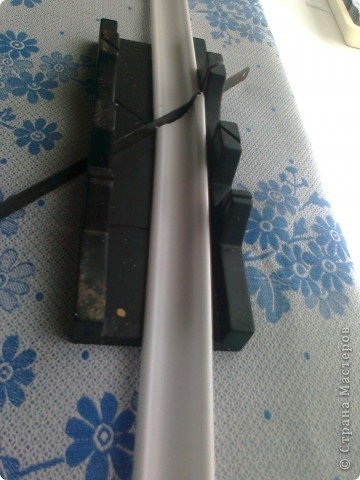
ѕолучились вот такие обрезки, которые нужно склеить. —клеили. аждый уголок проклеиваю отдельно, держу руками минуты три и так каждый. ѕолучилась така€ "чашечка".
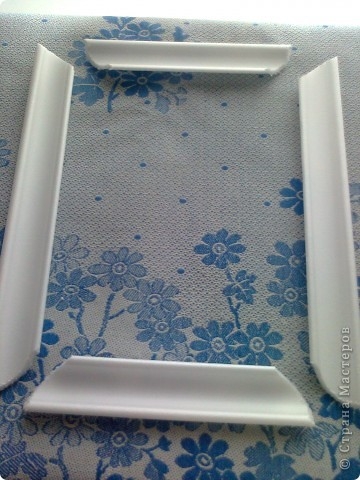
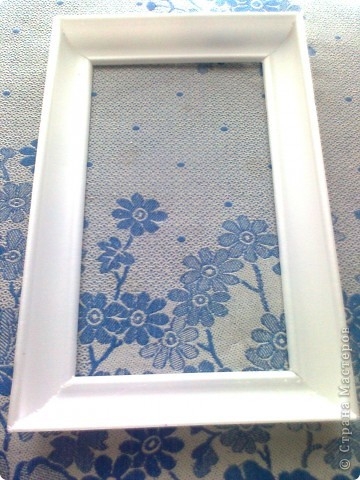
“еперь берЄм настенный плинтус, который в данном случае будет выполн€ть роль окантовки "чашечки" и режем на стусле. ќбратите внимание, что плинтус лежит в одной плоскости. ќтрезаем кончик, формируем угол. ќт него производим замер. ѕри работе посто€нно пример€йте на "чашечке". ќбрезаем противоположный угол. “аким образом заготавливаем четыре стороны окантовки.
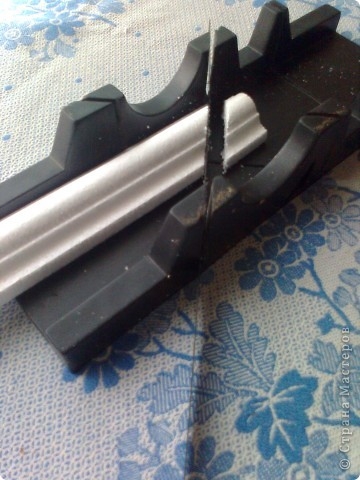
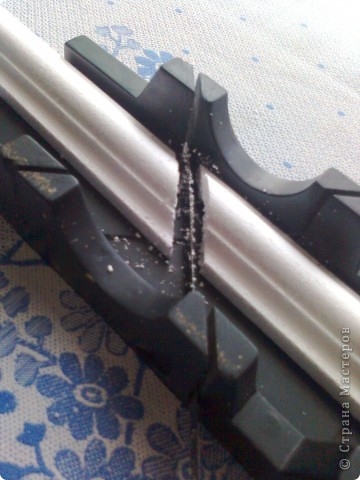
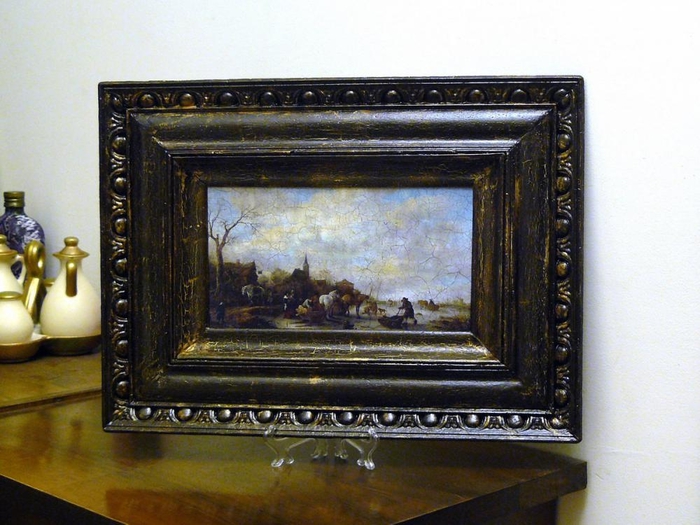
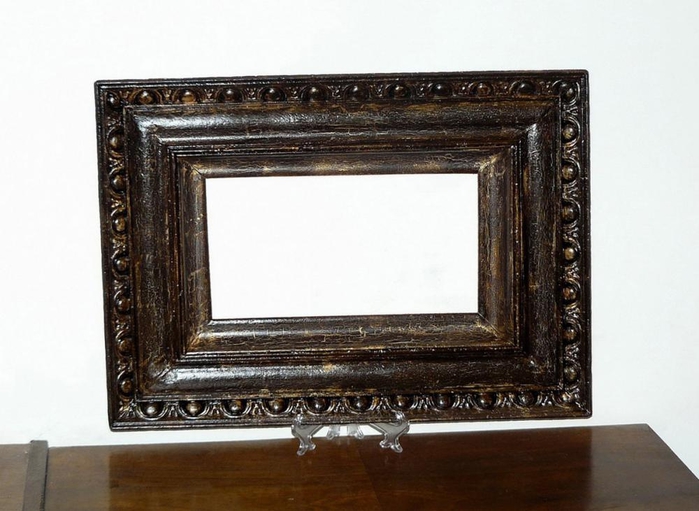
—клеиваем стороны. ѕолучилась вот така€ рамка. ќна может быть самосто€тельной. » фотографии будут прекрасно в ней смотретьс€.
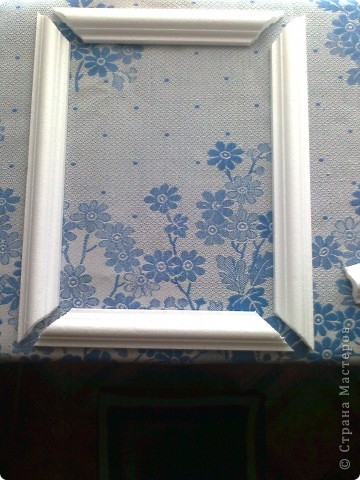
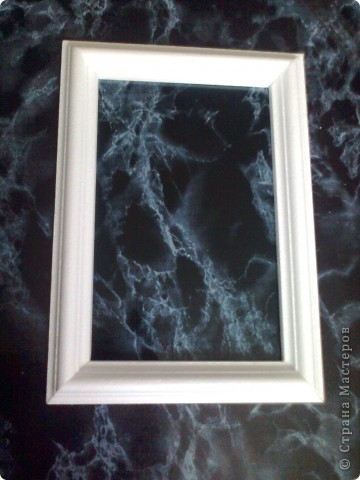
—лева - "чашечка", справа - окантовка. леем промазываем верхний бортик "чашечки", накладываем сверху окантовку, аккуратно подгон€ем, чтобы не было щели. ѕриклеиваем. ¬от така€ получилась объЄмна€ рамка. ≈Є глубина - 4см.
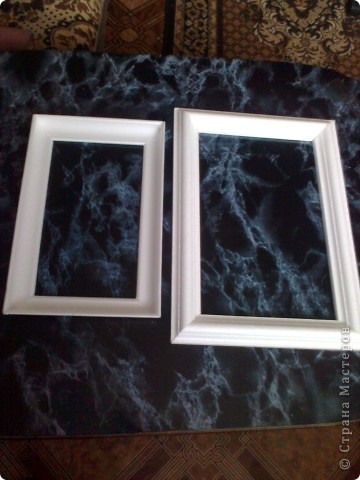
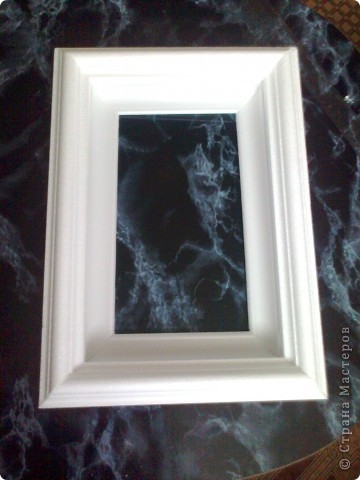
–амка покрашена золотой акриловой краской. артину запечатала в упаковочную плЄнку (это вместо стекла) , чтобы вышивка не пылилась. артину в такой рамке можно закрепить мелкими саморезами или просто саму рамку приклеить к картине. ¬ид сбоку первой рамки.
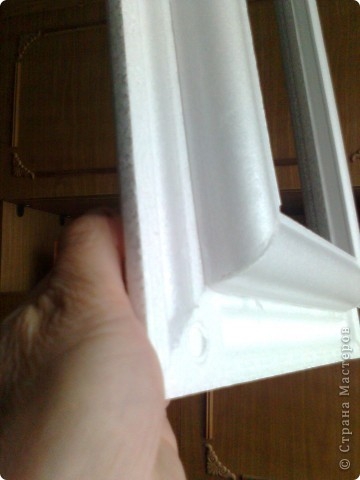
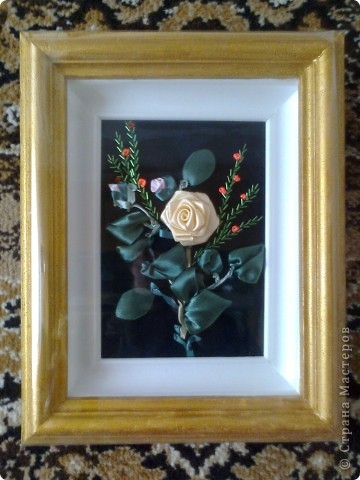
»сточник stranamasterov.ru/node/331959/
ј сейчас: замечательна€ работа ≈лены ѕоповой и перечисление ее "л€пов". ћожет кому пригодитс€ дл€ работы? »сточник dcpg.ru/blogs/7968/?search
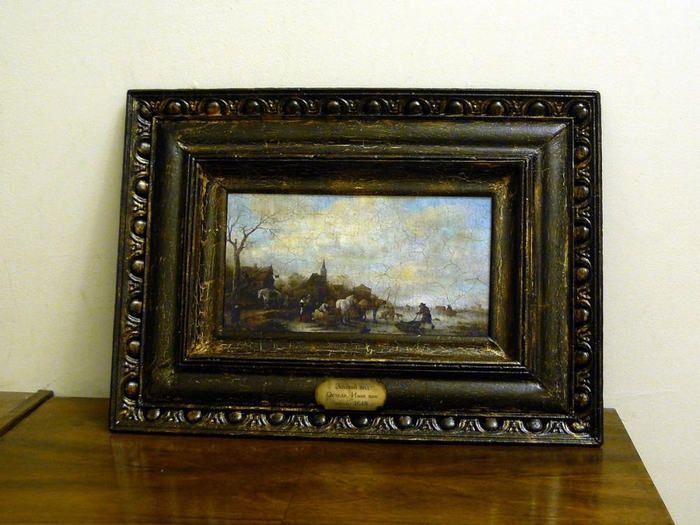
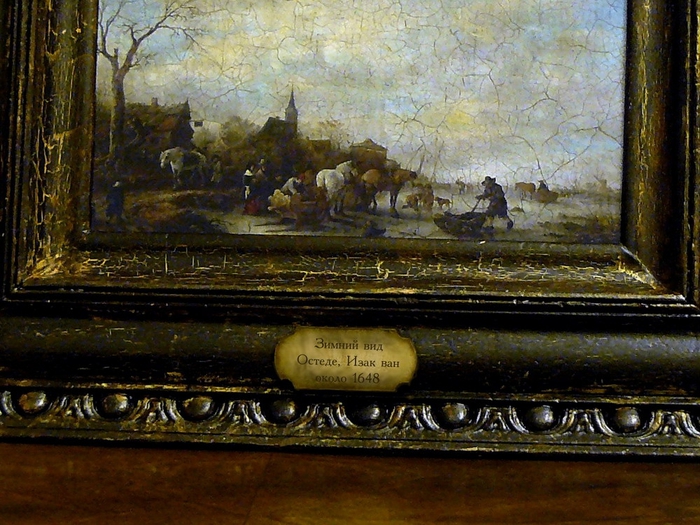
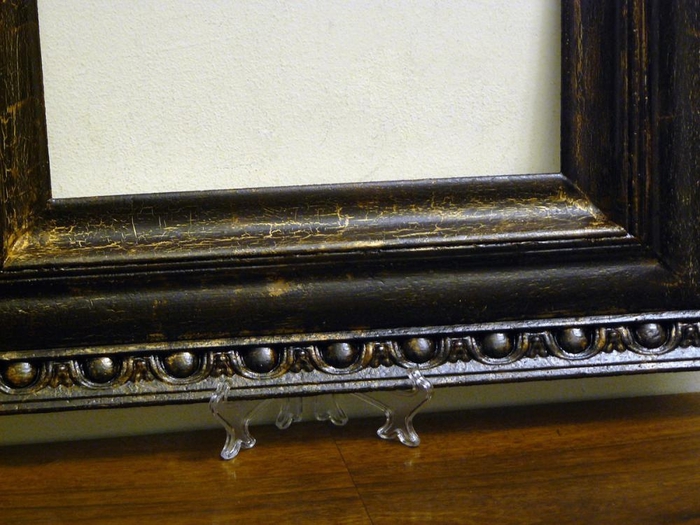
Ћ€п первый: промахнулась с размерами (хотела сделать ј4, а получилось ”же, картинку было трудно подобрать). Ѕолее того, одна планка внутренней окантовки получилась короче, чем друга€ (увлеклась выравниванием углов ), поэтому, если пригл€детьс€, видно, что картину обрамл€ет не пр€моугольник, а трапеци€…√отовую раму загрунтовала, покрасила в бежевый цвет, потом — одношаговый кракелюр и коричнева€ краска…
Ћ€п второй: под кракелюр покрыла золотом внутреннюю окантовку (жаба задушила золото тратить на всю поверхность ). ѕоэтому потом пришлось сверху немного пачкать бежевые трещины золотишком. —верху прошлась битумным лаком (его не жалела — это ж не золото )
Ћ€п третий: картинку приклеила на то, что Ѕог послал, а послал он мне кусок гофрированного картона. ѕоследстви€, € думаю, пон€тны.
Ћ€п четвертый: трещины на картинке чересчур крупные — перестаралась. »спользовала ћаймери 739-740.
ћетки: –амка из плинтусов |
ак сделать цветную соль дл€ декора. |
Ёто цитата сообщени€ ”льда [ѕрочитать целиком + ¬ свой цитатник или сообщество!]
|
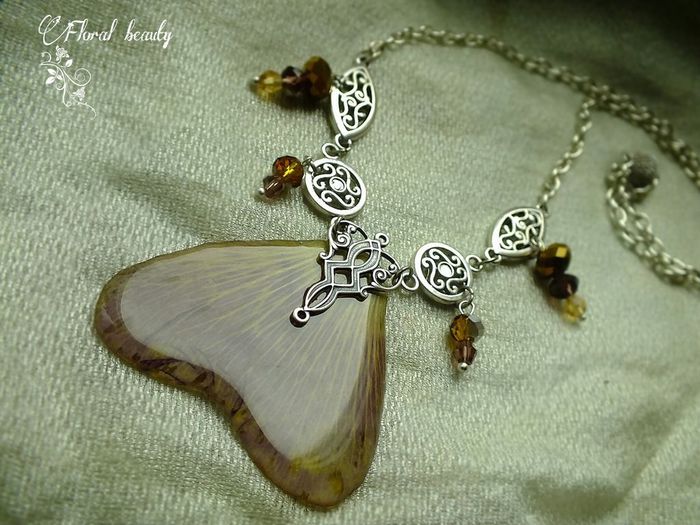
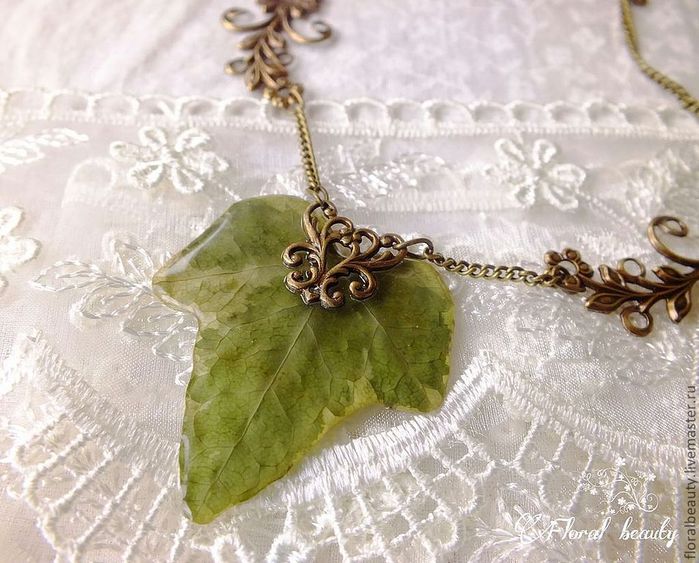
«аливаем лепестки и листь€ растений эпоксидной смолой. |
Ёто цитата сообщени€ “аша92 [ѕрочитать целиком + ¬ свой цитатник или сообщество!]
јвтор ћ : Floral beauty by Lidia Pavlikova
ћетки: лепестки листики эпоксидка эпоксидна€ смола |
ак сделать основу дл€ декупажа - клей. |
Ёто цитата сообщени€ nebumbum [ѕрочитать целиком + ¬ свой цитатник или сообщество!]

Ётот рецепт дл€ изготовлени€ основы декупажа, кле€. ƒекупажный клей используетс€ дл€ бумаги, но может быть использован и дл€ нанесени€ на издели€ из дерева, или стены покрытые бумагой. ¬ы можете использовать клей дл€ декупажа мебели чтобы преобразить ваш интерьер. »ли можете покрыть стол что бы запечатлеть на нЄм тот или иной рисунок. ≈сть масса способов использовани€ декупажного кле€! Ётот клей изготовить очень легко, и дешево. » можно с экономить деньги на покупке кле€ "Ёлмера" дл€ декупажа. ѕо этому рецепту вы сможете изготовить около 1 литра декупажного кле€. ≈го будет вполне достаточно дл€ какого либо крупного проекта, например покрыти€ старого сундука или комода.
Ўаг 1: —бор ингредиентов, чтобы изготовить декупажный клей вам понадобитс€ стакан пшеничной муки, 1 столова€ ложка порошка квасцов (дл€ продуктов с пр€ност€ми), 1 столова€ ложка порошка канифоли, 1.5 стакана теплой воды, 5 стаканов гор€чей воды, 1.5 стакана холодной воды, 8 капель масла гвоздики если вы хотите хранить клей долго, это нужно что бы законсервировать его.
Ўаг 2: —мешать муку, квасцы и канифоль в большой кастрюле. —делайте пасту, добавив 1.5 стакана теплой воды в кастрюлю и помешива€, пока оно не станет жидким.
Ўаг 3: Ќалейте в 5 стаканов гор€чей воды в кастрюлю и размешайте так что бы у вас не осталось комков.
Ўаг 4: ѕоставьте кастрюлю на медленный огонь и варите клей посто€нно помешива€, до консистенции не очень жидкого мЄда.
Ўаг 5: ƒобавьте в жидкий, гор€чий клей примерно 1.5 стакана холодной воды. ≈сли клей выгл€дит слишком густым дл€ вашего будущего проекта, то можете добавить немного больше воды, в общем помешивайте и добавл€йте во врем€ помешивани€ до нужной консистенции.
Ўаг 6: ƒобавить 8 капель масла гвоздики, если вам необходимо хранить клей продолжительное врем€. ≈сли вы собираетесь использовать весь клей быстро то не добавл€йте масло.
Ўаг 7: ¬озьмите большую банку с крышкой или другой плотно закрывающийс€ контейнер и перелейте клей туда когда он остынет. Ќе храните клей в холодильнике. ≈сли он загустеет, добавьте немного теплой воды перед следующим использованием. ≈сли вы добавл€ли масло гвоздики, то декупажный клей будет может хранитьс€ течение нескольких мес€цев, при условии что вы плотно его закрыли.

ћетки: клей дл€ декупажа декупаж сварить клей |
—амодельный 3D гель. |
Ёто цитата сообщени€ Lebedeva-3-3 [ѕрочитать целиком + ¬ свой цитатник или сообщество!]
Ќам понадоб€тс€: мука и стол€рный клей ѕ¬ј (лучше стол€рный, так как он более густой в отличии от канцел€рского. Ќо если у вас его нет - используйте обычный клей, просто муки понадобитс€ больше)

¬ удобную емкость, лучше если она будет с крышечкой, насыпаем муку (€ вз€ла чайную ложку) и добавл€ем постепенно клей. ¬ымешиваем до консистенции густой сметаны, чтобы смесь т€нулась, но не текла.

ћуку добавл€ем об€зательно, она создает наполнение и плотность и не позволит нарисованным элементам провалитьс€ после высыхани€!
¬ажно! Ќаш домашний объемный гель не будет прозрачным. ¬ данном случае мне нужен только объем под покраску.
Ќаносим наш 3D гель на поверхность тонкой кистью или палочкой с заостренным концом (это может быть зубочистка, палочка дл€ ногтей, стек дл€ лепки)

ѕросушиваем. ‘еном сушить элементы не рекомендую, дл€ просушки естественным путем понадобитс€ около 15-30 минут, в зависимости от толщины элементов.

отсюда
|
ƒелаем аэрозольную краску и Mod Podge (толст€к) |
Ёто цитата сообщени€ чего-ты-хочешь [ѕрочитать целиком + ¬ свой цитатник или сообщество!]
ƒелаем собственную аэрозольную краску и Mod Podge (толст€к-коротышка)
—енсации случаютс€ и в рукодельном мире. »ли открыти€, если хотите. ѕотому что поиском аналогов / заменителей существующих специальных средств дл€ рукодели€ занимаетс€, как вы€снилось всЄ рукодельное сообщество. Ќе только дл€ нас они дороги.
ѕервое: сделать аэрозольную краску можно своими руками
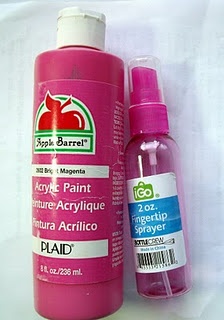
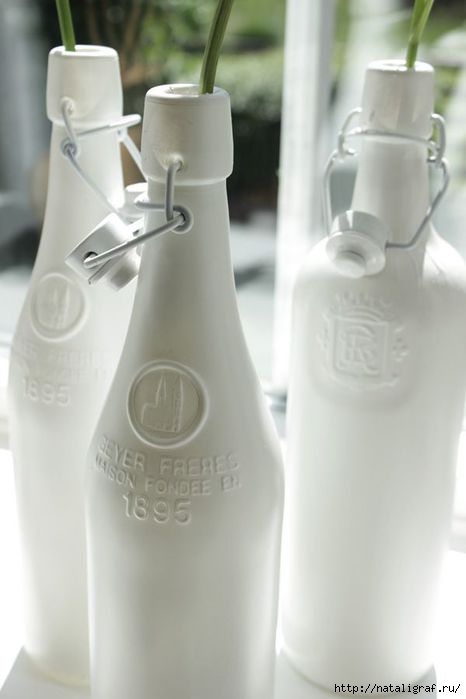
”дивительно, как это простое решение раньше не пришло в голову? ј ведь всЄ, что нам нужно - распылитель и акриловые краски. —мешиваем 2 части краски на 1 часть воды, хорошо встр€хиваем, чтобы смешать. » с удовольствием красим-обрызгиваем наши бутылочки или то, что у нас сейчас в работе :-)
¬торое: сделать собственный Mod Podge(который ещЄ называют толст€к-коротышка)
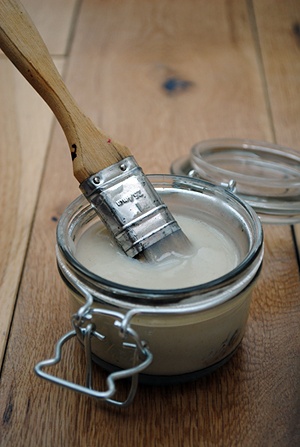
Ётот клей - мечта рукодельниц (во вс€ком случае, мо€ - точно!) выгл€дит так как на фото выше. ƒелаетс€ из муки+сахар+вода+уксус. ѕока неизвестно, пожалуй, главное - пропорции. Ѕудем пробовать и искать. ќпытным путЄм. –ецепт есть, опробован и рекомендован
ћетки: клей аэрозольный клей своими руками |
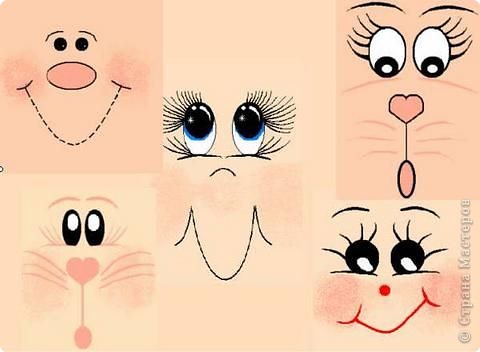
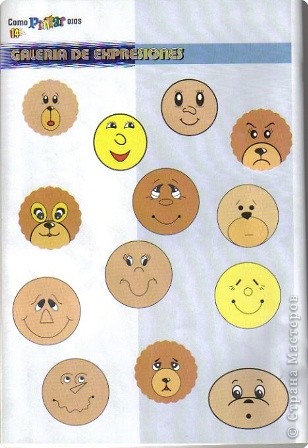
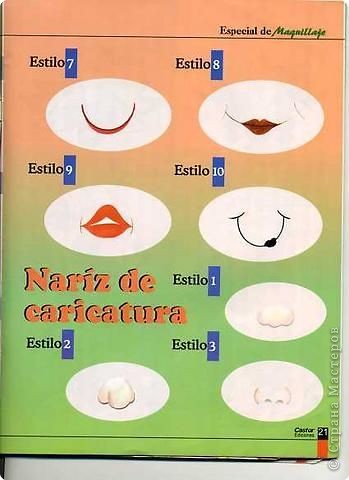
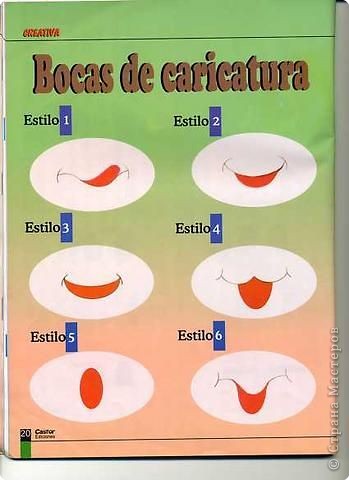
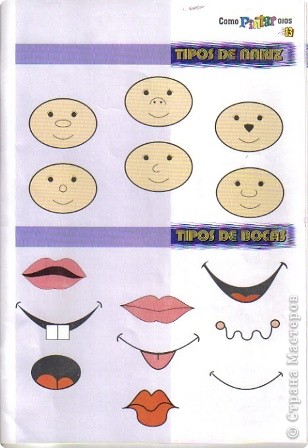
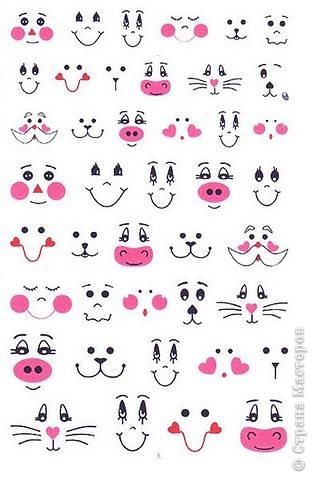
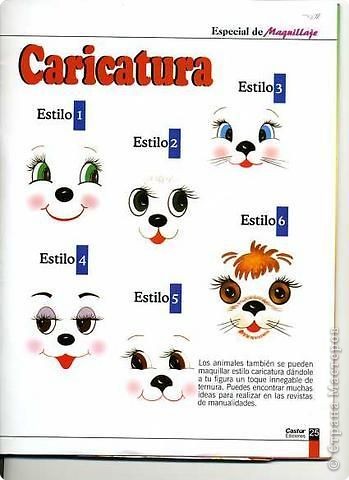
–исуем мордочки. |
Ёто цитата сообщени€ luzik [ѕрочитать целиком + ¬ свой цитатник или сообщество!]
|
ћќЋƒ јћ≈» — ѕќћќў№ё —»Ћ» ќЌќ¬ќ√ќ ѕ»—“ќЋ≈“ј. |
Ёто цитата сообщени€ –ождена_¬есной [ѕрочитать целиком + ¬ свой цитатник или сообщество!]
|
Ўкатулка дл€ рукодели€ из овощного €щика |
Ёто цитата сообщени€ Dama_Madama [ѕрочитать целиком + ¬ свой цитатник или сообщество!]
ћагазины рукодели€ на данный момент предлагают достаточное количество шкатулок дл€ рукодели€ на любой вкус, но что делать, если живЄшь в области где нет никакой возможности купить ничего похожего. ј ведь дл€ рукодельницы нет ничего невозможного и потратив пол дн€ можно получить достойный экземпл€р. —вою шкатулку дл€ рукодели€ € изготовила своими руками из овощного €щика.
|
орзина крючком |
Ёто цитата сообщени€ ¬Ћјƒ»ќЋј [ѕрочитать целиком + ¬ свой цитатник или сообщество!]
¬от такую корзинку дл€ рукодели€ сплетЄнную крючком нашла на просторах интернета.ѕеревод компьютерный Ќо в принципе пон€ть можно.
орзина крючком из верЄвки дл€ рукодели€
¬ам понадобитс€:
- ƒлина веревки (мой был 38м в длину и диаметром 6 мм, дл€ 22x42x17cm корзине)
- —пр€чьте пр€жи (€ использовал 310м от Patons 100% хлопка 4ply в сливочном сочетание цветов)
- –азмер 5.00мм крючок (использовать металлический крюк, если это возможно, как работа довольно жесткой), или больше, если ваша веревка толще.
артина:
‘онд р€д: –ешите, что базовый размер вам нужно. ћой был 22 на 42 см. –азница между двум€ измерени€ми (в моем случае 20 см), как долго цепочка вам нужно сделать, чтобы начать. Ёто было 30 или около того цепи дл€ мен€.
„. 30 (или номер, который требуетс€ дл€ вас желаемого размера) +2, поворот
ѕоложите веревку нар€ду с цепи дл€ работы с перекрытием несколько сантиметров.
–аунд 1: SC (работает через веревку) в 3 -м ч от крючка. «аполните еще несколько подкожно, а затем извиватьс€ веревку вперед на линию в конечном итоге с начала строки (т.е. избавитьс€ от перекрыти€). Sc до конечного CH, более 5 подкожно в конечном ч. (поворот веревку вокруг "углу" и вращающейс€ работу), SC до конца.
[NB: я подкожно в обратную петлю моей цепи, так что, как только € повернул за угол легче завершить подкожно. ¬ы можете увидеть это в фото, но не стоит делать то же самое, вы можете —ЅЌ в вашей цепочке, как обычно, если вы предпочитаете.]
ѕоследующие раунды: 3SC в каждом углу ул и подкожно во всех других петель. ѕродолжайте, пока работа не желаемые базовые размеры.
ѕереход к работе стороны: ѕосле того как база достаточно велика, остановить поставив 3SC в каждом углу ул, просто делайте 1SC в каждом ул вокруг. ƒл€ первого раунда этого вам нужно будет убедитьс€, что вы лежите веревку вертикально сверху следующую строку, котора€ может быть немного неудобный.
–учки: ќни не €вл€ютс€ об€зательными. огда стенки достаточно высоки, и после завершени€ раунда, Place St маркеры, где вы желаете ваши ручки, чтобы быть. “еперь, когда вы достигнете маркер, оставьте следующий набор петель необработанных (€ оставил 15sts сделать мой), и вместо крючком через веревку больше петель, чем у вас осталось необработанные (€ сделал 20 “Ќ через веревку). ѕродолжайте подкожно в п. после маркера, как и раньше.
ќбеспечение конец (ы): я модифицированный SC ST в конце моей веревки (и когда мне нужно было присоединитьс€ к новой длина часть пути через):
¬ставьте крючок в следующую петлю, составить цикл, пр€жу над, проведем через одну петлю, вставьте крючок в то же петлю, составить цикл, пр€жу над, проведем через 2 петли.
«акончить с подкожно в следующую петлю, но не через веревку. ќбрежьте веревку при необходимости, и ткать во всех концах.
|
ћарки дл€ скрапработ. |
Ёто цитата сообщени€ ћурчелла [ѕрочитать целиком + ¬ свой цитатник или сообщество!]
|
ƒелаем циферблат сами. |
Ёто цитата сообщени€ принцеска_1 [ѕрочитать целиком + ¬ свой цитатник или сообщество!]
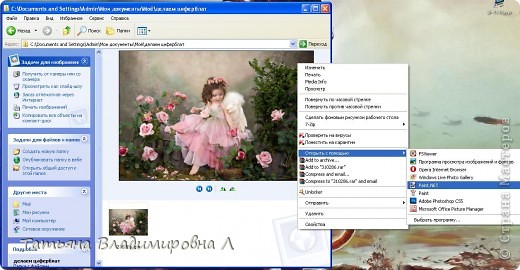
ƒоброго времени суток, мои милые декупажницы! —обралась € сделать часы. Ќачала работать в фотошопе, потратила много времени, т.к. не очень еще разбираюсь в этой программе. «атем нашла один из способов, как можно быстро и просто сделать циферблат в программе Paint.NET. ’очу с вами поделитьс€ этим способом. “ут можно сделать циферблат в на любой картинке, котора€ вам понравилась
≈сли нет данной программы, не беда, ее можно скачать в инете, скачка и установка займет всего лишь несколько минут.
ѕриступим: ачаем из инета картинку, из которой хотим сделать часики, открываем ее в программе Paint.NET
|
—амозатвердевающа€ паста |
Ёто цитата сообщени€ ≈лена-≈лена [ѕрочитать целиком + ¬ свой цитатник или сообщество!]
»з журнала "–учна€ работа". јвтор: ¬алентинка 747.
ƒорогуща€ пасточка
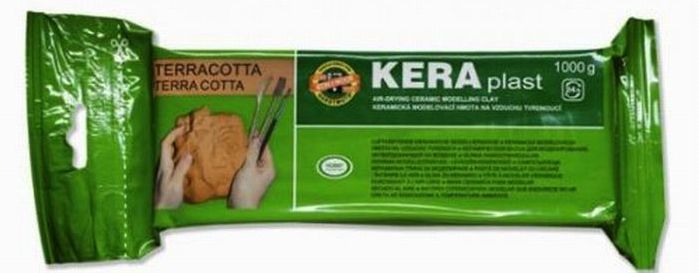
«аменитель за копейки:
–ецепт:
1. Ѕерем по 10 ст. ложек – крахмала, кле€ ѕ¬ј и зубной пасты.
2. «амешиваем как тесто, добавить можно водички.
3. «астывает уже через 20 минут.
“олько момент быстрого застывани€ - об этом нельз€ забывать!!!!
≈щЄ заменитель за копейки:
јвтор- им€ на кртинке, в инете нашла здесь polya.webnode.com » ещЄ рецептик интересный - им можно рисовать как дорогущими структурными пастами:
–ецепт:
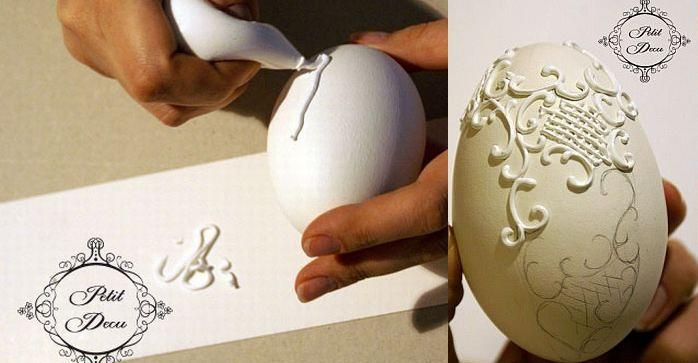
ћебельна€ или строительна€ шпатлЄвка с клеем ѕ¬ј - вы уже знаете наверное - прекрасное средство дл€ рисовани€ объЄмных узоров ( шприцом ,пластмассовой бутылочкой из-под краски дл€ волос с длинным носиком ,бутылочкой от канцел€рского кле€ ѕ¬ј, аналогично с тонким носиком или просто мешочком с маленьким срезом уголочка) я проверила свойства- прочна€, но долго сохнет ! »мейте это ввиду :) Ётим средством ( оно достаточно жидкое ) мы можем творить вот такие шедевры как пасхальное €йцо.
|
Ћаки |
Ёто цитата сообщени€ cebrusha-2 [ѕрочитать целиком + ¬ свой цитатник или сообщество!]
ѕро вс€кие лаки немножко, с любовью

|
“екстурна€ паста своими руками))) |
Ёто цитата сообщени€ миллер_елена [ѕрочитать целиком + ¬ свой цитатник или сообщество!]
»сточник
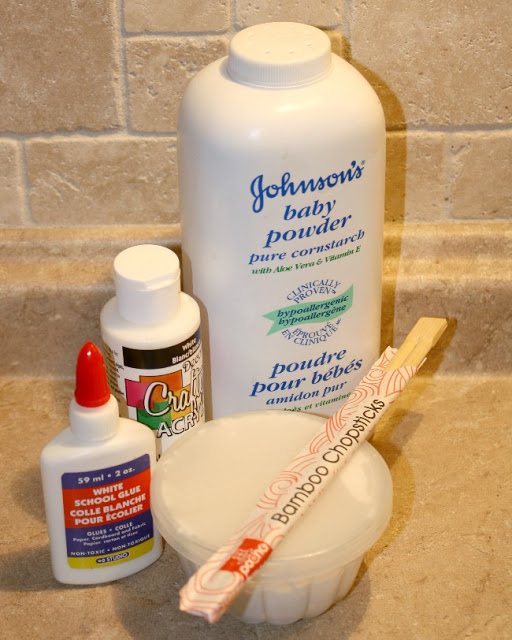
¬от такой совсем несложный рецепт: 1/4 чашки детского талька, 1 ст.л. кле€ ѕ¬ј, 1 ст. л. акриловой краски, немного воды - и все!!))
—пасибо большущее ћаше за находку!!!!
|
Ћак дл€ декупажа |
Ёто цитата сообщени€ limada [ѕрочитать целиком + ¬ свой цитатник или сообщество!]
Ќовое открытие: ѕаркетный лак Eurotex
«дравствуйте, дорогие декупажницы и декупажники!
’очу поделитьс€ с ¬ами своими исследовани€ми.
Ќаконец-то € нашла многофункциональный светлый эластичный неводный лак, который давно искала.
ќн стоит подешевле импортных, около 300 рублей, пахнет очень слабо. я попробовала с ним сделать одношаговое и двухшаговое кракле, закрепить им принт, провела тест на эластичность. „то у мен€ получилось, смотрим на видео:
P.S. ј уже совсем скоро мы с ¬ами встретимс€ на ќнлайн встрече:
|
—амодельные молды и основа дл€ декупаж |
Ёто цитата сообщени€ ‘ишка_и_ [ѕрочитать целиком + ¬ свой цитатник или сообщество!]
“ать€на рекот источник: ·
’очу поделитьс€ с вами как можно сделать самодельные молды. ≈щЄ € показываю какие вещи мы можем использовать как молды. ак заливку можно использовать гипс или алебастр, это € пишу как самый не затратный материал, если у кого в закромах есть что-то более подход€щее, то пробуйте

—ери€ сообщений "ћ ":
„асть 1 - »митаци€ камн€
„асть 2 - Ўкатулка. ћ »митаци€ малахита
...
„асть 20 - Ўкатулка с имитацией кружева "—ова-рукодельница"
„асть 21 - ћастер класс от Ћьвовны по кружевной тарелочке "–ишелье"
„асть 22 - —амодельные молды и основа дл€ декупажа
„асть 23 - ¬живление струйной распечатки. —екрет четкого рисунка.
„асть 24 - ћастер-класс по декорированию: Ќовогодний шар
|
—оздаем мини принадлежности дл€ кукольного домика. |
Ёто цитата сообщени€ fljuida [ѕрочитать целиком + ¬ свой цитатник или сообщество!]
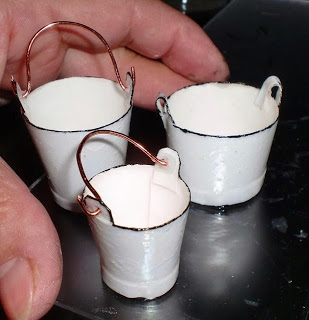
ћастер-классы по созданию кукольной утвари.
ќй, чую € подсела на всю эту кукольную атрибутику :)) ¬се эти мелкие интересности настолько прикольны, что глаз не отвести и , милые кукольники, думаю € ¬ас порадую не только на этой страничке :) я уже накачала много оригинальных мастер-классов по созданию бутылочек, книжечек, ковшиков и кувшинчиков :)) ќй, да много чего еще , так что, приглашаю ¬ас на кукольное посудное и хоз€йственное дефиле :))
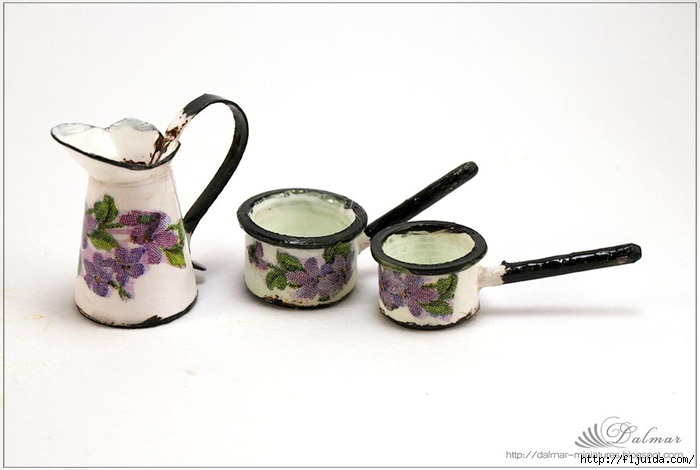
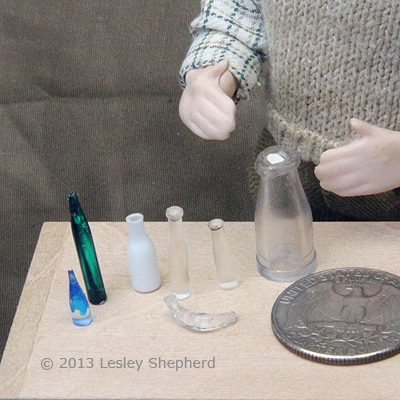
Ќачнем с производства бутылочек :))
|
ягодные веточки. ћ |
Ёто цитата сообщени€ Julia_Rzhevskaya [ѕрочитать целиком + ¬ свой цитатник или сообщество!]
¬ последнее врем€ € замечаю, что все больше и больше работ разных мастериц украшены €годными веточками. ¬ умелых руках это действительно шикарный декор! ј в преддверие осени и новогодних праздников, € бы даже сказала, что это очень необходимый элемент.
»так, как вы, наверное, уже пон€ли, мы будем делать вот такие €годные веточки:
|
ак обшить коробку тканью |
ƒневник |
ак обшить коробку?
»сточник: http://good-decor.ru/archives/429
Ћегко!
ѕри обустройстве интерьера перед нами часто встает вопрос: куда же девать гору необходимых мелочей так, чтобы легко было достать, но при этом их не было видно? ќтвет приходит сам собой: коробки-€щики-корзины-и-так-далее. ј чтобы вписать коробку в интерьер, нужно придать ей эстетичный вид: покрасить, обшить, обв€зать или обклеить. —егодн€ мы ответим на вопрос: как обшить коробку тканью? ƒл€ удобства съемки € буду показывать процесс на примере маленькой коробочки.
»так, как обт€нуть коробку тканью?

ѕонадобитс€:
- оробка нужной величины (можно вз€ть готовую обувную коробку или коробку от бытовой техники, а можно склеить ее самосто€тельно). » кусочек картона такого же размера, как дно коробки.
- “кань дл€ внешней части и дл€ внутренней (лен-коттон). ѕонадобитс€ два куска длинной равных периметру коробки + 3 см на подгиб, а шириной равных высоте коробки + 3 см на подгиб. ќдин – дл€ внутренней части, другой – дл€ внешней. » кусок ткани, равный по величине донышку коробки + 1,5 см с каждой стороны.

- лей «ћомент»
- лей ѕ¬ј
- Ќитка с иголкой в тон ткани
- Ћисток бумаги размером с дно коробки
«аймемс€ сначала внешней частью коробки. ќбернем ее тканью таким образом:


ак видите, € приклеиваю ткань на «ћомент» к коробке в одном месте – сзади (на первом фото из трех это видно), а стык зашиваю мелкими стежками (третье фото). лей все-таки пропитывает ткань, поэтому выбор был сделан в пользу иголки с ниткой, несмотр€ на то, что приклеить все было бы быстрее.
«атем подогнем припуски и оформим донышко:

ќно еще не закончено, но пока оставим его и перейдем к верхней части коробки. ѕодогнем верхние припуски внутрь, закрепим с помощью «ћомента» вот так:

ѕриступим к внутренней части.
ѕодогнем одну из длинных сторон примерно на 1 см.

ѕодогнута€ сторона будет сверху. Ќачинаем пришивать по периметру нашу «подкладку» к коробке следующим образом:

¬нутренний стык тоже зашиваем мелкими стежками или приклеиваем. ћы видим, что внутри донышко коробки получилось совсем не красивым, но сейчас мы это исправим!
Ѕерем кусочек картона такого же размера, как и дно коробки, он должен плотно входить в коробку и не выпадывать. ќбт€гиваем его тканью.

» кладем внутрь коробки.

» последний штрих – на донышко с внешней стороны приклеиваем листок бумаги, чтобы закрыть срезы ткани и предохранить их от осыпани€. Ќа этот раз клеим на клей ѕ¬ј. ¬ажно хорошо промазать кра€ бумаги.

ћетки: коробка дл€ игрушек коробки коробки дл€ хранени€ |
–абочее место рукодельницы |
ƒневник |
–абочее место рукодельницы: идеи по обустройству
ѕожалуй, каждый человек, увлеченный хендмейдом, мечтает о мастерской. сожалению, не все могут выделить под зан€ти€ рукоделием целую комнату, а вот создать дома компактный уголок дл€ своего увлечени€ могут многие.
ѕосле того как в доме вместо настольного компьютера поселилс€ ноутбук, необходимость в компьютерном столе постепенно сошла на нет. Ќа свободной горизонтальной поверхности скапливались в горы вещи. » в один прекрасный день за разгребанием очередного невесть откуда вз€вшегос€ нагромождени€ мне пришла в голову иде€, которой € хочу сегодн€ поделитьс€ с вами – превратить компьютерный стол в рабочее место рукодельницы.

»так, нам потребуетс€
- омпьютерный стол – 1 штука .
- Ёмаль ѕ‘-115 матова€, бела€ – 1 банка. (ƒл€ покраски стола € выбрала эмаль, так как она достаточно устойчива к механическим повреждени€м, а при создании рабочего места рукодельницы это очень важно. ќднако помните о том, что работать с эмалью нужно в хорошо проветриваемом помещении – запах у нее достаточно сильный. ƒл€ полного высыхани€ эмали нужно 24 часа)
- ”ниверсальный колер нужного цвета (например такой, как мы использовали при декоре телевизора, помните?)
- лей-жидкие гвозди (€ брала «ћомент монтаж») и пистолет дл€ жидких гвоздей. Ўтапик (это така€ треугольна€ в сечении планочка(см. каринку ниже), продаетс€ в любом строительном магазине (примерно 15р за полтора метра), на нее будут опиратьс€ наши полки и €щички). ƒве пр€моугольные полочки из толстой фанеры и ножовка по дереву.

- –азные баночки-коробочки дл€ хранени€ рукодельных мелочей: бусинок, ниток, фурнитуры, пуговиц и т.д.
ѕроцесс создани€ уголка рукодельницы не займет много времени (если не считать врем€ схватывани€ жидких гвоздей и высыхани€ краски) и сил.
ѕеред тем как приступить к покраске, нам нужно приклеить к столу на жидкие гвозди штапик, на нем будут лежать полки, а также он будет служить направл€ющими дл€ €щичков. Ќа фото ниже хорошо видно каким образом это можно сделать:

я решила сделать 2 длинные полки в центральной области и небольшие квадратные €щички дл€ ниток по бокам (там где раньше было место дл€ дисков). ≈сли вы собираетесь ставить на полочки что-то т€желое, то лучше подстраховатьс€ и закрепить штапик еще и обычными маленькими гвоздиками. я этого не делала – маленькие баночки с бусинами и €щички с нитками полки отлично выдерживают. стати, жидкие гвозди полностью схватываютс€ за 24 часа (некоторые за 12 – читайте инструкцию), только после этого их можно красить. “€желые банки € поставила в самый низ – непосредственно на стол.

Ѕоковые €щики дл€ ниток € сделала из картона и обт€нула тканью (лен) и шитьем, предварительно прогрунтовав ѕ¬ј и покрасив коричневой латексной краской.

ƒл€ хранени€ бусин, которые должны быть всегда под рукой, € использую баночки от детского питани€ «‘рутоЌ€н€» (из-за формы конечно же), декорирую их х/б кружевом. —одержание баночек мен€етс€ в зависимости от того, над чем работаю.

ј бесполезное пространство в глубине стола отлично подошло дл€ трех выдвижных €щичков (тоже картонные коробки, обт€нутые тканью), где лежат нитки дл€ вышивани€, х/б нитки дл€ в€зани€ крючком и разна€ тесьма.

Ѕоковые стороны стола тоже нужно использовать: с одной стороны € повесила органайзер (мы делали настенный органайзер в этом мастер-классе), а с другой – кружку дл€ хранени€ кисточек (эх, мо€ любима€ кружечка была).


ј вот так выгл€дит мой уголок рукодельницы в целом: внизу сто€т чемоданы с тр€почками и нитками дл€ в€зани€, к счастью, они идеально вошли на нижнюю полку:-) краю стола прикреплена лампа мэйд ин ———–, покрашенна€ в тот же цвет что и стол и декорированна€ кружевом, в круглой шкатулке лежит вс€ка€ канцел€рска€ дребедень вроде скрепок и ластиков.

ак видите, в создании уголка рукодельницы нет ничего сложного, а главное – это тоже очень даже творческий процесс! –абочий стол рукодельницы можно обустраивать и дальше, придумыва€ все новые и новые решени€ вечной проблемы организации пространства, так что удачных вам сотворений!
|
Ќавесные кармашки |
ƒневник |
”голок рукодельницы: настенный органайзер
»сточник: http://good-decor.ru/archives/178

ƒл€ создани€ такого органайзера (размер 50х25см) нам потребуетс€:
- ќдна пенопластова€ панель клеевого потолка (50х50см) (можно найти в любом строительном магазине, стоит где-то от 9 рублей за штуку). ¬ыбирайне с не очень выраженным рельефом.
- “кань (в моем случае лен и лен-коттон), при раскрое не забывайте о припусках на швы (€ добавл€ю по 1 см):

- 2 детали 27х52 см (дл€ обт€гивани€ основной части)
- ƒл€ накладных кармашков: € шила из достаточно тонкой ткани и не использовала уплотнитель, поэтому каждый карман € делала двухслойным и простегивала. ѕоэтому если решите делать карманы однослойными – смело делите количество деталей на 2. »так, дл€ карманов мне потребовалось: 2 детали 15х10см(дл€ маленького) и 2 детали 23х19см (дл€ большого)
- ƒл€ перемычек: 6 деталей 2.5х9 см (по 2 на каждую перемычку)
- ƒл€ вис€чего кармашка: 2 детали 28х26см. “ак как кармашек висит на 4 перемычках, потребуетс€ еще 8 деталей аналогичных тем, что описаны в пункте 3, их можно сделать на пару сантиметров длиннее. ƒл€ дна: плотна€ картонка 27х6 см
- 7 пуговиц
—начала сделаем основу. ƒл€ этого потолочную панель разрежем пополам, половинки складываем рельефными сторонами друг к другу.

—оединить половинки проще всего широким скотчем. Ћучше вз€ть прозрачный, € дл€ нагл€дности использовала синий. ћатериалом основы был выбран пенопласт по следующим причинам: он очень легкий, дешевый и в него легко втыкаютс€ булавки (справа от маленького кармашка оставлено место, куда можно крепить небольшие записочки).
ѕриступаем к изготовлению кармашков, это достаточно просто, как это делаетс€ покажу на примере маленького кармана: ƒве детали кармашка складываютс€ лицевыми сторонами друг к другу, прошиваютс€ с трех сторон, получившийс€ мешочек выворачиваетс€ (не забудьте подогнуть внутрь непрошитые срезы), простегиваетс€, верхн€€ часть отстрачиваетс€, пришиваетс€ пуговка. «атем готовый карман настрачиваетс€ на одну из деталей основы (27х52см). Ѕольшой карман делаетс€ аналогично.
„тобы кармашки не торчали, мы сделаем перемычки, застегивающиес€ на пуговицы. ƒве детали 2.5х9 см складываем лицевыми сторонами друг к другу и прошиваем с трех сторон. ¬ыворачиваем, прорезаем дырочку дл€ петли. ќтстрачиваем деталь по краю и обшиваем петлю обметочным швом. √отовую перемычку пристрачиваем к детали основы (на которой уже красуютс€ карманы
 ![]() ).
).
огда все карманы займут свои места на основе, мы делаем следующее: складываем две детали основы (те, что 27х52 см) лицевыми сторонами друг к другу (все кармашки должны оказатьс€ внутри) и сшиваем с трех сторон. ¬ыворачиваем получившийс€ мешочек, внутрь помещаем пенопластовую основу и зашиваем. ƒолжно получитьс€ вот так – почти готовый настенный органайзер: ѕриступаем к изготовлению вис€чего кармашка: 2 детали 28х26 см складываем лицевой стороной друг к другу, прострачиваем с трех сторон, выворачиваем, простегиваем (все также как и при изготовлении накладных карманов).
ѕолучившеес€ «оде€льце» складываем поплам и прострачиваем с двух сторон таким образом: ‘ормируем дно, застрочив уголки:
 ¬ыворачиваем карман, вставл€ем донышко, пришиваем перемычки (места швов закрываем пуговками), готовый карман пришиваем к основе.
ћетки: кармашки |
—ушеные апельсины дл€ декора за пару дней |
Ёто цитата сообщени€ √лебова_≈лена [ѕрочитать целиком + ¬ свой цитатник или сообщество!]
»сточник. ƒалее текст автора.
»де€ использовать дл€ декора сушеные дольки фруктов пришла, наверное, откуда-то из флористики. ќсобенной попул€рностью пользуютс€ цитрусовые – кружочки апельсинов, лимонов и даже грейпфрутов. » это не удивительно! ![]() ѕропитанные южным солнцем, они (даже в сушеном виде) привнос€т в работу кусочек непринужденности, тепла, уютности. роме того, с сушеным лимончиком можно заварить очень вкусный чай, так что сушеные апельсины и другие цитрусовые в хоз€йстве точно лишними не будут!
ѕропитанные южным солнцем, они (даже в сушеном виде) привнос€т в работу кусочек непринужденности, тепла, уютности. роме того, с сушеным лимончиком можно заварить очень вкусный чай, так что сушеные апельсины и другие цитрусовые в хоз€йстве точно лишними не будут!

—егодн€ € хочу рассказать вам как сушить апельсины, поделитьс€ своим методом.
|
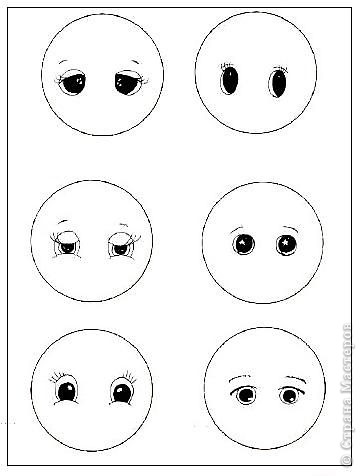
–исуем глазки |
Ёто цитата сообщени€ TomaMos [ѕрочитать целиком + ¬ свой цитатник или сообщество!]
ѕошаговый урок рисовани€: –исуем героинь сказок
јвтор ≈вгени€
источник:http://vrukodelii.com/poshagovyiy-urok-risovaniya-...medium=email&utm_campaign=
¬сем желающим научитьс€ рисовать, очень помогут набить руку пошаговые уроки. —егодн€ будем тренироватьс€ на кошках на принцессах из попул€рных сказок.
|
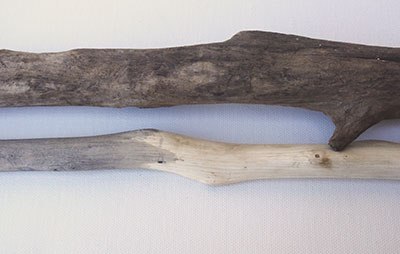
ак выбелить палочки. |
Ёто цитата сообщени€ ќльга-¬ [ѕрочитать целиком + ¬ свой цитатник или сообщество!]
|
ѕеренос изображени€ и —тарение ¬»ƒ≈ќ |
Ёто цитата сообщени€ irin69 [ѕрочитать целиком + ¬ свой цитатник или сообщество!]
ћетки: ѕеренос изображени€ |
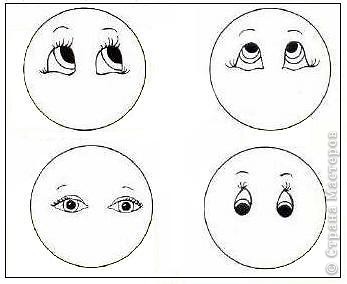
ак рисовать куклам глазки ћ |
Ёто цитата сообщени€ ѕанамочка [ѕрочитать целиком + ¬ свой цитатник или сообщество!]
—шить куколку по хорошей выкройке задача не сложна€,а вот нарисовать глазки,что бы они загл€дывали в душу,тут уже потрудитс€ нужно.Ќебольшой мастер-класс поможет разобратьс€ в тонкост€х рисовани€ глазок.
ћетки: глазки куклы рисование |
ќбъемна€ имитаци€ снега в декоре |
ƒневник |
ќбъемна€ имитаци€ снега в декоре
»сточник: http://cladovaya-solntsa.ru/2013/11/20/obemnaya-imitaciya-snega-v-dekore/

¬от как подкрадываетс€ Ќовый √од ! ¬ виде подготовки к празднику и это не смотр€ на то, что еще но€брь! » мне на дн€х захотелось сделать сувениры — тарелки на данную тематику с дополнением в виде объемных снежных обрамлений. «ахотела и сделала — за мною не заржавеет…
„то нам понадобитс€ в работе:
- емкость дл€ замеса
- крахмал
- клей ѕ¬ј
- белый акрил
- шпатель или нож

 «амешиваем в равных количествах крахмал и клей, а дл€ цвета добавл€ем белую акриловую краску , льем столько что-бы масса стала как тесто дл€ оладий.
„асть краски можно поместить в одноразовый шприц, чем больше объем шприца тем легче в него вложить массу.


 ак только вы замесили массу ее нужно сразу использовать , наносим шпателем или ножом на рабочую поверхность , пока масса свежа€ в нее можно вклеивать декоративные включени€ — бисер, стразы, бусины.


 — помощью шприца можно наносить более аккуратные линии и обрамлени€…. »скусственный объемный снег сохнет ооооочень быстро, поэтому инструменты тоже следует сразу-же отмыть как и руки!
¬от что у нас получилось в итоге! √лавное не забыть покрыть творческую работу слоем акрилового лака дл€ защиты от внешней среды. Ѕлагодар€ объемной имитации снега эти тарелочки приобрели свою неповторимость.
∆елаю всем успехов и процветани€!
ќбъемна€ имитаци€ снега в декоре
»сточник: http://cladovaya-solntsa.ru/2013/11/20/obemnaya-imitaciya-snega-v-dekore/
|
ак быстро сделать много помпонов. ћастер-класс |
Ёто цитата сообщени€ LediLana [ѕрочитать целиком + ¬ свой цитатник или сообщество!]
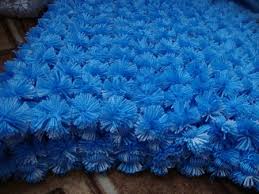 Ќашлась иде€ на иностранном сайте. «десь показано, как можно сделать много помпонов при помощи ножек стола, но, можно и перевернув стул вверх ногами, сделать это в гораздо более удобном положении, не по-пластунски. онечно, вы можете его поставить на "нечто", как показано на фото, но это, наверное, не удобно... ≈сли журнальный столик лЄгкий, можно и его перевернуть на полу вверх ногами. ќстальное всЄ пон€тно: нат€гиваем нитки вокруг ножек стола,
|
÷веты из ткани, бумаги, кожи, бисера |
Ёто цитата сообщени€ јгла€_22 [ѕрочитать целиком + ¬ свой цитатник или сообщество!]
ћетки: ÷веты из ткани бумаги кожи бисера |
ак сделать кракелюрный лак своими руками |
Ёто цитата сообщени€ Lebedeva-3-3 [ѕрочитать целиком + ¬ свой цитатник или сообщество!]
 ѕоверхность, покрыта€ кракелюрным лаком, смотритс€ так, как будто она потрескалась от времени. ƒл€ того, чтобы получилс€ эффект создани€ сеточки, можно приобрести однокомпонентные и двухкомпонентные лаки. Ќо так как эти лаки очень дорогие, то можно попробовать изготовить кракелюрный лак своими руками.
“ехнологи€ изготовлени€ кракелюрного лака своими руками
ракелюрный лак своими руками изготавливают на основе обычного мебельного лака ѕ‘-283, представл€ющий собой раствор алкидных смол. Ќа поверхность предмета, повергаемого декору, необходимо нанести слой лака и выдержать его в течение трех-четырех часов. Ћак должен быть слегка липким. ¬торым слоем на изделие наноситс€ акрилова€ краска, котора€ сразу же высушиваетс€ при помощи фена. ќт метода нанесени€ верхнего сло€ краски будут зависеть образовавшиес€ трещинки. “рещины будут идти по движению кисти, если кистью наносить акриловую краску. ≈сли вам захочетс€ получить сеточку, то верхний слой необходимо наносить спонжиком Ч губкой. √отовое изделие оставл€ют сохнуть на 36 часов.
 ракелюрный лак своими руками также изготавливают с помощью пшеничного декстрина, представл€ющий собой обработанный термическим способом крахмал. ƒл€ этого кип€ща€ вода добавл€етс€ в порошок декстрина и раствор€етс€ на вод€ной бане до состо€ни€ по густоте жидкого йогурта. —лой блест€щего лака на жидкой основе наноситьс€ на хорошо просушенное готовое изделие, а затем высушиваетс€. ѕосле этих операций подготовленный декстрин наноситс€ кисточкой погуще и подсыхает естественным способом в течение часа.
 ракелюрный лак своими руками можно создать и при помощи кле€ ѕ¬ј. ƒл€ этого всю поверхность смазывают толстым слоем кле€ ѕ¬ј, и дают возможность клею подсохнуть до состо€ни€ липкости. [ћастерицы советуют вот этот]
 отсюда
|
"¬живление" распечатки в ткань. |
Ёто цитата сообщени€ Nadin72 [ѕрочитать целиком + ¬ свой цитатник или сообщество!]
"¬живление" распечатки в ткань.
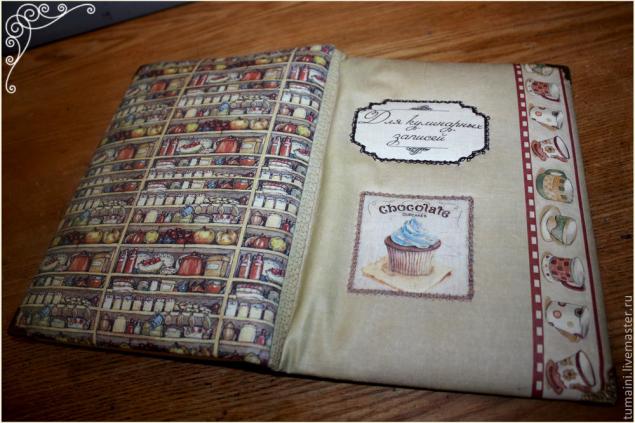
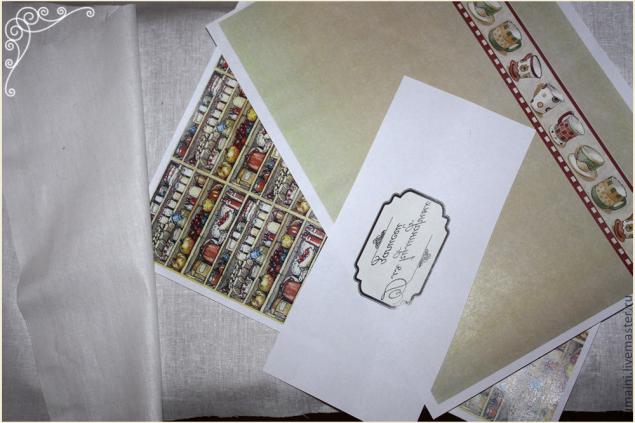
≈сли ¬ам нужен плотный кусочек ткани с конкретным рисунком и водоотталкивающими свойствами, то у мен€ есть иде€, и вовсе это не мастер-класс (если по-чесноку)!
ѕотребуютс€:
- бела€ ткань (например, б€зь);
- распечатанное на лазерном принтере изображение;
- акриловый лак;
- кисть;
- поролонова€ губка;
- валик дл€ приклеивани€ обоев (можно обойтись без).
|
ƒекорируем при помощи фольги. |
Ёто цитата сообщени€ fljuida [ѕрочитать целиком + ¬ свой цитатник или сообщество!]
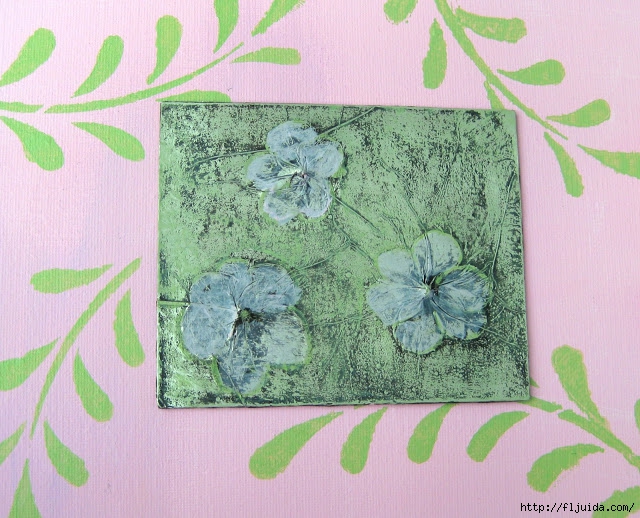
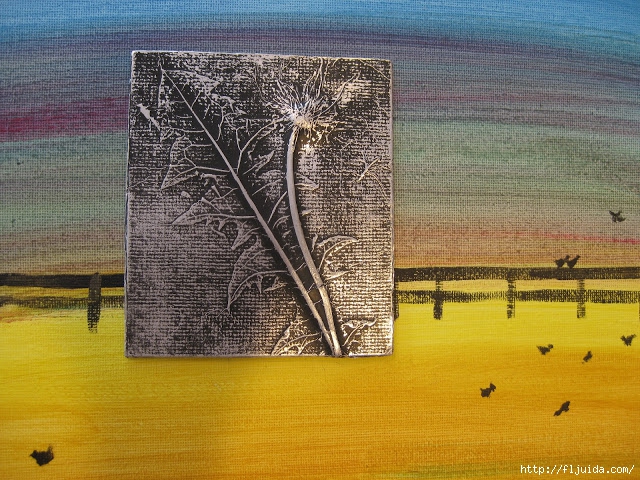
‘ольга дл€ декора.
Ѕлагодар€ фольге и всевозможным дополнительным рельефным издели€м можно получить оригинальную поверхность, которой оформл€ютс€ не только панно , но и поверхности на предметах декора интерьера.
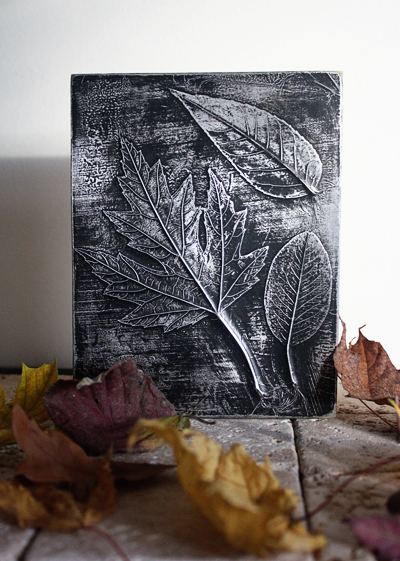
ј вот как это сделать, ¬ы узнаете чуть ниже :) ѕока рассмотрите варианты :) Ќадеюсь они ¬ас зажгут на творчество :)
|
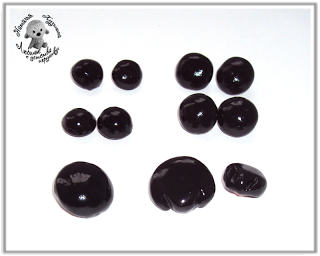
»зготовление глазоки и носиков из пластики |
Ёто цитата сообщени€ “аша92 [ѕрочитать целиком + ¬ свой цитатник или сообщество!]
ћетки: носик из пластики глазки |
ракле без кракелюрных лаков. |
Ёто цитата сообщени€ ћарина_ ривчун [ѕрочитать целиком + ¬ свой цитатник или сообщество!]
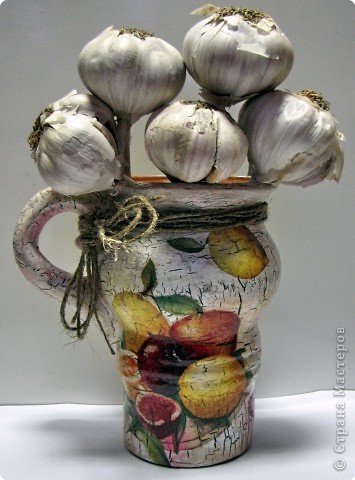
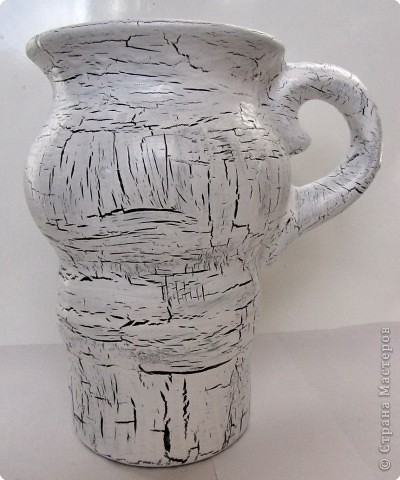
увшинчик дл€ чеснока.
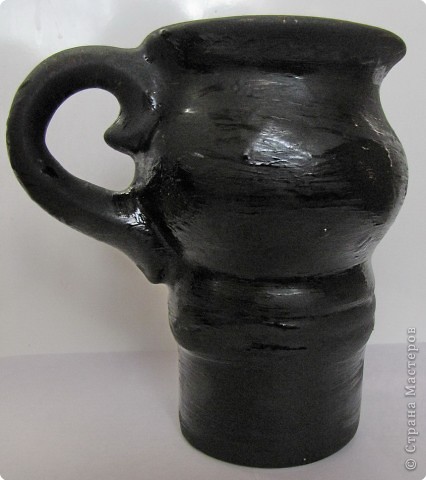
Ѕыл вот такой старенький кувшинчик, куплен еще в советские времена. ¬ымыт, обезжирен водкой.

«агрунтован черной водоэмульсионной краской DULUX. ћожно использовать и обычную водоэмульсионку. ќх, какой страшненький. Ќе нравитс€? ћне тоже. ƒать краске высохнуть.
«атем покрыть изделие клеем ѕ¬ј. —тарайтесь не делать никаких круговых движений кистью. »менно этим клеем € покрывала. лей водой не разводим.
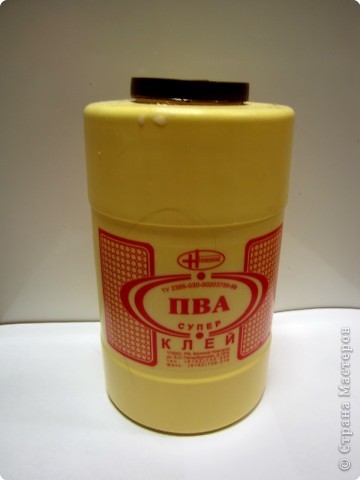
—тало по моему еще страшнее. Ќе ждем когла высохнет клей. Ќаносим водоэмульсионной краской DULUX контрастного цвета. краску наносите только в одном направлении. ѕо одному и тому же месту не возюкайте.
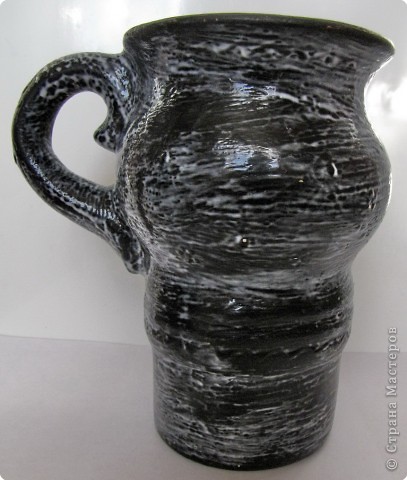
—разу после нанесени€ краски берите фен и сушите изделие. Ќа ¬аших глазах сразу пойдут трещины. „ем дольше ¬ы будете сушить феном, тем больше будут разъезжатьс€ трещины, поэтому можете отложить фен в сторону, как только поймете, что трещинки ¬ас устраивают. —н€ть на фото процесс с феном не могла. –уки то две.
Ќаклеиваете мотив салфетки. ≈стественно только верхний слой. ”ж больно бела€, аж глаза режет.
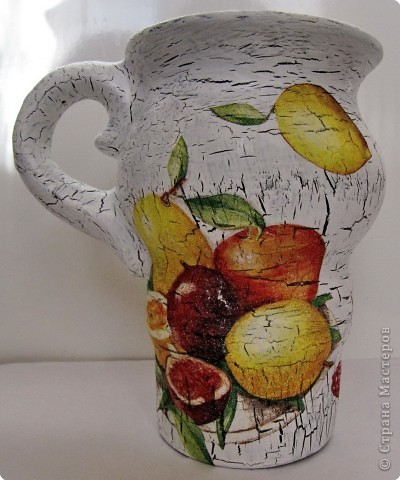
ѕастелью затен€ем вокруг мотива ( использую ѕетербургскую художественную пастель —пектр). ѕокрываем несколько раз акриловым лаком.
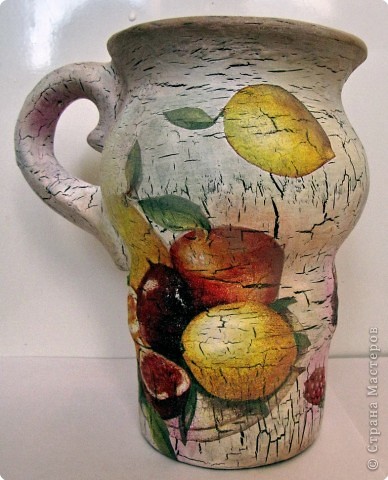
ƒорогие жительницы страны. „итаю много комментариев на тему , что нет у ¬ас в магазинах кракелюрных лаков. —пециально сегодн€ переделала кувшинчик, предназначенный на выкид мой дочкой. ¬ыполн€ла работу из самых простых материалов. ракелюрные лаки не примен€ла, а кракле все равно есть. ”дачи ¬ам, надеюсь все пон€тно.
|
ћ по изготовлению вазочки-креманки дл€ букета! |
Ёто цитата сообщени€ Rukodelkino [ѕрочитать целиком + ¬ свой цитатник или сообщество!]
|
ак сделать розочки из кожуры апельсина |
Ёто цитата сообщени€ fljuida [ѕрочитать целиком + ¬ свой цитатник или сообщество!]
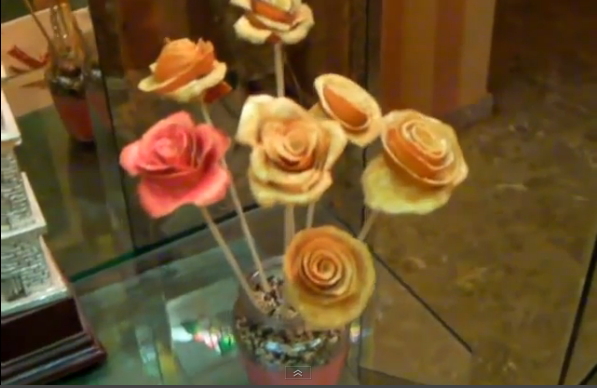
–озочки из апельсиновой кожуры.
ƒорогие читатели, нам всем предстоит недел€ встреч со своими близкими и друзь€ми :)Ќаверн€ка на праздничных столах будут апельсины, которые можно оригинально очистить, превратив кожуру в красивую розочку, зафиксировать зубочисткой и вуал€, украшение готово :)) ј если положить их на батарею, то такие розочки не только будут излучать аромат, но и " увековечатс€" дл€ декоративного оформлени€ в интерьере.
ј не покушать ли нам апельсинчиков ?:))
|
÷веток Purple |
ƒневник |
Even if you’re still not on board, you have to admit that there is an abundance of adorable baby girl summer attire in your daughter’s closet that you’ve just been waiting to pull out! And what better way to complete that darling summer outfit than a cute as can be dahlia headband?
About a year ago, Megan from Not Martha shared this genius felt dahlia tutorial that immediately landed on my To Make list. However, I didn’t get around to attempting it until a recent car trip. And I didn’t have any glue on hand.
So this is my sewn version.
To make one too, you’ll need-
-a 9×12 sheet of wool felt
-a stretchy headband (I found this one at Michael’s [random, right?], but I’ve also had luck finding plain baby headbands at Target and at Dollar Tree)
-sew on pearl beads
-invisible thread and needle
1. Cut out a whole pile of wool felt petals in three different sizes. As suggested by Not Martha in the tutorial for the glued version, I cut my felt into a few 2″ rows, a couple 1.5″ rows and a couple 1″ rows (and used the leftover to make my circle flower ‘base’). Then, I cut the rows into rectangles and then made ‘petal-ish’ shapes. It’s not an exact science- just freehand it. Be sure to make a point at the top of each petal, though, if you want your finished flower to be dahlia-esque.
2. Fold the bottom of the flower in to make a pinched petal.
3. Secure the pinched petal to the circle base (my circle was about 2″ wide) by handstitching with invisible thread. It worked best to stitch across the base of the petal horizontally and then secure with a vertical stitch as well. I usually did one more stitch just for kicks, so three stitches per flower.
4. Continue around the entire base, using your biggest petals.
5. Repeat entire process for the middle layer, using your middle-sized petals.
6. Finish off petal-ing by handstitching the smallest petals into a top layer. There should be only a small spot in the center that isn’t covered in petals.
7. In that uncovered center spot, stitch a pile of pearl beads (I think I used about 20 total). For full coverage, some of the beads will be stacked on top of each other. Oh, and the back of your flower base will be a mess of invisible thread- haha!
8. Sew around the perimeter of the felt base, securing the flower to the headband. Sew threw the petals- if they aren’t stitched in place, they have the tendency to flip up and get all backwards.
9. Pair this new headband with something summer-y! So adorable!
|
ј я ƒ≈Ћјё Ѕ”ћј√”. ћ |
Ёто цитата сообщени€ likmiass [ѕрочитать целиком + ¬ свой цитатник или сообщество!]
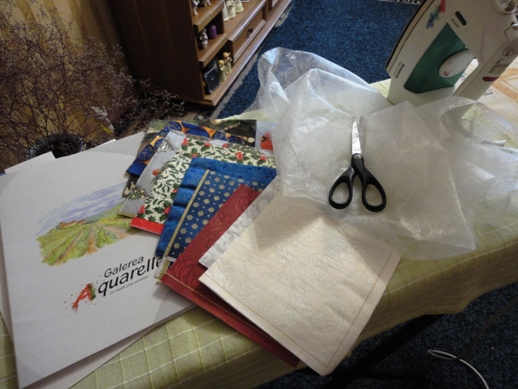
ћногие делают бумагу при помощи наклеивани€ салфеток. я покажу способ как это сделать совсем без проблем. —разу оговорюсь, что способ с пищевой пленкой мне не нравитс€. Ѕудем делать листы формата ј4
Ќам понадоб€тс€:
-салфетки,
- бумага дл€ акварели, можно картон и если надо тоненький листочек, то и офисна€ бумага сгодитс€,
- ножницы,
- утюг,
- клеева€ паутинка ( про нее смотрим здесьhttp://www.narodko.ru/article/tkach/dublerin/pautinka.htm ) Ёто та сама€ паутинка, которую мы привыкли видеть в виде узких полосочек, примен€емых дл€ подгибки наза юбок, брюк. Ќо эта широка€, ширина 1,2 м. —тоит 90 р. за метр.
|
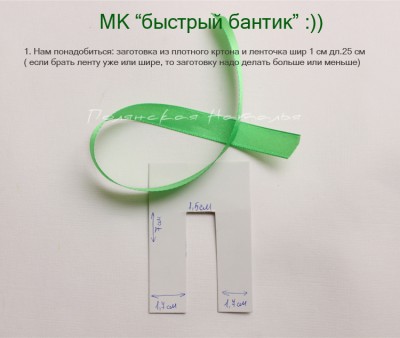
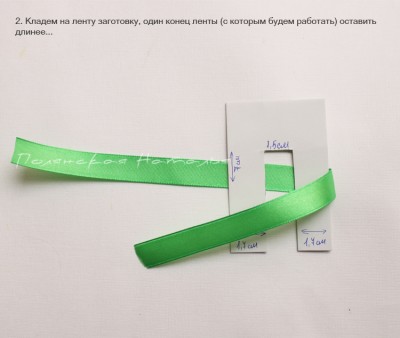
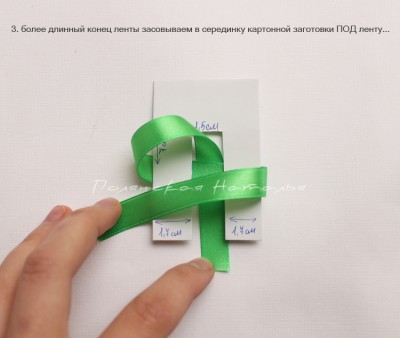
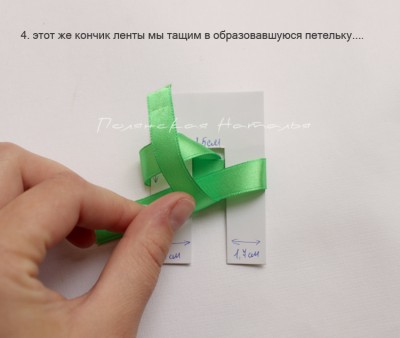
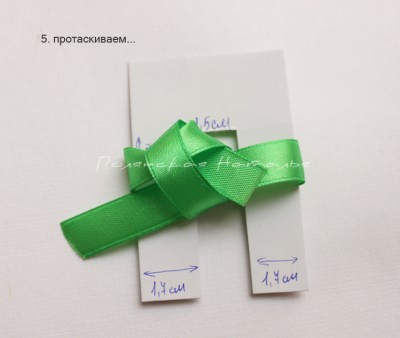
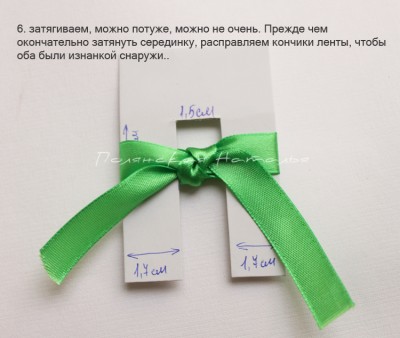
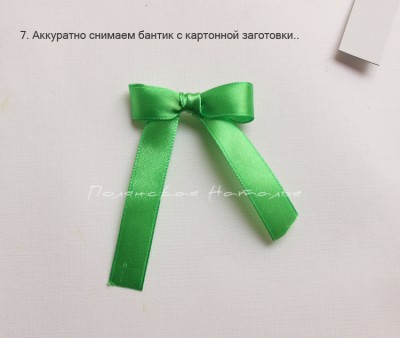
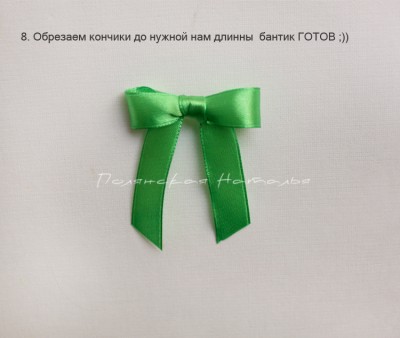
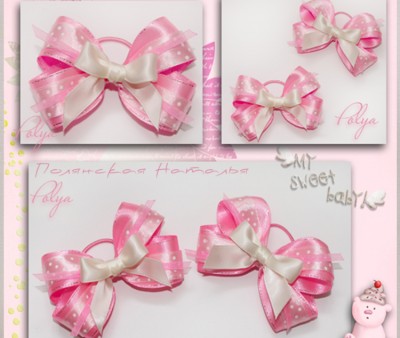
Ѕыстрый бантик |
Ёто цитата сообщени€ SwetlanaS [ѕрочитать целиком + ¬ свой цитатник или сообщество!]
ћетки: Ѕыстрый бантик |
ак покрасить бумагу. |
Ёто цитата сообщени€ √лебова_≈лена [ѕрочитать целиком + ¬ свой цитатник или сообщество!]
»сточник. ƒалее текст автора.
—егодн€ мы поговорим о том, как покрасить бумагу. я расскажу о тех способах, которыми активно пользуюсь: о покраске чаем, кофе, акварелью и пищевыми красител€ми.
акую бумагу вз€ть?
ќбычно дл€ своих блокнотов € использую офисную бумагу дл€ принтера, 80 г./кв.м. ћожно брать и более тонкую – 65 г./кв.м. – бумагу дл€ письма, ее очень удобно тонировать, т.к. зачастую можно покрасить только одну сторону, а друга€ пропитаетс€ сама. ≈сли нужно сделать скетч-бук или что-то в этом роде, то в дело идет чертежна€, акварельна€ или пастельна€ бумага.
ак покрасить бумагу кофе?
ћетки: ак покрасить бумагу |
√уашь с ѕ¬ј как замена масла и акрила |
Ёто цитата сообщени€ Lebedeva-3-3 [ѕрочитать целиком + ¬ свой цитатник или сообщество!]

јкрил - дорогой, масло - дорогое, еще и сохнет долго. „то, если вы хотите только попробовать что-то нарисовать на холсте? ¬сего одну картинку, ради которой не хочетс€ выкидывать "бешеные тыщи" на краски, которые потом будут просто лежать без дела? »ли вы только учитесь, или рисуете с детьми, или просто рисуете дл€ себ€. ¬ любом из этих случаев на помощь приходит дуэт гуашь+клей ѕ¬ј.
Ётому приему мен€ научили друзь€-керамисты, и € долго пользовалась этой смесью и дл€ рисовани€ на холстах, и дл€ росписи фигурок - да дл€ чего угодно это можно использовать. ћежду прочим, говор€т, что такой же смесью расписывают шкатулки с традиционными орнаментами.
|
ак всего за 10 минут превратить обычный картон в дизайнерский! |
Ёто цитата сообщени€ Milaij [ѕрочитать целиком + ¬ свой цитатник или сообщество!]
ѕонадоб€тс€:
- обычный белый картон дл€ детского творчества
- декоративна€ салфетка
- пищева€ плЄнка
- ножницы
- марл€
- утюг
»зготовление:
1. ¬ыбранную салфетку необходимо предварительно тщательно прогладить утюгом, чтобы убрать складки (если возможности утюга позвол€ют, можно при необходимости обдать салфетку паром).
2. ѕосле этого отдел€ем у салфетки верхний слой с рисунком.
3. Ќа лист картона расстилаем поочерЄдно пищевую плЄнку, салфетку и марлю.
4. “щательно и не спеша проглаживаем утюгом. —купитьс€ на температуру не стоит. ќсобое внимание следует уделить углам и кра€м, где утюг желательно подержать несколько секунд.
5. ѕереворачиваем картон и обрезаем излишки плЄнки и салфетки ножницами. ¬озможно, окажетс€, что на углах салфетка плохо схватилась. Ќе беда – эту недоработку устраним на следующем этапе.
6. ¬новь проглаживаем утюгом картон с лицевой и изнаночной стороны.
¬ итоге получаетс€ цельный лист картона с красивым рисунком и при€тной на ощупь фактурой.
— помощью такой салфеточной техники можно также изготовить красочную дизайнерскую бумагу из обычной офисной бумаги, белой или цветной.


—ери€ сообщений "своими руками":
„асть 1 - Ќоворожденным
„асть 2 - блокнот
...
„асть 24 - —неговик из бумаги
„асть 25 - ќткрытка-люлька
„асть 26 - ак всего за 10 минут превратить обычный картон в дизайнерский!
„асть 27 - ќригинальна€ иде€ дл€ влюбленных
„асть 28 - Ѕумажные помпоны
...
„асть 37 - упаковка подарка за дес€ть минут
„асть 38 - ќткрытка " ÷веточный взрыв" своими руками
„асть 39 - бабочки
|
| —траницы: | [2] 1 |


