-ћузыка
- јнтонио ¬ивальди-Ёльфийска€ ночь.
- —лушали: 12185 омментарии: 0
- «ара -* Ќедолюбила *
- —лушали: 4970 омментарии: 0
- √алина ’омчик - Ћучина (русска€ народна€ песн€)
- —лушали: 4733 омментарии: 0
- –ада –ай " ћы с тобой два берега"
- —лушали: 2514 омментарии: 0
- —лава - ќдиночество.
- —лушали: 10345 омментарии: 0
-–убрики
- јксессуары (шарфы, перчатки, сумки, ремни, браслет (415)
- Ѕрать€ наши меньшие... (276)
- ¬ышивка крестом (245)
- ¬€зание деткам (1299)
- ¬€зание дл€ дома (425)
- ¬€зание крючком (2059)
- ¬€зание спицами (2913)
- ƒл€ детей (271)
- ƒл€ себ€ ЋёЅ»ћќ… (780)
- »нтересно (740)
- виллинг (201)
- расота (798)
- Ћюбовна€ лирика (310)
- ћои работы (27)
- ћои фотографии (17)
- ћои любимцы (3)
- ѕрирода (11)
- Ќосочки, тапочки, сапожки (509)
- ѕлать€ (1142)
- ѕледы, коврики (367)
- ѕлетение из газет (261)
- –ецепты (2708)
- вторые блюда (443)
- салаты (164)
- первые блюда (58)
- –укоделие (2869)
- —ад, дача, огород (363)
- ”роки по в€занию, схемы (477)
- ÷веты - делаем сами (403)
- Ўапки, шали, палантины, накидки (377)
- Ўьем (1171)
- ёмор (135)
-неизвестно
-ѕоиск по дневнику
-ѕодписка по e-mail
-ѕосто€нные читатели
-—ообщества
-—татистика
«аписей: 19897
омментариев: 510
Ќаписано: 21734
ƒругие рубрики в этом дневнике: ёмор(135), Ўьем(1171), Ўапки, шали, палантины, накидки(377), ÷веты - делаем сами(403), ”роки по в€занию, схемы(477), —ад, дача, огород(363), –укоделие(2869), –ецепты(2708), ѕлетение из газет(261), ѕледы, коврики(367), ѕлать€(1142), Ќосочки, тапочки, сапожки(509), ћои фотографии(17), ћои работы(27), Ћюбовна€ лирика(310), расота(798), виллинг(201), »нтересно(740), ƒл€ себ€ ЋёЅ»ћќ…(780), ƒл€ детей(271), ¬€зание спицами(2913), ¬€зание крючком(2059), ¬€зание деткам(1299), ¬ышивка крестом(245), Ѕрать€ наши меньшие...(276), јксессуары (шарфы, перчатки, сумки, ремни, браслет(415)
—алфетка спицами |
Ёто цитата сообщени€ Imra [ѕрочитать целиком + ¬ свой цитатник или сообщество!]
|
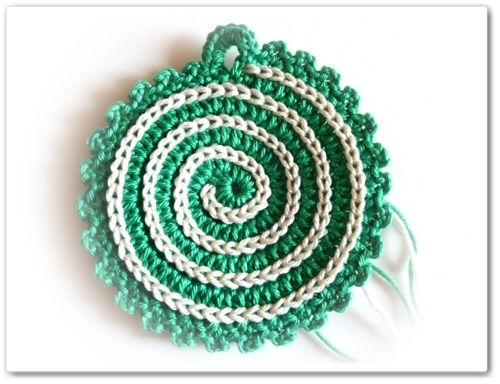
—пиральные. ѕодставки под чашки и стаканы. |
Ёто цитата сообщени€ Tosichka3 [ѕрочитать целиком + ¬ свой цитатник или сообщество!]
ќчень красива€ модель из пестрой пр€жи. ѕрактична€ и мила€ вещь дл€ уюта в доме. ¬€жите крючком спиральные подставки под чашки и стаканы.
1.
|
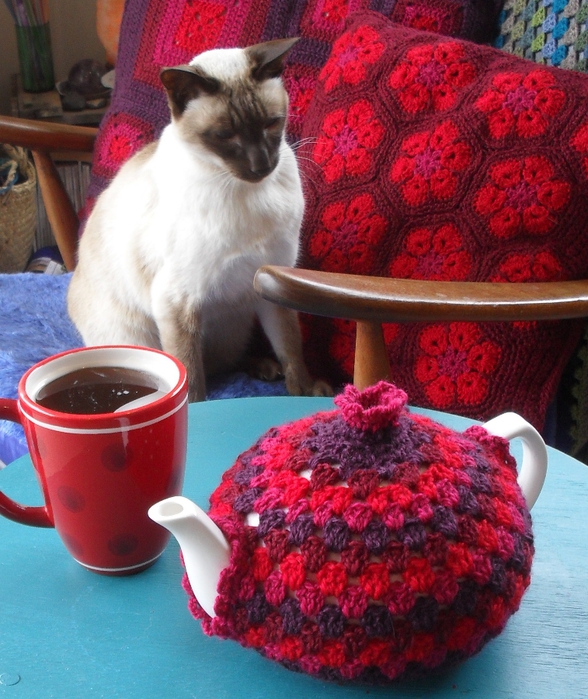
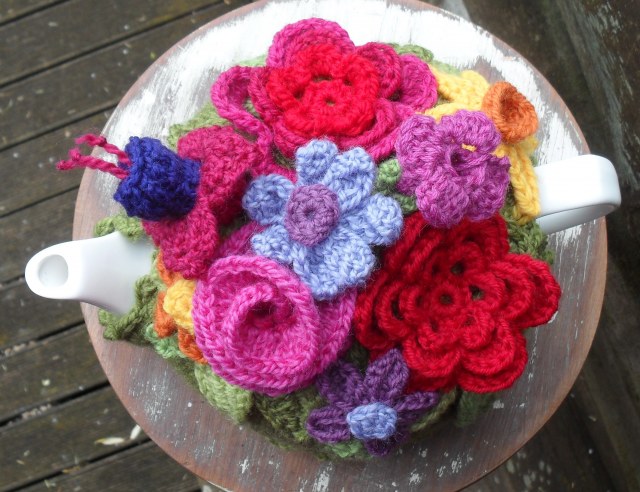
¬€заные грелки дл€ чайника |
Ёто цитата сообщени€ ћарриэтта [ѕрочитать целиком + ¬ свой цитатник или сообщество!]
|
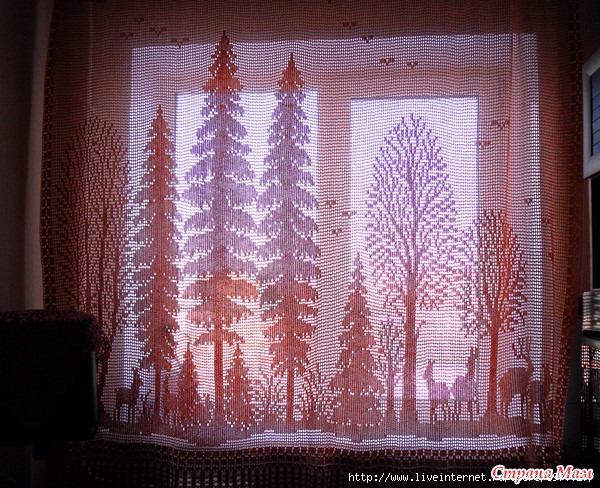
Ў» ј–Ќјя Ў“ќ–ј ‘»Ћ≈… ј –ё„ ќћ. |
Ёто цитата сообщени€ ћила-2010 [ѕрочитать целиком + ¬ свой цитатник или сообщество!]
|
Ќовогодний колокольчик |
Ёто цитата сообщени€ MerlettKA [ѕрочитать целиком + ¬ свой цитатник или сообщество!]
‘ото активны. –азмер схем определ€йте самосто€тельно.
»сточник: 1000 Mailles ‘ранцузский журнал 1000 Mailles (1000 петелек)
√од выпуска: 1975-20012 »здательство: Les Editions de Saxe S.A.
ISSN: 0339-3445 ∆анр: –укоделие язык: ‘ранцузский —’≈ћџ
|
ƒекоративные салфетки. ќчень красивые... |
Ёто цитата сообщени€ светани [ѕрочитать целиком + ¬ свой цитатник или сообщество!]
|
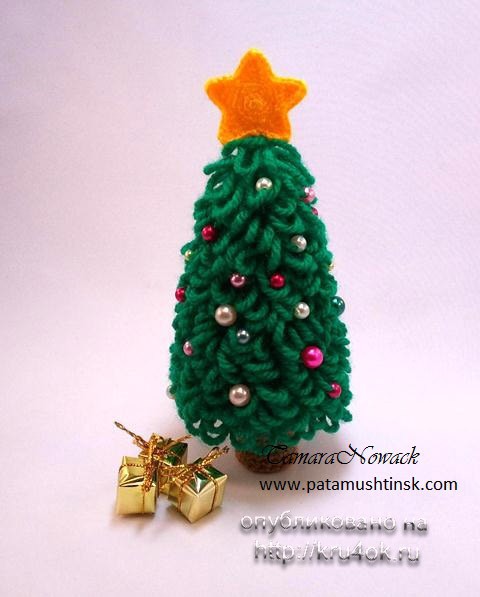
¬€зана€ елочка. |
Ёто цитата сообщени€ светани [ѕрочитать целиком + ¬ свой цитатник или сообщество!]
|
оврик-подушка... декорные идеи |
Ёто цитата сообщени€ MerlettKA [ѕрочитать целиком + ¬ свой цитатник или сообщество!]
![]() –азмер фото можно определ€ть самосто€тельно.
–азмер фото можно определ€ть самосто€тельно.
![]() — ј„ј“№ книгу "¬€жем сказку из остатков пр€жи"
— ј„ј“№ книгу "¬€жем сказку из остатков пр€жи"
![]() »сточник: ∆урнал 104 мелочи дл€ дома
»сточник: ∆урнал 104 мелочи дл€ дома
Qingqu Bianzhi— итайский журнал по в€занию крючком (104 мелочи дл€ дома) √од выпуска: 2000 ∆анр: в€зание ISBN: 7-5019-2960-2/TS.1793 ќписание: ¬ журнале представлены различные мелочи дл€ дома, св€занные крючком. ‘отографии и схемы.
|
Ўишки в инее. |
Ёто цитата сообщени€ светани [ѕрочитать целиком + ¬ свой цитатник или сообщество!]
|
ƒорожка крючком ... от Ondori |
Ёто цитата сообщени€ MerlettKA [ѕрочитать целиком + ¬ свой цитатник или сообщество!]
![]() –азмер фото можно определ€ть самосто€тельно.
–азмер фото можно определ€ть самосто€тельно.
![]() »сточник: ∆урнал ONDORI Crochet Lace 95
»сточник: ∆урнал ONDORI Crochet Lace 95
∆анр: –укоделие, в€зание
ќписание: Ќовейшие тенденции в в€зании крючком (очень редко спицами) из японии. «амечательный €понский журнал по в€занию с изысканными ослепительно красивыми модел€ми дл€ в€зани€ крючком и очень пон€тными схемами, где очень детально и пошагово показаны этапы в€зани€ каждого издели€
|
отик-валентинка. |
Ёто цитата сообщени€ светани [ѕрочитать целиком + ¬ свой цитатник или сообщество!]
|
оробочка из картона. |
Ёто цитата сообщени€ светани [ѕрочитать целиком + ¬ свой цитатник или сообщество!]

Material:
1. Thick Cardboard or paperboard, non-corrugated (around 1/6″ thick).
2. Felt for bottom and base.
3. Weaving material, example: yarn, twine, fabric strips, ribbons etc….Tools:
1. Sharp scissors (able to cut thick cardboard)
2. Hole puncher
3. Tapestry needle (#13)
4. Clothes pin
5. Craft / Tacky Glue
6. Pen or pencil
7. Ruler
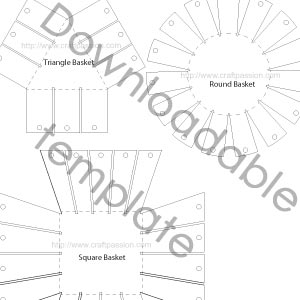 Download the basket weaving template (consist of triangle, round and square) in pdf format.
{It will either open in new tab or open a small window asking you to save it as file. If you can’t find the saved file in your computer, the default folder usually is in “/downloads”}
{If you can’t download the pdf pattern, probably you don’t have acrobat reader, download the latest version for free, here.}
Print it and enlarge 200% to get the size I made.
Trace it on the thick cardboard.
 After tracing the template on the thick cardboard, use a pair of strong and sharp scissors to cut the template out.
Punch the holes with a paper hole-puncher.
Trace base on felt, cut 2 pieces.
Get the rest of the tools & materials ready.
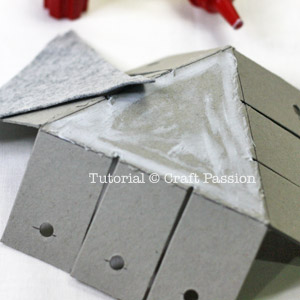 Brush a layer of tacky glue on the bottom of the basket, press & stick the felt onto it.
 Repeat the same to adhere the felt to the base.
Snip the edge of the felt follows the grooves between the fingers.
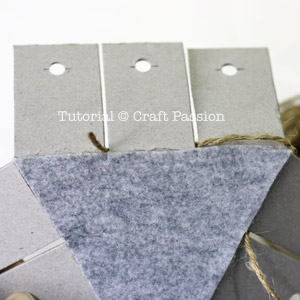 Being to weave over and under around the fingers of the frame.
 Push the twine into the grooves of the felt that you have just snipped.
Keep on weaving over and under the fingers until the end of first round.
 When begin the second round, you will notice that you are weaving in the reverse side of the first round.
A full wrap on both sides after finish the second round.
 Continue weaving and push the twine down to make them closer to each other. This will avoid gaps in between and will also hide the cardboard away.
As you go higher, the frame will stand up vertically and form the side of the basket.
 Continue until you just over the hole’s level.
Allow a long length of twine for rim stitching later.
 Put on clothes pin and allow some room for rim making.
 To make the rim, insert another type of twine through the space between the clothes pin by using a tapestry needle.
Since the length is quite long, divide the twine by halve and work both ends from middle.
 Keep going round by round. Take note on the corners and arrange them neatly.
 Lay the twine until it fully covers the top portion of the basket.
 Secure the rim by stitching the original twine through the holes.
 Stitch again on the opposite direction to form criss-cross pattern.
 When reaching the corner, pierce through the gap and make another stitch there.
 Hide all ends into the braid to neaten up the basket.
The basket is ready to be used.

|
орзина из шнура. |
Ёто цитата сообщени€ светани [ѕрочитать целиком + ¬ свой цитатник или сообщество!]
Crochet Hemp Basket
Amended on 19 September for better clarificationDifficulty Level: Intermediate, must know how to crochet sc, slst & ch
Finished size: approx. 11″ (D) x 5″ (H)
Gauge: Not essential as long as the hook size matches the medium worsted yarn weight.Materials & Tools:
1. Ace Manila Twisted Rope (75853), 1/4″ x 50′ or equivalent
2. Yarn, Lion Brand, Lion Cotton Yarn/color: Natural (beige) #760-098, or, cotton twine that is able to crochet.
3. Crochet hook: 4mm
4. Stitch marker
5. Quick dry adhesive glue
6. Scissor
7. Clothespin or clip
Abbreviations:
ch = chain
ch sp = chain space, the space between 2 sc that are link by chain stitch, could be 1 ch or 2 ch
sc=single crochet
st = stitch
slst = slip stitch
sk= skip
mm= move markerCrochet Hemp Basket Pattern:
[figure inside {} bracket indicates total stitches on the round]
R1 : ch2, sc8 on second ch from hook, ch1, place marker. {8}
** sc from row 2 onwards means sc around rope, otherwise as per instruction **
R2 : *sc on next st, ch1*, repeat * 8 times, mm. {16}
R3 : *sc on next ch sp, ch2*, repeat* 8 times, mm. {24}
R4 : *sc on next ch sp, ch1, sc on same ch sp, ch1*, repeat* 8 times, mm. {32}
R5 : *sc on next ch sp, ch2, sc on next ch sp, ch1* repeat* 8 times, mm. {40}
R6 : *sc on next ch sp, ch2*, repeat* 16 times, mm. {48}
R7 : *sc on next ch sp, ch1, sc on same ch sp, ch1*, repeat* 16 times, mm. {64}
R8 : *sc on next ch sp, ch2, sc on next ch sp, ch1* repeat* 16 times, mm. {80}
R9 : *sc on next ch sp, ch2*, repeat* 32 times, mm. {96}
R10 : *sc on next ch sp, ch1, sc on same ch sp, ch1, sc on next ch sp, ch1*, repeat* 16 times, mm. {96}
R11 : *sc on next ch sp, ch1, sc on next sp, ch2, sc on next ch sp, ch1*, repeat* 16 times, mm. {112}
R12 : *sc on next ch sp ch2, sc on next ch sp, ch2, sc on next ch sp, ch1*, repeat* 16 times, mm. {128}
R13 : repeat R12.
R14 : *sc on next ch sp, ch2*, repeat* 48 times, mm. {144}
R15 : repeat R14.
R16 : *[sc on next ch sp, ch2] repeat 4 times, [sc on next ch sp, ch1] repeat 2 times, sc on same ch sp, ch 1*, repeat* 8 times, mm. {144}
R17 : *[sc on next ch sp, ch2] repeat 4 times, [sc on next ch sp, ch1] repeat 3 times*, repeat* 8 times, mm. {144}
R18 : *[sc on next ch sp, ch2] repeat 5 times, [sc on next ch sp, ch1] repeat 2 times*, repeat* 8 times, mm. {152}
R19 : repeat R18.
R20 : *[sc on next ch sp, ch2] repeat 6 times, sc on next ch st, ch1*, repeat* 8 times, mm. {160}
R21 : repeat R20.
R22 : *sc on next ch sp, ch2*, repeat* 56 times, mm. {168}
R23 : repeat R22.
R24 : *[sc on next ch sp, ch2] repeat 5 times, [sc on next ch sp, ch1] repeat 2 times, sc on same ch sp, ch 1*, repeat* 8 times, mm. {168}
R25 : *[sc on next ch sp, ch2] repeat 5 times, [sc on next ch sp, ch1] repeat 3 times*, 3sc on next ch sp, crochet “handle” (see instruction below), 3sc on next ch sp, repeat* 3 times, 3sc on next ch sp, crochet “handle”, 3sc on next ch sp, repeat* 2 times, mm. {174}
R26 : repeat R25, twist rope at the handle section.Handle (work without rope) : *slst, ch, slst*, repeat* 6 times, leave 6″ rope as handle
Cut rope 1″ – 2″ from the last stitch, glue it down and clip the end to the basket body until it is securely fastened.
Glue the rope’s start end with adhesive too.
Weave and hide yarn end.
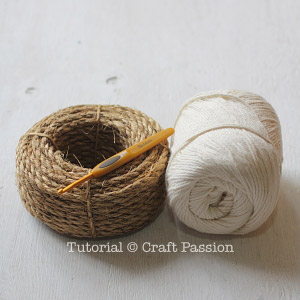 3 basic materials to work on, the manila rope, yarn or twine and a crochet hook.
 Crochet basic round according to the pattern (R1).
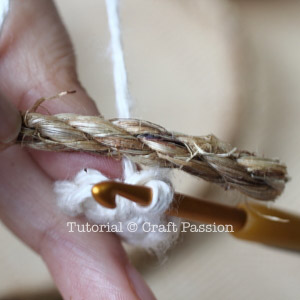 On round 2 onwards, all single crochet (sc) stitches in the pattern means single crochet on the rope.
Place the yarn under the rope.
 Insert hook into the loops of the previous round’s stitch, yarn over (yo) the yarn from the top of the rope.
 Pass through the loops of the previous round’s stitches to complete the sc around the rope.
 Crochet the base follow the pattern above. This is the 2nd round, remember to place a marker so you will know where is the beginning stitch of the round.
 Third round. Adjust the rope end nicely and fit into the base.
Crochet the rest as per pattern above.
 The look of the basket from the bottom.
 Complete till Round 24, just before making handles on the final 2 rounds.
 You will see the increment stitch as this, sc on next ch st, ch1, sc on same ch st, ch1.
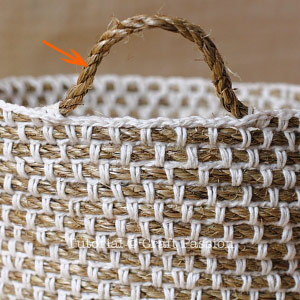 Round 25, handle construction. The handle is 6″ but if you want longer handle, you can always adapt to your length.
 Round 26, wind and twist the rope on the handle.
 This is the 3 sc stitches before and after the handle.
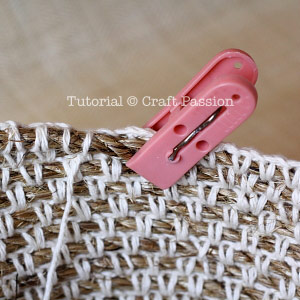 Apply the glue at the rope end, clip it to the basket until it is dry and securely fastened.

|
ƒорожка крючком ... от Ondori |
Ёто цитата сообщени€ MerlettKA [ѕрочитать целиком + ¬ свой цитатник или сообщество!]
![]() –азмер фото можно определ€ть самосто€тельно.
–азмер фото можно определ€ть самосто€тельно.
![]() »сточник: ∆урнал ONDORI Crochet Lace 95
»сточник: ∆урнал ONDORI Crochet Lace 95
∆анр: –укоделие, в€зание
ќписание: Ќовейшие тенденции в в€зании крючком (очень редко спицами) из японии. «амечательный €понский журнал по в€занию с изысканными ослепительно красивыми модел€ми дл€ в€зани€ крючком и очень пон€тными схемами, где очень детально и пошагово показаны этапы в€зани€ каждого издели€
|
расивое оформление вешалок-плечиков крючком |
Ёто цитата сообщени€ MerlettKA [ѕрочитать целиком + ¬ свой цитатник или сообщество!]
|
ѕодсолнухи. |
Ёто цитата сообщени€ светани [ѕрочитать целиком + ¬ свой цитатник или сообщество!]

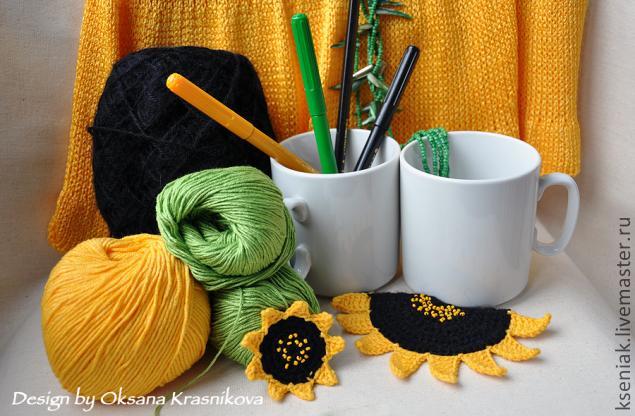
¬ам потребуетс€:
6 белых однотонных чашек, хлопчатобумажна€ пр€жа по 100 г желтой и зеленой 330 м/100 г, остатки черной шерст€ной пр€жи, 6 пуговиц, 10 г желтого бисера, крючок є3,5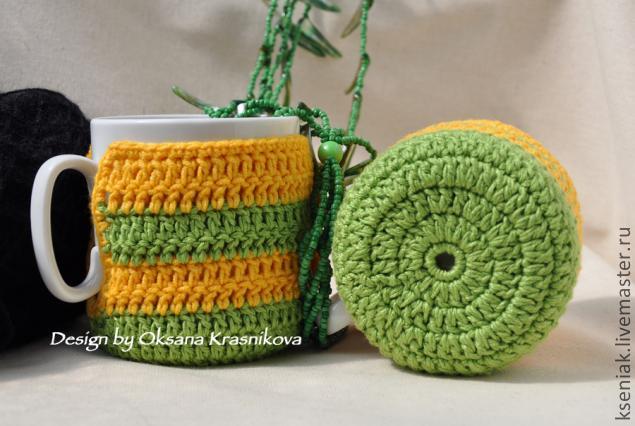
ѕервым делом в€жем сам футл€р (очередность полос желтого и зеленого цвета определ€ем на свое усмотрение). Ќачинаем с донышка. ƒл€ этого пров€зываем 5 в.п., замыкаем в круг и в€жем круговыми р€дами следующим образом:
1 р.: 1 в.п. подъема, 10 ст. б/н, 1 соед. ст.
2 р.: 2 ст. с/н в каждый ст. предыдущего р€да (1-й ст. с/н заменить 3-м€ в.п. подъема), соед. ст.
3 р.-4 р.: в€зать попеременно 1 и 2 ст. с/н в каждый ст. предыдущего р€да (1-й ст. с/н заменить 3-м€ в.п. подъема), соед. ст.
5-й и последующие р€ды в€зать ровно ст. с/н до нижнего основани€ ручки.
ƒл€ прорези под ручку оставл€ем 2-3 ст. с/н и продолжаем в€зать пр€мыми и обратными р€дами до необходимой высоты. ‘утл€р должен быть на 1-1,5 см ниже высоты чашки.
√отовый футл€р обв€зать ст. б/н. ƒл€ петли пров€зать 8 в.п., 1 соед. ст. в 1-ю в.п. и обв€зать ст. б/н.
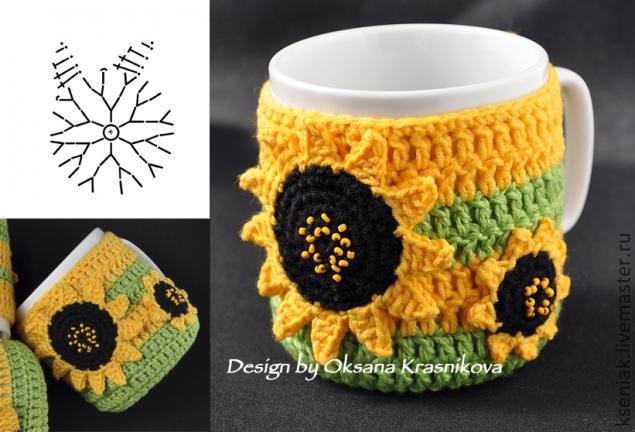
ƒл€ декора необходимо св€зать целые подсолнухи и половинки разной величины. Ќа рисунке дана схема подсолнуха среднего размера. ќриентиру€сь на приведенную схему, мен€йте количество круговых р€дов и размер лепестков, чтобы получить подсолнухи разного диаметра.
√отовые подсолнухи отутюживаем, расшиваем бисером и пришиваем к футл€рам. ѕришиваем к футл€рам пуговицы и «одеваем» в них чашки.
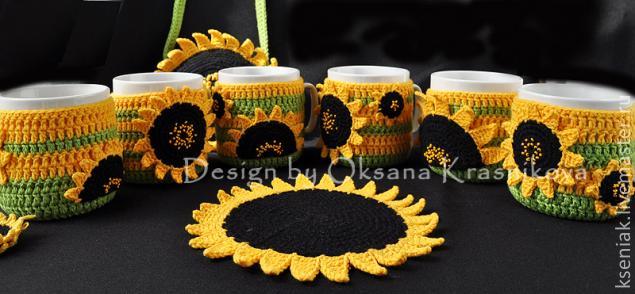
ѕри€тного чаепити€!
—окращени€
в.п. – воздушна€ петл€
ст. б/н – столбик без накида
ст. с/н – столбик с накидом
соед. ст. – соединительный стоблик http://www.livemaster.ru/topic/139915-grelki-dlya-chashek-podsolnechnyj-raj?msec=24?
|
Ўл€пка крючком . |
Ёто цитата сообщени€ MerlettKA [ѕрочитать целиком + ¬ свой цитатник или сообщество!]
|
ќконные подшторки ...паучки |
Ёто цитата сообщени€ MerlettKA [ѕрочитать целиком + ¬ свой цитатник или сообщество!]
”крашение дл€ окна... (мне нрав€тьс€ такие вот воздушные подшторки, и они очень дополн€ют такой праздник как рождество и Ќовый год, которые уже не так далЄки). Ўирина всей подшторки 54см, высота 72см. ¬ среднем необходимо 250г пр€жи х.б. ѕри€тного творчества !!!
|
айма или обв€зка салфеток крючком |
Ёто цитата сообщени€ MerlettKA [ѕрочитать целиком + ¬ свой цитатник или сообщество!]
|
ƒорожка крючком |
Ёто цитата сообщени€ MerlettKA [ѕрочитать целиком + ¬ свой цитатник или сообщество!]
|


