


 ...
...


������������ ����� �������
16 ������ 2010

�������� �������� ������������ ������� � ������������ �����, ��������� �������.
Lady Boutique Series �4845 2019 ������������: Boutique Sha ����: �������� ���������� �...
��� ��������� - (0)���������� ��������� ���� ��������: ������.��. ���� �������. ...
����� �� ����������� ������� - (0)����� �� ����������� ������� &n...
Morgenmuffel - �������� ���������, ������, ����������� - "���, ��� ������ �� �����". - (0)���� �� ������ �����) Morgenmuffel - �������� ���������, ������, ����������� - "���, ��� ������ �...
��� ��������� - (1)����
 � - �������������� ��� ���������� ���������� � �������� ������������. ����������� ��������� ����������: Internet Explorer 6, Fire Fox 1.5, Opera 9.5, Safari 3.1.1 �� ���������� JavaScript. �������� ��� ����� ����
 ��������������������� ������� �������� �� ��� ������ �����

���� �� ����� |
������� |

�����: hand-made |
��������� ���� |
|
������ ����� �������� � ������ ����� |
�����: ����� � ���� |
���� ������� |
�����: ����� � ���� |
��������� ��-�����������! |
�����: ����� |
��� ������� �������� ������� |
������� |
������� (http://umeha.3dn.ru/publ/kak_prishit_pugovicu_navechno/15-1-0-638)
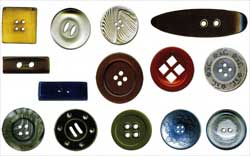
������� �������� ������� � ������� ��� ���������� ������ ����� � ������� ���������� ����� ��������� 0,4 ��. ��� ����� ����� ��������� ������ � ������� �����. ���������� �� �������� �� ����� ������ ���� �� ����� � �� ������� — �������. ����� ����� ����� �� ����� ������������.
�����: ����� � ���� |
����� �� ����� ������� |
|
�������� ����� �� �������� ����� |
�����: �������� |
������� � ��������� �������� ����� ��� ��������� |
������� |
�����: ����� � ���� |
������ ���������� ��� ���������! |
�����: hand-made |
��� ������ - ������������ ������� |
�����: ��������� ����� |
������ ��� ������� |
�����: ����� � ���� |
���������� "����������" |
�����: ����� � ���� |
���������� "�����" |
|
��������� |
�����: hand-made |
����� ��� ���� |
������ ������ - http://www.season.ru/links/sew_hom/
����� ��� ���� |
|
|
�����: ����� � ���� |
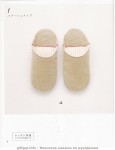
������ ������� ����� |
������� ������ ��������� ������� �����. ������ ������ ����� ���������� �����, ������ �� ��������, � ����������� �� ������ ����. ������, ���������� �����, ��������� ��� ���������� ��������, ���� ����������� ������. ������� �� ������������ � ����� �� �� ����� �������, �� ���������� ����������������.
����� ������� ����� ���������� ������������� ������������ ����� ������� ��� ������.

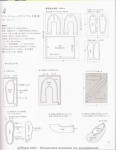
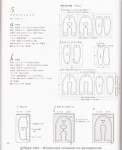
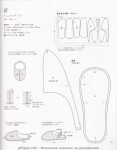
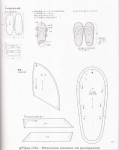
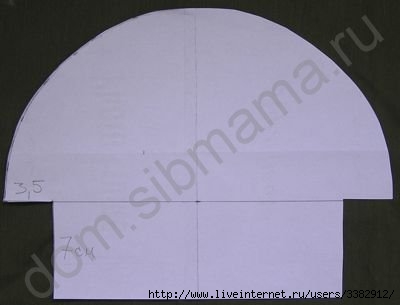
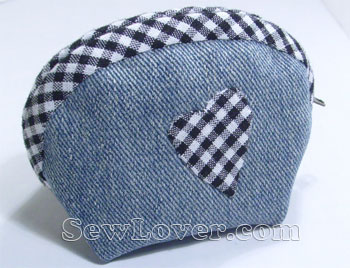
������� �����

������� �����-1
����, ���������:
1. ���������� ��� (���).
������������� ����� ������������� ����� ��� 7 ������ ���������, ����� � ������� �� ��������� ��� � ���������� ��� ������� ��������.
2. ���������� ����� ������ (���1).
������������� ����� ������������� ����� �� �������� �������������, ������� ����� ������� ������ ����� ����������� ������. ����� ���� �� ����������� ��������, � ������� – ��� �������� ��������, ��������� �� ������ ������� �����.
3. ���������� ����� ������ (���2).
��� ����� – ��������, ��� ���������� ������ ������� ��� ���������� �������. ����� ����������� ��������� ����� ������������� ����� �� ��������, � ������� – ���������� �� ����������� ����� ������� �����. �������� ��� �� �� ������ ������� �����.
3. ���������� ����� ������ (���3).
������ ��� ����� ���������� ������ ������� � ������������ ������������ � � �������� ����. ����� ��� ������ ���� ����� �������� ������������� �� ����������� ������ ������� �����. �������� ��� �� �� ������ ������� �����.
4. ���������� ����� (���).
����� ����������� ������������� ������ �������� �� ����� �����.
��� ������ ��������� ������� ������ ����� ����� ������� ������� ����� ��.
5. ���������� ����� (���).
����� ����������� �� ��������� ������, ������������� ����� ����� ��������. ������� – �� ������� ������ � �������� �� ������ ������� ��������.
��� ������ ��������� ������� ������ ����� ����� ������� ������� ����� ��.
6. ����� ����� (���).
����� ����������� �� �������� ��������� ����� �� ����� ��������� ��� �� �������� �����.
7. ����� ������ (��).
��� ��������� ���� ����� ����� ����������� �� ����� ��������� ��� ����� ����������� ����� ����� (���� ��� ���� ������ ������� � �����) � ����������� ������� �� ��������� �����.
������������ ������� ����� ����� ������ �� ����� ���.
8. ������ ���� (��).
��� ����� ��������� ��� �������� ��������� ����. ����� ������������� ������ �������������, ������� ����� ������� ������� ���� ����������� �������. ���������� ����� �� �������� ����������� ����.
��� ������ ������ ������������� ��������� ���� ������� ���� �� ������ ����� � �� ������ �������� ��� ������ ����� ��.
9. �������� ������ ����� (���).
����� ������������� ������������� �� ���������� ������� �� ������ ����� ����������� ������.
10. �������� ������ ���� (���).
����������� �����. ����� ������������� ����� ��������� ������� �� ������� �����, ������� ����� ������
������� �����. �����3
�����: ����� � ���� |
������ � ������ |
�����: ����� � ���� |
���� �������� �������� |
�����: ����� � ���� |
������ ��� � �� ������. |
������� |
(http://my.mail.ru/community/magij_rukodelij/62EE7E601095A4F5.html)
������ ��� � �� ������.
���� ������ ������������ ��������� ���� ������� ��������� �������. ��������� �������� �� ���� ����� � ���������, ��� ��� ��������� ������� ��� ���������� � ������� ��� ������������� ������ ������. � �������� �� ���������� �����, �� ���� ���������� ���� � �� ������ ����������. ��� ������ ������ ����� � ����� .
�����: ����� � ���� |
������� ����� |
�����: ����� � ���� |
��� ��������� |
������� |
��������: ![]() ��� ����� ���
��� ����� ���
���������� ���������� �� ������� ���������, ������������� � ���������
http://home-sweet.ru

������� �����

����� ��� ��������� ��������� ����

����� �������������

��� ������� � ���� ����� ������������� ������ ����� ������ � ����� � ���������. ������, ����������, � ����, ��������. ��� ������������� � �������� ��� ��������������. �� �������� � ���� ������������ ������ ������������ ��������� � ���������� �������� ������� � �� ������ � �����. ���� ���������� ���������� ������������ ���� � ����������� ������ � �����. ����������� ������� �� ������� �����, ���� � ������� ����� ���� ����� �������� �������������� 1900 ���������� �����. ��� ��������� �������� �� ������������������ ��������� �������. ������ ���������…
�����: �������� ��� |
��������� ������������������ ���������� ������� ������� |
������� |
��������: ����� - ��������� � ������. ver. Web 2.0
(http://umeha.3dn.ru/publ/nebolshoe_usovershenstvov...go_karmana_rubashki/15-1-0-567)
�����: ����� |
�������� �� Zakka Sewing |
�������� (��� ������� - ���� ��� �������� :) ) �� ��� ���������� ������ Zakka sewing. ������� ���, ������ ����� �� ��� ����� � ����� �� �� ���� ����� �� ����������, ������ free patterns, ������� � ��� ���������� ������ ��������. �������� ������, ��� �� ����������.

���, ����������, ����������� �������������, ������� � ����� � ����� ������������ ����� - ��� ���������� ��������


� ��� ���� �������

��, � ������ �������� ��������. ��� ��� �������� � ����� ��������� - ��� ��� ����� ��� �� �����, ����� ������� � ������ :)
�����: ����� |
�����-�����: ��������� ������� |
�����: ������� ������ www.myjane.ru/articles/text/
������ ������ ������� ���������� ���������� ���������? �� ��� �, � ���� ��������� ������� ������ �������. �� ������ ������ � �������� ��������, ����� ���� � �����������, ���-�� ������. ���� ���� �������! �������� ������� � ��������� �������! ��-��! ������ � ���������! � ������ � �������!
�����: ����� |
Hi-Tech-������ �������� ����� |
������� |
��������: http://www.trud.ru/article/24-01-2010/235376_v_parizhe_prodemonstrirovany_hi-tech-modeli_zhenskogo_belja.html

�������� ����������: ������������ ���������� ��������������������. ���� alexs.ucoz.ru
������� � ������, �� ������������� ��������, ������ ������ �������������������� ������� �����, �� ������� ����� ��������� �������� �����������
��� �� ��� �������� ����� ���������������. ���, ���� �� �������������� ������� — «����������������» ����������� — �������� «������» �� �������.
�����: ���� |
��������� ������� �� ������� ��������� |
������� |
��������: ����� ���������»����������


�����: ������� |
���������(���������) ������� �� ������� ��������� |
������� |
�����: ������� |
��������� ������ |
������� |
��������: �������� "��� ����� ���"
![]() ��� ����� ���
��� ����� ���
���������� ���������� �� ������� ���������, ������������� � ���������
http://home-sweet.ru

�����: ����� � ���� |
������� �� ������ (����) |
������� |
��������: http://groups.yahoo.com/group/HIASpecialEvents/photos/album/187908879/pic/list
�����: eltakay
Photo Albums > ww2008 Sweatshirt Jacket Contest
�� ���� ��� ������ ��������� ��������� �������� �����������. ������� ����, ��������� �� ����������, ���������� ������������.
�����: ������� |
��������� ���������� ��� ����������� |
������� |
��������: http://groups.yahoo.com/group/HIASpecialEvents/photos/album/1829647984/pic/list

�����: hand-made |
������������� Pattern Magic |
�����: ����� � ���� |
���������� ���� �� ��������� |
������� |
![]() ��� ����� ���
��� ����� ���
���������� ���������� �� ������� ���������, ������������� � ���������
http://home-sweet.ru
������������� ������� >>
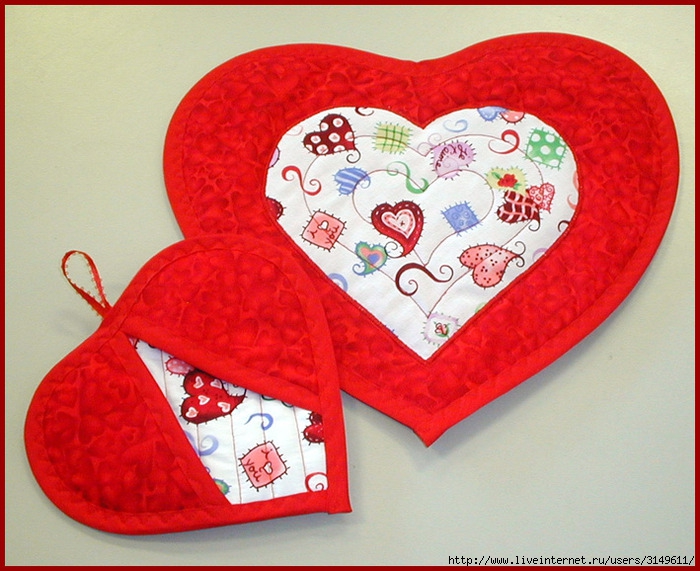
�������� �������� ������������ ������� � ������������ �����, ��������� �������.

����� �� ������ ��������� ������-������ ���������� ����, ����� ������ � ���, ��� ������� ������. ����� ���� �������������� ������ ��� ���� � ����� �� ������� �������� ��� “���������” � �� ��������-������� “���-������”. ���� ����� �� ������� ������, ��� ��� �������� � ���� ��������� – � ��� ������� ����� ������ � ������� ��� ��� ���������� � ����, ��� � ��� ����.
������� ������ �� ����������, �� ��������� ��������, ������� ������ ������ ������� � ������ �������� �������� ���� – ���� ������ ������������ ���������� �� � 1933-� ����. ����������, ������? ������ ���� � 70 ��� � 2003 ���� �������� ������� ����������� � ������� ����� ����������� ��������� ��� ������. ������ � �� ������������ ����� ������� ������ ��������� ������ � ������ ����� � ���������� ���, � ����������� ���������� ������ ��������� ������������ �� � ����� ������������� ����������.

��� ������ �� ������ � ����� – ����� ��������������! ���������� ����������� ������ “FunkyLobez”.
_________________________________________________________________________________
��� ����, ����� �������������� �� ���� ����� ������ ����� ������� ����������. �������� ����� ����������� ����� � ������ «��� ���».����������� ����������� ������ ������������.
_________________________________________________________________________________

������ �� ���� ��� �������� ������ �������� – ��� ������, �����, ������, �������, �����, ���������, ������ �������� ����������. �� ���� �������� ����������� ������� � ���� � ��������� ��������� ������� – ����� ��������� ������ � ������������ ����������! � ����� ������� ������ � �� ������ ������������ ���-��� �� ���� ������.
��������, ��������, �������� ���������, ������� �� ������, ��������, ����-����

������� 36/38 (40/42)
��� �����������
• 1150 (1110) � ��������� ����� (100% ����������� ������, 50 �/50 �)
• ������ � �������� ����� � 9
• 8 �������

��� ��� ������� ����� ����� ������� ������, ������� ��������� � ������������. �� ��������� �� �����, ��� � ������ ������� ��� ����������� ��������� ��������. ��� ���������, “������� ������” – ��� ������ ����������� ����, ������� ������� �� ����� ���������, �������� �������� � ����� ������. � ������ ���� � �������� ��� � ������ �� ����� � ������� ����� ��� ��������� ��������, ����� ������ � ��� ��������� ��� ����� ��� ��������, �� ������� ������ � ������������� �������! ����� ���� �������� ����� �� ������ �����.
____________________________________________________________________________________
�� ������� �������� � ������ �����? ������� ��� ��������� ���� �� ������������ ������ �������� ��������� ������� ������� ���������� �������� ������.
____________________________________________________________________________________

�������� ������ ���� ���������� � �������� ��������?
������������, ����������� ������, �������� ���������, ����-����

���� �������� ������ � �������� � ���������
������������, ����������� ������, �������� ���������, ����-����

� ��� �����������, ��� ����� ����, ��������� �������� ������� ������. �� ��� ����� ����� ������� ����� � ����� �������. ����� ������� ��� ������ ��� �������� �� �������� � �����. ������� �������������. ������ �������� ��� �������� � ����������� �������� �������� ���

���� �� �������� ��������� ���� �������������� ������, �� ����������� ������� �������� ����� Hormann (ո�����). ������ ��� ������������� – ������ �1 � ����, ������ ��� ��� �������������� ������ ����������� ��������, ��� ���������, �������, �� ��� ������ �������� �� 10 ���. �������� ������ rusdol.ru �������� ����������� ��������� ����� Hormann, � ����� ���� Came � Alutech, ��� ����� ��������� ����������� �� �������� � ������ ������������ ���� ����.
�������� ������ ���������� � 2002 ����, ��� �������� ������� �� �������� ��������� ������������ Hormann � ������� ����. ��� ������������ ��������, ������ � ��������� ������������ ��������, �������� ���������� � �������� �����, � ����� ������������ �������������� ����� ��������� �����������. ���� ������� ����������� ��� ������ ����� �����, � ����� ������������ �������� ����� ��������.
____________________________________________________________________________________
������� � ������ ����� ����� � ����� �����, ������� ������� ���� ����������. ����� ����� � ������ \”������� ���������\” ������� ������ � ������ ��������� � ������ ��������. �������� ������ �������!
____________________________________________________________________________________

����� ��������� ������� �� ������� � ������ � �������? ����� ������� �� ����� ����������� ���� ����������? � ����� ��� �������, �����, ������ ������� ���� �� �� ������� ���� �� �������.
������������� ������� ������� – ��� ��� ���� � ������. ��� ������ ��������� ������� – ��� �����!
__________________________________________________________________________________
������ ������� ��� ������� ��������� � ������������ ������. �� � �����, ����� ����� ����� �������� � �������� ��������� ���������. ������ � ������ ������ �� �������� �� ����� ���-��� �� �������� “������ ������� �� ������”.
__________________________________________________________________________________

� ������ �� ��� � ���� ����� ���� �������� ������� – ����� � ����. ���� ����� � ������������� ��������� ������� ������, �� � ��� �� �� ����������������, ����� ������� ����� ��� ���� � ��������? ��� �������� ��� ���, ��� ����� ����� � ������ ������� ��� ���� � �� ������������.
___________________________________________________________________________________
���� �� ����� ����� �������� � �����-����������, �� �������� �������� �� ����� �������� ����������� ������ – ����� ��������� ��� � 4 �������� 2009 ����, ����������� �����, �������� ��������������.
___________________________________________________________________________________

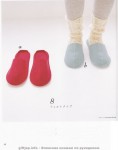
������ 38
��� �����������
• 1300 � ��������� � ������� ������� ����� (87% ������, 13% ������, 230 �/100 �)
• ������ � 5
• 2 ������������ ��������

��� ������� Aauumm ������� �������� ��������� ��������� ��� �����, �� ��� ������ ����� ������� ������ ������. ������ ��� ����� ������� �������������������� �� ��� ����!

��� ������� ����� ��������� ������� �������, ������� ������ ����� ���������� ��������. ������� ������� �������� ��� . ������ �������������� Decola ��������� ���������.

�� ����� ���������� �� ���� ������ ������ � �������, ������� ��������� ����� ����, ���� �� �����, �������� ��, ��� ��������� ���������, ����� ������� ����� ���� �����������. � ���� ����������� ���������� � ������� �� ������� ����������� ������� ���������� �����, � ������������� ��������� «�������� ������».
��� ���������� ������� ������� �����������: ������ ����, ���� �����, ����, � ���. ������ ������...

��� ����� � ��������� ����� ����� ���������� ��������������� �������� � �������� ����������� ���������� � ���������, �������������� ��� ����. ������ ������…

�������� �������� ��������� ������ Amy Batler, ������� ����� ����������� ��� ������� �������.
�����: hand-made |
������� |
������� |
��������: http://ac-meucantinho.blogspot.com/2008/10/santa-de-feltro.html
sábado, 25 de outubro de 2008 h
SANTA DE FELTRO


 Pode ser também um lindo chaveiro!
�����: hand-made |
������������ ������� |
������� |
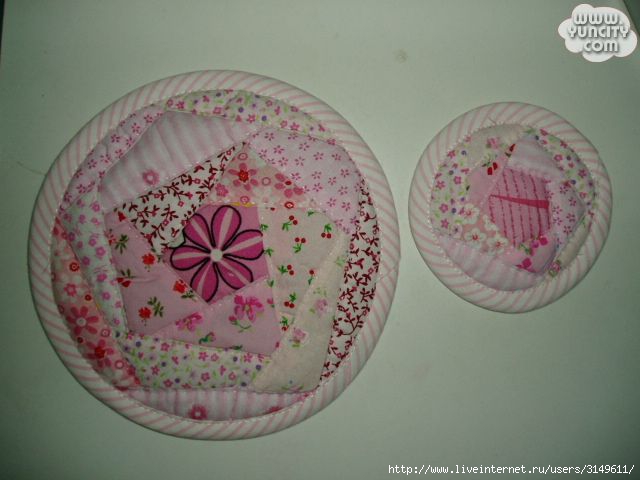
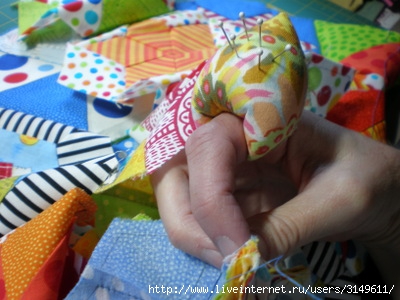
����� ����� ����� ��� ����� ����� ����� �������� ������, ��������� �� ��� ��� ���� ��������. �����������, �� ����� ������������ ��� ������� (�� �������� ������� �������), � �������, �� ������� ����� � ��������, � ������������, � ����� � ������ (������ ���������� � ������ �� ����� ��������� ������� � ��������� �������� �� ����������, ������ ������ �� ������������ ������, � ������ ����� � ����� ��������� ������� ��������� ��������� ������� � ������������ ����� ����� ������� � �������������� ������, � ���� ����� ���� ����� ������� � �������).
���������� ����� � �����: http://translate.google.com/translate?hl=ru&sl...01%2Falmofadas.html&anno=2, � ���, � ���� �������,�������������� �� � �����: http://translate.googleusercontent.com/translate_c?hl=ru&sl=auto&tl=ru&u=http://blog.betzwhite.com/2009/09/easy-repurposed-pillows.html&rurl=translate.google.com&twu=1&anno=2&usg=ALkJrhhxSMqVVhZUiFwkKl170g0LCqRu-w


�����: hand-made |
����� ��� ����� |
������� |
����� ����� �� ������� �������, �� ������ ������, ���� ������� ������� �����, ����� � �.�. ��� ���� �� ��������������� ��������� ������� �������� - ��������.� ������� ����� ������ � ������� �����, � �������, � ������� ����� ��� ������� ��� �������.
��� ���������� ����� � �����: http://www.123itsalmostfreeembroidery.com/threadcatcher.html


�����: hand-made |
����� |
�����: ������ ����������� |
������� ��� ������� |
������� |
��������: http://blog.craftzine.com/archive/2009/12/how-to_threadrack.html

Craftster user, thanate, shows how she built a custom threadrack to help organized her sewing space. This would be a great way to make something that fits your thread stash and your craft room!
Posted by
Rachel Hobson| Dec 2, 2009 10:00 AM
�����: hand-made |
����� ��� ������ |
������� |
��������: http://blog.craftzine.com/archive/2010/01/flashback_felt_needlebook.html


This month's theme on Craftzine is Make Space for Crafting, focused on tips and techniques to organize and maximize your craft space, which brings to mind Susan Beal's quick and clever Felt Needlebook project from the pages of CRAFT Volume 06. Susan teaches you how to transform wool felt, contrasting fabric, and a snap set into an adorable and useful little book for storing your sewing pins and needles.
Check out the full tutorial and then download a PDF of the project to print and share!
You can also still pick up the print version of CRAFT Volume 06 over in the Maker Shed.
Posted by
Goli Mohammadi| Jan 5, 2010 05:00 PM
������-�����:
 Felt Needlebook
8½"×11" piece of wool felt
Small piece of contrasting patterned
Fabric
Sewing machine
Pinking shears
Scissors
Vintage button
Small snap set
Needle and thread
Assortment of sewing pins and needles to tuck inside
1. Cut out pages.
Using pinking shears, cut 2 pieces of felt, each 4"×7", leaving a small tab extending 1" extra on the short side of 1 piece (as shown), edged with scissors.
2. Embellish the cover.
Fold the 2 pieces of felt like an 8-page book, with the tabbed piece on the outside, and the tab itself on the bottom of the layers. Cut a 2½"×2" rectangle out of the print fabric, and arrange it on the front of the book so it’s centered nicely. Set your sewing machine to a tight zigzag stitch and appliqué all 4 sides of the fabric square onto the front piece of felt.
3. Bind the book.
Sew the 2 felt rectangles down the center with a straight stitch to join the pages, backstitching at the beginning and end of the seam. Now hand-sew a small snap set into place on the tab and the front of the needlebook, and embellish the tab with a vintage button.
4. Add the extras.
Fill the pages with needles, pins, and needle threaders for your next out-of-the-house sewing project!
�����: ������-����� |
����� �� ��������� (������-�����) |
������� |
��������: http://soyouthinkyourecrafty-tuts.blogspot.com/search/label/Week%202%20-%20Leaf
 this no sew fabric wreath is super easy and super fast to make. using up just scraps, it's also a pretty cheap but classy way to dress up your wall!
 what you will need:
 then i took my frame and placed it on top of my muslin.
 i want a guide line for my wreath so i checked my cupboards for the right size circle, which in this case was one of my bowls.
 i traced with a pencil around my bowl. now i have a guideline for my wreath.
 next i took my fabric and cut little strips (mine are aprox 1 1/4 by 3 inches.
 i then folded in half my strips, and ironed down. these are going to be your leaves.
 now i'm going to show you how to make the leaf. these two next steps will help you make all your leaves on your wreath.
 next you are going to do the same thing with the other side. just like the picture above.
 using my drawn on circle as my guide, i will fold and hot glue gun my leaves onto the muslin
 make sure you do a small dab of hot glue on muslin, and in between fabrics (i even added a little dab in each layer of fabric so it all stayed put well)
 next place your second strip laying across the other way, and make sure you cover your raw edge bottom.
 continue your process of folding and hot glueing your leaves by alternating the way you lay your strip.
 and make sure you use your penciled in circle as your guide.
 see how easy!
 when you are done you will have a beautifully simple wreath. i hung mine with some fabric from the frame.
 and it hangs in my hall by the door. i think it would look great hanging alone on a wall or with a collage of other black frames with other artwork or pictures of family!
�����: hand-made |
���������� (������-�����) |
������� |
��������: http://soyouthinkyourecrafty-tuts.blogspot.com/2010/01/candy-bags.html


 I recycled a ruffle from one of Lucy's old pillows. Make your own ruffle, use some ruffled quilt binding, or just leave your pouch plain:
 If you choose to make a pouch without a ruffle, lay your INSIDE fabric right-side UP, lay the zipper on top of that and lay your OUTSIDE fabric right-side DOWN, like a sandwich:
 If you're going to add a ruffle, sandwich it right inside, on top of the zipper:
 and pin everything down:
 Change your standard Presser Foot to your Zipper Foot. Mine looks like this (looks like the normal presser foot with half of the foot missing):
 Sew all the way down, keeping the foot as close as you can to the zipper inside (so everything is nice and tight):
 Use your fingers to pull it tight thewhole time:
 When you're done, the bag should look like this, with the ruffle and zipper stuck in the middle:
 Sew a few lines down your ruffle to help it lay flat. I sewed about 4 lines (spaced about 1/4 inch from each other). The lines are for function and also for added decor:

 Your pouch should be looking like this:
 Taking your sewn piece (just as it looks above), sandwich it between the remaining fabric pieces (just as you did in the first steps). Don't forget to add your other ruffle piece in there:
 Pin and sew it all down:
 Sew a few lines of topstiching (as shown above) to keep your ruffle laying flat:
 It should look like this:
 For the remaining steps, make sure your zipper is 3/4 of the way zipped OPEN (or you'll never be able to turn your pouch inside-out). Line the zipper parts together (like this):
 Put both the Inside pieces back-to-back and put both the Outside pieces back-to-back and pin all the way around. You'll need to leave an opening at the base of the inside pieces so that you can turn it inside-out. I like to pin my start and stop points with double pins:
 Go to your Starting Point:
 and sew all the way around to your Stopping Point:
 Trim the corners:
 You should be able to see all the way through your bag, like this....with your ruffle in the middle:
 Pull it Inside-Out and make sure to push all your corners out:
 Like this:
 Pin the opening on your inside piece closed:
 And sew it shut:
 Push the lining piece back inside and.....you're done!
 Fill her up with treats and toys!
 ---------------------------------------------------------
 Let's get started!
 Clear Vinyl can be found in most fabric stores. It comes in varying weights and usually comes on a large roll, with paper in between (to keep it from sticking to itself). You can buy it by the yard for fairly cheap ($1-$2/yard). I used a medium-weight clear vinyl and cut two rectangle pieces, the same size as my pouch:
 When you get ready to assemble your pouch (as outlined above in the Ruffled Pouch), just lay a piece of vinyl on top of your inside pieces and sew them together with the rest of the bag:
 NOTE: Sewing with Vinyl can be a bit annoying because....
 and sew each one down with just a straight line:
 It's best to sew your fish on in the FIRST step, before you start assembling your bag.
 YUMMM.

 vinyl-lined dot fabric inside:
 and plenty of colorful licorice, of course:


�����: hand-made |
����� ��� ������ |
������� |
��������: http://blog.craftzine.com/archive/2010/01/how-to_sew_a_scissor_holder.html


I have quite the scissor collection. I used to keep them loosey goosey in a box, but after reaching in to grab a pair, and ending up almost loosing my hand, I decided to devise a new and more safe way to store them. I took a cue from simple knitting needle holders, and stitched up a quick roll-up holder. I used some sturdy printed canvas, and a lovely silk ribbon. This is a great project for using up scraps, and a fun way to organize your tools.

Materials:
Your scissor collection
1 yard heavy cotton fabric
1 yard ribbon
Rotary cutter and mat
Sewing machine
Thread
Not shown: Straight pins

Step 1: Fold the cotton fabric in half. Set your scissors out on the fabric. I lined up the screw of each pair, regardless of the handles or blade length. This way all the scissors will be centered on the holder. Cut out the fabric, being sure to cut through both sides.

Step 2: Cut a strip of fabric 1" wide, and 4" longer than the lined up scissors. Center it over the scissors.

Step 3: Pin down the strip in-between each pair of scissors. Push the straight pins into the fabric, as close as you can to the sides of the scissors.

Step 4: Set your sewing machine to the straight stitch. Sew along the three cut edges and the one folded edge of the fabric holder.

Step 5: Sew the strip down, along each line that you have pinned. I knew that I would have trouble sewing straight and even, so I purposefully made slightly uneven stitches. I sewed over the fabric strip three times where each pin was placed.

Step 6: Cut all the thread ends from the holder. Also cut off the remaining edges of the strip.

Step 7: Cut 2 pieces of ribbon, one 6" long, and one 12" long. Sew the short ribbon to the back of the holder, right against the edge.

Step 8: Mark where the rolled up holder meets the edge with the short ribbon. Take the scissors out, and then sew the long ribbon to the back of the holder, where you have marked.
Step 9: Now you can put all the scissors back and roll up the holder. Wrap the long ribbon around the bundle to secure it, and tie it closed. Volia!
Posted by
Brookelynn| Jan 4, 2010 12:00 PM
�����: hand-made |
���������� ����� |
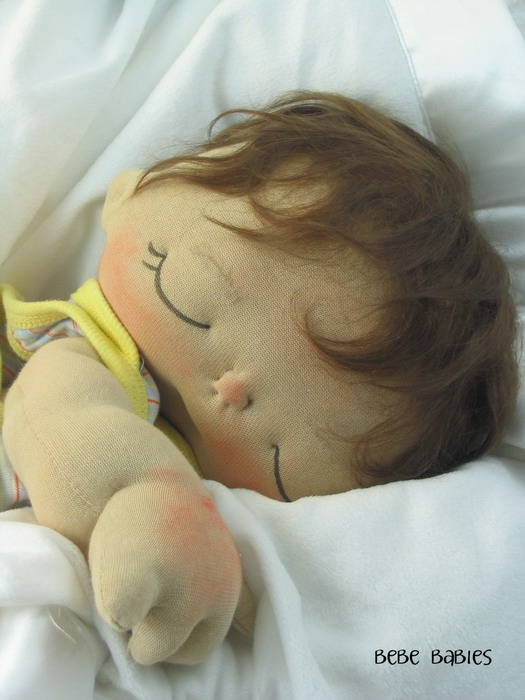
�����: ����� � ���� |
BeBe Babies |
�����: hand-made |
������� (������-�����) |
������� |
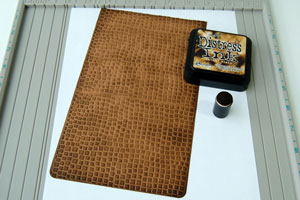
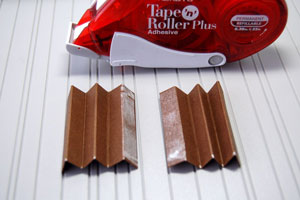
��������: http://www.splitcoaststampers.com/resources/tutorials/fauxleatherwallet/
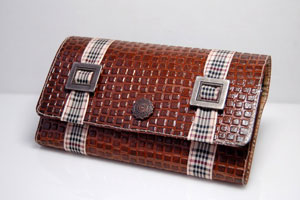
Create a beautiful faux leather wallet out of cardstock.
Punch two corners on the short side of the brown cardstock and patterned paper.
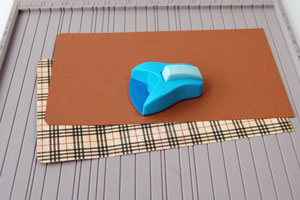
Emboss the brown cardstock with the Mosaic Cuttlebug Embossing folder.
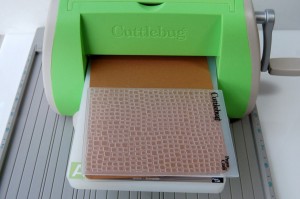
You need to run the cardstock piece through your die cut machine three times to emboss the entire piece.
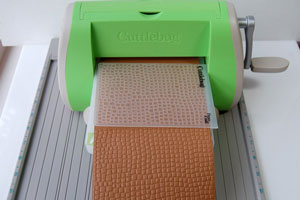
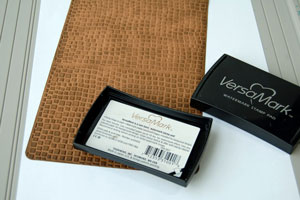
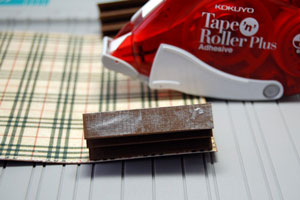
Sponge the embossed piece randomly with dark brown ink.
Apply Versamark™ ink over your cardstock.
Hint:
It's a big piece of cardstock. Apply first only to one half of the cardstock, emboss, then repeat with the other cardstock half.
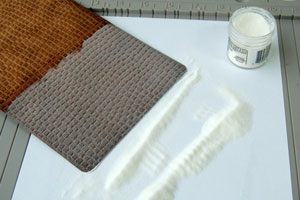
Add clear embossing powder over your cardstock.
Tap off excess.
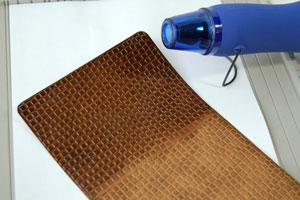
Heat emboss to complete the Faux Leather look.
Adhere the patterned paper to the back of the Faux Leather cardstock.
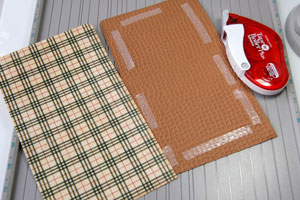
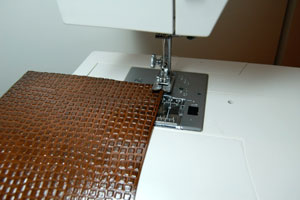
Sew around the edges of the cardstock.
Score your smaller brown cardstock pieces every 1/2" (1 cm) , adding five score lines.
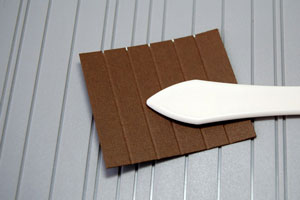
Fan fold the score lines mountain/valley style.
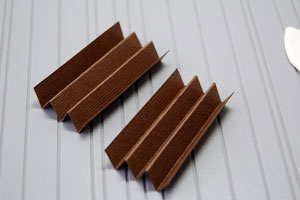
Add strong double sided adhesive to the last fold.
Adhere folded cardstock as shown.
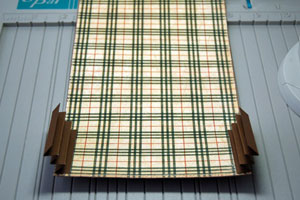
Add adhesive to the last fold of the cardstock fan.
Fold the lower part of the wallet as shown.
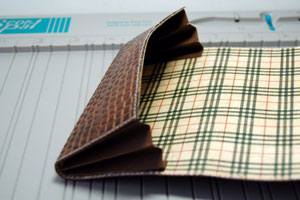
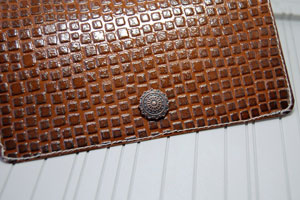
Use a piercing tool or similar to make a hole, and add a decorative brad at the front of the wallet.
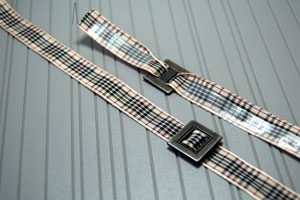
Attatch the buckles to the ribbon, add double sided tape and attatch them to the wallet as shown on the finished wallet.
Attach a small magnet as shown. (you want to use some strong glue here)
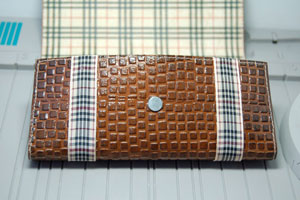
Your Faux Leather purse is finished.
Cut a window into your faux leather cardstock piece and place a stamped image behind it.
You've seen the tutorial, now you try it! We've got a section of the gallery set aside for Faux Leather Wallet. Try this technique, then upload your artwork to the gallery. Show us your creations!
We'd love to get your feedback or questions. Leave your comment below.
Page 1 of 1 pages
�����: ������-����� |
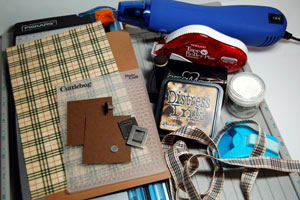
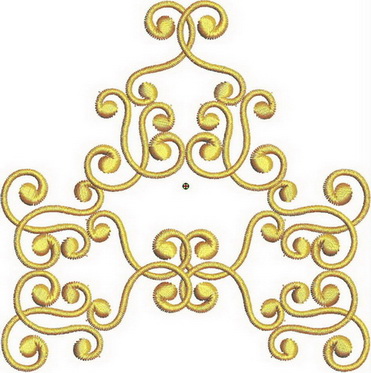
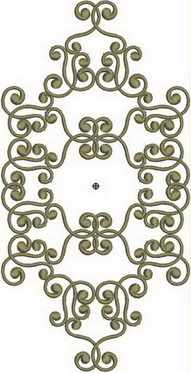
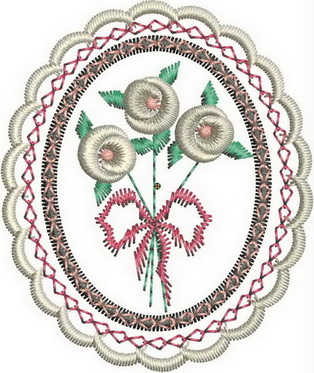
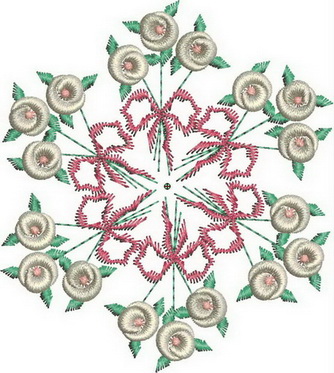
������� � �������� |
������� |
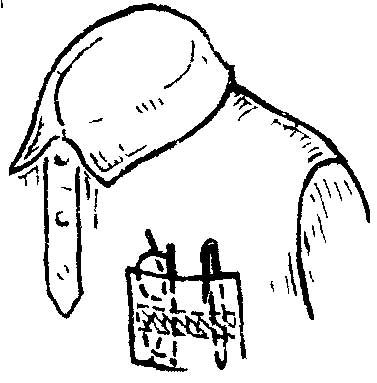
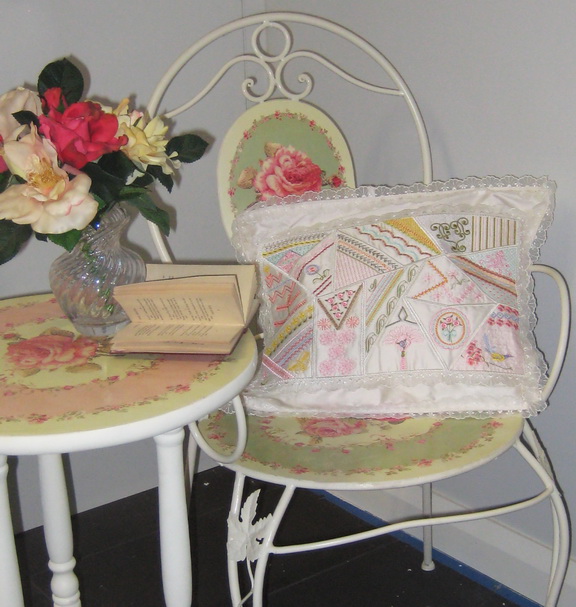
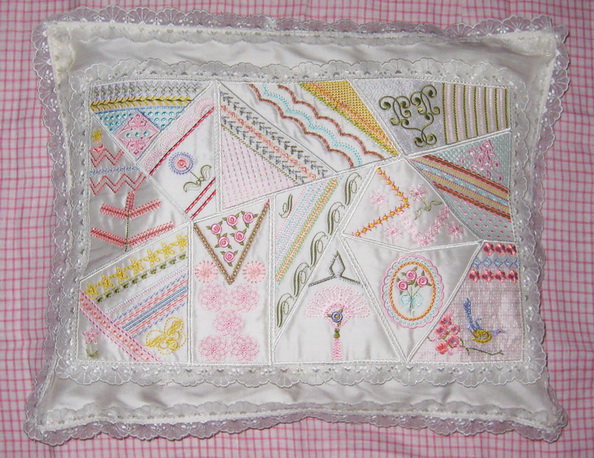
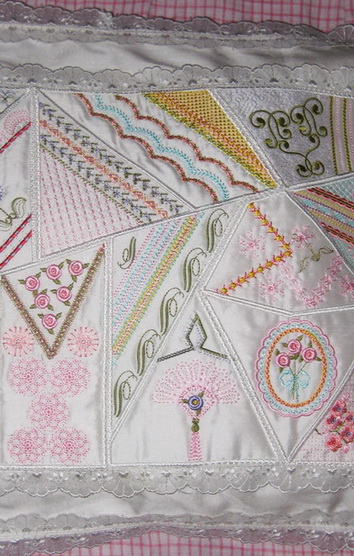
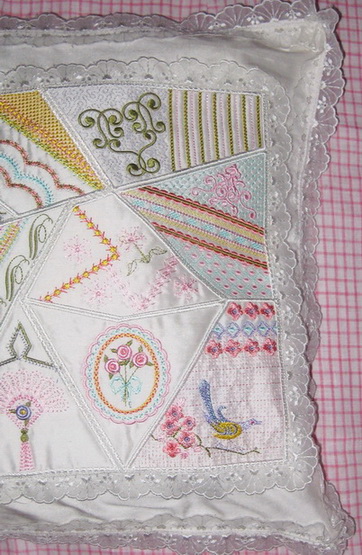
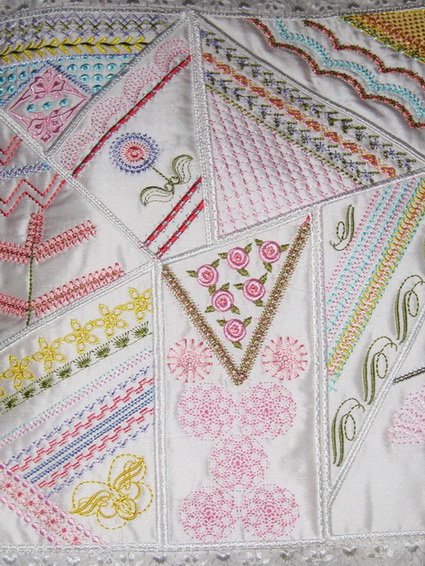
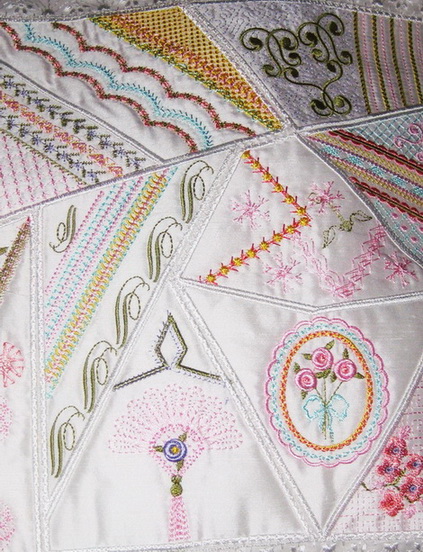
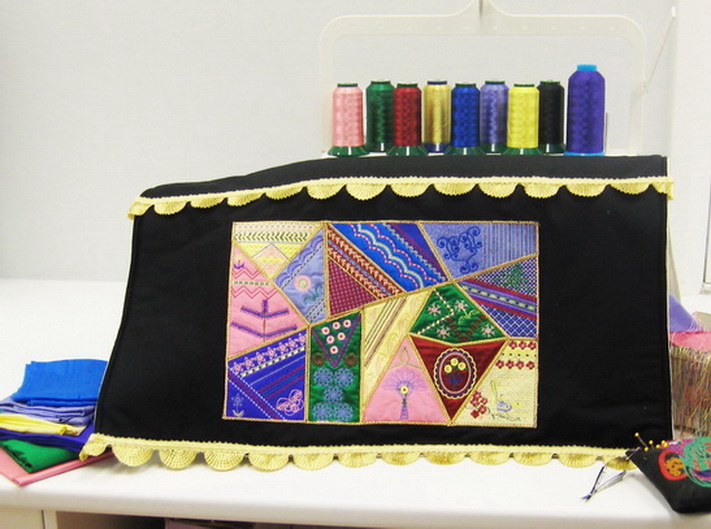
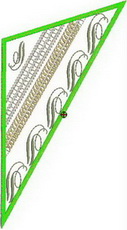
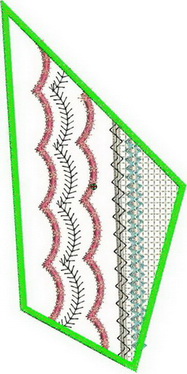
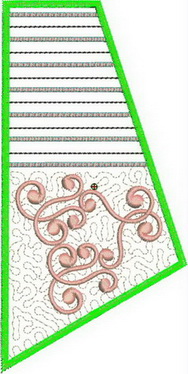
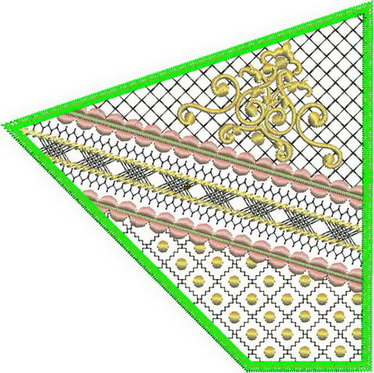
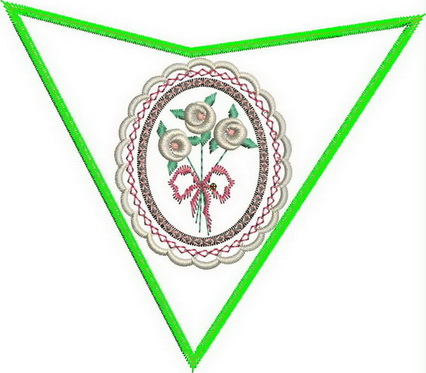
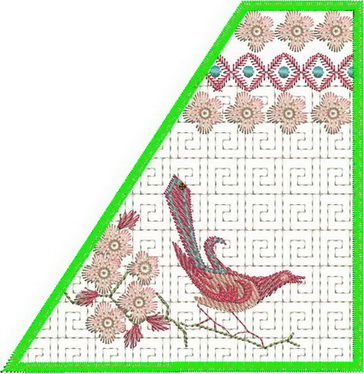
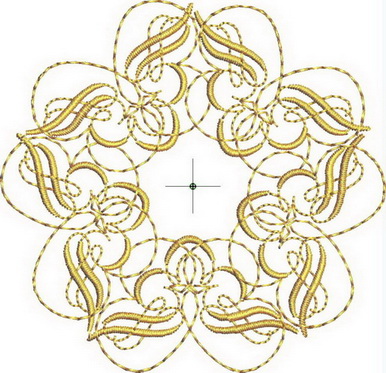
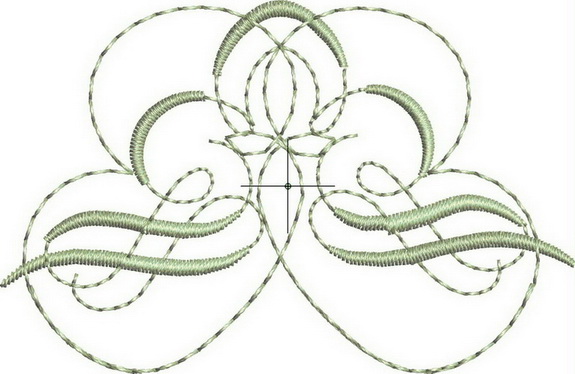
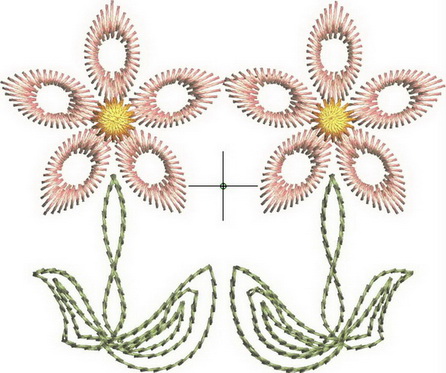
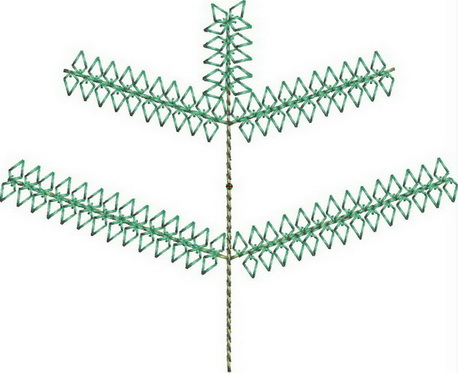
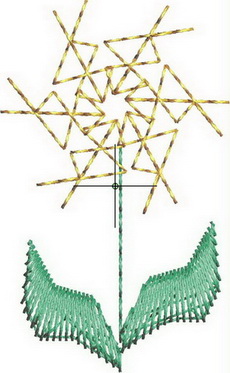
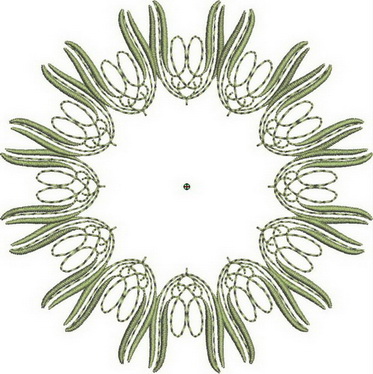
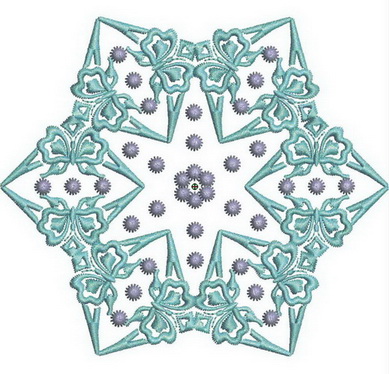
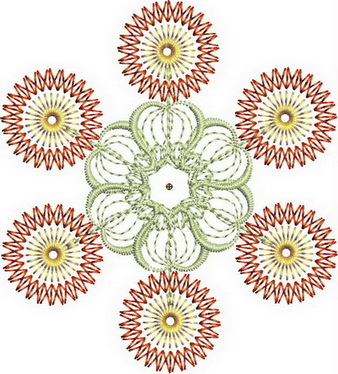
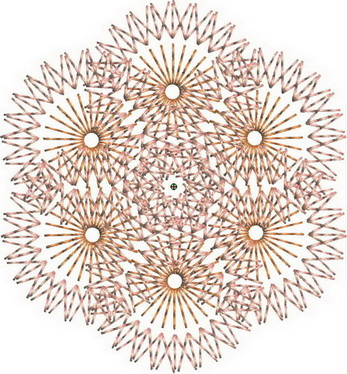
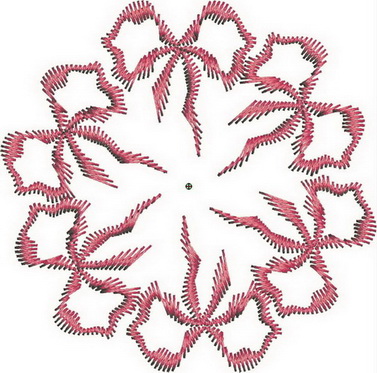
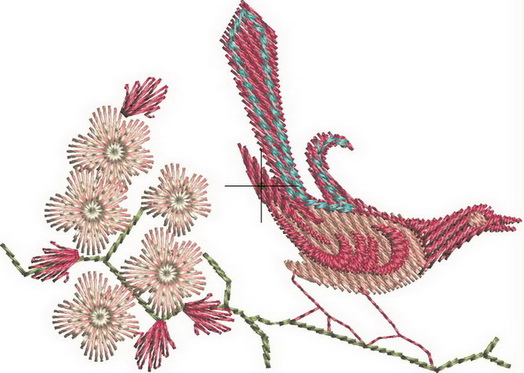
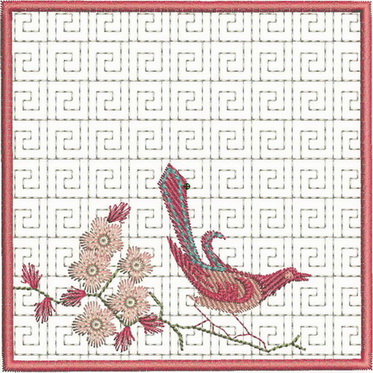
��� ������� � ������������ ������ ������ �������, �� ��������� ����� ������� ������ ������ ������������������ (�� ������ ����������). ������, � �������� � ������� ����� ����� ����� ����� �� ������������� � ��������.
�������� ���� ������������: http://www.stitchingart.com/
Crazy Patch No. 1 is suitable for a 5 x 7 inch hoop or 180 x 130mm hoop.
The colour chart and instructions are also included with the design.


The above instruction is also contained in your colour chart
Designs included in the Crazy Patch No. 1 set
Crazy_01
3.98 x 4.72 inches
9,523 stitches
9 thread changes

Crazy patch_02
4.01 x 6.16 inches
6,774 stitches
10 thread changes
Crazy_03
4.59 x 3.10 inches
9,003 stitches
8 thread changes
Crazy_04
2.88 x 5.23 inches
5,217 stitches
9 thread changes

Crazy_05
4.11 x 4.90 inches
7,445 stitches
7 thread changes
Crazy_06
2.65 x 5.62 inches
11,741 stitches
9 thread changes
Crazy_07
4.33 x 4.45 inches
4,659 stitches
7 thread changes
Crazy_08
3.39 x 6.13 inches
8,818 stitches
7 thread changes
Crazy_09
3.25 x 6.51 inches
12,034 stitches
8 thread changes
Crazy_10
2.94 x 5.87 inches
11988 stitches
8 thread changes
Crazy_11
4.17 x 4.16 inches
11,428 stitches
8 thread changes

Crazy_12
5.03 x 3.19 inches
3,878 stitches
8 thread changes
Crazy_13
5.02 x 4.38 inches
6,691 stitches
8 thread changes
Crazy_14
4.16 x 4.26 inches
9,700 stitches
11 thread changes
Design crazy_01
2.75 x 2.66 inches
6,244 stitches
1 thread change
Design crazy_02
2.40 x 1.55 inches
1,788 stitches
1 thread change
Design crazy_03
2.53 x 2.12 inches
1,732 stitches
3 thread changes

Design crazy_04
1.27 x 2.11 inches
871 stitches
3 thread changes
Design crazy_05
3.26 x 2.65 inches
2,516 stitches
2 thread changes
Design crazy_06
1.08 x 1.76 inches
490 stitches
2 thread changes

Design crazy_07
2.38 x 2.34 inches
3,417 stitches
2 thread changes
Design crazy_08
2.94 x 2.94 inches
6,673 stitches
1 thread change
Design crazy_09
4.06 x 3.54 inches
14,404 stitches
2 thread changes
Design crazy_10
2.90 x 3.20 inches
4,547 stitches
3 thread changes
Design crazy_11
2.54 x 2.72 inches
5,149 stitches
2 thread changes
Design crazy_12
4.89 x 6.98 inches
21,545 stitches
4 thread changes
Design crazy_13
3.88 x 3.78 inches
4,950 stitches
4 thread changes
Design crazy_14
2.09 x 2.47 inches
1,430 stitches
4 thread changes
Design crazy_15
3.91 x 3.91 inches
5,074 stitches
4 thread changes
Design crazy_16
4.02 x 4.05 inches
9,413 stitches
1 thread changes
Design crazy_17
4.02 x 7.94 inches
18,855 stitches
1 thread change
Design crazy_18
2.10 x 2.50 inches
4,143 stitches
5 thread changes
Design crazy_19
3.20 x 3.58 inches
10,024 stitches
4 thread changes
Design crazy_20
2.56 x 2.53 inches
2,130 stitches
1 thread change
Design crazy_21
2.79 x 1.99 inches
3,216 stitches
7 thread changes
Design crazy_22
3.91 x 3.91 inches
8,291 stitches
9 thread changes
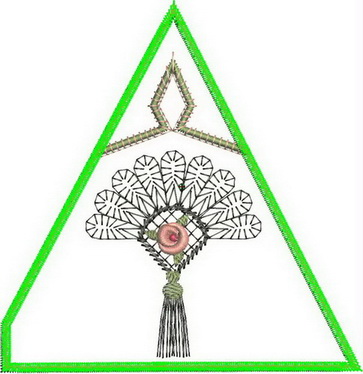
�����: hand-made |
������-����� ��� ������� ������� |
�����: hand-made |
������� |
�����: hand-made |
��� ����� ����������!!! �� ������.... |
�� ���������� ������! �� ��� �������,�� ���������� ������� ��� � ��������� ����!
������� ��������� ������������ (�������)�� ������-�����!!!
��� ������ ������������ ������� ��������� �������, ������, ��� ����� ����������. ��, ������� ������. ��������� �������.
������� ������� �����, ������� ��� ����� ���, � �������� ����� ���� ������� �����. ��� ��������� ���� ����� ����� ����. ������� � ���� � ���� ������������ �����, ����������, ������ 90 ��.
�� ���, �������� �, ��� 90 �� � ��������� ������ ����������.
90 �� – ��� ����� ������ ����������, � ������� ��������� ����.
� ����� ������ ���� ����������: 90:6,28=14 ��.
����� ���� �4, ���������� ��������� ���������� �������� 14 ��. �� ���� ����� �������� 7��. �! ����� ������ ������� ���� ����������!
�����: hand-made |
���������� �1 |
���� ��� ����� ���� ����������� ��������� ������ �� ������� ������������ � �����������. ����� � ���� ����������!
����, ����� 1
��������� ����������
�����: hand-made |