-������
- Ashlee Simpson - Autobiography
- �������: 14 �����������: 0
-����� �� ��������
-��������
60's 70's ayyaya chloe hey there delilah in lalala let's get this teen hearts beating miu miu out outta my head paul smith slalalalai sonia rykiel things have changed you know you are so elegant when you run you leave me broken ������������� ��������� ���� ��������
-���������� ��������
-����������
-����������
��� ��������� |
������ ��������� Irisara
�������� �3
��������� �� ���� ����, �� ������������� ������ ��� �� ��, �� � ����� ���-��, ���� ������� ���� ��� �� ����. ��� ��� �� ���������, ���� ��� �� �������, �����������)
OK, today we'll do from this to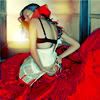
I did with this tuto many & many icons, I thinks it's really simple and beatiful
Requested by �� �����, ������������ � ��
Made in PS CS
Just 7 step
Rules & Notes:
[-] if you like this tut, comment please, it make me happy ^__^
[--] if something don't come out just ask me
[---] don't take this icons and tut as your own
[----] if you like this and other tuts, you are really welcome to friend me ;)
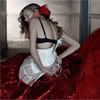
O1. crop, rotate and do what you want
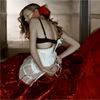
O2. create a new Color Balance layer:
Midtones (-10; -15; -20)
Shadows (10; 5; -10)
Highlights (0; 0; 0)
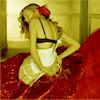
O3. create a new layer, fill it with #fffc00,
and change the layer mode to Soft Light
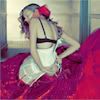
O4. create a new Selective Color layer:
Reds (-100; 0; 100; 100)
Yellows (-25; 0; -30; 0)
Magentas (-100; -100; -100; 0)
Neutrals (65; -20; -80; 15)
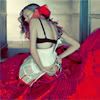
O5. create a new Selective Color layer:
Reds (-100; 100; 100; 100)
Yellows (0; 0; -65; 0)
Neutrals (0; 0; 0; 15)
Blacks (0; 0; 0; 20)
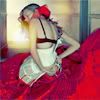
O6. drag this texture (by ), set it to Screen

O7. create a new Selective Color layer:
Reds (-70; 15; 100; 100)
Cyans (100; -60: -100: 100)
Blues (0; 0; 0; 100)
Neutrals (10; 0; 10; 0)
Black (0; 0; 0; 100)
Then you are done. Play with it. Than you can add some texts, texture, brushes and etc.
And I would wait your beatiful results ;)
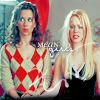
Other examples with the SIMILAR coloring:


��� �� ��������� ��� � ��� ����������, ��� �� ������� ����� ��� �������� � ���������: http://www.liveinternet.ru/users/c_collection/
��������� �� ���� ����, �� ������������� ������ ��� �� ��, �� � ����� ���-��, ���� ������� ���� ��� �� ����. ��� ��� �� ���������, ���� ��� �� �������, �����������)
OK, today we'll do from this to

I did with this tuto many & many icons, I thinks it's really simple and beatiful
Requested by �� �����, ������������ � ��
Made in PS CS
Just 7 step
Rules & Notes:
[-] if you like this tut, comment please, it make me happy ^__^
[--] if something don't come out just ask me
[---] don't take this icons and tut as your own
[----] if you like this and other tuts, you are really welcome to friend me ;)


Midtones (-10; -15; -20)
Shadows (10; 5; -10)
Highlights (0; 0; 0)

and change the layer mode to Soft Light

Reds (-100; 0; 100; 100)
Yellows (-25; 0; -30; 0)
Magentas (-100; -100; -100; 0)
Neutrals (65; -20; -80; 15)

Reds (-100; 100; 100; 100)
Yellows (0; 0; -65; 0)
Neutrals (0; 0; 0; 15)
Blacks (0; 0; 0; 20)


Reds (-70; 15; 100; 100)
Cyans (100; -60: -100: 100)
Blues (0; 0; 0; 100)
Neutrals (10; 0; 10; 0)
Black (0; 0; 0; 100)
Then you are done. Play with it. Than you can add some texts, texture, brushes and etc.
And I would wait your beatiful results ;)
Other examples with the SIMILAR coloring:


��� �� ��������� ��� � ��� ����������, ��� �� ������� ����� ��� �������� � ���������: http://www.liveinternet.ru/users/c_collection/
| �������������� | « ����. ������ — � �������� — ����. ������ » | ��������: [1] [�����] |


