-ћетки
3д udo альбом-елочка блог блог с открытками блоги мастериц блокнот винтажные открытки девушки девчушки инчики картинки картинки винтажные конвертики конфетка коробочки медвежата мк мышки мышки картинки надписи открытка открытки открытки из кусочков открыточки отрисовки отрисовочки пасты распечатка сайт сказки скетчи скетчи дл€ открыток скетчи+шаблоны скотч сундучок теги текстуры тильдочки тильдочки блог тильдочки отрисовки тильды тэги фон цветы винтаж чайничек-открытка чемодан-открытка штампики штампы €рлычки
-–убрики
- альбомы (10)
- полезное дл€ скрапа (3)
- надписи (2)
- конфетки (1)
- шкафик (1)
- инчики (1)
- девушки (1)
- вырезаеи сами (24)
- декупаж (6)
- журналы книги (3)
- картинки (41)
- (1)
- отрисовки (25)
- качаем и печатаем (22)
- бумажки дл€ рецептов (3)
- скрапнаборы (6)
- кошки (2)
- мк (53)
- коробочки (8)
- гессо и пасты (5)
- блокноты (3)
- конвертики (3)
- бутылочные крышки (1)
- мк раскрашивание (3)
- самодельна€ бумага (3)
- открытки (52)
- цветы винтажные (16)
- пластика (2)
- пуговично так))))))))))) (2)
- сайты (22)
- блоги (8)
- скетчи (10)
- тильдочки (15)
- штампики (8)
- эмбоссинг (1)
-ѕоиск по дневнику
-ѕодписка по e-mail
-—татистика
«аписи с меткой мк
(и еще 502991 запис€м на сайте сопоставлена така€ метка)
ƒругие метки пользовател€ ↓
3д udo альбом-елочка блог блог с открытками блоги мастериц блокнот бумажные куколки винтаж картинки винтажные открытки девушки девчушки дыроколы картинки картинки винтажные конвертик конвертики конфетка коробочки мк мышки мышки картинки надписи открытка открытки открытки из кусочков открыточки отрисовки отрисовки.много. отрисовочки пасты раскрашивание сайт сказки скетчи скотч сундучок теги текстуры тильдочки тильдочки отрисовки тильды тычинки своими руками фон чайничек-открытка чемодан-открытка шаблоны пейсли штампики штампы €рлычки
ћикс-ћедиа. Ѕлокнот. |
Ёто цитата сообщени€ яЌ«ј [ѕрочитать целиком + ¬ свой цитатник или сообщество!]
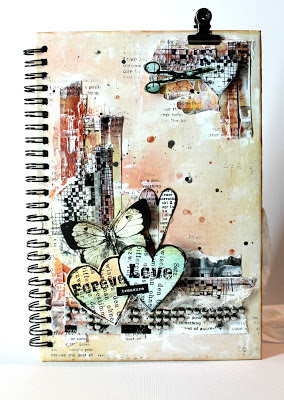
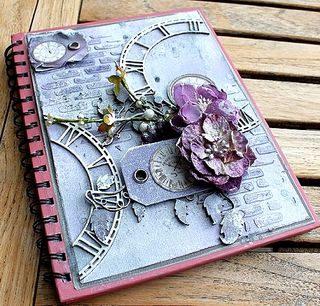
Ѕлокноты на пружине в стиле Mixed-media.
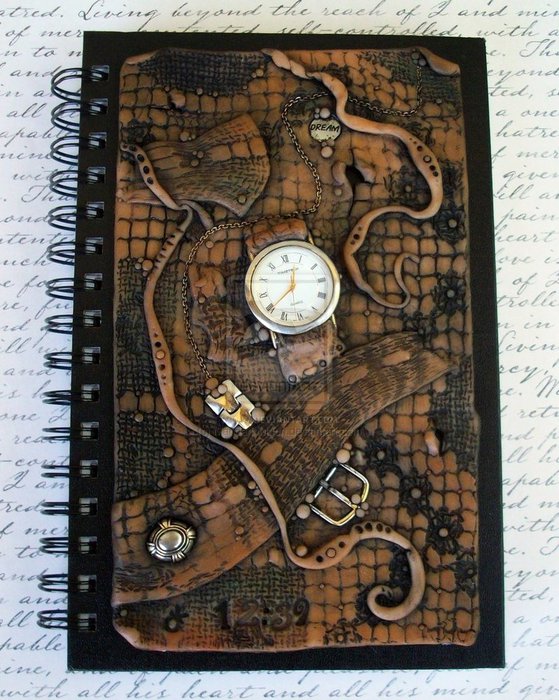
http://vlvista.blogspot.com/2015/05/inspiration-mixed-media.html
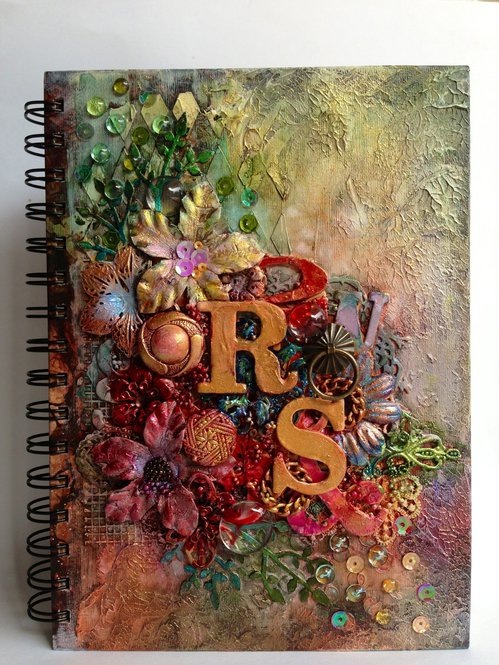

—ери€ сообщений "блокноты":
„асть 1 - Ѕлокнот. ѕаста. раски.
„асть 2 - Ѕлокнот. ѕасты, раски.
„асть 3 - ћикс-ћедиа. Ѕлокнот.
ћетки: пасты краски мк |
чайничек |
Ёто цитата сообщени€ √лебова_≈лена [ѕрочитать целиком + ¬ свой цитатник или сообщество!]
ќткрытка-чайник от Dennen Trable. Ўаблоны, мастер-класс
„итать далее...
ƒоброго времени суток!
’очу поделитьс€ с вами еще одной находкой - открыткой в виде чайника. ”верена, что наши милые матушки и бабушки, особенно любительницы семейных чаепитий, от подобной работы останутс€ в полном восторге! –абота не выгл€дит сложной, шаблоны в тексте поста. ѕри€тного просмотра!


|
ћетки: мк чайничек-открытка |
–аботаем с несколькими штампами |
Ёто цитата сообщени€ ylyandra [ѕрочитать целиком + ¬ свой цитатник или сообщество!]
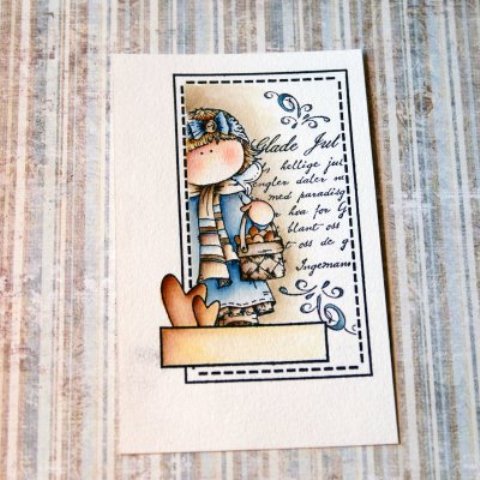
Ўтампинг,работа с несколькими штампами!!
ќчень полезный ћ !!!!
http://scrap-info.ru/myarticles/article_storyid_197.html
ќчень полезный ћ !!!!
http://scrap-info.ru/myarticles/article_storyid_197.html

—ери€ сообщений "штампики":
„асть 1 - просто штампик
„асть 2 - вензел€ углы штампы
...
„асть 6 - штампики отрисовки
„асть 7 - медвежата
„асть 8 - –аботаем с несколькими штампами
ћетки: Ўтампы мк |
мк по открыткам и коробочкам |
Ёто цитата сообщени€ Murisechka [ѕрочитать целиком + ¬ свой цитатник или сообщество!]
≈ще ћ по открыточкам и коробочкам(очень интересно)
 Today I want to show you three cards that I have made. —егодн€ € хочу показать вам три карты, которые € сделал в сад. They are all Confirmand Cards, something that are very popular here in Norway. ќни все конфирмант карты, что-нибудь очень попул€рны в Ќорвегии. I have already been asked to make a few:) ћен€ попросили уже два потр€сающе мало:)
 It was a bit hard to figure out how to show the inside the best, but first comes the side where you write your greetings. Ёто было довольно сложно пон€ть, как показывают в лучшее, но сначала приходит стороны wherefores вам написать поздравление.
 On the other side I have made a criss-cross envelope to put the money in. — другой стороны, € сделал крест-накрест две конверт положил деньги дюйма
 Here is the second card: ¬от втора€ карта:
 And under you can see how you can place the money. ј под ћожете ли вы увидеть, как вы можете разместить деньги. It is quite easy:) I have fasten the paper with brads. Ёто очень просто:) ¬ саду поста бумаги с штифтики.
 Here comes the third card: Here Comes третьей карты:
 I have made the outside match the inside. я сделал за пределами матча внутри. When I cut the paper for the card it is four cm longer than my normal card (15 cm). огда € вырезал бумаги дл€ карт это четыре см длиннее, чем мои нормальные карты (15 см). So this measures 15x19cm. “ак что это 15x19cm меры. Then I fold it in the middle as usual, and also at 15 cm down. “огда € сложить его в середине, как обычно, а также, что 15 см вниз. The remaining 4 cm is folded up. ќставшиес€ 4 см в сложенном.
 The images are from Whiff of Joy . »зображени€ из дуновение Joy .
 Hi! ѕривет! Today I will show you how I made an Easter giftbox. —егодн€ € покажу вам, как € сделал Giftbox ѕасхи. Under you can see the papers I used, pluss the gorgeous stamp illustrated by Norma Fickel for Whiff of Joy . ѕод видишь работ исключительных, а также великолепные штамп иллюстрируетс€ Ќорма Fickel дл€ дуновение Joy .
 Here are the measurements for the box. ¬от измерений дл€ коробки. With this measures I will have a box at the size 11x11x3,5 cm. — этой доброй воли ћеры ¬ саду на размер коробки 11x11x3, 5 см.
I have made the box and the cover separately. ¬ саду сделал коробки и крышки отдельно.
 Under you see how the papers looks like after I have inked and sewed them. Ќиже вы видите, как бумага выгл€дит как после того как € подписал сад и шили ограничени€.
 I use some adhesive tape to fasten them on all four sides. я использую ленту что-то клеем два быстрых ограничение ср всех четырех сторон.
 And now for the cover: » теперь дл€ обложки:
 I have put them together and seved the cover aswell. я их собрал крышки и seved также. Then I place it on the side of the box, to see where I am going to fasten them together. “огда € разместить его на стороне коробки, "чтобы увидеть, где € собираюсь быстро два ограничени€ вместе.
 I use the strips I made with the word window punch, and eight brads. я использую полосы € сделал с окном удар слово, барды и восемь. Make sure you have some space between the to parts, so it also can bend. —делайте что-то кислым вы сад пространство между двум€ сторонами, поэтому она также может поворотах.
 I also use the strips with some smaller brads to fasten the sides together. “акже € использую полосы с чем-то меньшего штифтики два быстрых странице вместе. Under you see the inside of the box. Ќиже вы видите внутри коробки. I could also have fasten them on the outside... я мог бы также сад быстро ограничение на внешней стороне ...
 And under you see the outside of the box. ј ниже вы видите за пределами коробки.
 Now all sides are fastened, and the box is ready to be decorated. “еперь все страницы закреплены, и коробка готова задать два оформлены.
 And here it is! » вот оно! The girl with the lamb is coloured with Distress Ink, re-inkers on water colour paper 300g. ƒевушка с €гненком окрашена бедствии чернил повторно inkers ср воды 300 г цветной бумаги. I have used a 00 size brush. ¬ саду исключительных размер 00 кисть.
 A closeup: рупным планом:
 The whole cover: ÷елом охватывать:
 And inside some yummy chocolate-balls filled with milkcream;)) ј внутри что-то вкусное шоколадно-м€ч, заполненный молока;))
 Here you see the box from the other side, with the strips. «десь вы видите окно с другой стороны, с полосками. I think they made a spesial decoration. я думаю, что они сделаны специальные декорации.
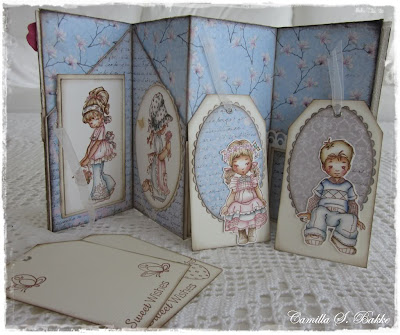
Hi! ѕривет! Here comes my tagcard tutorial. Here Comes My tagcard учебника. It is on how to make a card that you can put many tags in. Ёто, как сделать карту, ¬ы можете поместить много тегов дюйма I will also show a tip on how to make the tags. роме доброй воли показывает кончик ср ак сделать метки. Hope you will like it!:) Ќадеюсь, что вы добра€ вол€, как это:)
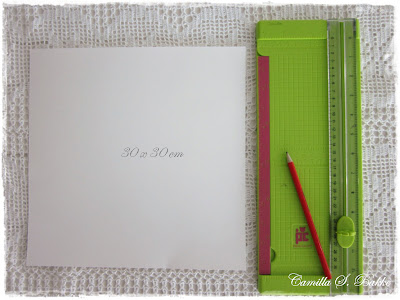
First you have to start with a bazzill paper measuring 30x30 cm. —начала вы, возможно, придетс€ начать с бумаги Bazzill измерени€ 30x30 см. Like the one under: ак показано ниже:
I have a pen to mark out where to fold, and a cutter which folds the paper. ” мен€ есть хороший два выхода землю wherefores два раза, и резак акие складки бумаги.
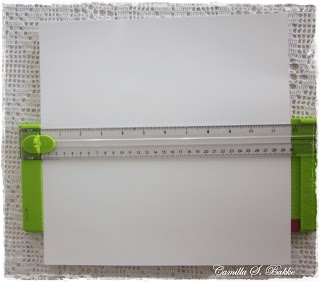
I start with folding the paper like you see on the next photo: ¬ начина€ со складным бумаги, как вы видите на следующей фотографии:
I fold it in the middle. я сложить его в середине. And when it is folded it looks like this: » когда он сложил его выгл€дит следующим образом:
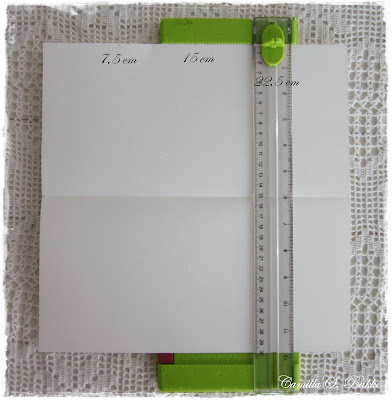
I open the paper again and start to measure where to fold on the other side. я открываю документ снова и начина€ два ћера wherefores два раза на другой стороне. The card is going to have four sides, so I therefor have to devide 30 by four. ƒержатель карты будет два четыре страницы, поэтому дл€ них €, возможно, придетс€ делителем 30 на четыре. So then I fold on 7,5 cm, 15 cm, and 22,5 cm like you can see on the photo under. “огда просто раз в ср 7,5 см, 15 см и 22,5 см ћожет вы просто видите на фото ниже. The fold in the middle (at 15 cm) you have to take on the opposite side of the paper, because you are going to fold it the other way. –аз в средний (на рассто€нии 15 см), вы, возможно, придетс€ вз€ть на противоположной стороне бумаги, потому что вы собираетесь в два раза Ёто другой путь.
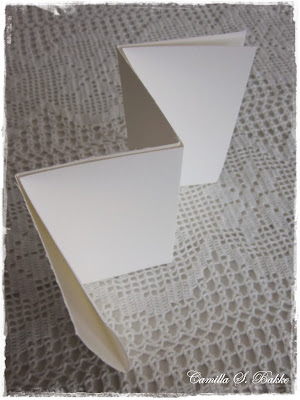
When you are finished folding, the paper looks like this. огда вы закончите складывающиес€, документ выгл€дит следующим образом. Like a small accordian:) ак малые Accordian:)
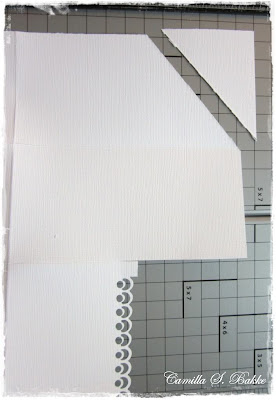
It is now time to make the pockets to put the tags inside. —ейчас настало врем€, чтобы сделать два пакета положить теги внутри. You can cut of small parts of all four sides. ¬ы можете вырезать из небольшой партии со всех четырех сторон. And it is not nesassary to have any measurments. » это не nesassary два сада любых измерений. I have just cut of paper very randomly:) But I will show you how I did it, so you have an idea. я только сократить бумаги очень случайно:) Ќо € покажу вам, как € это сделал, так что вы сад иде€.

I first started with two sides, and cut off a bit, and then I used a borderpunch on the remaining part, so the edge looked nicer. я начал с двух страницах, и отрезать немного, и € просто чрезвычайных границы штампа на оставшейс€ —тороны, то край выгл€дел лучше. Then I started with the two other sides. “огда € начал с двух других сторон. First I cut of a triangle. —начала € разрезе треугольник. I then took the cut-off part and placed it on the other side, so the side would look the same -only opposite from eachother. я просто догнал отсечени€ партии и поставил его на другую сторону, так что стороны будет выгл€деть то же самое, только противоположных друг от друга.
Like this: ак это:
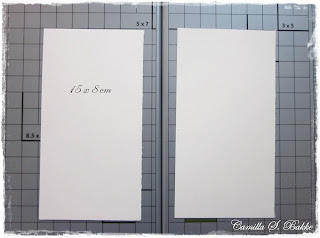
You will have a better view of it later. ¬ы будете иметь лучшее представление о его листь€. Now I wanted to make the front and the back of the card a bit thicker and stronger. “еперь € хотел сделать две передние и обратной стороне карты немного толще и сильнее. So I cut out two rectangles: “ак что € вырезал два пр€моугольника:
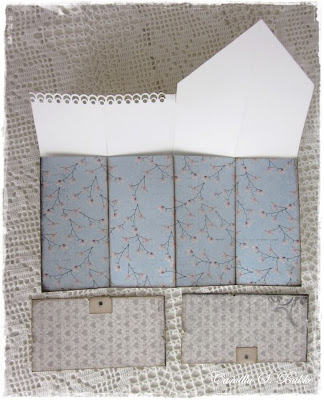
I then inked and decorated them with some gorgeous Maja Design paper. я просто подписал и оформлены ограничени€ с чем-то великолепна€ бумага Maja дизайна.
And I also measured up some more patteren paper (30x15 cm) to have inside the card. » € также измер€ли что-то более patteren бумаги (30x15 см) две сад внутри карты. It is a bit easier than making four parts (something you also can do, of course). Ёто немного легче, чем сделать четыре партии (что-то и ты можешь, конечно). I folded the pattern paper like the bazzill, and then fasten it with glue to the bazzill. я сложил бумаги картины как Bazzill, и просто закрепить его с помощью кле€ два Bazzill.
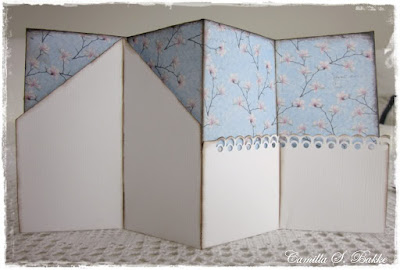
When you fold up the paper it looks like this: огда вы сложите бумаги это выгл€дит следующим образом:
Now I am going to show you how I made the tags to put inside the card. “еперь € собираюсь показать вам, как € сделал теги положил два внутри карты.
I used some leftovers and cut them up so they will fit the pockets on the card. ¬ необычно что-то остатки и сократить ограничени€ на добрую волю, чтобы они подход€т карманы в карты.
You can cut them at any size you like as long as they fit the pockets. ¬ы можете сократить их, что любого размера ¬ы хотели, если они подход€т карманы. This is a great way to use all the leftovers:) Ёто отличный способ две использовать все остатки:)
I then cut of a rectangle on one side. я просто вырезать из пр€моугольника ср одной стороны. I just cut randomly. я просто сократить случайно. 

I then use the cut-off rectangle to make the same on the other side. я просто использовать отсечени€ пр€моугольник два делают то же самое на другой стороне.
I will decorate these two tags with some cute images:) ƒоброй воли украсить Ёти две метки с чем-то милые образы:)
I now use some hours which I don't have pictures off, to decorate both four tags and the card:) —ейчас € использовать что-то часы, которые € не сад фотографии с, два украсить беспокоит четыре метки и карты:)
And here is what I came up with: » вот что € придумал:
Here is the front. ¬от фронта.
When it was too late I saw that I should have figured out something more clever with the ribbon to hold the card together. огда это было слишком поздно, € увидел, что € ’аббл сада пон€л, что-то весело с ”мный ленты две держать карты вместе. But for this one I have just wrapped it around the card. Ќо дл€ этого в саду просто заворачиваютс€ в него карту.
Under you can see the tags inside the card. ѕод видишь теги внутри карты.
Here is the whole inside with the tags taken out. ¬от все внутри с тегами вывезены.
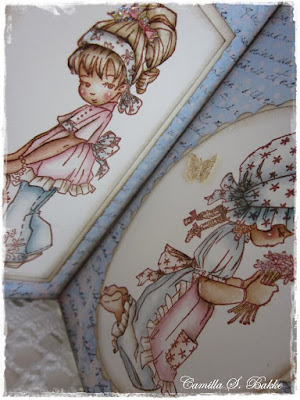
A close up: рупным планом:
And the last one, the back: » последнее, обратно:
I hope this made sense..:) я надеюсь, что это имело смысл ..:)
Saturday, April 10, 2010 —уббота, 10 јпрель 2010
Confirmand Cards with money-pockets by Camilla онфирмант карты с деньгами-пакетов по амилла
 Today I want to show you three cards that I have made. —егодн€ € хочу показать вам три карты, которые € сделал в сад. They are all Confirmand Cards, something that are very popular here in Norway. ќни все конфирмант карты, что-нибудь очень попул€рны в Ќорвегии. I have already been asked to make a few:) ћен€ попросили уже два потр€сающе мало:)
The most common gift is money. Ќаиболее распространенный €д деньги. And instead of just putting them inside the card, I have now made three different "pockets" to put the money in. » вместо того, просто положив ограничение внутри карты, € сейчас сделал три различные "карманы", чтобы вложить деньги дюйма I will now show you the cards and their insides. ƒоброй воли теперь показать вам, карт и их внутренности.
*** ***
Here is the first one: ¬от перва€:
 It was a bit hard to figure out how to show the inside the best, but first comes the side where you write your greetings. Ёто было довольно сложно пон€ть, как показывают в лучшее, но сначала приходит стороны wherefores вам написать поздравление.
 On the other side I have made a criss-cross envelope to put the money in. — другой стороны, € сделал крест-накрест две конверт положил деньги дюйма
 Here is the second card: ¬от втора€ карта:
 And under you can see how you can place the money. ј под ћожете ли вы увидеть, как вы можете разместить деньги. It is quite easy:) I have fasten the paper with brads. Ёто очень просто:) ¬ саду поста бумаги с штифтики.
 Here comes the third card: Here Comes третьей карты:
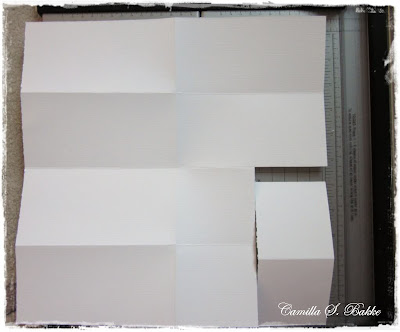
 I have made the outside match the inside. я сделал за пределами матча внутри. When I cut the paper for the card it is four cm longer than my normal card (15 cm). огда € вырезал бумаги дл€ карт это четыре см длиннее, чем мои нормальные карты (15 см). So this measures 15x19cm. “ак что это 15x19cm меры. Then I fold it in the middle as usual, and also at 15 cm down. “огда € сложить его в середине, как обычно, а также, что 15 см вниз. The remaining 4 cm is folded up. ќставшиес€ 4 см в сложенном.
 The images are from Whiff of Joy . »зображени€ из дуновение Joy .
The sentiments are from Stempelglede . Ќастроени€ от Stempelglede .
The papers are from Tim Holtz-Shabby Chic. –абот от “има ’ольц-ѕотертый Chic.
All images are coloured with Distress Ink, re-inkers. ¬се изображени€ цветными чернилами с бедствии повторно inkers.
I have inked (walnut stain) and sewed the edges. ¬ саду подписали (орех п€тна) и сшил кра€.
Tuesday, March 16, 2010 ¬торником, 16 марта 2010
A giftbox for Easter by Camilla S. Bakke Giftbox на ѕасху амилла —. Ѕакке
 Hi! ѕривет! Today I will show you how I made an Easter giftbox. —егодн€ € покажу вам, как € сделал Giftbox ѕасхи. Under you can see the papers I used, pluss the gorgeous stamp illustrated by Norma Fickel for Whiff of Joy . ѕод видишь работ исключительных, а также великолепные штамп иллюстрируетс€ Ќорма Fickel дл€ дуновение Joy .
 Here are the measurements for the box. ¬от измерений дл€ коробки. With this measures I will have a box at the size 11x11x3,5 cm. — этой доброй воли ћеры ¬ саду на размер коробки 11x11x3, 5 см.
I have made the box and the cover separately. ¬ саду сделал коробки и крышки отдельно.


 Under you see how the papers looks like after I have inked and sewed them. Ќиже вы видите, как бумага выгл€дит как после того как € подписал сад и шили ограничени€.
 I use some adhesive tape to fasten them on all four sides. я использую ленту что-то клеем два быстрых ограничение ср всех четырех сторон.
 And now for the cover: » теперь дл€ обложки:
 I have put them together and seved the cover aswell. я их собрал крышки и seved также. Then I place it on the side of the box, to see where I am going to fasten them together. “огда € разместить его на стороне коробки, "чтобы увидеть, где € собираюсь быстро два ограничени€ вместе.
 I use the strips I made with the word window punch, and eight brads. я использую полосы € сделал с окном удар слово, барды и восемь. Make sure you have some space between the to parts, so it also can bend. —делайте что-то кислым вы сад пространство между двум€ сторонами, поэтому она также может поворотах.
 I also use the strips with some smaller brads to fasten the sides together. “акже € использую полосы с чем-то меньшего штифтики два быстрых странице вместе. Under you see the inside of the box. Ќиже вы видите внутри коробки. I could also have fasten them on the outside... я мог бы также сад быстро ограничение на внешней стороне ...
 And under you see the outside of the box. ј ниже вы видите за пределами коробки.
 Now all sides are fastened, and the box is ready to be decorated. “еперь все страницы закреплены, и коробка готова задать два оформлены.
 And here it is! » вот оно! The girl with the lamb is coloured with Distress Ink, re-inkers on water colour paper 300g. ƒевушка с €гненком окрашена бедствии чернил повторно inkers ср воды 300 г цветной бумаги. I have used a 00 size brush. ¬ саду исключительных размер 00 кисть.
 A closeup: рупным планом:
 The whole cover: ÷елом охватывать:
 And inside some yummy chocolate-balls filled with milkcream;)) ј внутри что-то вкусное шоколадно-м€ч, заполненный молока;))
 Here you see the box from the other side, with the strips. «десь вы видите окно с другой стороны, с полосками. I think they made a spesial decoration. я думаю, что они сделаны специальные декорации.
—ери€ сообщений "отрисовки":
„асть 1 - тильдочки
„асть 2 - тильдочки
...
„асть 17 - медвежата
„асть 18 - открытки
„асть 19 - мк по открыткам и коробочкам
„асть 20 - такие разные открытки
„асть 21 - открыточки
...
„асть 23 - мышки
„асть 24 - открытки √ио
„асть 25 - ќтрисовочки.
—ери€ сообщений "коробочки":
„асть 1 - коробочки
„асть 2 - ќ–ќЅќ„ »
...
„асть 5 - коробочки
„асть 6 - коробочка с сюрпризом
„асть 7 - мк по открыткам и коробочкам
„асть 8 - “»Ћ№ƒќ„ »
ћетки: открыточки коробочки тильдочки отрисовочки мк |
открытки |
Ёто цитата сообщени€ nelehhelen [ѕрочитать целиком + ¬ свой цитатник или сообщество!]
ћетки: открытки мк |
блоги мастериц |
Ёто цитата сообщени€ белка28 [ѕрочитать целиком + ¬ свой цитатник или сообщество!]
—ери€ сообщений "блоги":
„асть 1 - блоги мастериц
„асть 2 - Ѕлог BEV
„асть 3 - открытки √ио
...
„асть 6 - чудный блог
„асть 7 - „”ƒќ-ќ“ –џ“ »
„асть 8 - ¬ƒќ’Ќќ¬≈Ќ»≈. Becca Feeken/
|
ћетки: мк блог открытки |
открытки от Toni |
Ёто цитата сообщени€ белка28 [ѕрочитать целиком + ¬ свой цитатник или сообщество!]
ћетки: мк открытки блоги мастериц |
сундучок с конфетой |
Ёто цитата сообщени€ …ера [ѕрочитать целиком + ¬ свой цитатник или сообщество!]
—ундучок с конфеткой
„итать далее...
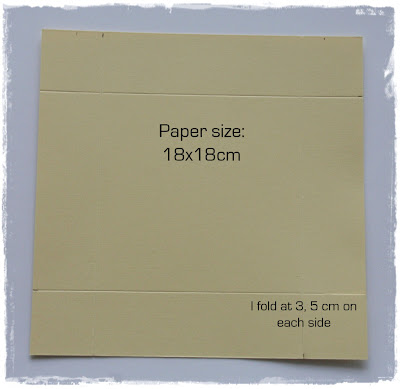
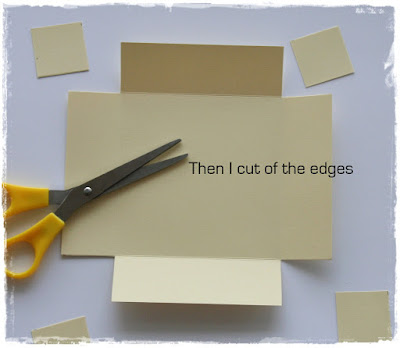
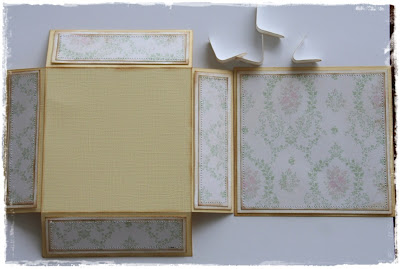
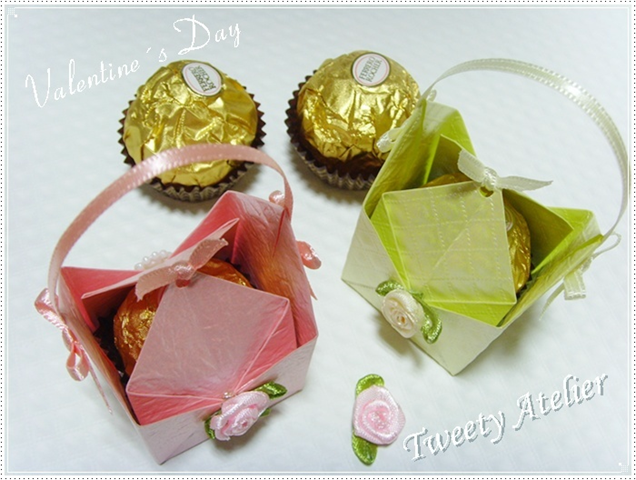
¬ такой упаковке любой подарок засверкает, как бриллиант в достойной оправе. Ѕриллиантом будет конфета, а оправой замечательные сундучки из текстурной бумаги.
‘ото мастер-класс по складыванию и оформлению таких сундучков.
ћетки: мк сундучок |
открытка-аккардеон |
Ёто цитата сообщени€ ƒина312 [ѕрочитать целиком + ¬ свой цитатник или сообщество!]
ћетки: мк открытка |
ќткрыточка с “ильдой |
Ёто цитата сообщени€ nelehhelen [ѕрочитать целиком + ¬ свой цитатник или сообщество!]
ћетки: мк тильдочки |
ќткрытка с “ильдой.ћ . |
Ёто цитата сообщени€ nelehhelen [ѕрочитать целиком + ¬ свой цитатник или сообщество!]
ћетки: тильдочка мк |
Ѕез заголовка |
Ёто цитата сообщени€ “э_амо [ѕрочитать целиком + ¬ свой цитатник или сообщество!]
ћетки: мк |
| —траницы: | [1] |


