Без заголовка |
A few weeks a go I decided that I wanted to make Conner a warm hat for our outdoor adventures (not that we actually go outside much when it’s snowing) but he definitely needed something thicker than what he had. Luckily I have different colors of fleece for projects that I still haven’t had the chance to make, so I used small pieces and made him a cute little hat with teddy bear ears. And as usual I wanted to share a tutorial and the pattern so you can make some too, and keep the babies in your life warm and cozy!
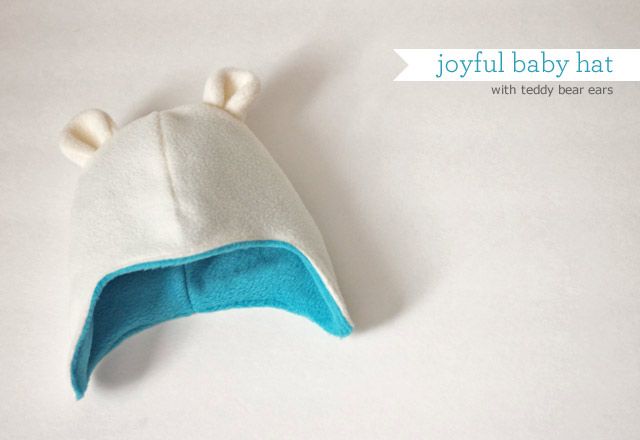
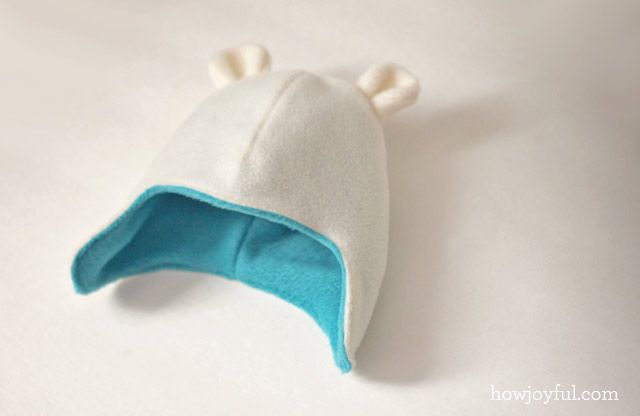
The first har I made (when I made this tutorial) was a month and a half a go, so Peanut was only 2 and a half months, I made the hat just like the pattern I’m sharing, but he grew out of it pretty fast, so I made a second one (photo below) adding 1/4″ around the pattern.

Since I made this pattern measuring Conner and not with an actual hat, I’m not sure about the sizes. The best way to be sure the hat will fit your baby perfectly is to measure the circumference and then measure the pattern, that’s what I did for the second hat, I just added 1/2″total to the width of the pattern. But you can also just use your copy machine and make the whole pattern bigger.
Now that I’ve warn all of you about the sizing, let’s start making this cute hat!
MATERIALS
* if you make it in one color you only need 1/2 yard, if you make it in 2 colors, get 1/2 yard of each and that will be good for 2 hats.

The pattern is a PDF file, to view that file you will need to have Abobe Reader installed on your PC or MAC. Without the program you will not be able to download or preview the file. If you have troubles please visit this link, because each browser works differently.
PROCESS
 |
1- First you need to cut your pieces, in this picture you can see the 4 pieces for the ears and the two for the hat body. I left 1/4″of seam allowance for mine. |
 |
2- Place the ear pieces with the right side facing in and sew around the edge. |
 |
3- Turn the ears inside our, then fold the ends toward the center, just like the picture shows, once you have them in that shape pin them in place. |
 |
4- Fold the hat body in half right side facing in an sew the back and the front. |
 |
5- Repeat the previous step with the inside piece of the hat. |
 |
6- Place the hat with the front facing towards you. |
 |
7- Pin the hears to the body as shown the picture, ears facing down with the front facing the front of the hat. |
 |
8- Pin the rest of the top opening so it’s easier to sew. |
 |
9- Repeat with the inside piece, and if you want you can add ears to this too and make the hat reversible, I chose to have one side with ears and the other one without. |
 |
10- Turn the hat inside out. |
 |
11- Place the body pieces one inside the other with the right sides facing each other. |
 |
12- Pin them in place for easy sewing. |
 |
13- Sew all the way around leaving a small opening in the back. |
 |
14- Turn the hat inside out. |
 |
15- Pin the opening shut and topstitch all the way around the edge of the hat. |
 |
16- After topstitching you can iron the seams so your hat is ready to warm up your baby’s hear and ears! |
I am so bummed he grew out of the white hat so fast, but that’s the good part about this patterns being simple, they are fearly easy to make so I just have to make more!
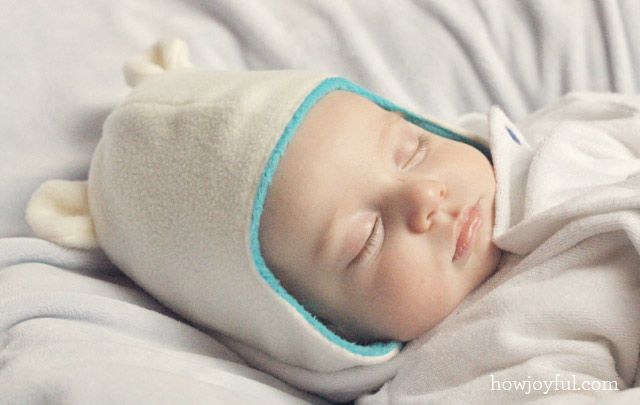
He is not much of a hat baby, he always tries to take them off, but I just pull it back in. I really like the coverage of the ears and I made the back kind of low so his neck is protected from the back too.

I hope you enjoy the pattern and I will love to see pictures if you make some for your babies or to give as presents!
| Рубрики: | дети шитье |
| Комментировать | « Пред. запись — К дневнику — След. запись » | Страницы: [1] [Новые] |


