-–убрики
- kulinariniai žurnalai (32)
- akmuo (2)
- ¬€зание спицами (12604)
- мои работы (112)
- -мои работы-в€зание (80)
- ƒжемперы и пуловеры. (2862)
- ∆акеты, кардиганы, кофточки (2215)
- ∆аккард-идеи (1296)
- пальто, куртки, накидки (495)
- болеро,пончо ,накидки (510)
- ∆илеты, безрукавки (418)
- “опы, болеро (380)
- носки, чулки, тапочки,сароги (673)
- шаль,палантины,шарфы,платки (спицы.крючок) (1870)
- варежки , перчатки (740)
- носки,варежки,шапки,шали и т.(спицы.крючок) (105)
- Ўапочки, береты, шл€пки и др. (681)
- ѕлать€, туники, сарафаны (939)
- костюмы (95)
- ёбки спицами (129)
- брюки, шорты (3)
- ¬я«јЌ»≈ ƒЋя ћ”∆„»Ќ (503)
- мои хотелки (1028)
- дл€ собак(спицы,крючок) (46)
- узоры (спицы) (1102)
- Ђ∆гуты, косы, шишечки,рельефыї (456)
- ¬€зание с мехом (8)
- журналы и книги по в€занию (2714)
- в€зальные хитрости. (1964)
- мк,узоры (1898)
- пр€жа (111)
- уроки в€зани€ (спицы) (1432)
- »Ќ‘ќ (1419)
- ЁЌ÷» Ћќѕ≈ƒ»» (174)
- ¬я«јЌ»≈ - –ё„ќ (10717)
- ∆ј ≈“ –ё„ ќћ (668)
- плать€,туники (крючок) (2105)
- топы, блузы, кофточки (1654)
- юбки,брюки ,шорты (476)
- купальники (123)
- сумки(спицы,крючок) (352)
- скатерти, салфетки (397)
- рючком цветы (375)
- ѕќ –џ¬јЋј Ќј –ќ¬ј“№, ѕќƒ”Ў » (810)
- ѕЋ≈ƒџ,ѕќ –џ¬јЋј. ќ¬–» » и “.ѕ. (785)
- ¬я«јЌџ≈ ќ¬–» » (242)
- ¬€заные воротнички (15)
- кайма (353)
- шнурочки, по€са (100)
- ќћЅ»Ќ»–ќ¬јЌЌќ≈ ¬я«јЌ»≈ –ё„ ќћ (28)
- игрушки (1163)
- куклы (686)
- -куклы.¬олосы,глаза,одежда (150)
- узоры (крючок) (1480)
- ‘илейное в€зание (271)
- уроки в€зани€ (крючок) (1115)
- ирландское кружево (1069)
- ‘–»‘ќ–ћ (122)
- Ѕ–ё√√— ќ≈ –”∆≈¬ќ (44)
- на вилке (28)
- –умынское кружево. (51)
- CRAZY-WOOL (17)
- ¬я«јЌ»≈ ƒ≈“— ќ≈ (1545)
- ƒетские шапочки (358)
- пинетки, носочки, шапочки и т.п. (472)
- в€зание детское-девочки (1620)
- детское крючком (594)
- в€зание детское-мальчики (512)
- ”крашени€ из бисера ,сутаж (4138)
- -мои работы-бисер (29)
- Ѕ»—≈–. (1136)
- Ѕисероплетение книги и журналы (702)
- ” –јЎ≈Ќ»я (678)
- манекены,подставки дл€ украшений (6)
- ¬џЎ»¬ ј (1437)
- -мои работы-вышивка (3)
- ¬ышивка в ковровой технике (10)
- ¬ал€ние (325)
- из кожи (320)
- из газет и бумаги (415)
- ѕлетение из газет (253)
- ¬интажные коробки,шкатулки (66)
- упаковка (32)
- этикетка мастер класс (4)
- декупаж (42)
- необычные виды рукодели€ (395)
- игрушки (217)
- ”„»ћ—я –»—ќ¬ј“№ (161)
- роспись по ткани (79)
- Ћ≈ѕ ј/соленое тесто (175)
- из меха (12)
- Ѕукет из конфет (21)
- “опиарии (23)
- ÷¬≈“џ »« “ јЌ» (÷¬≈“ќƒ≈Ћ≈≈) (36)
- флористика (52)
- мыло своими руками (55)
- свечи (20)
- пластик (78)
- полиэтиленовые пакеты (49)
- ѕасха (24)
- Ќовый год (268)
- ”Ћ»Ќј–»я (5281)
- блюда из м€са,курицы (820)
- блюда из овощей,грибов и т.п. (623)
- выпечка(пироги,пицца,бел€ши и т.п.) (807)
- заготовки,засолки(в т.ч. из рыбы, м€са) (246)
- «аготовки на зиму (704)
- блюда из рыбы (302)
- салаты (394)
- закуски,бутерброды (340)
- закуски (91)
- творог, молоко (318)
- соусы (173)
- первые блюда (131)
- блины (107)
- подборки разных блюд (238)
- советы по кулинарии (327)
- десерт (344)
- сладка€ выпечка(торты,пирожное) (1146)
- тесто (387)
- крем (80)
- напитки (141)
- украшени€ блюд (187)
- ƒекор, интерьер, дизайн ѕолезные советы (800)
- »деи дл€ дома (445)
- ƒомашние советы (775)
- ƒј„ј,ѕ–»”—јƒ≈ЅЌџ… ”„ј—“ќ (704)
- дизайн (191)
- огородные дела,рассада (344)
- прочее,цветы (352)
- томаты (52)
- огурцы (22)
- перец (8)
- Ўьем дл€ уюта в доме (114)
- Ўитье (281)
- јѕѕЋ» ј÷»я (55)
- ћќƒј и —“»Ћ№ (247)
- ѕрически (74)
- расота/ћаски, ћаки€ж, ћаникюр (281)
- плоский живот. (86)
- ”ход за лицом и телом.ƒомашн€€ косметика (949)
- Ќародные средства (424)
- Mедицина (168)
- искусство, книги (321)
- —тихи. ёмор.ƒл€ души (803)
- -стихи (202)
- -юмор (57)
- -дл€ души (269)
- автошкола (12)
- —ловари (119)
- фильмы (83)
- музыка (125)
- ќћѕ№ё“≈– (265)
- ¬идео. (7)
- открытки (150)
- ќформление дневника (481)
- дл€ дневника информаци€. (306)
- -новое инфо,дл€ дневника (94)
- фотошоп (53)
- Ћитва (13)
- смайлики (9)
- јнглийский €зик (31)
-—сылки
-ћетки
-ћузыка
- ¬ладимир ¬ысоцкий-"Ёх –аз"
- —лушали: 4146 омментарии: 0
- Ќепара_ќни знакомы давно_(”тром ничего не случитс€)
- —лушали: 2745 омментарии: 2
- –оманс из к/ф "∆изнь одна",ћуз.ј.–ыбникова,—л.ј.јхматовой .
- —лушали: 49934 омментарии: 0
- √ригорий Ћепс - Ќасто€ща€ ∆енщина
- —лушали: 5390 омментарии: 2
- ћ.ћуромов - —транна€ женщина...
- —лушали: 25372 омментарии: 0
-Ќовости
-ѕоиск по дневнику
-ѕодписка по e-mail
-ƒрузь€
-ѕосто€нные читатели
-—ообщества
-—татистика
«аписей: 50386
омментариев: 3905
Ќаписано: 55778
«аписи с меткой кукла
(и еще 96076 запис€м на сайте сопоставлена така€ метка)
ƒругие метки пользовател€ ↓
бабушкин квадрат бисер браслет. браслеты варежки вышивка в€зание в€занные хитрости девочки детское джемпер жакет жаккард жилет жилеты журнал журналы по в€занию кайма кардиган косы кофточка крючок мальчики мужской носочки пальто пинетки платье подушка покрывало пуловер салфетка сарафан свитер скатерть снуд соус спицы томатный джем топ торт туника узор украшени€ филейное в€зание шаль шапка шарф
” ќЋ » - –ј—ќ“ ». ѕ≈–≈¬ќƒ ј√Ќ»» “ќѕќ– ќ¬ќ… |
Ёто цитата сообщени€ VERA-L [ѕрочитать целиком + ¬ свой цитатник или сообщество!]
ћетки: кукла крючок |
” ќЋ ј Ћ”ѕ»“ј |
Ёто цитата сообщени€ VERA-L [ѕрочитать целиком + ¬ свой цитатник или сообщество!]
ћетки: кукла крючок |
ј —¬я«ј“№ –ё„ ќћ –ј—»¬џ≈ √Ћј«ј ƒЋя ” Ћџ |
Ёто цитата сообщени€ VERA-L [ѕрочитать целиком + ¬ свой цитатник или сообщество!]
ћетки: кукла глаза |
ќ„≈Ќ№ ѕќƒ–ќЅЌџ… ћ ѕќ ” ќЋ№Ќќ… –”„ ≈!! |
Ёто цитата сообщени€ Ѕайкалочка_10 [ѕрочитать целиком + ¬ свой цитатник или сообщество!]
ќп€ть с заграничного сайта! Ќу очень подробно!!!!!!!! —тащила отсюда! лассный сайт по куклам! http://members.home.nl/asrai/cursus-en.htm
|
The hand I made for this lesson is from the palm of the hand to the finger tips about 1.80 inch. It is a bit bigger than I usually make, smaller gave some photographic problems 'cause I don't have a macro lens. |
 |
 |
|
The size of the hands depend on the size of the head. The length of a hand is equal to the length from chin to halfway the forehead. A face is usually about 2 hands wide. This can always vary a bit depending on the kind of doll. You start off by making 2 cylinder shaped rolls of fimo, in this lesson they are about 2.6 inch long and 0.60 inch thick (pict. 1). Sculpt one end in a kind of spoon shape by pressing the clay with your thumb. Sculpt the hand thinner to the "finger tips' by pushing it more flat (pict. 2). |
|
 |
 |
|
For this lesson I'll continue with the making of the right hand. Try to work simultaneously on both hands because it is hard to make an equal looking hand afterwards. To make a wrist, roll the clay between thumb and point finger like pict. 3 You now have a roughly shaped hand with a part arm. Make the arm thinner if necessary. Smooth the hand nice and round. The hollow part is the inside/hand palm of the hand (pict. 4). |
|
 |
 |
|
At pict. 5 you see the back of the hand. You will now make 3 incisions with a knife for separating the fingers. The thumb will be added later. Because this will be a right hand, the incision for the little finger is cut a little further than the other incisions, take your own hand as example. Bend the 2 outer fingers gently side wards so you have more space (pict. 6). Hold the fingers between your point finger and thumb. While warming the clay by the warmth of your hands, very gently roll the fingers slightly back and forth, so the inside of the fingers will also become round. You can use a sculpting tool for the areas that are difficult to reach. |
|
 |
 |
|
When the two outer fingers are smoothed, you start with the middle two. Bend them slightly apart and again roll them gently back and forth to round off the edges on the inside of the fingers (pict. 7). Do this very slowly, it is important that while you are doing this, the clay will be warmed by your fingers so they don't rip at the beginning. Use a sculpting tool to smooth the areas that are hard to reach (pict. 8). |
|
 |
 |
|
Because of the smoothing of the fingers they usually will get a little too long, cut them off at the right size (pict. 9). Round off the finger tops again (pict. 10). |
|
 |
 |
|
The fingers of the hand should now look something like pict. 11 We will now continue with the inside of the hand. Make the dimple of the hand a little more distinct by pressing the palm slightly with your thumb and smudging clay towards the wrist. (pict. 12). |
|
 |
 |
|
Press the clay on the wrist like in pict. 13, so you will clearly see the difference between the wrist and where the handpalm begins (pict. 14). |
|
 |
 |
|
Next step is making a thumb. Sculpt a pear shape piece of fimo, make an incision in the broad part of the thumb' (pict. 15) Pull the parts a bit side-wards and place the thumb on the hand as in pict. 16. |
|
 |
 |
||||||||||||||||||||||||||||||||
|
Push the thumb firmly against the hand, blend the seams on all sides with a sculpting tool and smooth with your fingers (pict. 17-18). When the thumb is too long or thick, cut off a piece and re-shape the thumb. |
|||||||||||||||||||||||||||||||||
 |
 |
||||||||||||||||||||||||||||||||
|
Nails can be made in many ways. You can draw lines with a knife or other sharp tool. You can also slantwise cut off a piece of a lemonade straw and use this to make an indent of a nail. For this lesson I used a little hollow chisel. They are normally used for chiseling wood but they are also very handy (when you turn them around) for making nail prints on clay fingers (pict. 19). Use a sharp tool to correct the lines if necessary (pict. 20). |
|||||||||||||||||||||||||||||||||
 |
 |
||||||||||||||||||||||||||||||||
|
Don't forget to attach the lines at the fingertips, so the nails will look like they lay on the finger (pict. 21). This is very precise work. We will now continue with the palm of the hand. You can make it as detailed as you like, it also depends on the pose of the doll and if the palms of the hands are visible or not. If they are not visible you can keep it more simple. Place a C-shaped slice of fimo on the palm and an extra slice at the beginning of the thumb (not too thick) as in pict. 22. |
|||||||||||||||||||||||||||||||||
 |
 |
||||||||||||||||||||||||||||||||
|
Press the slices and the seams firmly, gently blend the seams using a sculpting tool (pict. 23) make sure the palm looks natural. When all the seams are blended (pict. 24), moisten your finger and smooth the hand palm by rubbing it with your finger. |
|||||||||||||||||||||||||||||||||
 |
 |
||||||||||||||||||||||||||||||||
|
Now it is time to add some lines to the hand palm, you can use a thin sculpting tool for this (pict. 25). Look at your own hands where the lines should be. Add some lines at the beginning of the fingers using a mini tool or a toothpick (pict. 26). |
|||||||||||||||||||||||||||||||||
 |
 |
||||||||||||||||||||||||||||||||
|
Also draw lines on the inside of the fingers, again watch your own hand closely to see how this looks. (pict. 27). The inside of the hand is finished now, we turn the hand around and continue with the back. It depends on the kind of hands you want, how you will proceed. If you want real smooth elegant hands, you better not add big knuckles. Just a few 'knuckle lines' at the place of the knuckles will look nice too. If you want more detailed hands you proceed like this. Place thin slices of fimo in the middle of each finger and slices just under the fingernail. You also add slices fimo on the knuckles of the hand (pict. 28). |
|||||||||||||||||||||||||||||||||
 |
 |
||||||||||||||||||||||||||||||||
|
Carefully blend the seams with your sculpting tool until the seams are smoothened. (pict. 29-30), don't forget the sides of the fingers. Try to hold on to the shape of the knuckle, don't blend too wide, or it might end up looking more like a tumor than a knuckle... ;-). This is very precise work that will take some time. |
|||||||||||||||||||||||||||||||||
 |
 |
||||||||||||||||||||||||||||||||
|
It still looks a bit rough at this point. Moisten your finger and 'polish' the fingers to make them smooth, without fading out the knuckles (pict. 31). Between the knuckles on the hand, you draw some lines with your sculpting tool towards the arm, to accentuate some of the muscles (pict. 32). Rub the lines with a finger to blur and make it look more natural.
|
|||||||||||||||||||||||||||||||||
ћетки: кукла |
ћќя ЋёЅ»ћјя ” Ћј.“–» ќ“ј∆Ќќ≈ ј“≈Ћ№≈. |
Ёто цитата сообщени€ Gegoma [ѕрочитать целиком + ¬ свой цитатник или сообщество!]
ћетки: кукла одежда |
” Ћџ —ѕ»÷јћ» |
Ёто цитата сообщени€ Nanina [ѕрочитать целиком + ¬ свой цитатник или сообщество!]
ћетки: кукла спицы |
” ќЋ » ќ“ ¬≈–ј ≈„ ќ |
Ёто цитата сообщени€ Luyda52 [ѕрочитать целиком + ¬ свой цитатник или сообщество!]
ћетки: кукла |
” Ћџ —¬ќ»ћ» –” јћ» |
Ёто цитата сообщени€ Luyda52 [ѕрочитать целиком + ¬ свой цитатник или сообщество!]
ћетки: кукла |
ј »« ќЅџ„Ќџ’ ѕ”√ќ¬»÷ —ƒ≈Ћј“№ √Ћј«ј ƒЋя ” ќЋ »« јѕ–ќЌј |
Ёто цитата сообщени€ Luyda52 [ѕрочитать целиком + ¬ свой цитатник или сообщество!]
ћетки: кукла |
” Ћџ »« јѕ–ќЌј » —»Ќ“≈ѕќЌј: ћј—“≈–- Ћј—— ƒЋя Ќј„»Ќјёў»’ |
Ёто цитата сообщени€ Luyda52 [ѕрочитать целиком + ¬ свой цитатник или сообщество!]
ћетки: кукла |
—ќ«ƒј≈ћ Ђ ј–јћ≈Ћ№Ќџ≈ √”Ѕ »ї ƒЋя ” ќЋ ¬ “≈’Ќ» ≈ Ђ— ”Ћ№ѕ“”–Ќџ… “≈ —“»Ћ№ї. ”“я∆ ј √”Ѕ |
Ёто цитата сообщени€ Luyda52 [ѕрочитать целиком + ¬ свой цитатник или сообщество!]
ћетки: кукла |
¬я«јЌјя ћјЋџЎ ј јѕ≈Ћ№ ј |
Ёто цитата сообщени€ –иоритта [ѕрочитать целиком + ¬ свой цитатник или сообщество!]
ћетки: кукла крючок |
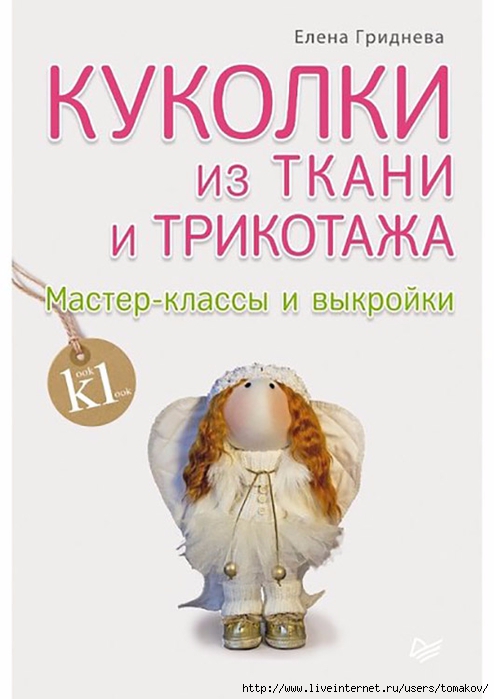
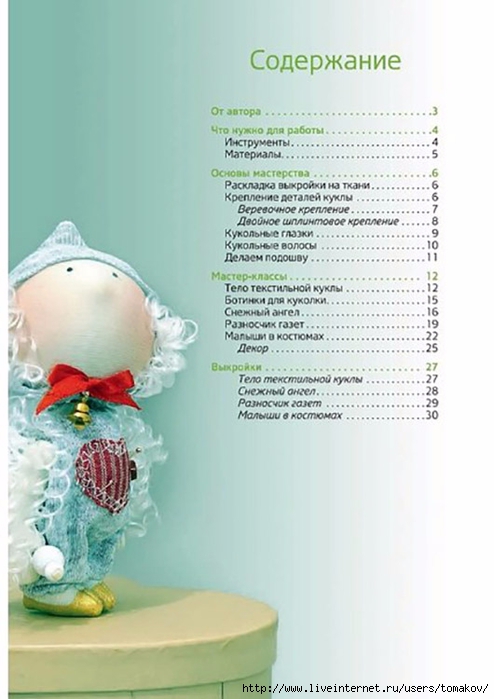
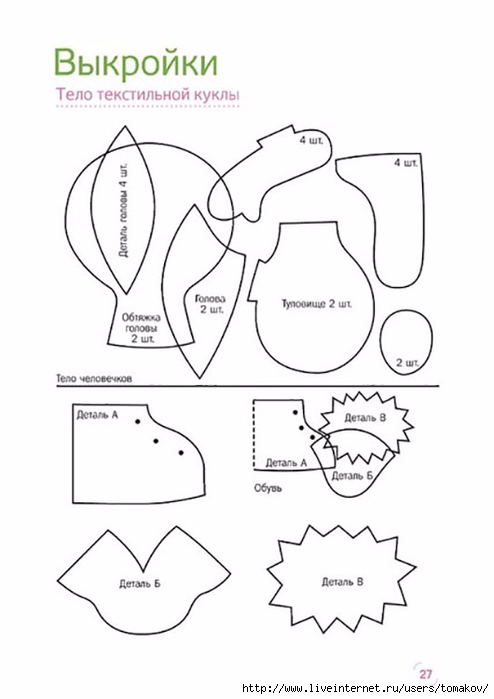
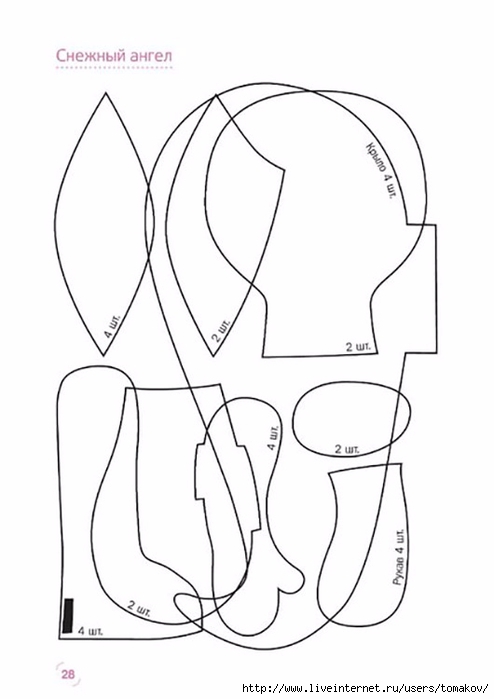
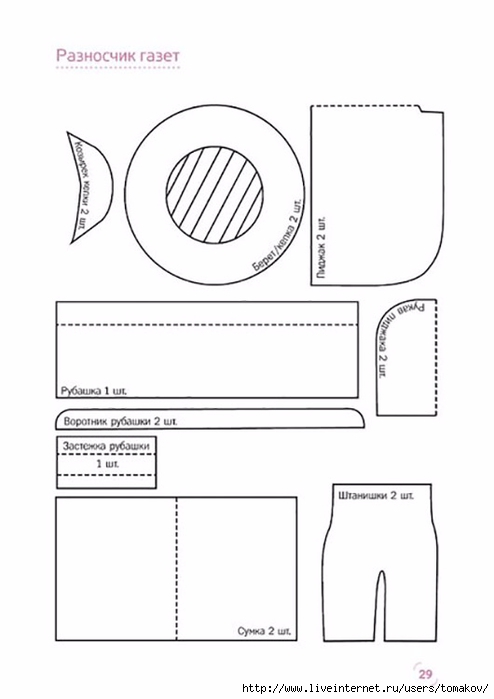
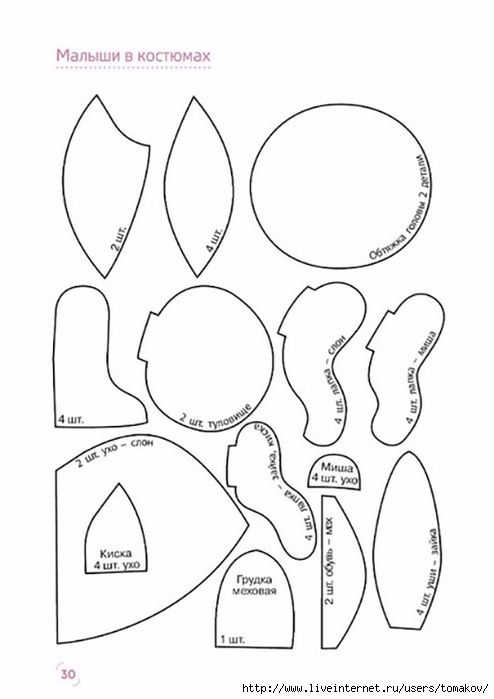
уколки из ткани и трикотажа |
Ёто цитата сообщени€ losik-kurnosik [ѕрочитать целиком + ¬ свой цитатник или сообщество!]
уколки из ткани и трикотажа
2.
3.
4.
5.
6.
7.
8.
9.
10.
11.
12.
13.
14.
15.
16.
17.
18.
19.
20.
21.
22.
23.
24.
25.
26.
27.
28.
29.
30.
31.
32.
ћетки: кукла |
ќ—Ќќ¬џ ” ќЋ№Ќќ… — ”Ћ№ѕ“”–џ... |
Ёто цитата сообщени€ svtusik555 [ѕрочитать целиком + ¬ свой цитатник или сообщество!]
ћетки: лепка кукла |
ѕ”ѕ— –ё„ ќћ. BABY WITH DUMMY BY MARIYA KOZLOVA |
Ёто цитата сообщени€ Ћада_√ермановна [ѕрочитать целиком + ¬ свой цитатник или сообщество!]
јвтор: Mariya Kozlova (AmigurushkiMK).

„итать далее
ћетки: кукла |
” Ћј ћј–“»Ќј. |
Ёто цитата сообщени€ Ћада_√ермановна [ѕрочитать целиком + ¬ свой цитатник или сообщество!]
јвтор:
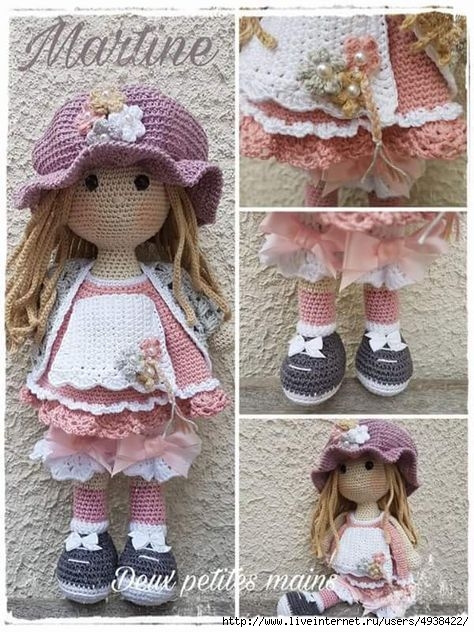
Sandrine CAMPANA
ќпубликовала:
Ћисичка. “ардис. “ри клубка.
https://vk.com/topic-29191739_36018130
” автора кукла около 38 см, пр€жа 100% хлопок.
ѕонадобитс€:
✨крючок 2,5 мм
✨глаза 10 мм
✨пр€жа бежева€, бела€, сера€. светло-коричнева€, розова€, светло-сера€ и сиренева€
„итать далее
ћетки: кукла крючок |
” ќЋ ј |
Ёто цитата сообщени€ nata5219 [ѕрочитать целиком + ¬ свой цитатник или сообщество!]

ћетки: кукла крючок |
” ќЋ ». »ƒ≈» |
Ёто цитата сообщени€ nata5219 [ѕрочитать целиком + ¬ свой цитатник или сообщество!]
ћетки: кукла |
” ќЋ ј |
Ёто цитата сообщени€ nata5219 [ѕрочитать целиком + ¬ свой цитатник или сообщество!]
ћетки: кукла крючок |
ћ ѕќ ј– ј—Ќќ… ” Ћ≈ |
Ёто цитата сообщени€ nata5219 [ѕрочитать целиком + ¬ свой цитатник или сообщество!]
ћетки: кукла крючок |
ѕ”ѕ—џ …ќ-…ќ. ј¬“ќ– ћј–»Ќј «ј’ј–ќ¬ј |
Ёто цитата сообщени€ losik-kurnosik [ѕрочитать целиком + ¬ свой цитатник или сообщество!]

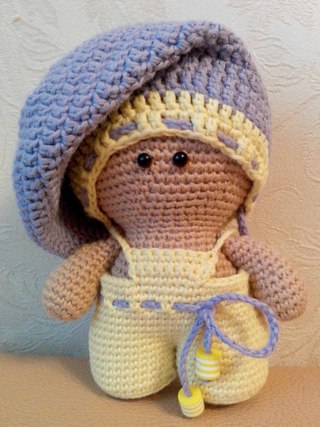
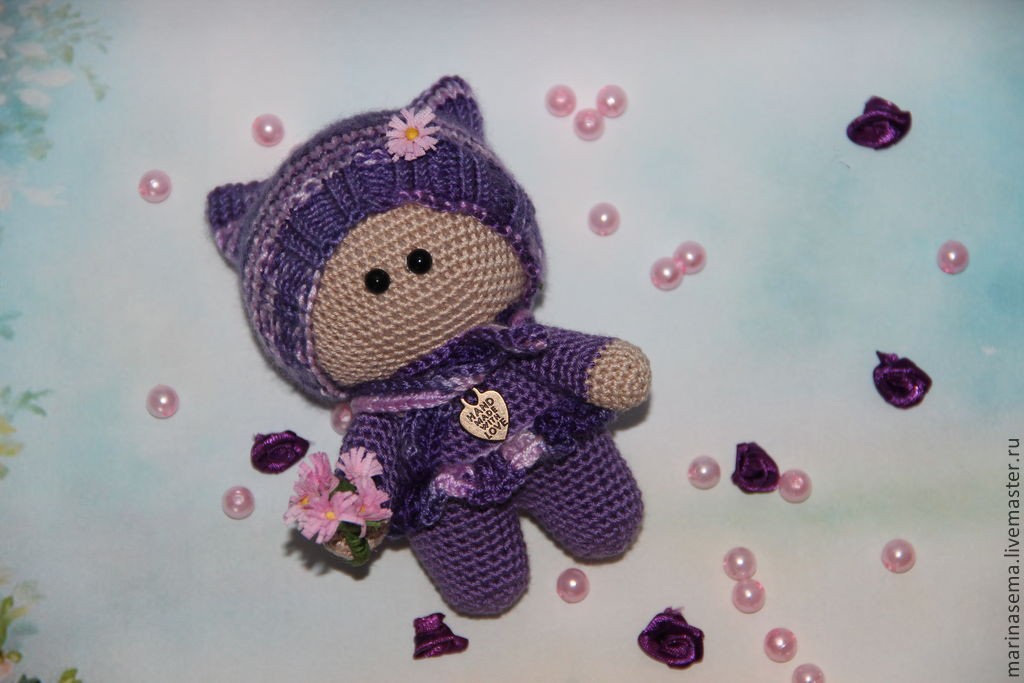
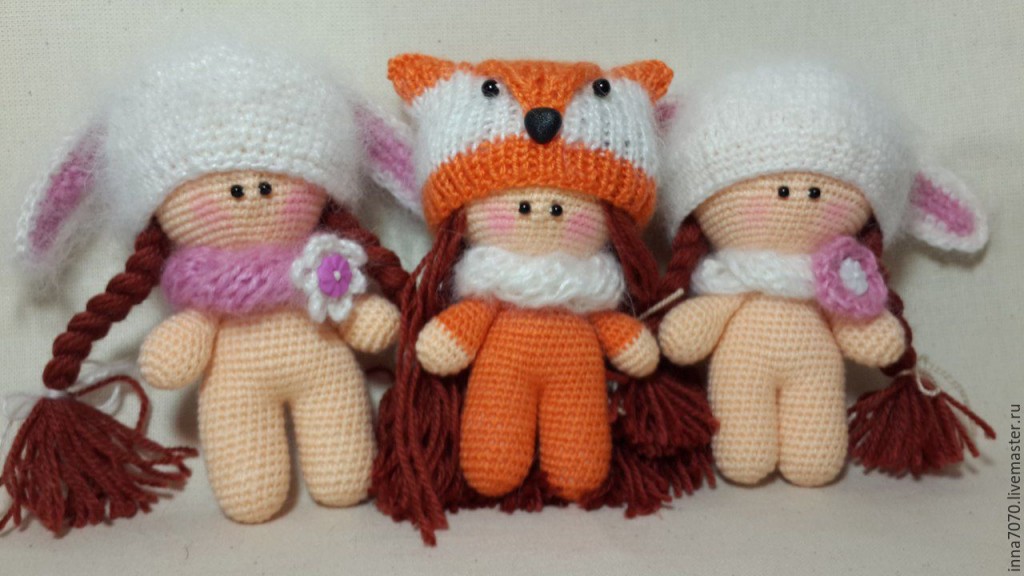
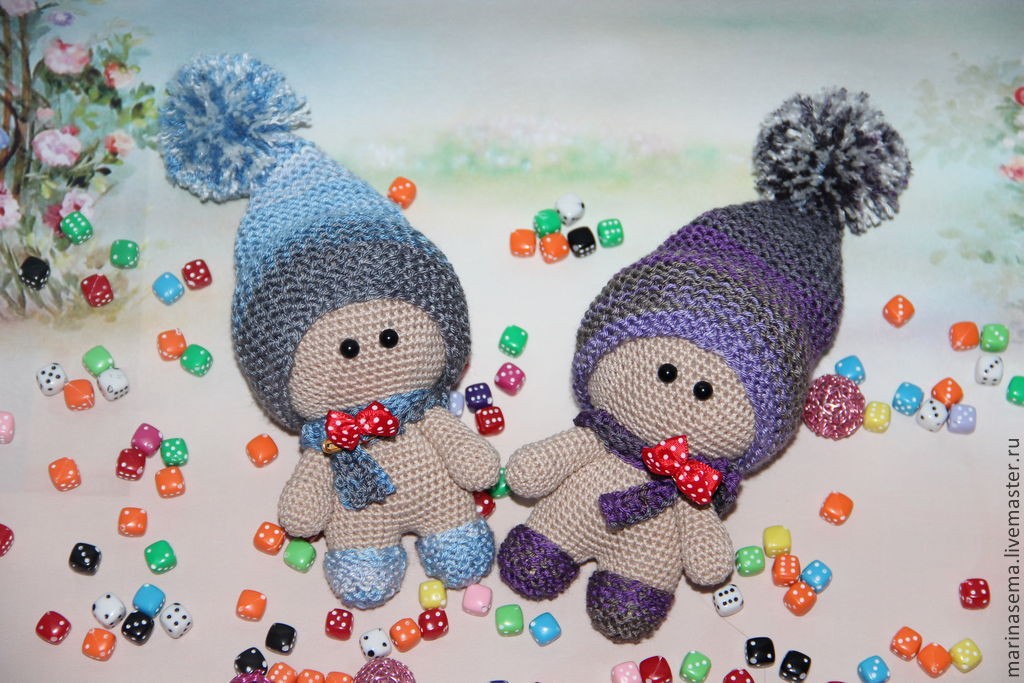
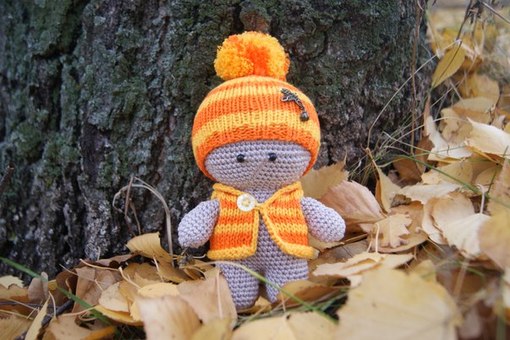
¬€заные пупсы …о-йо завоевали сердца многих рукодельниц и мам. ќни смотр€тс€ потр€сающе мило, очень м€гкие и тискательные, да еще и в€жутс€ достаточно быстро.
јвтором оригинальной идеи €вл€етс€ ћарина «ахарова. —хема в€зани€ пупса крючкомпредставлена ниже, под фотографи€ми.
¬€зана€ игрушка пупс …о-йо получаетс€ около 16 см (если в€зать пр€жей YarnArt Jeans). ƒл€ устойчивости в стопы можно положить картон. √олова, туловище и ноги в€жутс€ одной деталью, начина€ со стоп. „тобы голова держалась прочно и не запрокидывалась, можно в области соединени€ с туловищем вставить ватные палочки, как это было описано дл€ в€заной куклы Ћалалупси. ќдежду дл€ в€заной игрушки, малыша …о-йо, можно св€зать самую разнообразную. ѕредлагаем вдохновитьс€ работами мастеров, которые были найдены на просторах интернета.
 /handcraft-studio.com/wp-content/uploads/2015/11/схемы-игрушек-малыш-йо-йо-амигуруми.jpg" target="_blank">http://handcraft-studio.com/wp-content/uploads/201...ушек-малыш-йо-йо-амигуруми.jpg 320w" style="border: 0px none; margin: 5px;" title="схемы игрушек малыш йо-йо амигуруми" width="320" />
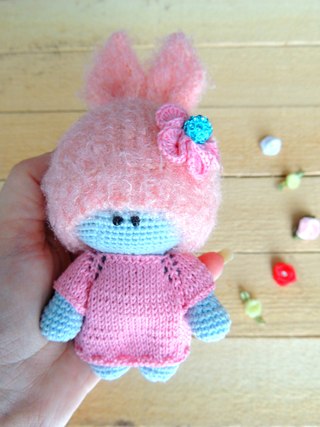 /handcraft-studio.com/wp-content/uploads/2015/11/игрушки-крючком-в€заные-куклы-схемы-в€зани€-игрушек.jpg" target="_blank">http://handcraft-studio.com/wp-content/uploads/201...уклы-схемы-в€зани€-игрушек.jpg 320w" style="border: 0px none; margin: 5px;" title="игрушки крючком в€заные куклы схемы в€зани€ игрушек" width="320" />
 /handcraft-studio.com/wp-content/uploads/2015/11/игрушки-крючком-схемы-в€зани€-игрушек-в€заные-куклы-300x300.jpg" target="_blank">http://handcraft-studio.com/wp-content/uploads/201...ушек-в€заные-куклы-300x300.jpg 300w, http://handcraft-studio.com/wp-content/uploads/201...грушек-в€заные-куклы-75x75.jpg 75w, http://handcraft-studio.com/wp-content/uploads/201...ани€-игрушек-в€заные-куклы.jpg 320w" style="border: 0px none; margin: 5px;" title="игрушки крючком схемы в€зани€ игрушек в€заные куклы" width="320" />
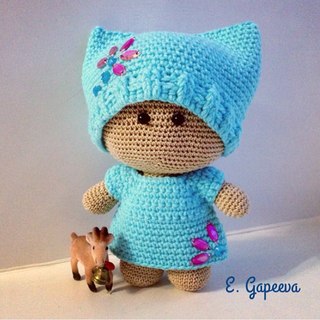 /handcraft-studio.com/wp-content/uploads/2015/11/схемы-игрушек-игрушки-крючком-малыш-йо-йо-в€заные-куклы-300x300.jpg" target="_blank">http://handcraft-studio.com/wp-content/uploads/201...о-йо-в€заные-куклы-300x300.jpg 300w, http://handcraft-studio.com/wp-content/uploads/201...-йо-йо-в€заные-куклы-75x75.jpg 75w, http://handcraft-studio.com/wp-content/uploads/201...-малыш-йо-йо-в€заные-куклы.jpg 320w" style="border: 0px none; margin: 5px;" title="схемы игрушек игрушки крючком малыш йо-йо в€заные куклы" width="320" />
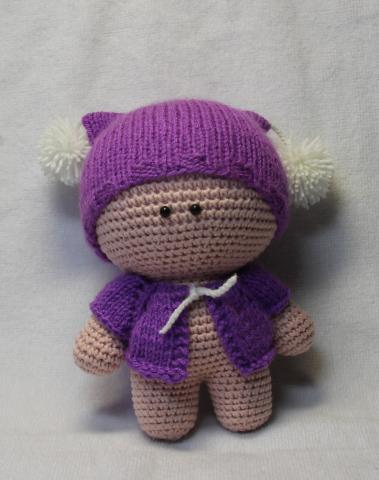 /handcraft-studio.com/wp-content/uploads/2015/11/схемы-игрушек-в€заные-куклы-амигуруми-малыш-йо-йо-описание.jpg" target="_blank">http://handcraft-studio.com/wp-content/uploads/201...уруми-малыш-йо-йо-описание.jpg 379w" style="border: 0px none; margin: 5px;" title="схемы игрушек в€заные куклы амигуруми малыш йо-йо описание" width="320" />
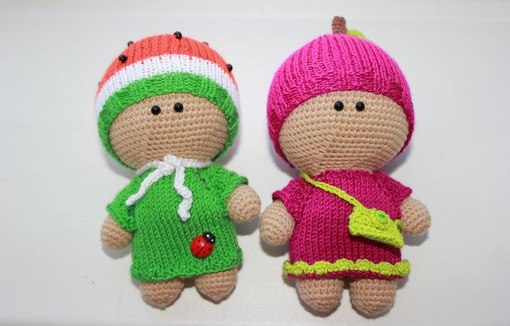 /handcraft-studio.com/wp-content/uploads/2015/11/в€заные-малыши-в-шапочках-куклы-амигуруми-схемы-в€зани€-игрушек-105x67.jpg" target="_blank">http://handcraft-studio.com/wp-content/uploads/201...емы-в€зани€-игрушек-105x67.jpg 105w, http://handcraft-studio.com/wp-content/uploads/201...руми-схемы-в€зани€-игрушек.jpg 510w" style="border: 0px none; margin: 5px;" title="в€заные малыши в шапочках куклы амигуруми схемы в€зани€ игрушек" width="500" />
 /handcraft-studio.com/wp-content/uploads/2015/11/в€заные-пупсы-схемы-игрушек-амигуруми-описание.jpg" target="_blank">http://handcraft-studio.com/wp-content/uploads/201...игрушек-амигуруми-описание.jpg 1024w, http://handcraft-studio.com/wp-content/uploads/201...-амигуруми-описание-105x70.jpg 105w" style="border: 0px none; margin: 5px;" title="в€заные пупсы схемы игрушек амигуруми описание" width="500" />
 /handcraft-studio.com/wp-content/uploads/2015/11/в€заные-куклы-крючком-схемы-игрушек-амигуруми-описание-1024x576.jpg" target="_blank">http://handcraft-studio.com/wp-content/uploads/201...мигуруми-описание-1024x576.jpg 1024w, http://handcraft-studio.com/wp-content/uploads/201...-амигуруми-описание-105x59.jpg 105w, http://handcraft-studio.com/wp-content/uploads/201...игрушек-амигуруми-описание.jpg 1280w" style="border: 0px none; margin: 5px;" title="в€заные куклы крючком схемы игрушек амигуруми описание" width="500" />
 /handcraft-studio.com/wp-content/uploads/2015/11/в€заные-пупсы-йо-йо-схемы-в€зани€-игрушек-крючком-амигуруми.jpg" target="_blank">http://handcraft-studio.com/wp-content/uploads/201...-игрушек-крючком-амигуруми.jpg 1024w, http://handcraft-studio.com/wp-content/uploads/201...к-крючком-амигуруми-105x70.jpg 105w" style="border: 0px none; margin: 5px;" title="в€заные пупсы йо-йо схемы в€зани€ игрушек крючком амигуруми" width="500" />
 /handcraft-studio.com/wp-content/uploads/2015/11/в€заные-пупсы-схемы-в€зани€-игрушек-крючком-описание-мк-105x70.jpg" target="_blank">http://handcraft-studio.com/wp-content/uploads/201...крючком-описание-мк-105x70.jpg 105w, http://handcraft-studio.com/wp-content/uploads/201...грушек-крючком-описание-мк.jpg 510w" style="border: 0px none; margin: 5px;" title="в€заные пупсы схемы в€зани€ игрушек крючком описание мк" width="500" />
 /handcraft-studio.com/wp-content/uploads/2015/11/схемы-игрушек-малыш-йо-йо-в-одежде-в€заные-куклы-описание.jpg" target="_blank">http://handcraft-studio.com/wp-content/uploads/201...жде-в€заные-куклы-описание.jpg 591w" style="border: 0px none; margin: 5px;" title="схемы игрушек малыш йо-йо в одежде в€заные куклы описание" width="500" />
»грушки крючком
—хема в€зани€ пупса …о-йо
ѕо мере в€зани€ набиваем игрушку наполнителем.
Ќоги (2 детали), туловище, голова (в€жутс€ слитно)
1.6 сбн в кольцо амигуруми
2.(прибавка) х 6 (12 сбн)
3.(1 сбн, приб) х 6 (18 сбн)
4.(приб, 8 сбн) х 2 (20 сбн)
5-13. 20 сбн (вторую ногу в€зать аналогично, соединить с первой, после соединени€ всего получаетс€ 40 сбн)
Ќачинаем тело
14. 40 сбн
15. 12 сбн, уб, 15 сбн, уб, 9 сбн (38 сбн)
16. 11 сбн, уб, 15 сбн, уб, 8 сбн (36 сбн)
17. 8 сбн, уб, 15 сбн, уб, 9 сбн (34 сбн)
18. 8 сбн, уб, 14 сбн, уб, 7 сбн (32 сбн)
19. 8 сбн, уб, 13 сбн, уб, 7 сбн, (30 сбн)
20. 8 сбн, уб, 13 сбн, уб, 5 сбн (28 сбн)
21. 7 сбн, уб, 11 сбн, уб, 6 сбн (26 сбн)
22. 7 сбн, уб, 10 сбн, уб, 5 сбн (24 сбн)
23. 6 сбн, уб, 9 сбн, уб, 5 сбн (22 сбн)
24. 6 сбн, уб, 8 сбн, уб, 4 сбн (20 сбн)
25. 5 сбн, уб, 7 сбн, уб, 4 сбн (18 сбн)
Ќачинаем голову
26. (2 сбн, приб) х 6 (24 сбн)
27. (3 сбн, приб) х 6 (30 сбн)
28. (4 сбн, приб) х 6 (36 сбн)
29. (5 сбн, приб) х 6 (42 сбн)
30. (6 сбн, приб) х 6 (48 сбн)
31. (7 сбн, приб) х 6 (54 сбн)
32. (8 сбн, приб) х 6 (60 сбн)
33. (9 сбн, приб) х 6 (66 сбн)
34-44. 66 сбн
45. (9 сбн, уб) х 6 (60 сбн)
46. (8 сбн, уб) х 6 (54 сбн)
47. (7 сбн, уб) х 6 (48 сбн)
48. (6 сбн, уб) х 6 (42 сбн)
49. (5 сбн, уб) х 6 (36 сбн)
50. (4 сбн, уб) х 6 (30 сбн)
51. (3 сбн, уб) х 6 (24 сбн)
52. (2 сбн, уб) х 6 (18 сбн)
53.(1 сбн, уб) х 6 (12 сбн)
54.(уб) х 6 (6 сбн)
—т€нуть отверстие, закрепить и обрезать нить.
–уки (2 детали)
1.6 сбн в кольцо
2.ѕриб х 6 (12)
3.(1 сбн, приб) х 6 (18)
4-7. 18 сбн
8. (1 сбн, уб) х 6 (12)
9-14. 12 сб
15. (уб) х 6 (6 сбн)
«акрыть петлю, пришить ручки.
ѕолучилось голенькое тельце. ¬€жем дл€ пупса шапочку (спицами или крючком). ћожно вз€ть описание любой детской шапки. ѕосле того, как надели шапку, пришиваем глазки (как показано на фото).
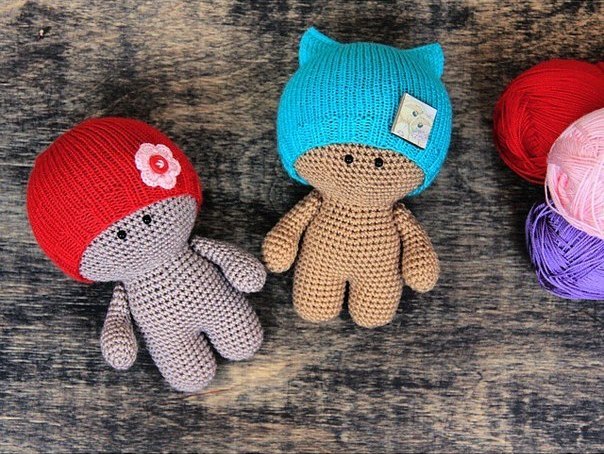
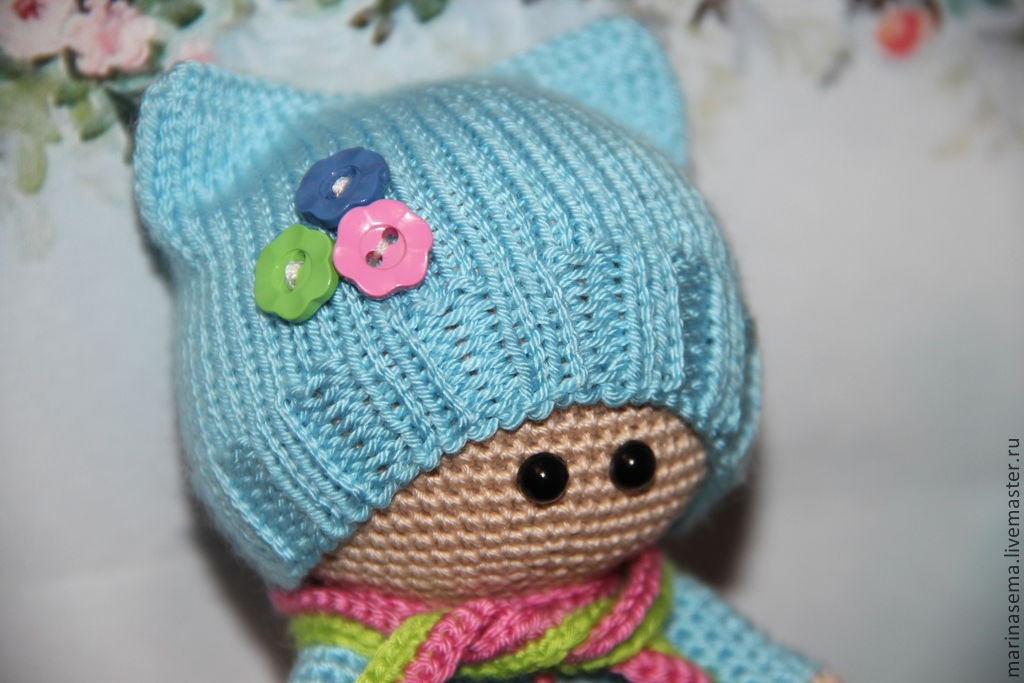 /handcraft-studio.com/wp-content/uploads/2015/11/в€заные-куклы-крючком-схемы-в€зани€-игрушек-малыш-в-шапочке-амигуруми.jpg" target="_blank">http://handcraft-studio.com/wp-content/uploads/201...-малыш-в-шапочке-амигуруми.jpg 1024w, http://handcraft-studio.com/wp-content/uploads/201...в-шапочке-амигуруми-105x70.jpg 105w" style="border: 0px none; margin: 5px;" title="в€заные куклы крючком схемы в€зани€ игрушек малыш в шапочке амигуруми" width="500" />
— в€заной одеждой дл€ куклы можно пофантазировать в зависимости от того, будет это девочка или мальчик. ќдежду также, как и шапку, можно св€зать либо спицами, либо крючком (см. фото разных работ выше)
http://handcraft-studio.com/игрушки-крючком-пупсы-йо-йо-схема/
ћетки: кукла крючок |
ќ—ќЅ≈ЌЌќ—“» ” ќЋ№Ќџ’ ѕ–ќѕќ–÷»… |
Ёто цитата сообщени€ losik-kurnosik [ѕрочитать целиком + ¬ свой цитатник или сообщество!]
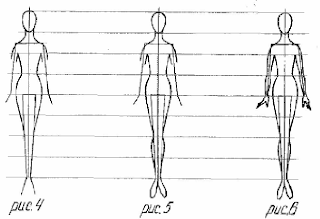
ќсобенности кукольных пропорций.
http://tanyadolls.blogspot.ru/2012_09_01_archive.html
–аньше, создава€ куклу, €всегда старалась укладыватьс€ в пропорции человеческого тела. –езультат
нравилс€ не всегда и € не понимала в чем тут дело. ѕока, наконец, не
прочитала в книге јртамоновой ≈. " уклы" о том, что анатоми€ гармоничной
"взрослой" куклы несколько отлична от пропорций реального человека.
ак ни странно это звучит, кукла, котора€ выполн€лась в строгом
соответствии с закономерност€ми строени€ человеческого тела, выгл€дит
дисгармонично. ≈е руки кажутс€ слишком длинными, а ноги слишком
короткими. Ћадони и ступни слишком массивными.
ѕоэтому при создании "взрослой" куклы важно синтезировать пропорции,
присущие дет€м и взрослым, найти их золотую середину сочетани€.
√армонично смотр€тс€ несколько раст€нутые кукольные фигуры с удлиненными
по сравнению с реальностью пропорци€ми ног, шеи. –уки кукол следует
несколько укорачивать относительно "человеческой нормы", уменьша€ при
этом размер ладоней и ступней.
огда кукла сложна€ и выполн€етс€ из деталей, изготовленных из различных
материалов, тогда очень удобно использовать методику выполнени€ шаблона
куклы, который поможет упор€дочить соотношение различных заготовок.
«а единицу построени€ такой фигуры беретс€ размер головы куклы. ≈сли
головку мы уже создали, то тогда измерив циркулем голову от макушки до
подбородка будем иметь этот необходимый размер. ≈сли головка еще в
проекте, то выбираетс€ произвольный размер и строитс€ шаблон, а затем
важно строго придерживатьс€ этого размера при лепке головы. ѕервый
вариант мне кажетс€ легче.
ƒл€ построени€ шаблона нужно вз€ть лист бумаги, соответствующий размеру
задуманной куклы, вертикальной линией разделить его пополам.
ќпределитьс€ с высотой куклы отложив 7-10 голов (в последнем случае
фигура будет выт€нутой, "модельно" стройной) и опира€сь на выбранную
единицу построени€ и выше описанные особенности кукольной фигуры
набросаем силуэт. ¬ разработке этого шаблона важно ориентироватьс€ на
общее впечатление от пропорций фигуры стрем€сь сделать его наиболее
привлекательным. ƒостигнув желаемого нужно согнуть по продольной оси
лист бумаги и вырезать из него фигурку куклы. Ёта заготовка поможет при
дальнейшем изготовлении каркаса куклы, при раскройке тканевого
чехла-тела и пригодитс€ при сборке куклы.
”дачи и ¬дохновени€! :)
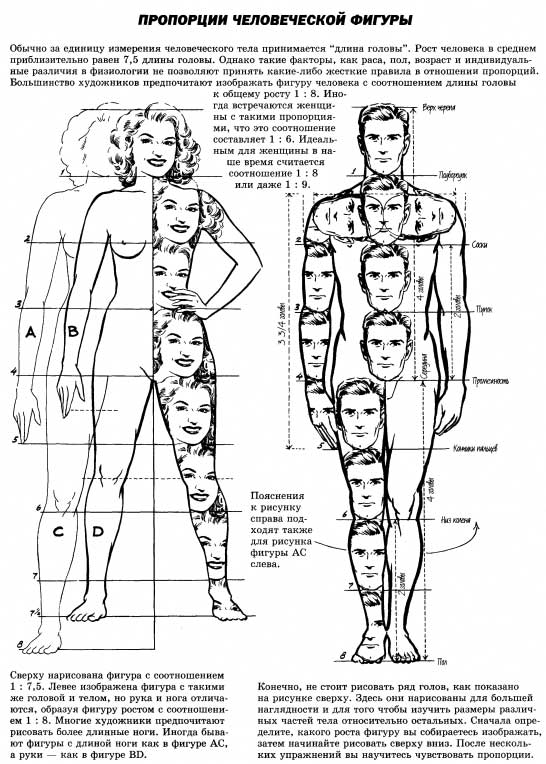
ѕропорции человека (основы моделировани€ куклы) ..
идеальных форм, в ней существует разнообразие, и оно основано на формуле
пропорций и соотношений всех частей тела.
гробнице пирамиды близ ћемфиса (около 3000 лет до н. э.). — того времени
и до наших дней ученые и художники работают над раскрытием тайны
пропорции человеческого тела. Ќам известен египетский канон времени
фараонов, канон эпохи ѕтоломеев, каноны ƒревней √реции и –има. ћы знаем
канон ѕоликлета, который долгое врем€ был общепризнанным, знаем
исследовани€ јльберти, Ћеонардо да ¬инчи, ћикеланджело и ученых —редних
веков, и среди них, прежде всего, широко известный труд ƒюрера. ¬ этих
исследовани€х размеры человеческого тела определ€лись по отношению к
размеру головы, лица или стопы; позднее эти основные величины получили
дальнейшее членение и были приведены в такое соотношение между собой,
что получили всеобщее применение в качестве единиц измерени€. «—топа»
(фут) и «локоть» сохранились в качестве общеупотребительных мер длины
вплоть до нашего времени.
«а ее основу ƒюрер прин€л рост человека (h), подразделив его на
следующие элементы:
пропорци€х тела человека. ƒолгое врем€ отдельные части тела человека
служили основой всех измерений, €вл€лись естественными единицами длины.
“ак, у древних египт€н было три единицы длины: локоть (466 мм),
равн€вшийс€ семи ладон€м (66,5 мм), ладонь, в свою очередь, равн€лась
четырем пальцам. ћерой длины в √реции и –име была ступн€.
примен€лс€ дюйм - длина сустава большого пальца, п€дь - рассто€ние между
раздвинутыми большим и указательным пальцами (их копнами), ладонь -
ширина кисти руки.
более поздние времена - длину среднего пальца руки. ¬ соответствии с
эстетическим каноном греческого скульптора ѕоликлета единицей измерени€
тела служила голова; длина тела должна быть равной восьми размерам
головы.
различаютс€, но отношени€ этих частей соответствуют в большинстве
случаев отношени€м тех же целых чисел.
пропорции тела лишь постепенно, ко времени завершени€ роста, достигают
своего конечного развити€, отвечающего золотой пропорции (существует
поверье, что в два года рост ребенка соответствует половине будущего
роста взрослого человека).
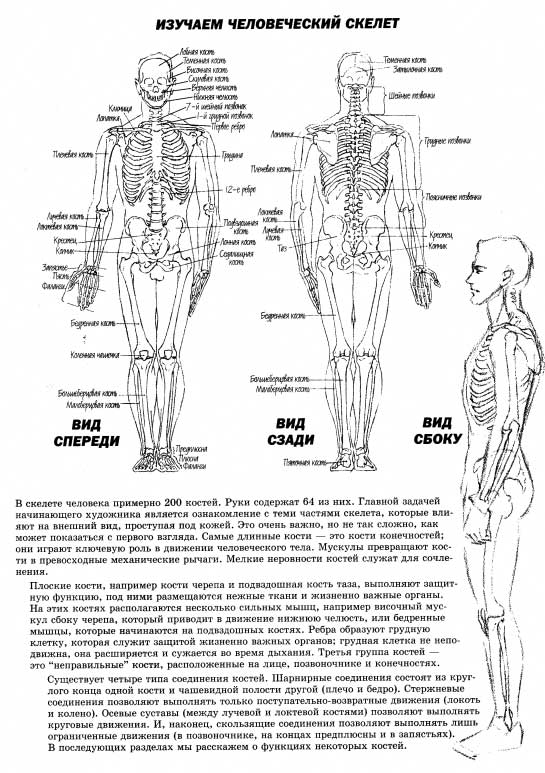
«десь приведу снимки страничек из замечательной книги ƒжека ’амма " ак рисовать голову и фигуру человека", которые нагл€дно показывают пропорции головы и тела человека.
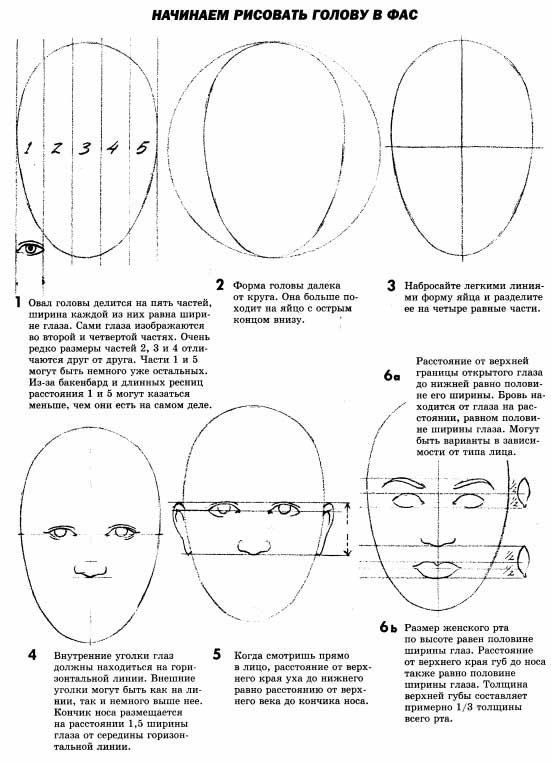
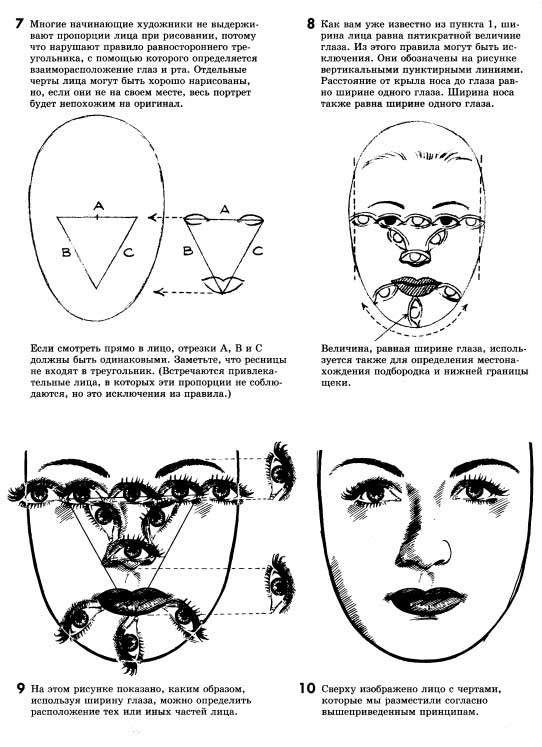
ћетки: кукла |
ћ Ц ≈ў® ќƒ»Ќ »Ќ“≈–≈—Ќџ… —ѕќ—ќЅ –≈ѕЋ≈Ќ»я ¬ќЋќ— ” Ћјћ |
Ёто цитата сообщени€ Ћана_Ѕерг [ѕрочитать целиком + ¬ свой цитатник или сообщество!]
ћ – ≈щЄ один интересный способ креплени€ волос куклам.
Ќашла здесь http://blogs.mail.ru/mail/ozur7/1EF124CBC559FFE0.html
јвтора цитирую полностью.
»—“ќ„Ќ» - http://needlenoodles.com/home/?q=node/83,http://www.liveinternet.ru/users/oliviya2/post123699213
(извин€юсь за кор€вость - переводила online в Google)
” большинства моих кукол волосы из пр€жи, € считаю делать их быстрее и намного проще,
чем по отдельности пришивать каждую пр€дь. ¬ этим примере € использую ткацкий станок,
который можно купить в специализированных магазинах. ќднако, если вы не сможете его
найти или не чувствуете такую необходимость, длинный кусок картона или дерева около
2 1/4 дюйма в ширину (прим.- думаю ширина зависит от желаемой длинны пр€док…)
тоже можно использовать.
(ѕримечание: в этом примере € использую контрастный кусок пр€жи дл€ пров€зывани€
кра€ бахромы, чтобы сделать шаги более заметными. ак правило, € использую нить,
котора€ менее заметна при креплении волос к голове куклы.)
Ўаг 1: Ќачните с создани€ 1 петли нитью дл€ сцеплени€ (или, контрастные нити в данном
примере)

Ўаг 2: ¬озьмите нить и оберните еЄ сначала сзади, потом спереди станка
ћетки: кукла |
ќ∆»¬Ћя≈ћ “≈ —“»Ћ№Ќ”ё ” Ћ”: –ќ—ѕ»—№ Ћ»÷ј |
Ёто цитата сообщени€ √алина_Ѕикмуллина [ѕрочитать целиком + ¬ свой цитатник или сообщество!]
”„»ћ—я ќ∆»¬Ћя“№ “≈ —“»Ћ№Ќ”ё ” Ћ”: –ќ—ѕ»—№ Ћ»÷ј
ћетки: кукла |
¬я«јЌјя —Ќ≈√”–ќ„ ј |
Ёто цитата сообщени€ ’ьюго_ѕьюго_рукоделие [ѕрочитать целиком + ¬ свой цитатник или сообщество!]
ћетки: игрушка кукла Ќовый год |
ѕ–»„≈— ј ¬я«јЌќ… ” ќЋ ≈. ћј—“≈–- Ћј——. |
Ёто цитата сообщени€ elenaslava [ѕрочитать целиком + ¬ свой цитатник или сообщество!]
ћетки: причЄска кукла |
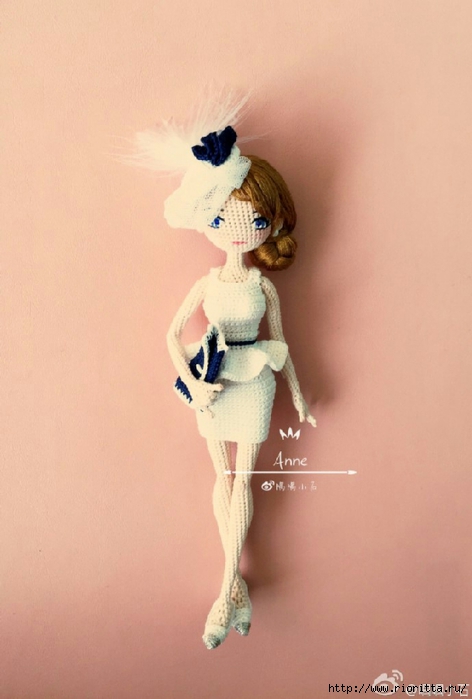
¬я«јЌјя ” ќЋ ј ЁЌЌ» |
Ёто цитата сообщени€ –иоритта [ѕрочитать целиком + ¬ свой цитатник или сообщество!]
в€зана€ куколка Ённи
автор описани€ Gomi_Chen
перевод «ар€ны озыр€цкой
ћетки: кукла крючок |
¬ыкройки одежды дл€ кукол. Gotz 50см |
Ёто цитата сообщени€ irbish [ѕрочитать целиком + ¬ свой цитатник или сообщество!]
источник http://babiki.ru/blog/master/36025.html
1.

2.

3.

4.

5.

6.

7.

8.

9.

10.

11.

12.

13.

14.

15.

16.

17.

18.

ћетки: кукла одежда |
ѕЋј“№≈ ƒЋя ћјЋ≈Ќ№ ќ… »√–”Ў » ќ“ ≈Ћ≈Ќџ Ќ» »“»Ќќ… |
Ёто цитата сообщени€ зверобой [ѕрочитать целиком + ¬ свой цитатник или сообщество!]
ћетки: одежда кукла |
ј »« ќЅџ„Ќџ’ ѕ”√ќ¬»÷ —ƒ≈Ћј“№ √Ћј«ј ƒЋя ” ќЋ |
Ёто цитата сообщени€ Valentina_iv [ѕрочитать целиком + ¬ свой цитатник или сообщество!]
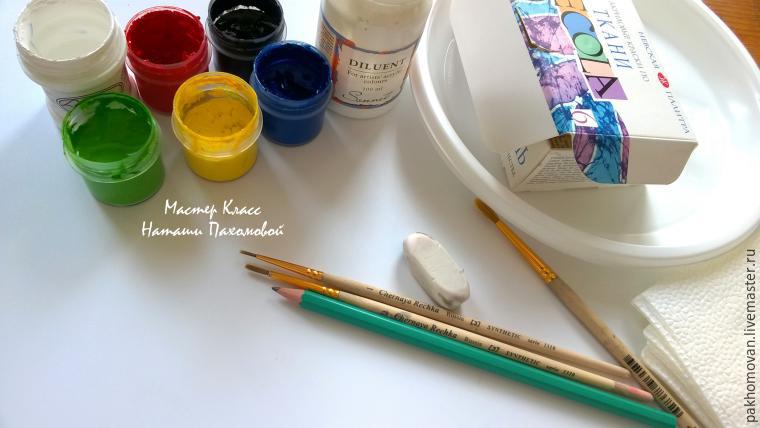
ƒорогие любительницы кукол из капрона, когда-то давно мен€ просили сделать мастер-класс о том, как € рисую глаза дл€ кукол. ¬от наконец собралась) Ќадеюсь вам пригодитс€ мой способ создани€ глазок из пуговиц.
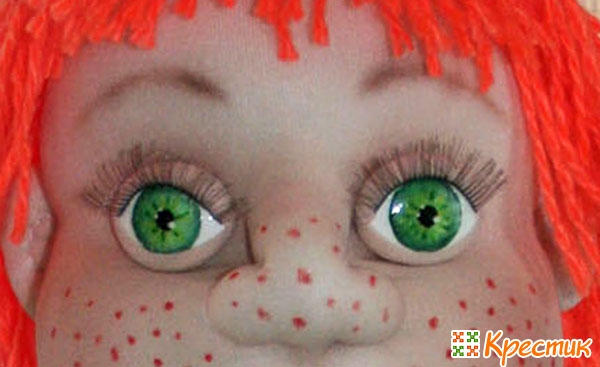
ћатериалы и инструменты использую следующие:
- пуговки
- акриловые краски
- зубочистки
- лак дл€ ногтей (белый и прозрачный)
- кисточки
- карандаш
- трафаретную линейку
ћетки: кукла |
¬я«јЌџ≈ ” ќЋ » ƒЋя ƒ≈¬ќ„≈ - ћјЋџЎ≈ . |
Ёто цитата сообщени€ Olora [ѕрочитать целиком + ¬ свой цитатник или сообщество!]
¬€заные куколки дл€ девочек- малышек.

ћетки: кукла |
ќЅЋ≈√„ј≈ћ —Ѕќ– ” ” Ћџ: —ѕќ—ќЅ ѕ–ќћ≈∆”“ќ„Ќќ√ќ –≈ѕЋ≈Ќ»я ƒ≈“јЋ≈… |
Ёто цитата сообщени€ tomakov [ѕрочитать целиком + ¬ свой цитатник или сообщество!]
јвтор Elena-39
’очу показать, как собираю своих малышей, моих любимых человечков.
¬озможно, кто-то уже пользуетс€ таким способом, € к нему пришла сама в процессе долговременной работы. Ѕуду рада, если этот способ пригодитс€ вам при сборке ваших кукол.

ћетки: кукла |
ќЋ√ќ“џ ƒЋя ” ќЋ “»ѕј PAOLA REINA. |
Ёто цитата сообщени€ оцур [ѕрочитать целиком + ¬ свой цитатник или сообщество!]
ћетки: кукла одежда |
ћ —ќЅ»–ј≈ћ ” Ћ” ¬ ƒќ–ќ√” «ј ј«„» ”. Ў№≈ћ „≈ѕ„» ƒЋя —ќ’–јЌЌќ—“» ѕџЎЌќ… ѕ–»„≈— ».ј¬“ќ– “јЋ№яЌј ћјЋ≈Ќ№ ќ≈ „”ƒќ |
Ёто цитата сообщени€ pawy [ѕрочитать целиком + ¬ свой цитатник или сообщество!]
ћетки: кукла |
ћ "ѕ–»Ў»¬ј≈ћ ¬ќЋќ—џ ” Ћ≈ »« Ќј“”–јЋ№Ќќ… Ў≈–—“»". ј¬“ќ– “јЋ№яЌј ћјЋ≈Ќ№ ќ≈ „”ƒќ |
Ёто цитата сообщени€ pawy [ѕрочитать целиком + ¬ свой цитатник или сообщество!]
ћетки: кукла |
ј ¬џЎ»“№ √”Ѕ » ¬я«јЌќ… ” Ћ≈ |
Ёто цитата сообщени€ зверобой [ѕрочитать целиком + ¬ свой цитатник или сообщество!]
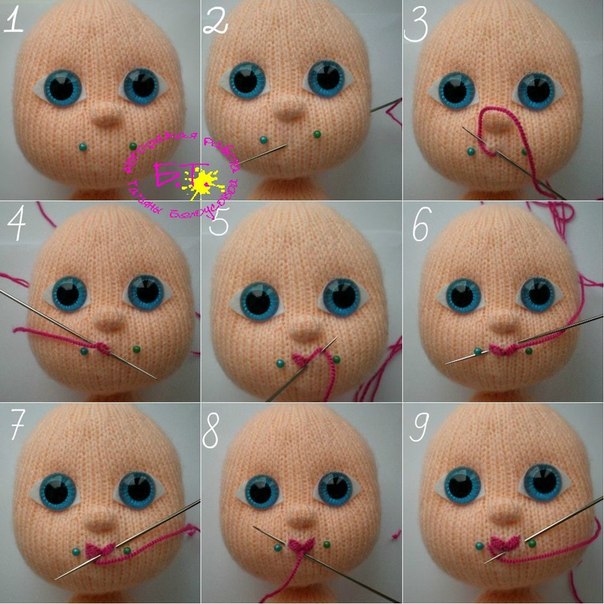
јвтор замечательного ћк по √убкам “ать€на Ѕелоусова
http://www.livemaster.ru/topic/1250829-vyshivaem-gubk..
ћетки: кукла |
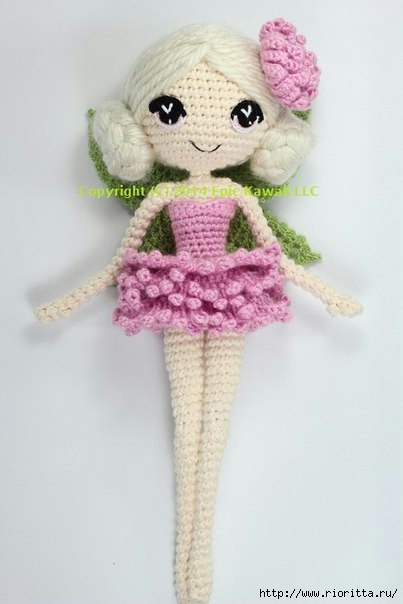
¬я«јЌјя ‘≈я ’–»«јЌЌј |
Ёто цитата сообщени€ –иоритта [ѕрочитать целиком + ¬ свой цитатник или сообщество!]
в€зана€ фе€ ’ризанна (’ризантема)
автор Epik Kawaii
перевод - Ќаст€ »ванова
ћетки: кукла крючок |
–”„ » ƒЋя ¬я«јЌџ’ »√–”Ў≈ |
Ёто цитата сообщени€ ћарина_√–ј [ѕрочитать целиком + ¬ свой цитатник или сообщество!]
’очу поделитьс€ описанием выв€зывани€ пальчиков дл€ в€заных игрушек, которое нашла здесь:
http://www.livemaster.ru/topic/71111-ruchki-dlya-vyazanyh-igrushek
“акие мелкие детали украшают создаваемый образ. ѕолюбуйтесь на эту красотку!

ћетки: кукла ручка |
ћјЋ≈Ќ№ јя ћ»Ћјя ” ќЋ ј |
Ёто цитата сообщени€ SVETA-290 [ѕрочитать целиком + ¬ свой цитатник или сообщество!]

ћетки: кукла крючок |
” Ћј ЁЌƒ» |
Ёто цитата сообщени€ SVETA-290 [ѕрочитать целиком + ¬ свой цитатник или сообщество!]

ћетки: кукла крючок |
Ћќ”Ќ |
Ёто цитата сообщени€ SVETA-290 [ѕрочитать целиком + ¬ свой цитатник или сообщество!]

ћетки: кукла крючок |
Ћќ”Ќ≈——ј |
Ёто цитата сообщени€ SVETA-290 [ѕрочитать целиком + ¬ свой цитатник или сообщество!]

ћетки: кукла крючок |
ѕ”ѕ— |
Ёто цитата сообщени€ SVETA-290 [ѕрочитать целиком + ¬ свой цитатник или сообщество!]

ћетки: кукла крючок |
–≈—Ќ»÷џ »« »—“ќ„ ». |
Ёто цитата сообщени€ Lubara [ѕрочитать целиком + ¬ свой цитатник или сообщество!]
Ќа форуме "ƒелаем кукол своими руками" (http://forums.zooclub.ru/showthread.php?t=39536&page=30) нашла, как мне кажетс€, полезную подсказку по изготовлению ресниц дл€ кукол. ÷итирую оттуда:
|
|
—ери€ сообщений "****глаза дл€ куклы":
„асть 1 - –исуем кукле глазки
„асть 2 - ак рисовать глазки. ћ . “екстильна€ звездочка.
...
„асть 8 - —амодельные вставные глаза от oleum_13
„асть 9 - –исуем глазки тыквоголовой кукле - тыковке
„асть 10 - –есницы из кисточки
„асть 11 - »зготовление глаз дл€ кукол
„асть 12 - √лазки дл€ игрушек из Ёпоксидки
...
„асть 22 - –исуем глазки куколке. мастер-класс
„асть 23 - √лазки дл€ м€гкой игрушки. ћастер- ласс.
„асть 24 - “ехника "∆ивого взгл€да" от Dianna Effner
ћетки: кукла ресницы |
¬я«јЌјя ” ќЋ ј BY HAVVA UNLU |
Ёто цитата сообщени€ –иоритта [ѕрочитать целиком + ¬ свой цитатник или сообщество!]
в€зана€ куколка By Havva Unlu
јвтор: By Havva Unlu
ѕереводчик: јнастаси€ ƒудник

ћетки: кукла крючок |
¬я«јЌјя ј– ј—Ќјя ” Ћј |
Ёто цитата сообщени€ ’ьюго_ѕьюго_рукоделие [ѕрочитать целиком + ¬ свой цитатник или сообщество!]
в€зана€ каркасна€ кукла
автор мастер класса »рина ”мнова (idotti)
далее слова автора
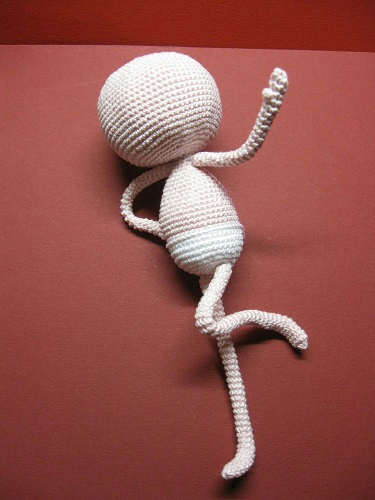
аркасна€ в€зана€ кукла хороша тем, что может не только отлично держать форму, но и радовать свою хоз€йку пластичностью, артистичностью, любыми танцевальными па или спортивными фигурами. ћногие бо€тс€ работать с проволокой, однако это не так сложно, как кажетс€ на первый взгл€д.
ѕомните, что каркасные игрушки не предназначены дл€ маленьких детей. ѕри€тного в€зани€!
ћетки: кукла крючок |
” ќЋ » - ћќЋЋ», Ѕ≈ЋЋ » Ћ≈…Ћј |
Ёто цитата сообщени€ VERA-L [ѕрочитать целиком + ¬ свой цитатник или сообщество!]
ћетки: кукла спицы |


