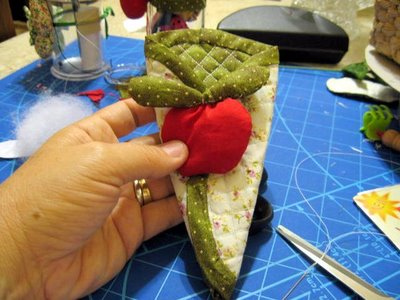
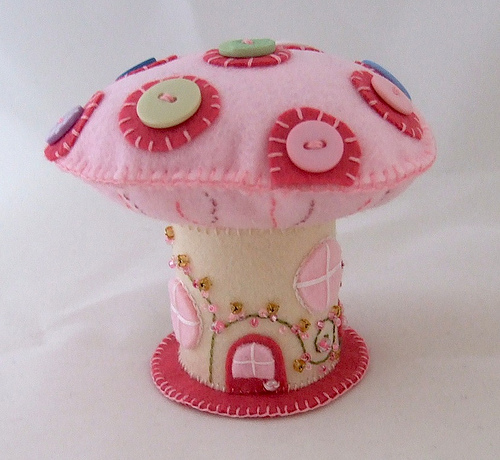
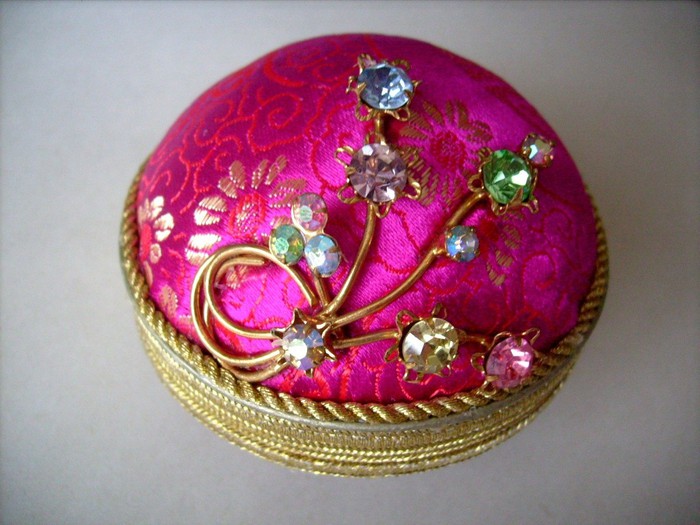
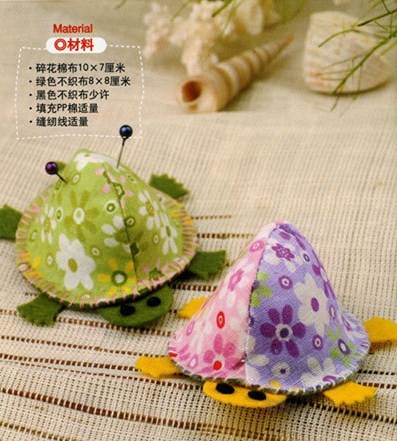
ќбшиваем швом "назад иголку" 15 квадратиков. Ќаверно, этот этап самый утомительный. ;)))
¬ышиваем мотивчики
ƒобавл€ем бисер

Ќарезаем 15 квадратов с мотивами
—шиваем по 5 квадратиков в форме звездочки (цветочка, снежинки...) швом дл€ бискорню. ѕолучаем нижнюю и верхнюю части будущей плюшечки.
ѕришиваем к одной из "звездочек" боковые стороны.

» соедин€ем полученный "шатер" со второй "звездочкой"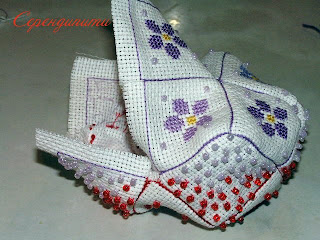
Ќабиваем синтепухом. Ќе забываем добавить что-нибудь дл€ аромата будущей бискорню. » получаем вот такую "калорийную булочку".
ѕришиваем в серединках верхней и нижней частей бусинки (пуговки, шармики), ст€гиваем и алле-оп! Ѕискорню-п€тиклинка готова!


—олидна€ така€ вещь получилась!
-–убрики
- фетр (54)
- —овушки (12)
- ‘отограф Michael (11)
- из CD (4)
- —крап (2)
- Ѕабочки рукотворные (51)
- ¬интаж (37)
- ¬ышивка (334)
- ¬€зание (431)
- детское (23)
- другое (58)
- дл€ дома (532)
- прихватки (30)
- игольницы (70)
- »грушки (169)
- тильды (5)
- из бросового материала (24)
- »нтерьер (147)
- вилтинг, пэчворк (162)
- книги, журналы (137)
- онфеты (22)
- ухн€ (103)
- ћастер-классы (1612)
- ћода, шитьЄ (576)
- переделки (2)
- другое (103)
- ћои воплoщени€ (28)
- ќсобое торжество (89)
- оформление блога (54)
- пинетки, носочки (56)
- ѕоделки (188)
- ѕодушки, подушечки (232)
- –азное (98)
- –ождественнское, пасхальное (163)
- —воими руками (618)
- ”паковка (38)
- —катерти, салфетки (6)
- сумок много не бывает (231)
- трафареты, орнаменты, шаблоны (266)
- ”крашени€ (85)
- цветы из ткани и не только (327)
- Ўапочки, шарфики (102)
- Ўторы, покрывала (71)
-ћетки
-ѕодписка по e-mail
-ѕоиск по дневнику
-—татистика
«аписей: 4609
омментариев: 2727
Ќаписано: 10741
ƒругие рубрики в этом дневнике: Ўторы, покрывала(71), Ўапочки, шарфики(102), цветы из ткани и не только(327), ‘отограф Michael(11), фетр(54), ”крашени€(85), трафареты, орнаменты, шаблоны(266), сумок много не бывает(231), —овушки(12), —крап(2), —катерти, салфетки(6), —воими руками(618), –ождественнское, пасхальное(163), –азное(98), ѕодушки, подушечки(232), ѕоделки(188), пинетки, носочки(56), оформление блога(54), ќсобое торжество(89), ћои воплoщени€(28), ћода, шитьЄ(576), ћастер-классы(1612), ухн€(103), онфеты(22), книги, журналы(137), вилтинг, пэчворк(162), »нтерьер(147), из бросового материала(24), »грушки(169), дл€ дома(532), ¬€зание(431), ¬ышивка(334), ¬интаж(37), Ѕабочки рукотворные(51), из CD(4)
ј ј јя ” ¬ј— »√ќЋ№Ќ»÷ј???????? |
Ёто цитата сообщени€ Maya_Toplu_ [ѕрочитать целиком + ¬ свой цитатник или сообщество!]
|
‘утл€рчик дл€ ножниц |
Ёто цитата сообщени€ —ундучок_хоз€юшки [ѕрочитать целиком + ¬ свой цитатник или сообщество!]
|
She'sSewPretty |
Ёто цитата сообщени€ белка28 [ѕрочитать целиком + ¬ свой цитатник или сообщество!]
|
расивые игольницы |
Ёто цитата сообщени€ ћедвеженокћ [ѕрочитать целиком + ¬ свой цитатник или сообщество!]
|
»гольницы.. |
Ёто цитата сообщени€ Tawa_Saenko [ѕрочитать целиком + ¬ свой цитатник или сообщество!]
ћетки: рукоделие игольницы |
»гольницы. |
Ёто цитата сообщени€ Tawa_Saenko [ѕрочитать целиком + ¬ свой цитатник или сообщество!]
ћетки: игольницы |
интересные идеи - »√ќЋ№Ќ»÷џ |
Ёто цитата сообщени€ Helenochka-01 [ѕрочитать целиком + ¬ свой цитатник или сообщество!]
ћетки: рукоделие игольницы |
’ранительница рукодельных мелочей |
Ёто цитата сообщени€ –укоделочка [ѕрочитать целиком + ¬ свой цитатник или сообщество!]
ћетки: рукоделие идеи |
¬тора€ жизнь баночки дл€ детского питани€ |
Ёто цитата сообщени€ „ернышок [ѕрочитать целиком + ¬ свой цитатник или сообщество!]
” мен€ дома таких баночек скопилось несметное множество - и выбросить жалко, и применени€ найти им никак не найду. Ќо оказалось, что они могут быть очень даже полезными. ѕосмотрите сами.

ћетки: рукоделие игольницы mk |
Ѕискорню. —хемы. |
Ёто цитата сообщени€ elnik1 [ѕрочитать целиком + ¬ свой цитатник или сообщество!]
ћетки: рукоделие бискорню. схемы |
÷веточные игольницы шитые ( ”„ј »ƒ≈…!!!!) |
Ёто цитата сообщени€ Sunny_Risha [ѕрочитать целиком + ¬ свой цитатник или сообщество!]
ћетки: рукоделие игольницы |
»гольница-диванчик из пластиковой бутылки |
Ёто цитата сообщени€ elenbar [ѕрочитать целиком + ¬ свой цитатник или сообщество!]
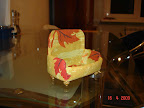
¬от такой диванчик (игольница) получилс€ из бутылки от Ћинора. »дею подсмотрела где-то в блоге, кажетс€ в испанском или мексиканском... “ам на благотворительном базаре продавали что-то подобное. —сылку конечно же не сохранила :-(
ƒиванчик уже подарен третим ѕ»‘чиком...

»так, брем бутылку от Ћинора или чего-то похожего... »з круглых бутылок можно креслице сделать... ќтдираем этикетку, моем изнутри и разрезаем приблизительно посередине - лишнее потом отрежем :-)


Ќадрезаем по бокам и отрезаем лишнее, придава€ форму дивана
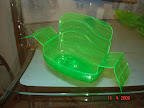

обклеиваем заготоку синтепоном. я использовала целлюлозные салфетки - они такие толстенькие - вот такие:

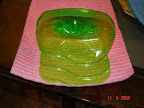
ќп€ть же - в процессе обклеивани€ отрезаем все лишнее

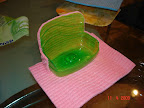

ќтмер€ем и отрезаем тканюшку на "обивку"


Ќачинаем приклеивать обивку со спинки:
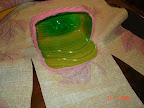
¬ местах закруглений и изгибов материал подрезаем
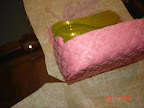
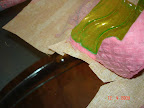
ћажем спинку изнутри клеем и приклеиваем подрезаные кончики ткани на внутреннюю часть спинки
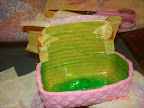
и на подлокотники
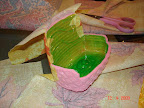
“еперь оставленный сверху кусок ткани заварачиваем на внутреннюю сторону спинки. ћажем спинку клеем и потихоньку (подреза€ ткань на изгибах) аккуратненько приклеиваем

ѕриклеиваем донышко и переднюю внешнюю часть

ќп€ть отрезаем лишнюю ткань

ќбклеиваем подлокотники
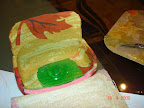
ƒонышко внутри пока не клеим - переворачиваем диванчик и протыкаем дырки под будующие ножки

ћне повезло - у мен€ были такие специальные проволочные гвоздики (от люстры)
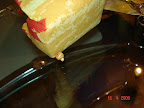

ј вообще - можно сделать так:
Ѕерем бисерину,надеваем еЄ на проволоку сантиметров п€ть длинной, размешаем в районе центра проволоки, сгибаем проволоку пополам и соедин€ем вместе еЄ кончики, а потом сверху одеваем бусину. Ѕисерина не дает бусине соскочить вниз.
ѕросовываем кончики проволоки в сделанные дырки в донышке дивана и разгибаем кончики в разные стороны
” мен€ гвоздики - поэтому € их просто загнула

ѕолучились вот такие ножки
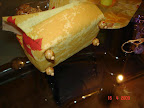
ѕосле этого можно приклеить и ткань на внутренюю часть донышка
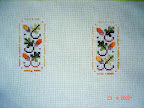
¬ышиваем пару мотивчиков (The Drawn Thread - Automn Leaves Keeper - давно хотела вышить.. нитки конечно какие под руки попались)
¬ырезаем матрасики дл€ спинки и дл€ сидени€. Ќа сидушку - потолше

”же почти прилично выгл€дит
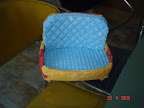
ѕример€ем.. вырезаем мотивчик, приклеиваем и подрезаем на углах и изгибах
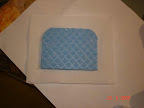
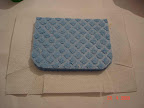
ѕриклеиваем кончики на внутреннюю часть матрасика
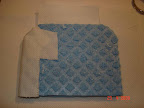
ѕолностью изнанку закрывать не об€зательно - все равно к спинке будем приклеивать
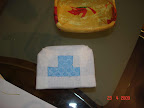
“ак же обклеиваем матрасик

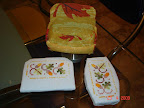
“еперь приклеиваем вначале матрасик на спинку

ј потом на сидение

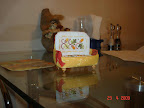
вот такой диванчик получилс€.
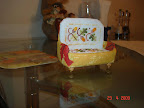
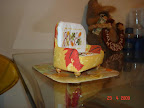

ћожно конечно и дальше его улучшать - сделать ссвзи кармашек дл€ ножниц, сделать отделку шнуром, сшить подушечки...
ћетки: рукоделие игольницы |
»√ќЋ№Ќ»÷џ. |
Ёто цитата сообщени€ ЋЄнна [ѕрочитать целиком + ¬ свой цитатник или сообщество!]
ћетки: рукоделие игольницы |
÷веточные игольницы шитые ( ”„ј »ƒ≈…!!!!) |
Ёто цитата сообщени€ Sunny_Risha [ѕрочитать целиком + ¬ свой цитатник или сообщество!]
ћетки: игольницы |
оровка -игольница (спицы) |
|
ѕодушечка бискорню в подарок |
Ёто цитата сообщени€ Natero2602 [ѕрочитать целиком + ¬ свой цитатник или сообщество!]
ѕодушечка бискорню в подарок
 „то такое бискорню
„то это же такое, бискорню? ‘актически, (от фр. biscornu изогнутый) - это [кривулькаk.
¬ышитое крестиком или расшитое бисером объЄмное изделие из двух квадратов канвы, повЄрнутых относительно друг друга на 90 градусов, сшитых по периметру и в центре.
ќбычно используетс€ в качестве аксессуара (игольница, ма€чок на ножницы, подвеска, кулончик, Єлочна€ игрушка).
¬ообще, это очень мила€ и стильна€ вещица, котора€ может стать прекрасным подарком к любому празднику.
—воЄ знакомство с бискорню € начала в прошлом году с такой монохромной кривулечки; тогда же € и пон€ла, насколько просто делаютс€ такие милые и замысловатые на вид штучки.
ј сегодн€ € предлагаю всем изготовить дл€ себ€ эту замечательную штучку, использу€ мой несложный, но достаточно подробный мастер-класс.
ак сделать бискорню
1. ѕодбираем понравившуюс€ схему вышивки бискорню, ведь они могут быть разных размеров (маленькие - 35х35, 40х40 крестиков по стороне и большие - 70х70, 80х80 по стороне), но всегда квадратные.
я подобрала две схемы вышивки дл€ бискорню:

ѕодбирать надо 2 схемки одинакового размера - дл€ верхней и дл€ нижней частей бискорню (можно выполнить и две одинаковых половинки).
ѕрекрасную подборку схем вышивки крестом дл€ бискорню можно посмотреть здесь.
ѕодбираем мулине или бисер дл€ вышивки, котора€ может быть как монохромной, так и цветной.2. ѕодбираем канву подход€щего размера (чтобы можно было вышить оба рисунка) и делаем разметку смывающимс€ или исчезающим маркером дл€ удобства. ћежду схемами должно быть некоторое рассто€ние, хот€ бы клеточек 12.
–азметку можно сделать и ниткой, но не делайте еЄ простым карандашом или другим не смывающимс€ пишущим предметом!
≈сли ¬ы выполнили разметку ниткой, будьте осторожнее при вышивании, чтобы не пришить нитку разметки намертво (ведь обычно дл€ удобства разметка выполн€етс€ контрастной ниткой, чтобы она была заметнее). ѕо ходу вышивки лишнюю разметочную нить можно удал€ть.

3. ¬ырезаем квадраты с припусками на швы, вышиваем крестиком (или расшиваем бисером) квадраты канвы по схемам. ≈сли ¬ы привыкли вышивать исключительно на п€льцах, нужно оставить большие припуски, чтобы канву можно было нат€нуть на них.
—тираем вышивку (чтобы исчезла разметка), утюжим с изнанки (чтобы крестики стали более ровными и выпуклыми).

4. ќтступаем от краЄв вышивки 3-5 крестиков (проверьте, чтобы на обеих вышивках была возможность отступить одинаковое количество крестиков!) и обшиваем по всему периметру квадратов швом назад иголку (на иностранный манер его называют бэкстичем).


— изнанки бэкстич выгл€дит так:

5. ј теперь самое важное: приступим к сборке бискорню. ќпределим середину верхней части бискорню (€ отмечаю еЄ иголочкой). репим нить (€ сшиваю всегда в 2 нитки мулине) в уголке нижней части, выводим на лицевую часть.
ѕоддеваем нитку бэкстича (только нитку, не задева€ при этом канву!!!) точно на середине верхней части и выт€гиваем нитку.

я предлагаю шить справа налево. «ахватываем второй от уголка стежок бэкстича на нижней части и поддеваем следующий стежок бэкстича верхней части. » так далее

Ўов получаетс€ таким:

6. ƒоходим до уголка верхней части (а дл€ нижней части бискорню это будет середина стороны квадрата). јккуратно (техника - всЄ та же) обходим уголок и продолжаем сшивать дальше


— изнанки бискорню сейчас выгл€дит примерно так:


” ¬ас на глазах произойдЄт чудо. ¬ы своими руками из двух простых плоских квадратов создадите объЄмную замысловатую фигуру!

7. огда останетс€ зашить 1 сторону, не забудьте остановитьс€ и набить бискорню. я предпочитаю использовать дл€ этого синтепон или холлофайбер.


“еперь зашиваем оставшийс€ край и, спр€тав кончик нитки, аккуратно обрезаем еЄ.


8. Ѕискорню почти готова, но не хватает одной маленькой характерной детали.
—делаем посередине ут€жку. ¬озьмЄм иголку попрочней. ѕрочную нитку в 2 сложени€ вдеваем так, чтобы на конце образовалась петл€. Ќаходим центр нижней части бискорню (по рисунку это проще сделать), протыкаем еЄ насквозь и выводим нить, но конец нитки (петл€) должен остатьс€ снизу.
ќтступаем 1 крестик на верхней части бискорню и протыкаем еЄ снова в обратном направлении, пропуска€ иголку в петельку снизу, нат€гиваем нить.


ƒелаем ещЄ несколько стежков (туда-сюда), закрепл€ем нить.
ƒействительно, стало похоже на кривульку!

Ќу, а теперь крепим бусинку (пуговку) в месте ут€жки и бискорню готова!

ѕри желании еЄ можно украсить бисером, кисточками по уголкам, пришить петельку
Ќу а что сделать с ¬ашей бискорню - подскажет ¬аша фантази€!

ћетки: подушечка бискорню |
Ѕискорню-п€тиклинка |
Ёто цитата сообщени€ Natero2602 [ѕрочитать целиком + ¬ свой цитатник или сообщество!]
Ѕискорню-п€тиклинка

ћетки: бискорню-п€тиклинка |
арбузные дольки |
Ёто цитата сообщени€ Irini6na [ѕрочитать целиком + ¬ свой цитатник или сообщество!]
ћетки: рукоделие в€зание крючком |
Ѕискорню. —хемы. |
Ёто цитата сообщени€ elnik1 [ѕрочитать целиком + ¬ свой цитатник или сообщество!]
ћетки: рукоделие бискорню. схемы |
ћастер класс изготовление игольниц |
Ёто цитата сообщени€ James_york [ѕрочитать целиком + ¬ свой цитатник или сообщество!]
http://www.craftstylish.com/item/945/how-to-make-pretty-pincushions
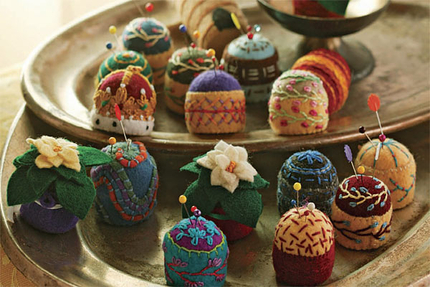
Are you ready for “oohs” and “ahs” all around? At just 1-1/2 inches tall, these minute pincushions will be the darlings of any party and the apple of any craftster’s eye. They fit neatly into a sewing box and are extremely handy perched on a sewing machine (just add a Velcro dot).
And did I mention that these cushions use recycled materials? The base is a soda-bottle cap wrapped with craft felt. As you can see in the photo, the sky’s the limit in terms of design. Besides simple shapes reminiscent of cupcakes or candy, you can fashion a mini poinsettia, a crown, or even a beehive or cactus—cute, cuter, cutest!
What you'll need:
Plastic cap from a liter-size soda bottle
Chalk
Sharp scissors
Craft felt
Large-eye embroidery needle
Multicolored skeins of embroidery floss
Poly fiberfill
Step 1: Prepare the base
Lay the bottle cap on a small square of felt. Trace the shape with chalk. Then cut along the chalk line with sharp scissors.
 |
Trace a bottle cap on felt. Cut along chalk line with scissors to create the base of the pincushion. |
Step 2: Sew outer sleeve to the base
Cut a felt strip a bit wider than your cap’s height and long enough to wrap around the cap with some overlap. Wrap it around the cap. Then slipstitch along the overlap. Pop in the base circle, and slipstitch around it as shown. Don’t cut the floss!
 |
Wrap outer sleeve around cap. Slipstitch along the overlap. |
 |
Slipstitch around the base circle. Leave a tail of floss to complete the bottom of the pincushion. |
Step 3: Create the top
Cut a 3-inch square, and then round the corners. Baste around the circle’s outer edge. Pull the floss ends to gather. Stuff the pouch with polyfiberfill (until the ball is hard), and knot the floss ends. Press the ball into the base.
 |
Cut a 3-inch square. Round the corners with scissors to create a circle. |
 |
Baste around circle's outer edge. Pull the floss to gather. |
 |
Fill the gathered circle with fiberfill to create a firm ball. Stuff the pouch into the bottlecap. |
Step 4: Sew the ball to the base
Hand-stitch in place using a blanket stitch or whipstitch. Working from right to left, bring the needle from back to front 1/8 inch from the edge. Keep the thread from the previous stitch under the needle point.
 |
Blanket stitch. This stitch secures the top to the base. |
Step 5: Embellish with embroidery
Pincushions are the perfect canvas for hand embroidery. Thread your needle with a single strand of embroidery floss. Combine the stitches shown below to make flowers, vines, or geometric designs. If at first you don’t succeed, try again. Felt is very forgiving.
 |
Decorate your pincushion. Try different patterns to get a unique look. |
Feather Stitch
Working from right to left, bring the needle out at point A. Insert it at point B, holding a loop of thread to the left. Bring the needle up at point C inside the loop. Pull the stitch to tighten. Point C then becomes point A. Repeat.
 |
Feather stitch. Vary the length and angle of your stitches for different effects. |
Lazy Daisy
Bring the needle out at point A. Reinsert it into the same hole or close to it, leaving a loop. Exit at point B, holding the loop under the needle. Pull the needle through. Insert the needle on other side of the thread loop to secure.
 |
Lazy Daisy. Use one of more petals to create floral designs. |
French Knot
Bring the needle and thread out at point A. Hold the thread taut with your left hand, and wrap it around the needle two or three times. Insert the wrapped needle close to point A.
 |
French knot. Scatter or cluster the knots to add texture. |
Photos: Sloan Howard and Scott Phillips
ћетки: рукоделие игольницы |


