-ћетки
-–убрики
- (2)
- сад-огород (1)
- бисер (1)
- бумага (13)
- вал€ние (16)
- видео (26)
- вышивка (7)
- вышивка лентами (5)
- в€зание крючком (30)
- в€зание спицами (20)
- в€заные игрушки (7)
- декупаж (157)
- делаем цветы (19)
- ƒл€ детей (16)
- духовное (7)
- живопись-рисование (9)
- зайцы (6)
- здоровье (44)
- игрушки-зверюшки (19)
- картинки (15)
- квиллинг (1)
- компьютер (6)
- коты (6)
- куклы (157)
- кулинари€ (39)
- заготовки (4)
- мишки (27)
- мудрые мысли (26)
- музыка (20)
- мультфильмы (3)
- мыловарение (10)
- народные куклы (7)
- начинающим (55)
- наше женское (29)
- новогодние картинки и фоны (37)
- новогодние поделки (37)
- открытки (4)
- оформление ƒневника (88)
- поделки (7)
- ѕолезное (6)
- пошив (28)
- праздники (7)
- притчи (6)
- программы (28)
- проза.любовь (2)
- пэчворк (40)
- рисование (51)
- рукоделие (60)
- скрапбукинг (64)
- соленое тесто (8)
- ссылки (9)
- стихи (59)
- тильды (7)
- фотошоп (104)
- цветы (5)
- это интересно (20)
- тесты (2)
-÷итатник
ѕрихватка из лоскутков по спирали: мастер-класс + шаблон ќтличный способ утилиз...
–оза, которую вы выбрали расскажет, когда сбудетс€ ваше желание! - (0)–оза, которую вы выбрали расскажет, когда сбудетс€ ваше желание! ѕеред вами п€ть роз, загадайт...
Ўьем лакомник в русском стиле из лоскутков. - (0)Ўьем лакомник в русском стиле из лоскутков (ћ ) Ўьем лакомник в русском стиле из ло...
8 способов, которые 100% вернут вам зрение дес€тилетней давности - (2)8 способов, которые 100% вернут вам зрение дес€тилетней давности «≈сли вы не исполь...
ѕеченый лук вместо лекарств от множества недугов - (0)ѕеченый лук вместо лекарств от множества недугов ѕеченый лук — это лучше, чем лекарства,...
-ѕомощь новичкам
ѕроверено анкет за неделю: 0
«а неделю набрано баллов: 0 (79995 место)
«а все врем€ набрано баллов: 6 (46723 место)
-Ќовости
-ѕриложени€
 ќткрыткиѕерерожденный каталог открыток на все случаи жизни
 я - фотографѕлагин дл€ публикации фотографий в дневнике пользовател€. ћинимальные системные требовани€: Internet Explorer 6, Fire Fox 1.5, Opera 9.5, Safari 3.1.1 со включенным JavaScript. ¬озможно это будет рабо
 —тена—тена: мини-гостева€ книга, позвол€ет посетител€м ¬ашего дневника оставл€ть ¬ам сообщени€.
ƒл€ того, чтобы сообщени€ по€вились у ¬ас в профиле необходимо зайти на свою стену и нажать кнопку "ќбновить
—тена—тена: мини-гостева€ книга, позвол€ет посетител€м ¬ашего дневника оставл€ть ¬ам сообщени€.
ƒл€ того, чтобы сообщени€ по€вились у ¬ас в профиле необходимо зайти на свою стену и нажать кнопку "ќбновить- “оррЌјƒќ - торрент-трекер дл€ блогов“оррЌјƒќ - торрент-трекер дл€ блогов
 —качать музыку с LiveInternet.ruѕроста€ скачивалка песен по заданным урлам
-—тена
-
ƒобавить плеер в свой журнал
© Ќакукрыскин
-я - фотограф
-ѕоиск по дневнику
-ѕодписка по e-mail
-ƒрузь€
-ѕосто€нные читатели
-—ообщества
-“рансл€ции
-—татистика
«аписи с меткой скрапбукинг
(и еще 122105 запис€м на сайте сопоставлена така€ метка)
ƒругие метки пользовател€ ↓
бумага вал€ние видео вышивка в€зание крючком в€зание спицами в€заные игрушки декупаж делаем цветы дл€ детей здоровье игрушки-зверюшки картинки компьютер куклы кукы кулинари€ мишки мудрые мысли музыка музыка- романтика. мыловарение начинаюшим начинаюшим.оформление блога. начинающим наше женское новогодние картинки и фоны новогодние поделки новоодние картинки и поздравлени€ оформление дневника оформление дневника.анимаци€. оформление дневника.рамки поделки полезное пошив пошив. программы пэчворк рисование рукоделие рукоделие. скрапбукинг соленое тесто стихи ф-ш фотошоп фотошоп. фотошоп.новый год. цветы это интересно
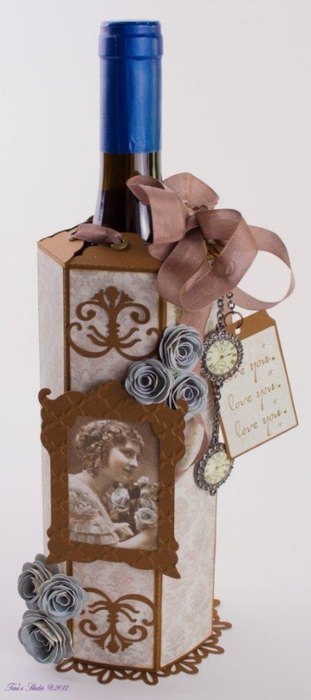
ѕодарочна€ упаковка дл€ бутылки. —крапбукинг |
Ёто цитата сообщени€ ћарриэтта [ѕрочитать целиком + ¬ свой цитатник или сообщество!]
—овсем скоро праздник..... ¬от так красиво можно упаковать бутылку со спиртным дл€ подарка. Ќиже есть шаблон, который можно увеличить и подогнать под размер бутылки любого размера


ћетки: скрапбукинг |
ѕостеры из газет. |
Ёто цитата сообщени€ окс€н€ [ѕрочитать целиком + ¬ свой цитатник или сообщество!]
ћетки: скрапбукинг |
ћ : «аголовок при помощи кле€ |
Ёто цитата сообщени€ —тарника [ѕрочитать целиком + ¬ свой цитатник или сообщество!]
»сточник http://puzatiyslon.blogspot.com
»нтересный ћ нашла у “амары в блоге —окровища пузатого слона —пасибо “амаре за ћ , € вот как клей найду буду осваивать ( один универсальный кругом), а пока запишу себе в постик и с вами поделюсь.
ƒалее слова автора
–ешила показать как € делаю заголовки при помощи кле€ "ћомент". я использую "ћомент кристалл".
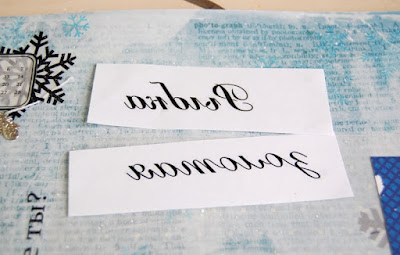
ѕрикладываю напечатанным текстом к страничке. „тобы ничего не сдвинулось во врем€ натирки, приклеиваю за углы мал€рным скотчем. Ќаношу хороший слой кле€. Ќе жалею!
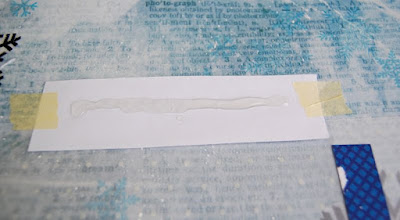
ƒл€ перевода использую старую-старую пилочку :) Ќе знаю подойдет ли палочка от натирок. Ќо с этого "инструмента" клей потом можно легко сн€ть. » он все-таки потверже.
’орошенько натираю-втираю. √лавное делать это на ровной и твердой поверхности. ѕроцесс похож на работу с натирками :)
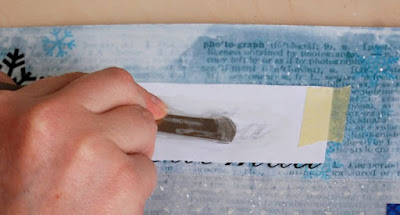

¬се готово как только буквы стали хорошо видны с нашей (обратной) стороны. —амое главное не "передержать" - иначе листок приклеитс€, и можно испортить страничку!
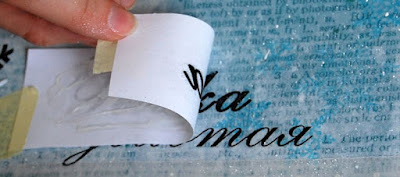
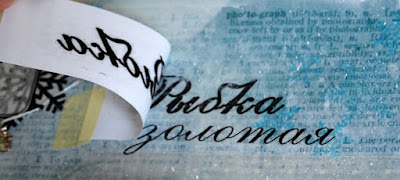
ѕри отсутствии чипбордов-наклеек и прочих благ скраповой цивилизации хороший выход!
ћетки: скрапбукинг |
Ўпаргалки-ћ |
Ёто цитата сообщени€ Ўальной_јнгел_13 [ѕрочитать целиком + ¬ свой цитатник или сообщество!]
Ўпаргалки-ћ
- јльбом в твердом переплете
- јльбом дл€ брадс
- јльбом классический с файлами
- јльбом с дверками, твердый переплет
- јльбом с кармашками
- јльбом с отделением дл€ дисков
- јльбом с раскрывающимис€ дверками
- јльбом с тканевой обложкой
- јльбом складной "ѕраздник"
- јльбом, обложка-дверки
- јльбом-книга
- јльбом-кубик
- јльбом-мини, странички разной формы
- јльбом-открытка (с тегами)
- јльбом-переплет твердый еще
- јльбомчик
- јльбомчик из конвертиков дл€ дисков
- јльбомчик-миник, складной
- Ѕантики красивые
- Ѕлокнот (декорирование готового)
- Ѕлокнот-книга дл€ рецептов
- Ѕлокнот-органайзер, на стол
- Ѕлокнотик дл€ клейких блоков
- √ирл€нда новогодн€€
- ƒекорации новогодние
- ƒомик Ќовогодний
- ƒомик-игрушка
- «аписна€ книжка с кармашками
- «аписна€ книжка с переплетом
- «аписна€ книжка, с переплетом
- арточки рассадочные с зайчиками
- л€ксы акриловые
- онверт вертикальный на зав€зках и другие конвертики!
- онвертик (дл€ денег)
- онвертик с фото
- онвертик-кошелечек, с отделени€ми
- онвертик-приглашение јверькин
- онвертик-рамка дл€ фото
- орзинка плетена€
- орзиночка пасхальна€
- орзиночки дл€ подарочков (небольшие)
- оробка-развалюшка
- оробочка дл€ денежного подарка
- оробочка дл€ диска
- оробочка дл€ дисков
- оробочка дл€ небольшого подарка
- оробочка дл€ штампов
- оробочка с крышкой
- оробочка с цветами
- оробочка-кексик
- оробочка-оригами
- оробочка-сердечко
- оробочка-сумочка дл€ подарка
- оробочки по трафарету
- оробочки-оригами
- ћини-карточки поздравительные
- ћини-книжечка (брелок, подвеска)
- ћини-кол€сочка
- ћини-пинетки
- ћини-шкатулочка
- Ќочник из банки из-под ча€
- ќбложка тканева€, переплет твердый, кольца
- ќбложкаальбома, твердый переплет, разный объем
- ќкрашивание бумаги кофе
- ќрганайзер (скрап)
- ќрганайзер еще
- ќткрытка и коробочка, ћ яны
- ќткрытка из крафт-пакета
- ќткрытка интересна€
- ќткрытка необычной формы
- ќткрытка с кармашками-сюрпризиками
- ќткрытка с объемной картинкой
- ќткрытка с окошком
- ќткрытка с секретиком
- ќткрытка со свечами
- ќткрытка ступеньчата€
- ќткрытка-аккордеон
- ќткрытка-закладка
- ќткрытка-конвертик
- ќткрытка-мини-альбомчик
- ќткрытка-пиджак
- ќткрытка-сумочка
- ќткрытки с мнини-вложени€ми (дл€ денег, карточек)
- ќткрыточка ажурна€
- ќткрыточка с тегами
- ќткрыточка-упаковка дл€ шоколадки
- ѕакет дл€ подарка
- ѕапка-аккордеон
- ѕергамано
- ѕереплет на палочках дл€ суши
- ѕодвески на елку
- ѕолимерна€ глина_воскова€ печать
- ѕоп-ап, уроки
- ѕосадочные карточки
- ѕуговки из полимерной глины
- ѕуговки картонные
- –амка-витрина
- –амочка дл€ фото
- –амочка из гипса
- –амочки, почти багет
- –амочки-коробочки на стену
- —ани ƒеда ћороза
- —умочка-корзинка дл€ подарков
- ”красить пластиковую баночку
- ”крашени€ дл€ детских утреников (на шпажке)
- ”паковка подарков
- ÷веточки бумажные
- ÷веточки разные
- ÷веты из нажелатиненной ткани
- ÷веты из ткани и биссера
- Ёмбоссинг без фена
- Ёмбоссинг-вдавливани
ћетки: скрапбукинг |
ћ миниальбомов |
Ёто цитата сообщени€ ёлена- [ѕрочитать целиком + ¬ свой цитатник или сообщество!]
ћетки: скрапбукинг |
Ќовогодние надписи ћарины јбрамовой |
Ёто цитата сообщени€ kohhhka [ѕрочитать целиком + ¬ свой цитатник или сообщество!]
ћетки: скрапбукинг |
расива€ ретро бумага дл€ творчества. |
Ёто цитата сообщени€ »юньска€_акварель [ѕрочитать целиком + ¬ свой цитатник или сообщество!]
ћетки: скрапбукинг |
≈лочка дл€ открытки |
Ёто цитата сообщени€ Bo-ti-ka [ѕрочитать целиком + ¬ свой цитатник или сообщество!]
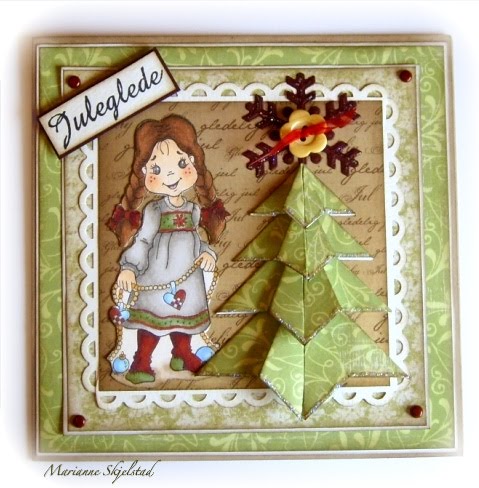
Ќе удержалась, чтобы не отметить этот мастер-класс, который € нашла «ƒ≈—№. —пасибо автору Marianne!
ћетки: скрапбукинг |
расим листы бумаги, делаем фон. |
Ёто цитата сообщени€ –аритет [ѕрочитать целиком + ¬ свой цитатник или сообщество!]

ƒл€ работы нам понадоб€тс€:
1. ®мкость.
ѕодойдЄт люба€ Ємкость чуть больше размера листа.
ћетки: скрапбукинг |
ќ„≈Ќ№ –ј—»¬џ≈ ќ“ –џ“ќ„ » своими руками... |
Ёто цитата сообщени€ милена70 [ѕрочитать целиком + ¬ свой цитатник или сообщество!]
ћетки: скрапбукинг |
»митаци€ кружев контурами. ћастер-класс от ≈лены Ўевченко |
Ёто цитата сообщени€ √лебова_≈лена [ѕрочитать целиком + ¬ свой цитатник или сообщество!]
ѕриветствую вас на страницах моего дневника!
ѕомню, в институте дл€ оформлени€ титульного листа по начертательной геометрии мы чертили сетку с промежутками в 2 мм, что ли, и вписывали туда название предмета - очень был монотонно-кропотливый труд:) ” мен€ получалось как-то очень уж на редкость аккуратно и изысканно, что мигом оценили мои однокашники - в результате, кто-то дл€ мен€ чертил основные чертежи, а € делала титул чуть ли не всему потоку:) Ќикак не думала, что подобное можно повторить контурами, да еще и сымитировать кружево:) я хочу предложить вашему вниманию великолепную работу и мастер-класс от ≈леночки Ўевченко, в котором она очень подробно показывает и рассказывает все тонкости кружевной росписи контуром. ѕри€тного просмотра!


ћетки: скрапбукинг |
≈ще ћ по открыточкам и коробочкам |
Ёто цитата сообщени€ Murisechka [ѕрочитать целиком + ¬ свой цитатник или сообщество!]

Saturday, April 10, 2010 —уббота, 10 јпрель 2010
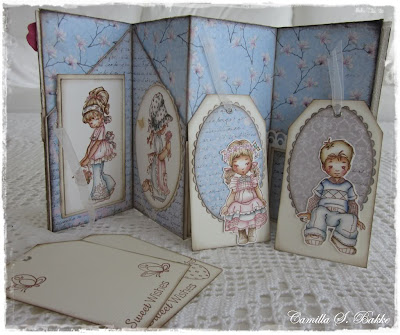
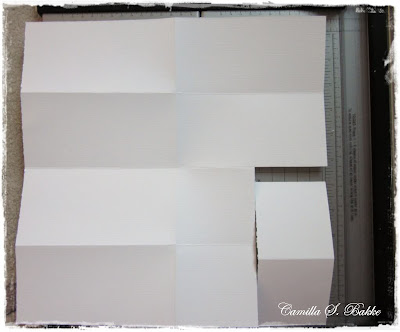
Confirmand Cards with money-pockets by Camilla онфирмант карты с деньгами-пакетов по амилла
 Today I want to show you three cards that I have made. —егодн€ € хочу показать вам три карты, которые € сделал в сад. They are all Confirmand Cards, something that are very popular here in Norway. ќни все конфирмант карты, что-нибудь очень попул€рны в Ќорвегии. I have already been asked to make a few:) ћен€ попросили уже два потр€сающе мало:)
 It was a bit hard to figure out how to show the inside the best, but first comes the side where you write your greetings. Ёто было довольно сложно пон€ть, как показывают в лучшее, но сначала приходит стороны wherefores вам написать поздравление.
 On the other side I have made a criss-cross envelope to put the money in. — другой стороны, € сделал крест-накрест две конверт положил деньги дюйма
 Here is the second card: ¬от втора€ карта:
 And under you can see how you can place the money. ј под ћожете ли вы увидеть, как вы можете разместить деньги. It is quite easy:) I have fasten the paper with brads. Ёто очень просто:) ¬ саду поста бумаги с штифтики.
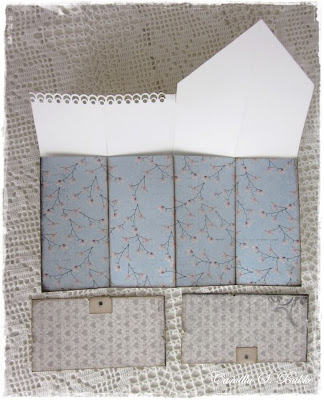
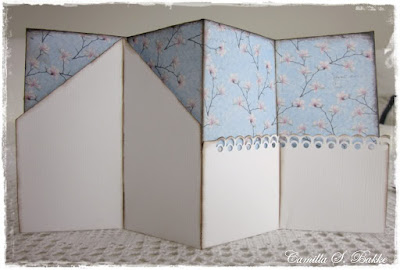
 Here comes the third card: Here Comes третьей карты:
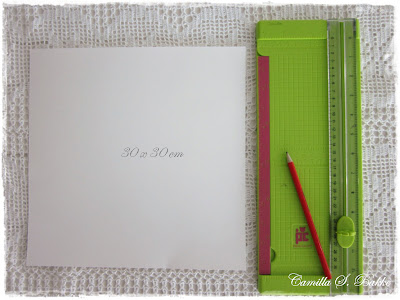
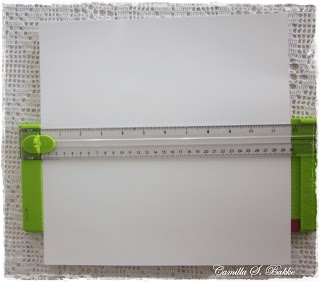
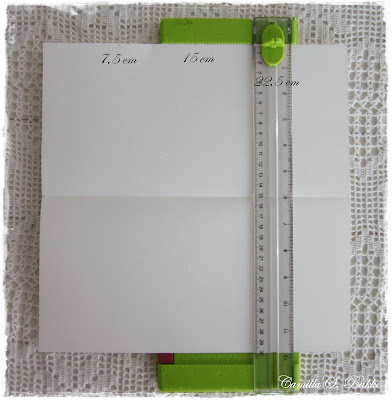
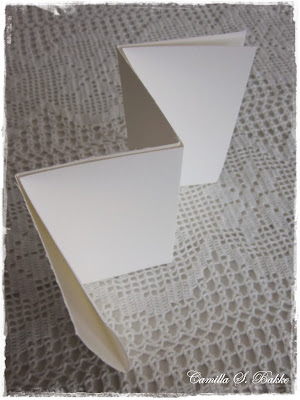
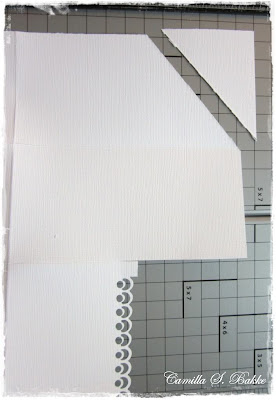
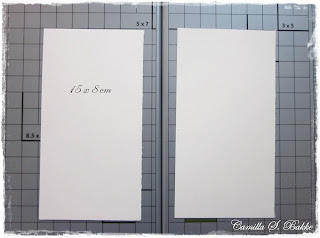
 I have made the outside match the inside. я сделал за пределами матча внутри. When I cut the paper for the card it is four cm longer than my normal card (15 cm). огда € вырезал бумаги дл€ карт это четыре см длиннее, чем мои нормальные карты (15 см). So this measures 15x19cm. “ак что это 15x19cm меры. Then I fold it in the middle as usual, and also at 15 cm down. “огда € сложить его в середине, как обычно, а также, что 15 см вниз. The remaining 4 cm is folded up. ќставшиес€ 4 см в сложенном.
 The images are from Whiff of Joy . »зображени€ из дуновение Joy .
Tuesday, March 16, 2010 ¬торником, 16 марта 2010
A giftbox for Easter by Camilla S. Bakke Giftbox на ѕасху амилла —. Ѕакке
 Hi! ѕривет! Today I will show you how I made an Easter giftbox. —егодн€ € покажу вам, как € сделал Giftbox ѕасхи. Under you can see the papers I used, pluss the gorgeous stamp illustrated by Norma Fickel for Whiff of Joy . ѕод видишь работ исключительных, а также великолепные штамп иллюстрируетс€ Ќорма Fickel дл€ дуновение Joy .
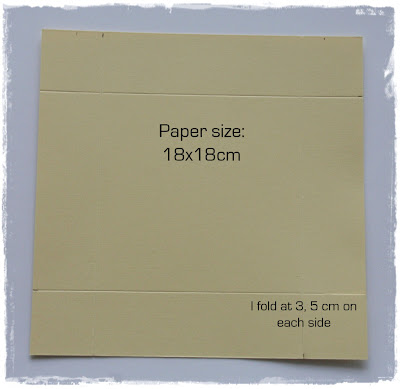
 Here are the measurements for the box. ¬от измерений дл€ коробки. With this measures I will have a box at the size 11x11x3,5 cm. — этой доброй воли ћеры ¬ саду на размер коробки 11x11x3, 5 см.
I have made the box and the cover separately. ¬ саду сделал коробки и крышки отдельно.
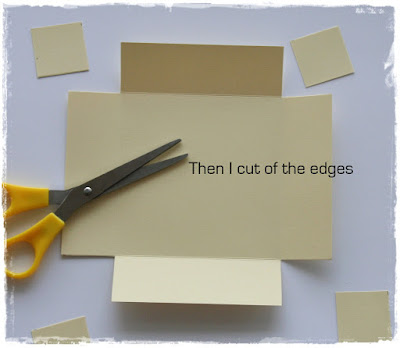
 Under you see how the papers looks like after I have inked and sewed them. Ќиже вы видите, как бумага выгл€дит как после того как € подписал сад и шили ограничени€.
 I use some adhesive tape to fasten them on all four sides. я использую ленту что-то клеем два быстрых ограничение ср всех четырех сторон.
 And now for the cover: » теперь дл€ обложки:
 I have put them together and seved the cover aswell. я их собрал крышки и seved также. Then I place it on the side of the box, to see where I am going to fasten them together. “огда € разместить его на стороне коробки, "чтобы увидеть, где € собираюсь быстро два ограничени€ вместе.
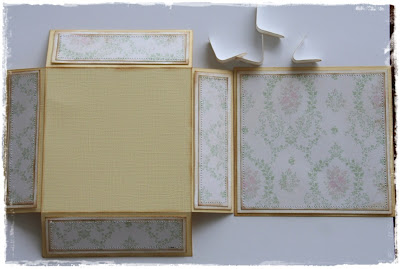 I use the strips I made with the word window punch, and eight brads. я использую полосы € сделал с окном удар слово, барды и восемь. Make sure you have some space between the to parts, so it also can bend. —делайте что-то кислым вы сад пространство между двум€ сторонами, поэтому она также может поворотах.
 I also use the strips with some smaller brads to fasten the sides together. “акже € использую полосы с чем-то меньшего штифтики два быстрых странице вместе. Under you see the inside of the box. Ќиже вы видите внутри коробки. I could also have fasten them on the outside... я мог бы также сад быстро ограничение на внешней стороне ...
 And under you see the outside of the box. ј ниже вы видите за пределами коробки.
 Now all sides are fastened, and the box is ready to be decorated. “еперь все страницы закреплены, и коробка готова задать два оформлены.
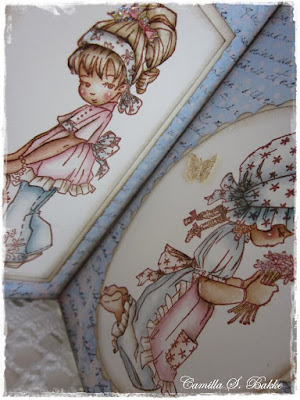
 And here it is! » вот оно! The girl with the lamb is coloured with Distress Ink, re-inkers on water colour paper 300g. ƒевушка с €гненком окрашена бедствии чернил повторно inkers ср воды 300 г цветной бумаги. I have used a 00 size brush. ¬ саду исключительных размер 00 кисть.
 A closeup: рупным планом:
 The whole cover: ÷елом охватывать:
 And inside some yummy chocolate-balls filled with milkcream;)) ј внутри что-то вкусное шоколадно-м€ч, заполненный молока;))
 Here you see the box from the other side, with the strips. «десь вы видите окно с другой стороны, с полосками. I think they made a spesial decoration. я думаю, что они сделаны специальные декорации.
ћетки: скрапбукинг |
ћ - —крапбукинг. ¬идео мастер- классы. ќткрытки |
Ёто цитата сообщени€ Lina_Korm [ѕрочитать целиком + ¬ свой цитатник или сообщество!]
ћетки: скрапбукинг |
—крапбукинг. ¬идео мастер- классы. ќткрытки. |
Ёто цитата сообщени€ Lina_Korm [ѕрочитать целиком + ¬ свой цитатник или сообщество!]
ћетки: скрапбукинг |
ћ - оробочка с откидной крышкой. |
Ёто цитата сообщени€ MamaVarvarki [ѕрочитать целиком + ¬ свой цитатник или сообщество!]
ћетки: скрапбукинг |
ћ - ј“— сердечные- отличные! |
Ёто цитата сообщени€ eGozZzaa [ѕрочитать целиком + ¬ свой цитатник или сообщество!]
јвтор: ƒинул€ http://paper-fairytale.blogspot.com/2011/06/blog-post_5723.html
ћетки: скрапбукинг |
„удесные розы из чайных пакетиков. |
Ёто цитата сообщени€ √лебова_≈лена [ѕрочитать целиком + ¬ свой цитатник или сообщество!]
ƒоброго времени суток!
ѕопробуйте догадатьс€, из чего сделаны эти замечательно-винтажные розы? »з использованных чайных пакетиков!!! ѕосмотрите, кака€ прелесть!! ѕричем цвет роз будет зависеть от ваших вкусовых предпочтений:)
Ќиже вы увидите подробно, как сделать розы и вот такой чудесный букетик! ќчень легко.
ѕредставл€ю лица своих родственников, когда € попрошу собирать дл€ мен€ использованные чайные пакетики...
ћетки: скрапбукинг |
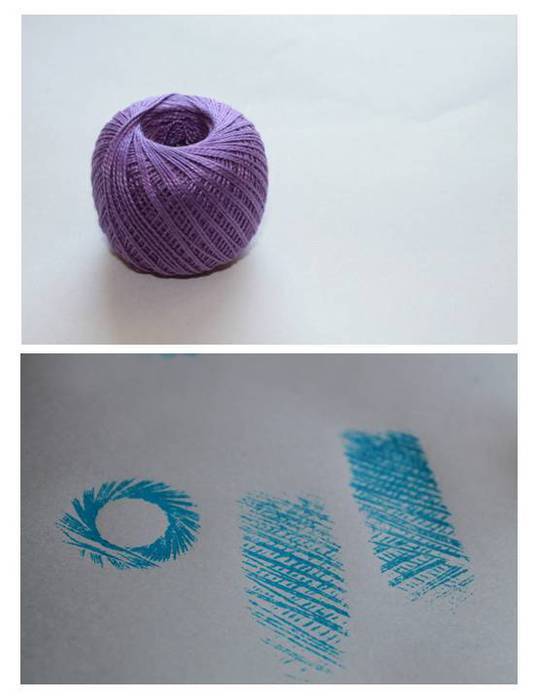
33 штампа из ничего. |
Ёто цитата сообщени€ NNN_10 [ѕрочитать целиком + ¬ свой цитатник или сообщество!]
ћетки: скрапбукинг |
»деи декорировани€ баночек, горшков и вазочек |
Ёто цитата сообщени€ ћарриэтта [ѕрочитать целиком + ¬ свой цитатник или сообщество!]
ќбожаю, когда из ничего, из того, что стоит в сарае или подлежит ликвидации, можно создать своими руками красоту. ѕредставл€ю вашему вниманию подборку из моих черновиков, собранную с разных сайтов, по декорированию глин€ных горшков, вазочек, баночек. Ќе спешите ничего выбрасывать), любому предмету можно подарить новую жизнь и украсить им интерьер)
»з дерев€нной кадки можно сделать корзинку дл€ рукодели€ декорировав ее тканью, джутом и цветами из ткани

— помощью гипюра и краски, из глин€ного горшка можно сделать вазу дл€ цветов

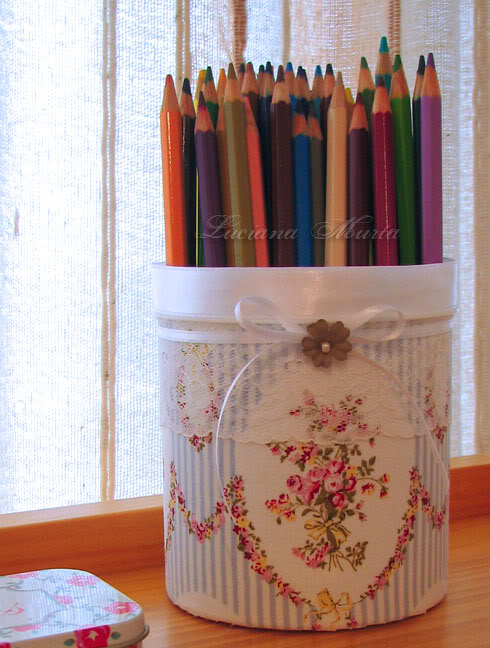
»з пластикового ведерка от майонеза можно сделать нежную карандашницу в стиле "шебби-шик"
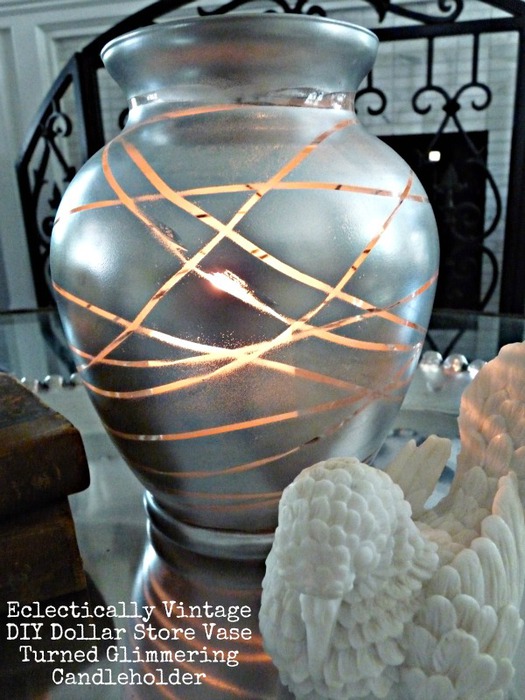
—текл€нную вазу можно превратить в винтажный подсвечник
—мотрим мастер-классы?
ћетки: скрапбукинг |
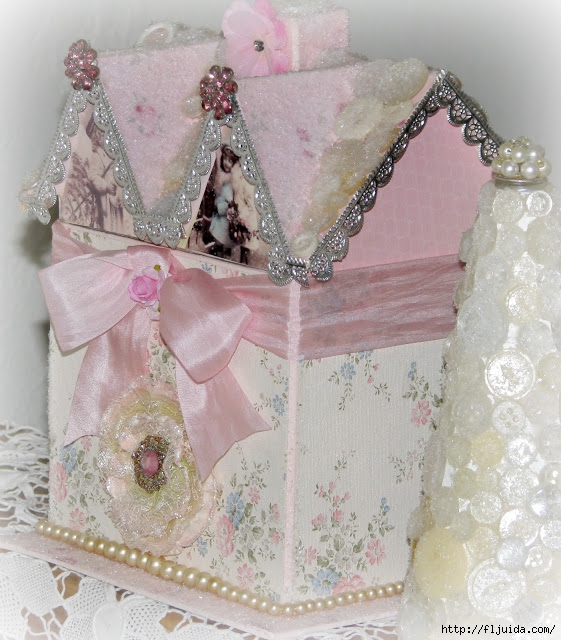
ƒекор коробочек кружевом и цветами. ћ самой коробочки |
Ёто цитата сообщени€ fljuida [ѕрочитать целиком + ¬ свой цитатник или сообщество!]
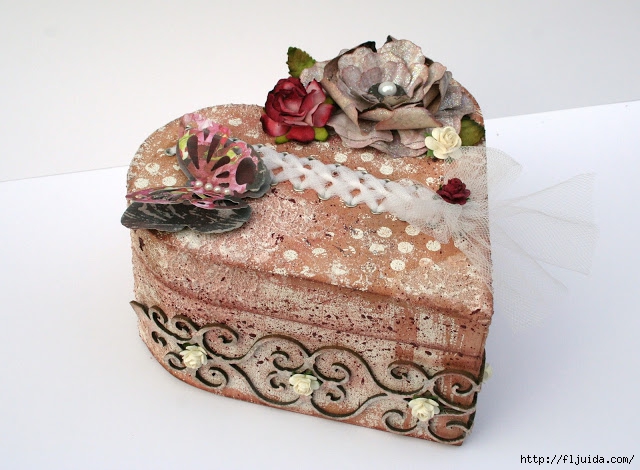
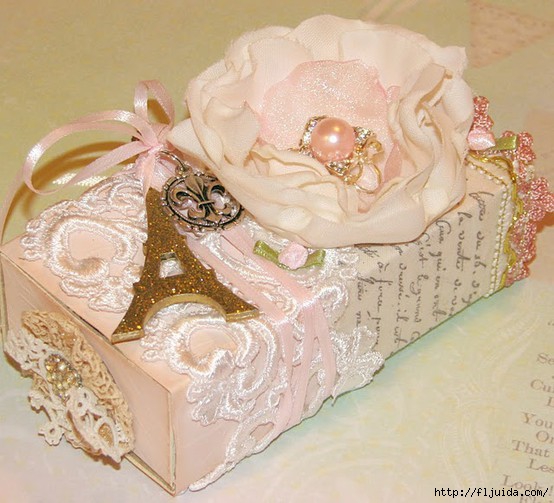
»деи декора коробочек кружевом и цветами в винтажном стиле.
а в конце вы сможете посмотреть мастер-класс по созданию красивой винтажной чайной коробочки.
ћетки: скрапбукинг |
