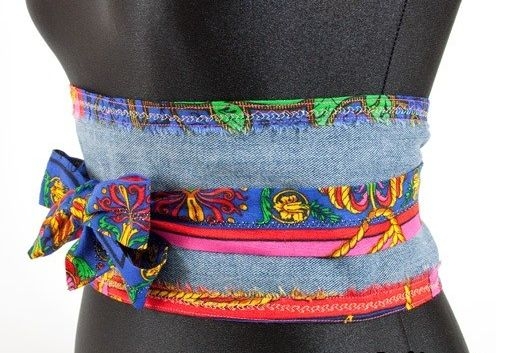
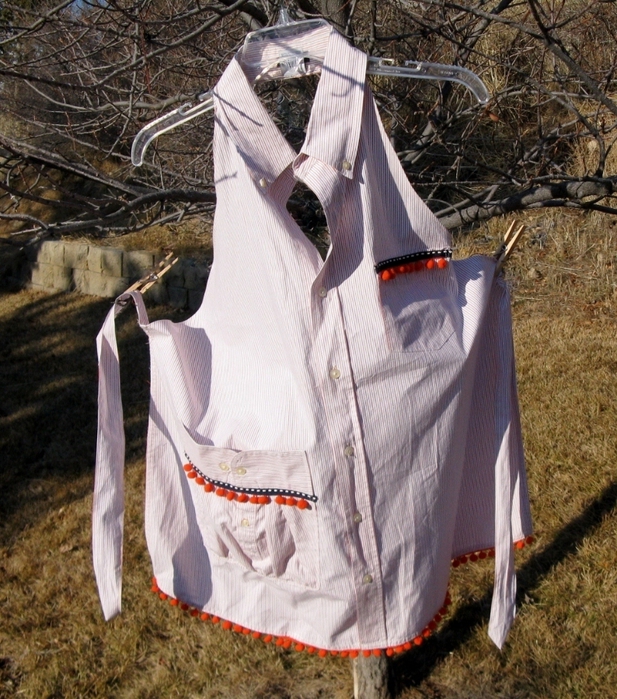
��� ����� ������ �� ������� �������. ������-����� |
� �����, ��� � ���� � ��������� �������� �������� ������� �������. ������� ������ �� ���������� � ������ ����� ������ ��� ����� ���� - ������.
|
����� ������, ������-����� |
|
�����. ���� ����� ������ �������. ������������� ��! |

|
��� ��������� |
|
��� ��������� |

 Das alte T-Shirt (oder Stoffreste) doppelt zusammenlegen und circa 2,5 Zentimeter breite und unterschiedlich lange, am Ende spitz zulaufende Streifen schneiden.
 Auch die Kette auf unterschiedliche Längen durch Aufbiegen von Ketten-Gliedern trennen. Die geöffneten Glieder brauchst du noch!
 Im Schulterbereich mit der Nagelschere immer je zwei ganz kleine Löcher in den Shirt oder Sweatshirt stechen …
 … und die Stoffstreifen durchziehen. Ich habe circa 4 Zentimeter unterhalb der Schulternaht auch jeweils zwei Stoffstreifen durchgezogen.
 Mit der Nadel wieder 2 Löcher durchbohren (siehe großes Foto) und ein offenes Ketten-Glied durchziehen.
 Nun die Kette daran einhängen und das offenen Ketten-Glied mit der Zange schliessen. Alternativ kannst du die Ketten auch auf dem Oberteil annähen. FERTIG!!!


|
��� ��������� |
|
�� ������ �������� |
1.

2.


|
�� ������ �������� |
Yeah, more DIY! I made this fringe shirt/dress thing last week with just an old shirt and some scissors. I really like how it turned out, and I've worn it out twice already...with no stares! I thought everyone would give me a lot of greif for this one, but nobody really seems to care.


|
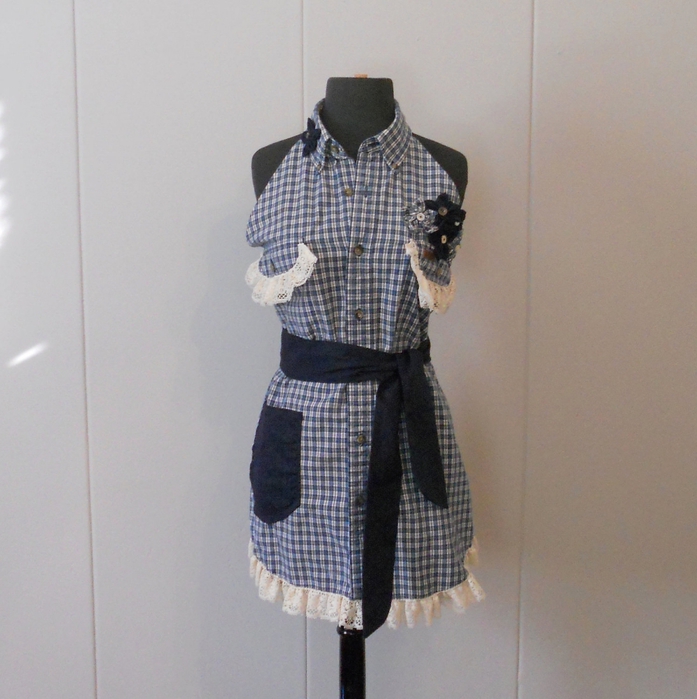
������ �� 2� ������� �������� |
�������� ����������� �� ����� ����� ���� ��������� � ������, ��� ����� �� ������� ������ ���� ��� ������,
� �� ������ ������ ���� �������.
����� ����������� ���������!
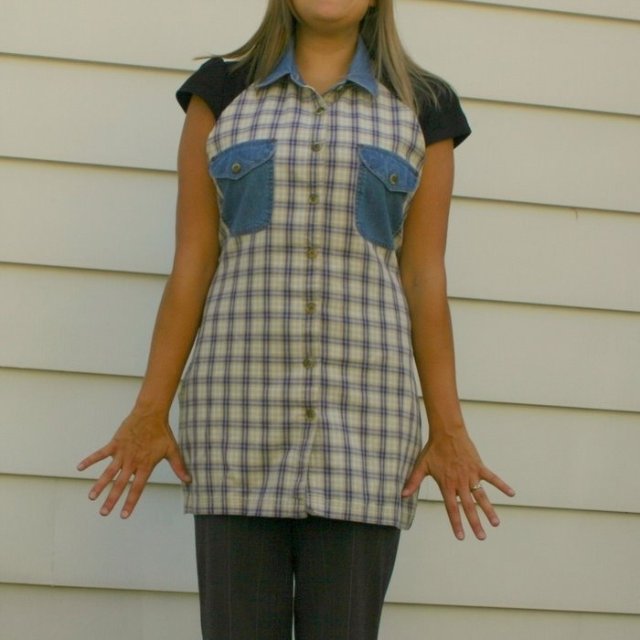
  I created this dress using 2 men's T shirts which are sewn together at the neck. Supplies: * 2 identical cotton T shirts (I used Hanes white undershirts, size Large. I dyed them blue before making the dress) Men's size large T's will make a XS/S dress. If you wear a larger size, buy larger T shirts) * 4 1/2 length of braided elastic that is 3/8 wide 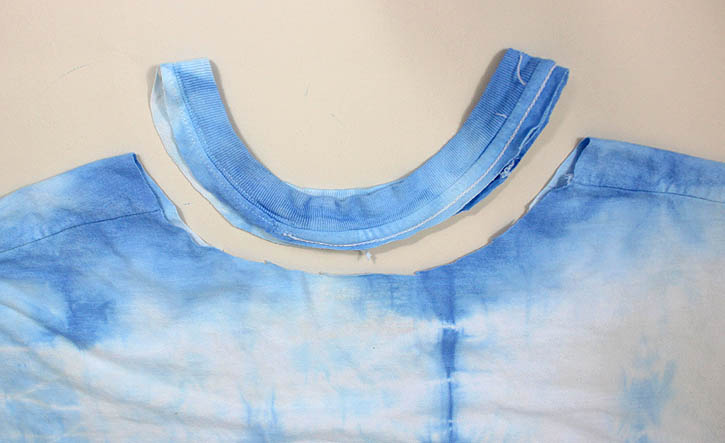 [Cut off the neck on both T shirts]  [Step 2: Create the pockets. Sew the arm holes closed on the right side of one of the shirts. Stitch a line approximately 1/2 inch above the arm bands]  [Step 3: Cut off the arm bands- I found that the pockets lay better without the added thickness. Don't cut too close to the stitches. Leave about 1/4 inch. This T shirt will be the skirt part of the dress]  [Step 4: Turn both shirts inside out and then sew them together at the neck]  [Step 5: I sewed a small piece of elastic on the front waistband to give the dress a better fit. At this point the front and back of the dress are the same. Just choose a side to be the front. Mark the middle with a pin. Measure 4 1/2 inches on both sides of the pin and mark those off spots off. This is where the elastic gets sewn]  [Here is the sewn on elastic. Make sure you stretch the elastic while sewing it. It creates a nice, gathered look in between the pockets]  [Final step: Turn the dress right side out, put it on and tuck the pockets in] |
|||
|
|
|||
1.


|
�� ������ �������� |


|
�� ������ �������� |


|
| ��������: | [1] |