-–убрики
- вал€ние (26)
- ћаги€ (8)
- женские штучки (4)
- витражна€ роспись (20)
- вторые блюда (167)
- вышивка бисером (32)
- вышивка крестиком (363)
- вышивка лентами (26)
- в€зание крючком (362)
- в€зание дл€ себ€ любимой (47)
- в€зание пледов и скатертей (31)
- в€зание спицами (68)
- декоративные бутылки (1)
- декупаж (53)
- деревь€ из бисера (6)
- детки (8)
- дл€ дневника (3)
- домашний уют (45)
- животные (4)
- здоровье (81)
- игрушка (158)
- из газетных трубочек (11)
- из соленого теста (15)
- картины (39)
- кинематографи€ (84)
- кофейные идейки (4)
- куклы (220)
- кукольна€ обувь (20)
- кукольные глазки (14)
- кукольные одежки (19)
- кукольные прически (7)
- кулкольные штучки (16)
- лепка (12)
- мастер-класс (65)
- музыка (34)
- мыло (1)
- напитки (7)
- папье-маше (21)
- пироги и пирожки (78)
- подарки своими руками (36)
- ѕќƒ≈Ћ » »« Ѕ”ћј√» (31)
- поэзи€ (6)
- приколы (3)
- пэчворк (6)
- религи€ (30)
- сад и огород (96)
- салаты (30)
- сладости (101)
- торты (4)
- конфеты (3)
- солени€ (6)
- соусы (2)
- сумки (20)
- тильда (49)
- фотографии (23)
- фотошоп (15)
- цветы (9)
- шитье (91)
- это интересно (145)
- €ична€ скорлупа (6)
-ћетки
-ћузыка
- ƒжо ƒассен- ≈сли б не было теб€...
- —лушали: 17198 омментарии: 0
- Bertie Higgins - Casablanca (ћузыка которую долго искал)
- —лушали: 147434 омментарии: 0
- “ри дома .. Ќа стихи ».“алькова.
- —лушали: 10644 омментарии: 0
- AIN'T NO SUNSHINE (ћјЋ≈Ќ№ »… MICHAEL JACKSON)
- —лушали: 410 омментарии: 0
- SHE
- —лушали: 265 омментарии: 0
-ѕоиск по дневнику
-ѕодписка по e-mail
-—татистика
ƒругие рубрики в этом дневнике: €ична€ скорлупа(6), это интересно(145), шитье(91), фотошоп(15), фотографии(23), тильда(49), сумки(20), соусы(2), солени€(6), сладости(101), салаты(30), сад и огород(96), религи€(30), пэчворк(6), приколы(3), поэзи€(6), ѕќƒ≈Ћ » »« Ѕ”ћј√» (31), подарки своими руками(36), пироги и пирожки(78), папье-маше(21), напитки(7), мыло(1), музыка(34), мастер-класс(65), ћаги€(8), лепка(12), кулкольные штучки(16), кукольные прически(7), кукольные одежки(19), кукольные глазки(14), кукольна€ обувь(20), куклы(220), кофейные идейки(4), кинематографи€(84), картины(39), из соленого теста(15), из газетных трубочек(11), игрушка(158), здоровье(81), животные(4), женские штучки(4), домашний уют(45), дл€ дневника(3), детки(8), деревь€ из бисера(6), декупаж(53), декоративные бутылки(1), в€зание спицами(68), в€зание крючком(362), вышивка лентами(26), вышивка крестиком(363), вышивка бисером(32), вторые блюда(167), витражна€ роспись(20), вал€ние(26)
Ѕез заголовка |
Ёто цитата сообщени€ ћарриэтта [ѕрочитать целиком + ¬ свой цитатник или сообщество!]
ѕолезна€ информаци€ дл€ всех, кто собираетс€ в поездку в другой город. Ќа сайте YouRenta.ru вы сможете заранее подыскать себе квартиру дл€ проживани€. ¬ладельцы квартир, здесь же, на этом сайте, смогут дать объ€вление и сдать квартиру по весьма выгодной цене. ≈сли вы собрались, например, в –остов-на-ƒону, заходите по ссылке http://yourenta.ru/c-rostov-na-donu/ и выбирайте себе квартиру , котора€ сдаетс€ посуточно ( что гораздо выгоднее, чем проживание в гостинице), в соответствии со своими вкусами и предпочтени€ми.
’очу вам представить два способа создани€ розы из ткани. –озу можно использовать дл€ шить€ сумки, пледа или оде€ла.

![[folder[2].jpg]](http://lh4.ggpht.com/_KcqYBn0MUD8/TTIDihWvX_I/AAAAAAAAp3c/zmk5SWsbrfA/s1600/folder%5B2%5D.jpg)
![[1129891417766[3].jpg]](http://lh5.ggpht.com/_KcqYBn0MUD8/TTIDntgYTMI/AAAAAAAAp38/DU4X7LgMfv8/s1600/1129891417766%5B3%5D.jpg)
![[63c62be1t83bc3f00cc10&690[3].jpg]](http://lh3.ggpht.com/_KcqYBn0MUD8/TTIDlHzYu2I/AAAAAAAAp3s/dhhlaDUZd14/s1600/63c62be1t83bc3f00cc10%26690%5B3%5D.jpg)
ћетки: шитье |
“юльпанчики из ткани. |
Ёто цитата сообщени€ Ќадежда-Ёсперанса [ѕрочитать целиком + ¬ свой цитатник или сообщество!]
ћетки: тильда |
Ўьем –ќ«џ и “ёЋ№ѕјЌџ. ѕодробный мастер-класс |
Ёто цитата сообщени€ ћарриэтта [ѕрочитать целиком + ¬ свой цитатник или сообщество!]
ћетки: шитье |
ѕион из ткани —ветланы орниловой. ћ . |
Ёто цитата сообщени€ —ветлана_ орнилова [ѕрочитать целиком + ¬ свой цитатник или сообщество!]
Ќастроение сейчас - ѕрекрасное, творческое
—овсем немного времени остаЄтс€ до праздновани€ Ќового года!
ѕрекрасные дамы всЄ чаще задумываютс€ о том, в какой нар€д облачитьс€. ѕредлагаю ¬ашему вниманию брошь, котора€ позволит превратить заур€дное оде€ние в праздничный нар€д.
¬от мой мастер-класс.
 ƒл€ создани€ такого цветка ¬ам потребуетс€:
искусственна€ ткань розового (двух оттенков) и зелЄного цвета,
клеева€ паутинка,
ленточка дл€ отделки,
ножницы,
клей ѕ¬ј,
клеевой пистолет,
проволока,
гофрированна€ бумага,
свеча,
основа дл€ броши.
1. –озовую ткань ( светлую и тЄмную) нарезаем на квадратики :
размер 3*3 см по 13 штук.
размер 5*5см 6шт.
–азмер 6*6 см 6 шт.
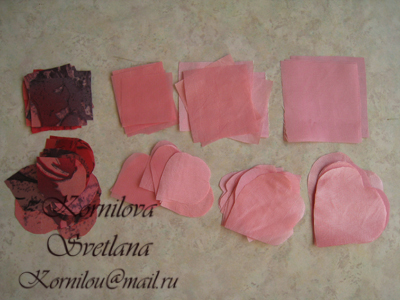
”мело управл€€сь ножницами, превращаем квадратики в капельки и сердечки
2. ќплавл€ем край каждого лепестка над свечой.
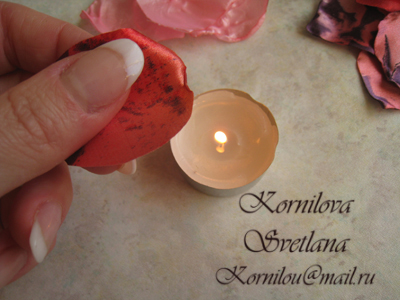
3. ¬от что у нас получилось.

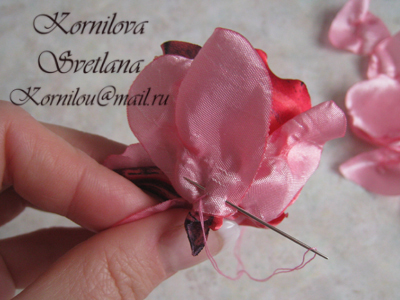
4. ќсновани€ всех маленьких лепестков сшиваем между собой. ƒалее по одному добавл€ем остальные.
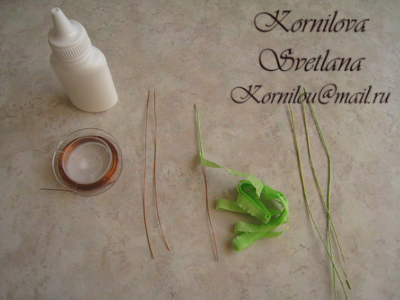
5. ќборачиваем проволочки зелЄной гофрированной бумагой, закрепл€€ концы клеем ѕ¬ј.
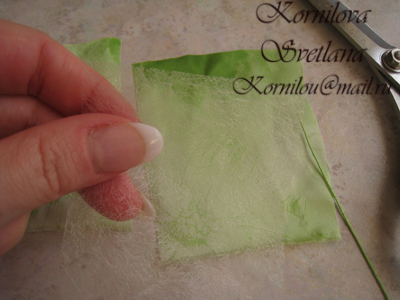
6. ћежду зелЄными квадратиками (размер 10*10) прокладываем клеевую паутинку и проволочку. «акрепл€ем утюгом. ¬ырезаем листь€.
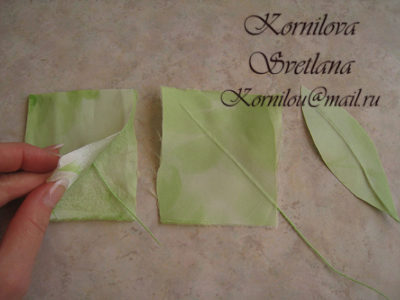
7. ќплавл€ем кра€ листьев над свечой.
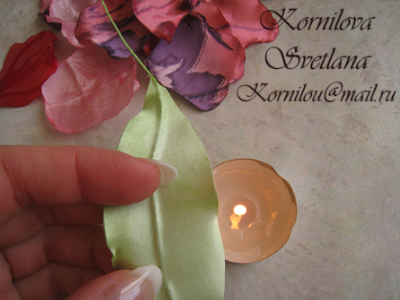
8. — помощью пистолетного кле€ крепим к цветку листь€ и основу дл€ броши.
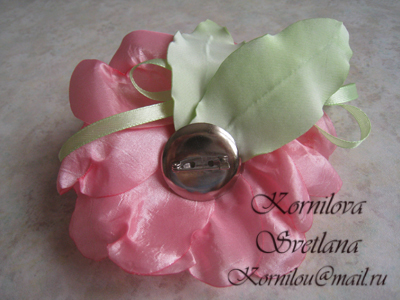
9. Ѕрошь готова!
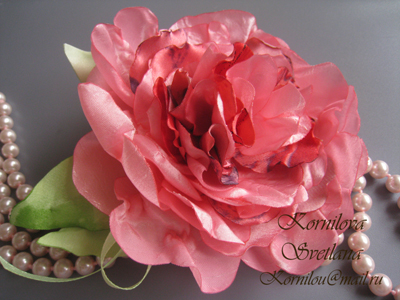
10. ∆елаю ¬ам прекрасного праздничного настроени€!!!
Ѕольша€ благодарность Ў≈Ћ ќ¬»÷≈ за консультации по публикации сообщени€!
—ери€ сообщений "÷веты из ткани":
„асть 1 - ќсень в моих работах.
„асть 2 - ќсновы композиции
„асть 3 - ѕион из ткани —ветланы орниловой. ћ .
„асть 4 - цветы цумами канзаши
„асть 5 - ÷веты из ткани
...
„асть 41 - "’ризантемы любви"
„асть 42 - нига по изготовлению цветов. Ўаблоны
„асть 43 - ака€ прелесть! —вадебные аксессуары
ћетки: полезности |
–ецепт холодного фарфора (очень простой) |
Ёто цитата сообщени€ “аша92 [ѕрочитать целиком + ¬ свой цитатник или сообщество!]
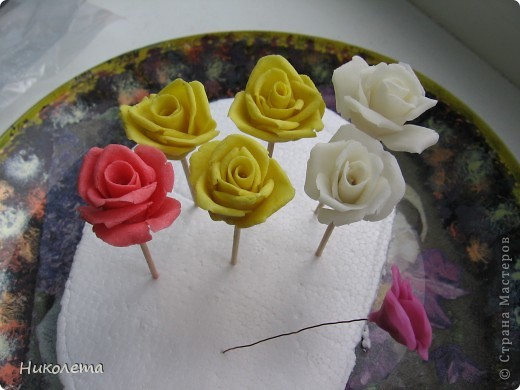
Ќашла этот рецепт у мастера Ќиколеты, спасибо ей огромное за эту идею. ѕопробую об€зательно :)
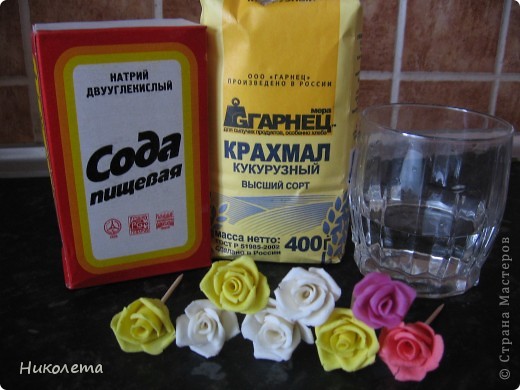
нам понадоб€тс€: 1/4 часть чашки пищевой соды
1/4 часть чашки кукурузного крахмала (можно картофельного)
1/4 часть чашки воды
¬се смешать в сковороде с тефлоновым покрытием
„итать далее
ћетки: соленое тесто |
апроновые крылышки |
Ёто цитата сообщени€ —ундучок_хоз€юшки [ѕрочитать целиком + ¬ свой цитатник или сообщество!]
огда то, еще в школьные годы, делали вот такие бабочки, а тут повстречала вот такой, своеобразный мастер класс...
ћетки: шитье |
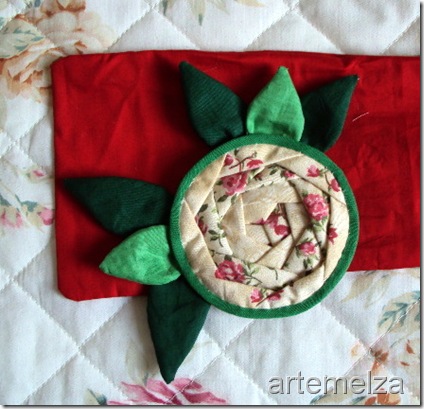
японска€ роза. ћ |
Ёто цитата сообщени€ Kozlovenikaya [ѕрочитать целиком + ¬ свой цитатник или сообщество!]
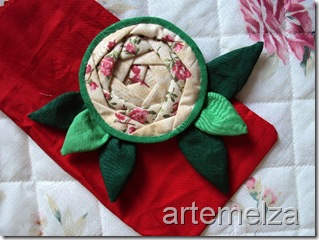
Rosa japonesa de patchwork | Japanese rose of patchwork
Posted: 18 Feb 2010 09:48 AM PST
 |
|
It is a bit of work but it is not difficult once we know how to do. |
    |
|
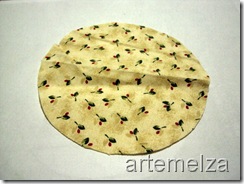
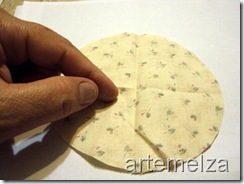
Cut a circle of 10 cm in diameter. |
   |
|
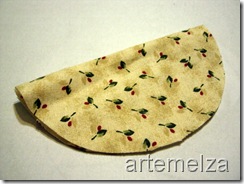
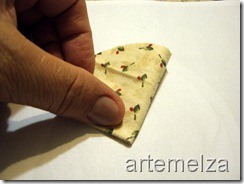
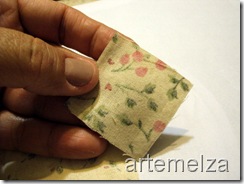
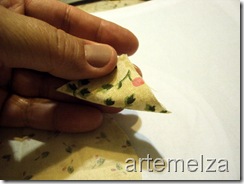
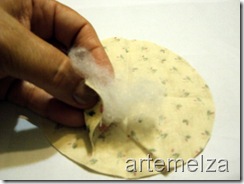
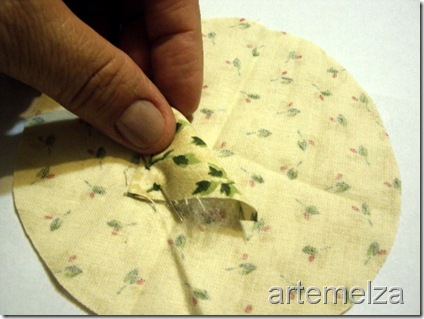
Take 3 square of 4x4 cm fold into triangle and place a little filling |
 |
|
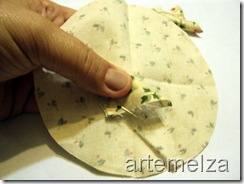
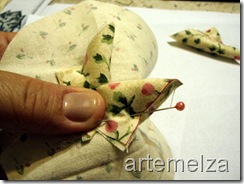
Secure with a pin. Do this with the other squares. |
  |
|
Place the first triangle in the center of the circle. |
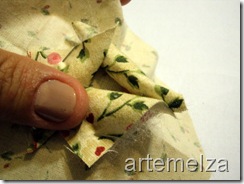 |
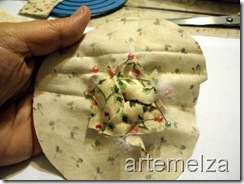 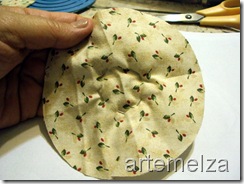 |
|
The third triangle between the 2 above so that they are united in the center of the circle. Secure with pins |
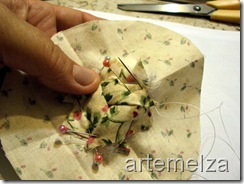 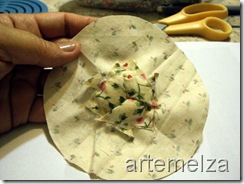 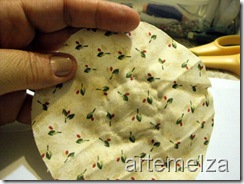 |
|
Sew into a circle the 3 triangles together |
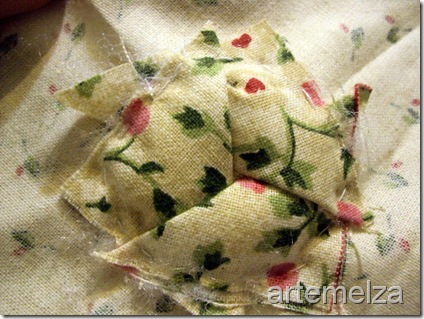 |
|
Like this. |
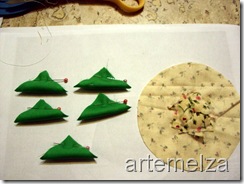 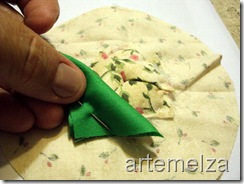 |
|
Take 5 triangles of different fabric and place one at a time around the 3 triangles already sewn. Leave appear about 2 cm of the 3 initial triangles |
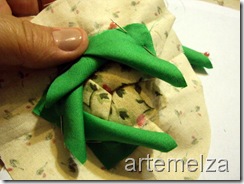 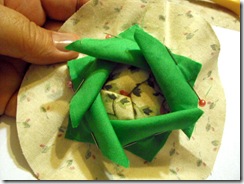 |
|
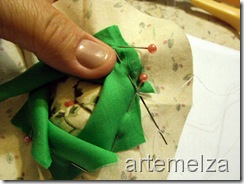
Put one beside the other, leaning a little, forming a pentagon in the center of the rose. |
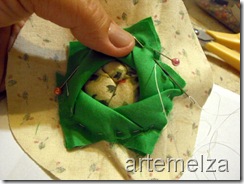  |
|
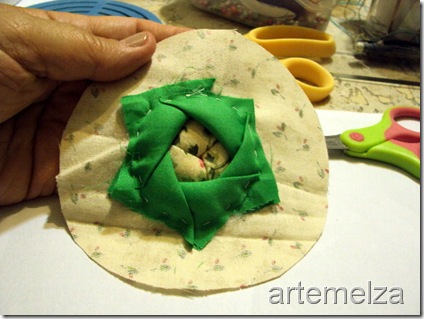
Pin and sew in a circle. |
 |
|
Like this |
  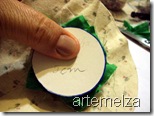 |
|
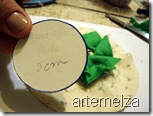
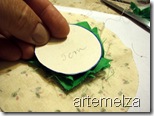
If you experience difficulty in tailoring a circle, cut a circle of 5 cm in low-weight paper (fine), place a pin in the center and sew all around. |
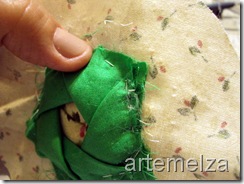 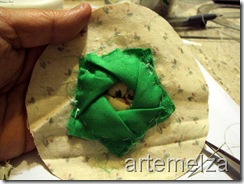 |
|
Stay tuned for the fabric to be sewn on the tips of the triangles |
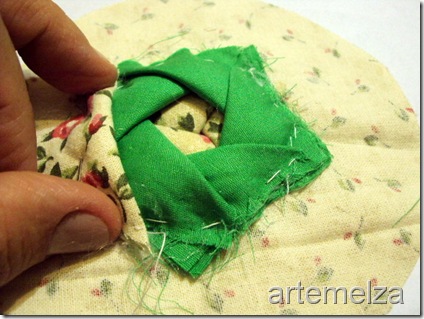 |
|
Take 6 triangles with filling in another fabric and sew them around the 5 triangles. |
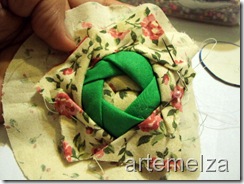 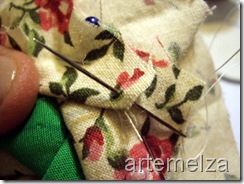 |
|
Like this. |
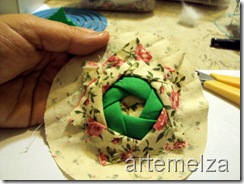 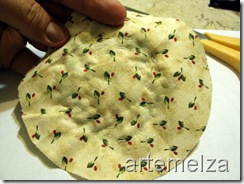 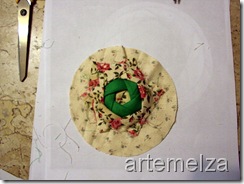 |
|
Sew in a circle. |
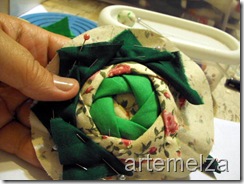 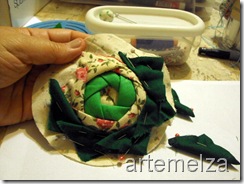 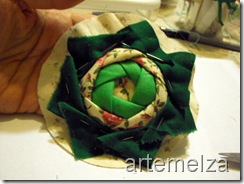 |
|
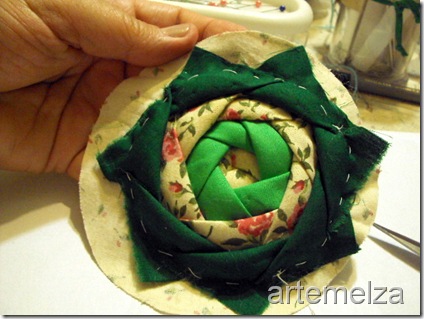
Take 7 filled triangles with fabric of different color and stitch leaving a margin of about 1 cm of the previous triangles. |
 |
|
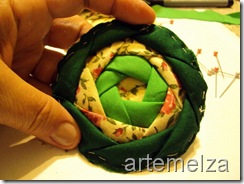
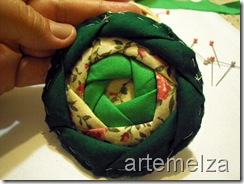
Sew around in a circle. |
  |
|
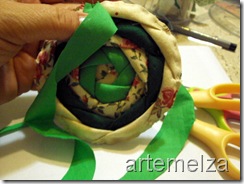
The next step is to cut the excess fabric that remains taking care not to cut the seam. |
 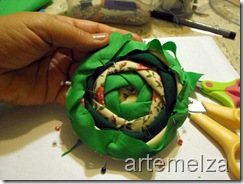 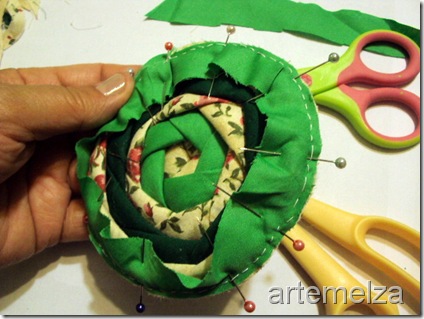 |
|
Finish by placing a border for the finish |
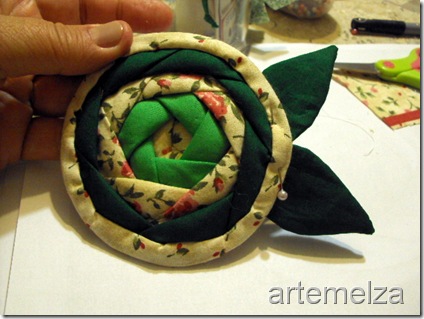 |
|
The rose will look like this. |
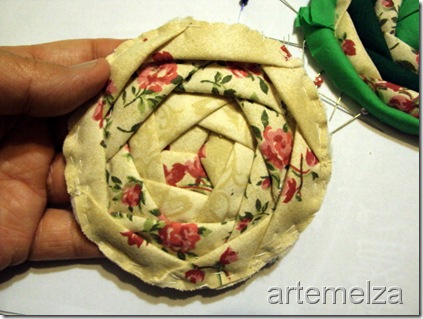 |
|
This rose was made with fabrics that match better |
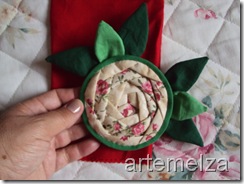 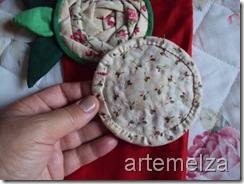 |
|
I finished this way. |
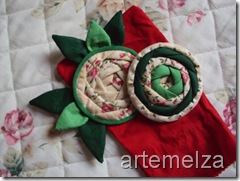 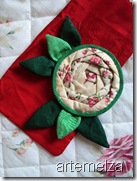 |
|
I hope you enjoy. I loved it. Any questions do not be shy. continua... to be continued... |
ћетки: шитье |
÷веточки |
Ёто цитата сообщени€ _ _с_ю_х_и_н_ [ѕрочитать целиком + ¬ свой цитатник или сообщество!]
ћетки: полезности |
орзиночка с цветами |
Ёто цитата сообщени€ SelenArt [ѕрочитать целиком + ¬ свой цитатник или сообщество!]
ћетки: полезности |
| —траницы: | [1] |


![[1112107632984429617[3].jpg]](http://lh6.ggpht.com/_KcqYBn0MUD8/TTIDgA3LKJI/AAAAAAAAp3M/smq-8rB0LKY/s1600/1112107632984429617%5B3%5D.jpg)
![[6994272dn8b27feca3995&690[3].jpg]](http://lh5.ggpht.com/_KcqYBn0MUD8/TTIDsZHdAjI/AAAAAAAAp4c/WJd2ZiKaXCk/s1600/6994272dn8b27feca3995%26690%5B3%5D.jpg)

![DSC08701[8] (480x640, 116Kb)](http://img1.liveinternet.ru/images/attach/c/4/79/771/79771647_DSC087018.jpg)
![DSC08717[6] (640x480, 80Kb)](http://img0.liveinternet.ru/images/attach/c/4/79/771/79771650_DSC087176.jpg)

![0 postando[5] (640x400, 86Kb)](http://img0.liveinternet.ru/images/attach/c/4/79/771/79771422_0_postando5.jpg)


