-ћетки
-–убрики
- ¬€зание (5921)
- Ќа вилке (49)
- ћакраме (8)
- Ћинейка (8)
- ћашинное (6)
- ƒл€ женщин (2477)
- улинари€ (2446)
- ¬ыпечка (1050)
- «акуски (432)
- ƒесерт (349)
- ¬торые блюда (292)
- —алаты (146)
- «аготовки (120)
- Ќапитки (102)
- ¬осточна€ кухн€ (30)
- —упы (29)
- —оусы (25)
- ћикроволновка, хлебопечка, мультиварка (22)
- Ўашлык, гриль (21)
- ѕриправы (5)
- —оветы (2)
- —пеции (1)
- ћастер-класс (1994)
- ƒет€м (1748)
- ¬ышивка (1712)
- Ѕлэкворк (52)
- Ўитье (1692)
- ƒл€ дома (1196)
- »деи (1129)
- »грушки (1075)
- ”зоры, мотивы (1058)
- ”крашени€ (942)
- азанши (19)
- ¬оздушные шары (4)
- ниги и журналы (935)
- Ќовый год (918)
- ”рок (773)
- ƒекор (765)
- расота и здоровье (497)
- ѕрически (70)
- —умки (418)
- ѕоделки из бумаги (409)
- ѕлетение из газет (85)
- виллинг (31)
- ќригами (5)
- усудама (5)
- ѕолезные поделки (302)
- —крап (229)
- Ўаблоны (39)
- Ѕумага (34)
- ќткрытки (22)
- Ѕлокнот (14)
- јльбом (8)
- –азное (177)
- —ад, огород (168)
- —оветы (154)
- Ѕисер (129)
- ќбувь (118)
- ѕасха (110)
- —сылки (105)
- ‘лористика (95)
- ”паковка (91)
- ћыло, свечи (81)
- ƒл€ мужчин (72)
- ƒекупаж (68)
- ѕластиковые бутылки (42)
- –астени€ (42)
- ¬ал€ние (33)
- ѕодарки (32)
- »зонить (24)
- “рафареты, шаблоны (23)
- –аскраски (19)
- ћозаика (17)
- ‘отошоп (16)
- ѕоделки из проволки (14)
- »з сенна, веток... (12)
- «онты (11)
- апрон (10)
- —оленое тесто (10)
- –оспись по стеклу (9)
- √анутель (8)
- Ћепка (8)
- Ѕатик (6)
- ѕереводчик (5)
- ‘эн-шуй (4)
- ћои работы (2)
- ѕроволка (2)
- ожа (1)
-ћузыка
- ∆елаю тебе
- —лушали: 2979 омментарии: 0
- Alain Delon & Dalida. Paroles Paroles
- —лушали: 166947 омментарии: 0
- Engelbert Humperdinck The Shadow Of Your Smile
- —лушали: 23561 омментарии: 0
- Mylene Farmer - California
- —лушали: 14485 омментарии: 0
- Mylene Farmer - California
- —лушали: 14485 омментарии: 0
-неизвестно
-ѕодписка по e-mail
-ѕоиск по дневнику
-—татистика
¬ложенные рубрики: Ўаблоны(39), ќткрытки(22), Ѕумага(34), Ѕлокнот(14), јльбом(8)
ƒругие рубрики в этом дневнике: Ўитье(1692), ‘эн-шуй(4), ‘отошоп(16), ‘лористика(95), ”рок(773), ”паковка(91), ”крашени€(942), ”зоры, мотивы(1058), “рафареты, шаблоны(23), —умки(418), —сылки(105), —оленое тесто(10), —оветы(154), —ад, огород(168), –оспись по стеклу(9), –астени€(42), –аскраски(19), –азное(177), ѕроволка(2), ѕолезные поделки(302), ѕоделки из проволки(14), ѕоделки из бумаги(409), ѕодарки(32), ѕластиковые бутылки(42), ѕереводчик(5), ѕасха(110), ќбувь(118), Ќовый год(918), ћыло, свечи(81), ћои работы(2), ћозаика(17), ћастер-класс(1994), Ћепка(8), улинари€(2446), расота и здоровье(497), ожа(1), ниги и журналы(935), апрон(10), »зонить(24), »з сенна, веток...(12), »деи(1129), »грушки(1075), «онты(11), ƒл€ мужчин(72), ƒл€ женщин(2477), ƒл€ дома(1196), ƒет€м(1748), ƒекупаж(68), ƒекор(765), √анутель(8), ¬€зание(5921), ¬ышивка(1712), ¬ал€ние(33), Ѕисер(129), Ѕатик(6)
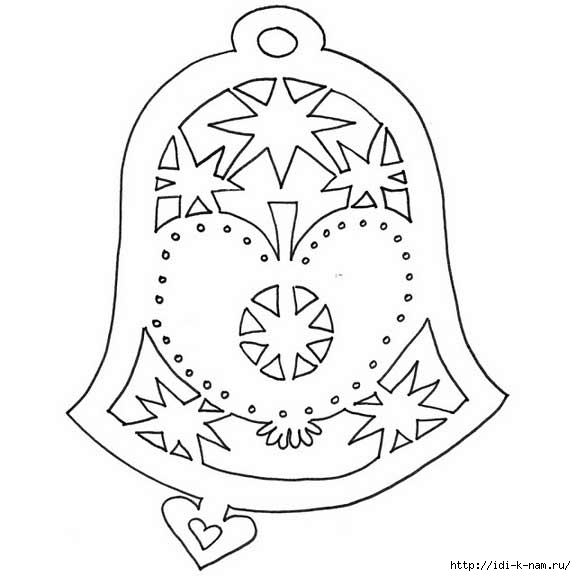
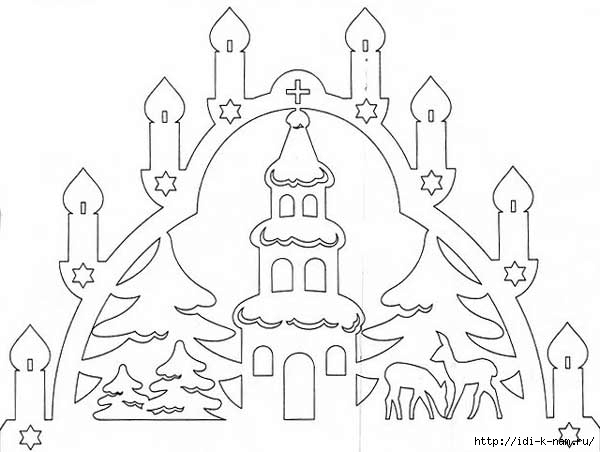
Ќовогодние шаблоны |
Ёто цитата сообщени€ ’ьюго_ѕьюго_рукоделие [ѕрочитать целиком + ¬ свой цитатник или сообщество!]
ћетки: поделки из бумаги новый год шаблоны |
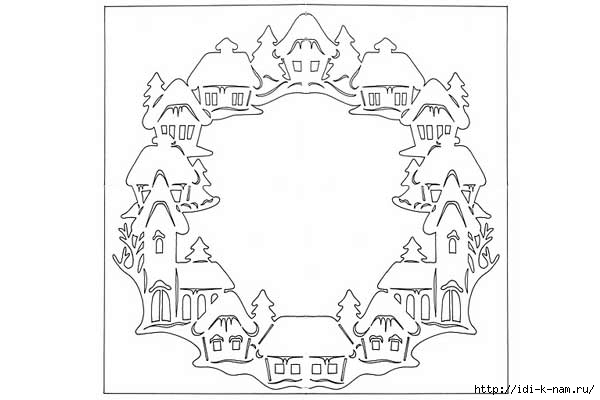
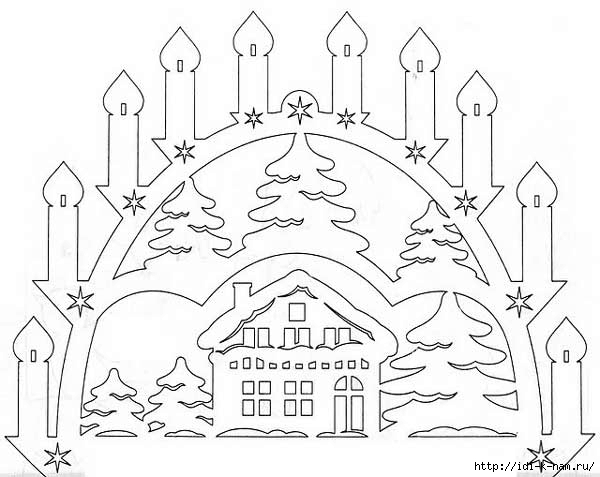
Ќовогодние шаблоны |
Ёто цитата сообщени€ Elnik14 [ѕрочитать целиком + ¬ свой цитатник или сообщество!]
ћетки: шаблоны поделки из бумаги новый год |
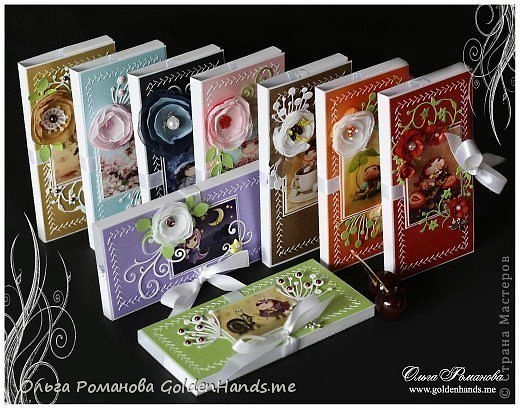
≈ще немного об открытках-шоколадницах. ‘ото-мастер класс |
Ёто цитата сообщени€ alenka46 [ѕрочитать целиком + ¬ свой цитатник или сообщество!]
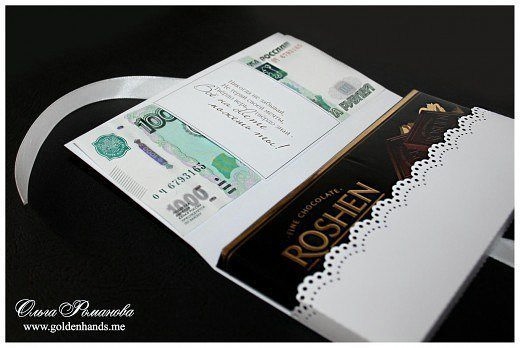
≈ще немного об открытках-шоколадницах. ‘ото-мастер класс.
Ќаверное уже никого не удивишь таким милым и при€тным сюрпризом, как открытка- шоколадница. ѕодарить такой презент можно и по поводу и без... ћожно включить фантазию и красноречие и снабдить такой подарок меткой фразой, юмористическим пожеланием или просто красивой цветочной композицией. «десь все зависит только от ¬ашей фантазии, повода или ситуации. ѕредлагаю ¬ашему вниманию замечательный фото-мастер класс с сайта " ќдноклассники".
2.
ћетки: скрап подарки поделки из бумаги |
ќ“ –џ“ » 8 ћј–“ј |
Ёто цитата сообщени€ NadeikaN [ѕрочитать целиком + ¬ свой цитатник или сообщество!]
ћетки: поделки из бумаги |
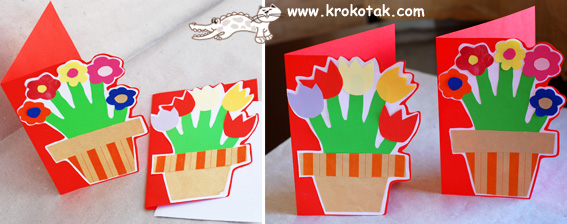
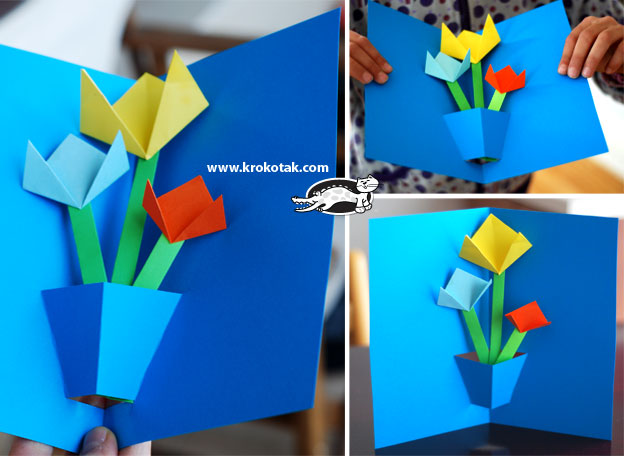
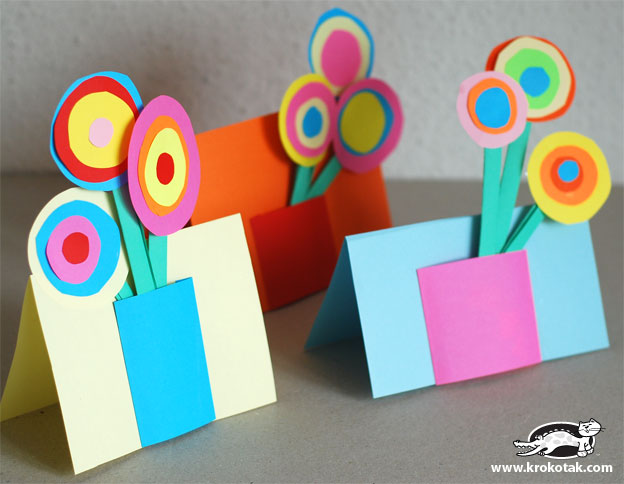
ќткрытки на 8 марта делаем вместе с детьми |
Ёто цитата сообщени€ ћелисса [ѕрочитать целиком + ¬ свой цитатник или сообщество!]
«наете, какой подарок на 8 марта дл€ мен€ самый-самый ценный? Ќет, не угадали! Ёто не золото, и не бриллианты, не духи, не украшени€ и даже не цветы. ƒороже всех сокровищ мира дл€ мен€ открытка, сделанна€ ручонками моего маленького ребенка, с криво приклееной аппликацией, смешными рисунками и неумело написанными поздравлени€ми... “акие подарки € храню с большой любовью и они мне всегда греют душу своим теплом. ’очу предложить вашему вниманию открытки, которые можно сделать вместе с детьми к празднику 8 марта или ко ƒню ћатери.

ћетки: поделки из бумаги развивающее дет€м |
ќрнамент |
Ёто цитата сообщени€ ќл€_»саева [ѕрочитать целиком + ¬ свой цитатник или сообщество!]
ћетки: вышивка крестиком блокнот |
— птичками |
Ёто цитата сообщени€ ќл€_»саева [ѕрочитать целиком + ¬ свой цитатник или сообщество!]
ћетки: вышивка крестиком блокнот |
јльбом |
Ёто цитата сообщени€ ќл€_»саева [ѕрочитать целиком + ¬ свой цитатник или сообщество!]
ћетки: вышивка крестиком новый год альбом |
«аписна€ книжка |
Ёто цитата сообщени€ ќл€_»саева [ѕрочитать целиком + ¬ свой цитатник или сообщество!]
ћетки: вышивка крестиком блокнот |
«аписна€ книжка |
Ёто цитата сообщени€ ќл€_»саева [ѕрочитать целиком + ¬ свой цитатник или сообщество!]
ћетки: вышивка крестиком блокнот |
Ќовогодние открытки |
Ёто цитата сообщени€ принцеска_1 [ѕрочитать целиком + ¬ свой цитатник или сообщество!]
ћетки: новый год мастер-класс поделки из бумаги |
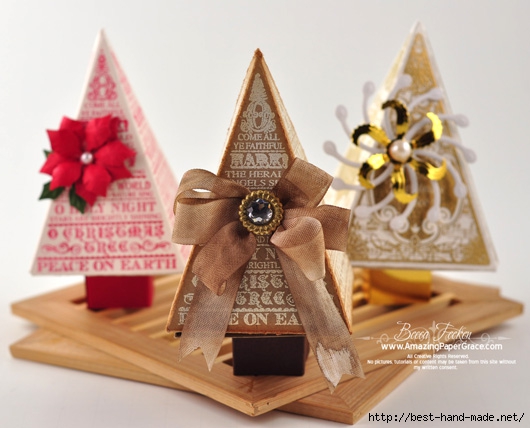
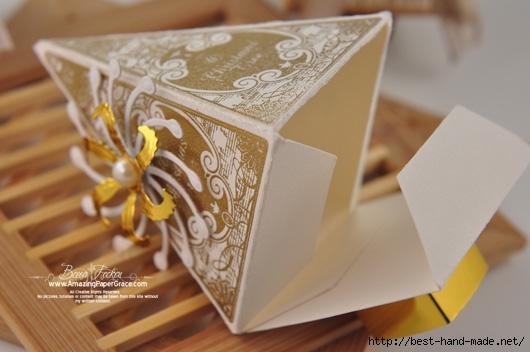
–ождественска€ елочка: скрап-коробочка:) ќчень красиво! ¬идео мастер-класс |
Ёто цитата сообщени€ √лебова_≈лена [ѕрочитать целиком + ¬ свой цитатник или сообщество!]
ѕриветствую вас на страницах моего дневника!
Ћовите еще одну замечательную работу мастерицы Ѕекки, автора ресурса Amazing Paper Grace - скрап-коробочку дл€ упаковки новогодних подарков. ќчень симпатичный вариант. ѕодробности изготовлени€ смотрите в видео мастер-классе. ѕри€тного просмотра!

ћетки: мастер-класс скрап упаковка новый год |
артинки дл€ декупажа. √еографические карты...и средства передвижени€.... |
Ёто цитата сообщени€ fljuida [ѕрочитать целиком + ¬ свой цитатник или сообщество!]
ћетки: декупаж |
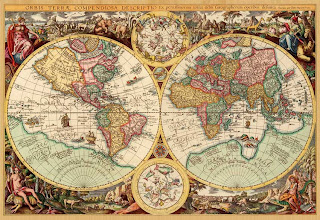
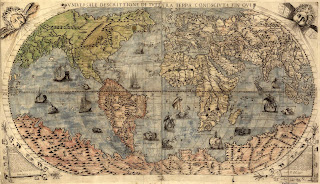
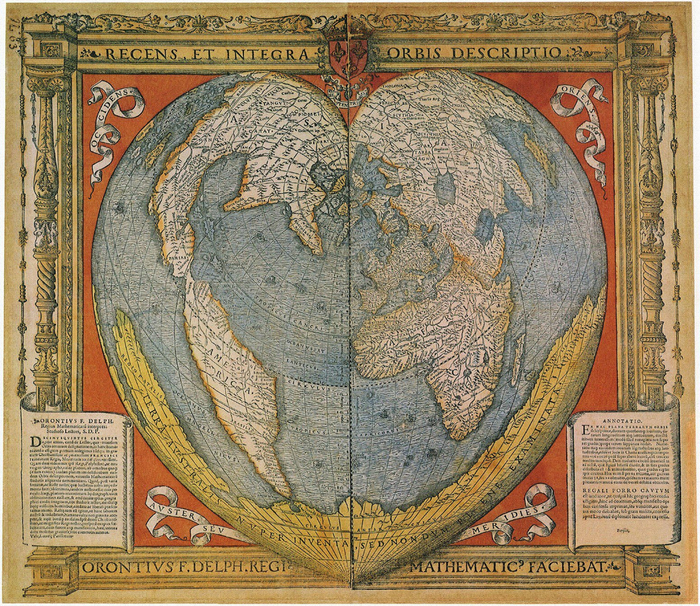
јтлас. арты. |
Ёто цитата сообщени€ AngelinaRace [ѕрочитать целиком + ¬ свой цитатник или сообщество!]
ћетки: скрап |
ћастер-класс - подушечка дл€ булавок и иголок |
Ёто цитата сообщени€ Kasly [ѕрочитать целиком + ¬ свой цитатник или сообщество!]
ћетки: мастер-класс шитье скрап игольницы |
ћ - фонарик |
Ёто цитата сообщени€ tatianaamo [ѕрочитать целиком + ¬ свой цитатник или сообщество!]
ћ - фонарик.
јвтор: ®лка. ƒалее текст автора.


” мен€ получились вот такие фонарики:


» один- новогодний:

ћетки: мастер-класс поделки из бумаги |
997 рисунков дл€ пэчворка, росписи стекла или аппликаций со схемами. |
Ёто цитата сообщени€ Taklis [ѕрочитать целиком + ¬ свой цитатник или сообщество!]
ћетки: шаблоны |
Ўтампики |
Ёто цитата сообщени€ lora-lend [ѕрочитать целиком + ¬ свой цитатник или сообщество!]
ћетки: скрап |
÷веты из кружков |
Ёто цитата сообщени€ Ўрек_Ћесной [ѕрочитать целиком + ¬ свой цитатник или сообщество!]
ћетки: скрап поделки из бумаги |
—крап словарь |
Ёто цитата сообщени€ принцеска_1 [ѕрочитать целиком + ¬ свой цитатник или сообщество!]

ј“— - Artist Trading Cart - небольшие карточки, дизайнерской визитки, открытки, размером 2,5 на 3,5 дюйма (6.35см*8,89 см). Ёто произведение искусства в миниатюре. ќни весьма попул€рны среди людей творческих профессий. »х дар€т или раздают на выставках.
Ѕиговка (—reasing) - нанесение вдавленных линий на плотную бумагу или картон с целью дальнейшего сгибани€ бумаги в этом месте.
Ѕордюр (border) - элемент украшени€ скрапстраницы, служащий зачастую дл€ разграничени€ пространства. ћожет быть выполнен из бумаги, ленты, тесьмы, кружева или при помощи штампов.
<<
ћетки: скрап |
–озы из бумаги дл€ украшени€ свадебных подарков. √отовые шаблоны дл€ распечатки на принтере |
Ёто цитата сообщени€ ћарриэтта [ѕрочитать целиком + ¬ свой цитатник или сообщество!]
ѕредставл€ю вашему вниманию бумажные розы дл€ украшени€ свадебного подарка. ƒа и не только свадебного) ÷ветные шаблоны можно использовать дл€ скрапбукинга, дл€ украшени€ коробочек, дл€ создани€ праздничных тегов, а также, дл€ изготовлени€ цветов из фетра, пластика или другого материала.
ј это - идеи дл€ нагл€дности и вдохновени€
ћетки: скрап шаблоны флористика |
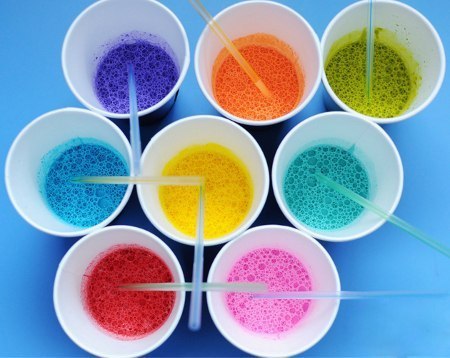
”чимс€ рисовать мыльными пузыр€ми! (скрапбукинг) |
Ёто цитата сообщени€ Tujh07 [ѕрочитать целиком + ¬ свой цитатник или сообщество!]
Ўаг 2. ЅерЄм соломинку и дуем через неЄ в мыльную воду, что бы образовать побольше пузырей.
Ўаг 3. ЅерЄм акварельную бумагу и прислон€ем сверху к пузыр€м. ѕолучаем фантазийные разноцветные узоры.
Ўаг 4. ƒаЄм высохнуть.
»з такой бумаги можно сделать поздравительные открытки родственникам и друзь€м, можно использовать как фон в скрапбукинге и примен€ть в других видах творчества!
ћетки: мастер-класс скрап бумага |
јтлас. арты. |
Ёто цитата сообщени€ AngelinaRace [ѕрочитать целиком + ¬ свой цитатник или сообщество!]
ћетки: скрап |
ћ "Ўтамп из картона" |
Ёто цитата сообщени€ фыр [ѕрочитать целиком + ¬ свой цитатник или сообщество!]
|

ћетки: мастер-класс скрап |
“очечна€ роспись и трафареты |
Ёто цитата сообщени€ keltma [ѕрочитать целиком + ¬ свой цитатник или сообщество!]


» оп€ть - этот небольшой ћ дл€ тех, кто сам рисовать не умеет. ѕредлагаю сделать узоры по трафаретам - это совсем не сложно.
ћетки: мастер-класс трафарет |
ќчаровательные глазки (Ћюбител€м игрушек) |
Ёто цитата сообщени€ Natalica_JA [ѕрочитать целиком + ¬ свой цитатник или сообщество!]
ћетки: игрушки шаблоны |
÷веты из картона |
Ёто цитата сообщени€ фыр [ѕрочитать целиком + ¬ свой цитатник или сообщество!]
ћетки: мастер-класс поделки из бумаги скрап |
ќткрытки дл€ женщин |
Ёто цитата сообщени€ Iulga [ѕрочитать целиком + ¬ свой цитатник или сообщество!]
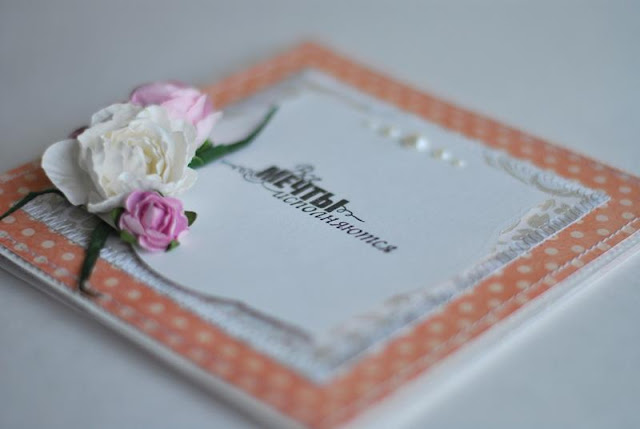
Ќекоторые думают, что дл€ того, чтобы сотворить "девочкину" открытку, достаточно наличи€ цветочков и ленточек.
я считаю, что в любой открытке важен сюжет.
ћои ∆енские открытки - это мечты, сны и воспоминани€.
ћетки: скрап открытки |
¬еточка дикой розы |
Ёто цитата сообщени€ Kasly [ѕрочитать целиком + ¬ свой цитатник или сообщество!]

ћетки: мастер-класс поделки из бумаги скрап |
”красим свой рабочий стол?:)) ћастер-класс,карандашница (скрапбукинг) |
Ёто цитата сообщени€ Tujh07 [ѕрочитать целиком + ¬ свой цитатник или сообщество!]
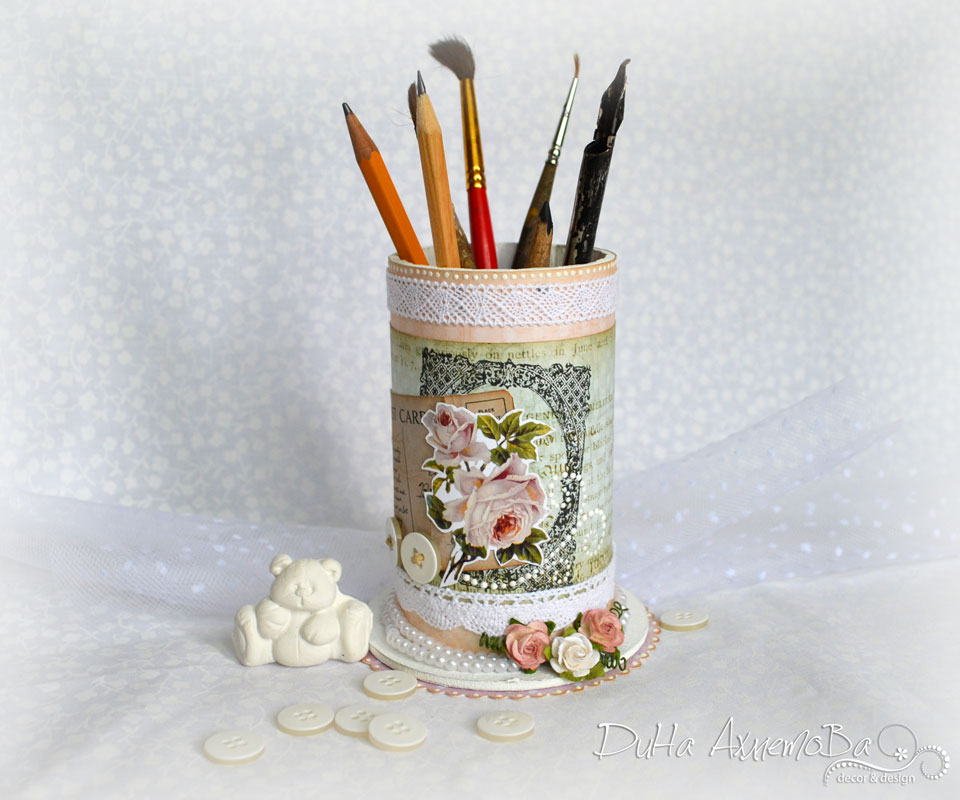
Ётот мастер-класс € делала дл€ блога —крап-фантазии. ≈сли есть вопросы, пишите, € об€зательно отвечу!
—егодн€ € предлагаю вам порадовать себ€ и сделать красивую и очень практичную вещь дл€ своего рабочего стола. ѕодставка дл€ карандашей, ручек, кисточек и чего угодно. “акую идею вы можете вз€ть за основу, а полет фантазии по украшению подставочки в этом случае просто безграничен!
ћетки: мастер-класс скрап полезные поделки |
оллекци€ ћ . |
Ёто цитата сообщени€ Ѕорюсь_с_маразмом [ѕрочитать целиком + ¬ свой цитатник или сообщество!]
÷веты.
http://inessgold.blogspot.com/2011/05/138.html
354 мастер-класса!!!!!!!!
¬ау!!!!
—пасибо!!!!!!!!!!!!!!!!!!!!!!!!!!!!!!!!!!!!!!!!!!!!!!!!!!!!!!!!!!!!!!!!!!!!!!!!!!!!!!

—ери€ сообщений "ћастер-класс":
„асть 1 - ћ по открыткам
„асть 2 - ћиленько, простенько, но прикольно))
...
„асть 4 - ѕодборка очень полезных ћ
„асть 5 - оллекци€ ћ .
„асть 6 - оллекци€ ћ .
„асть 7 - ћ коробочка без кле€.
„асть 8 - Ќет, не оскудеет иде€ми земл€ русска€...
...
„асть 20 - ќткрытка- шоколадница. ћастер-класс
„асть 21 - ак сделать юбку из фатина.
„асть 22 - ћ розочки:)
ћетки: мастер-класс скрап |
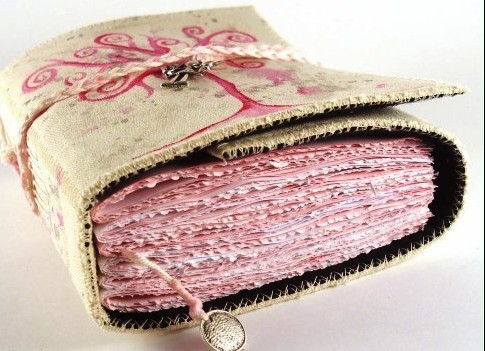
Ѕолее 80 ћ по переплетам и блокнотам, обложкам дл€ паспорта и |
Ёто цитата сообщени€ Krunia [ѕрочитать целиком + ¬ свой цитатник или сообщество!]

“ут много интересного и полезного: http://inessgold.blogspot.com/2011/09/blog-post_04.html
ћетки: мастер-класс скрап |
ящик дл€ писем!!! |
Ёто цитата сообщени€ Joli_M [ѕрочитать целиком + ¬ свой цитатник или сообщество!]
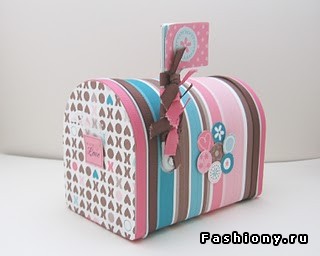
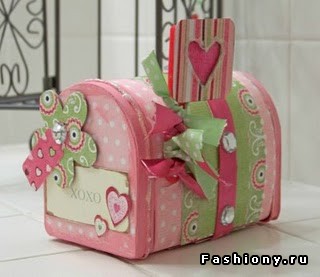
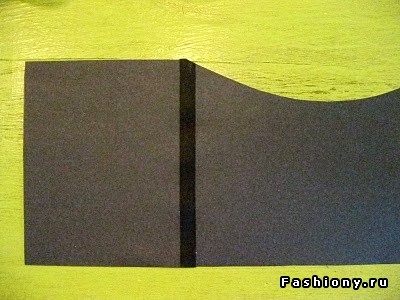
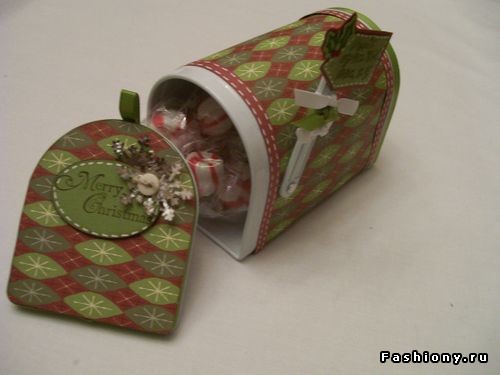
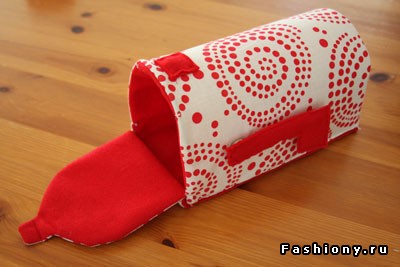
ѕриобретите небольшой кусочек фетра или картона, и создайте тепленький почтовый €щичек (:
Ќагл€дное пособие:

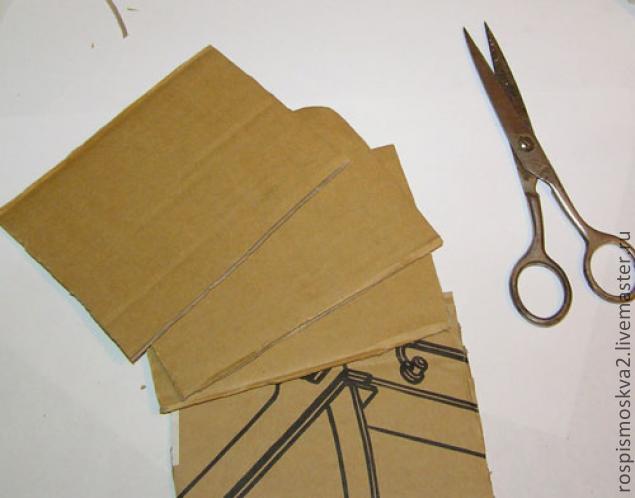
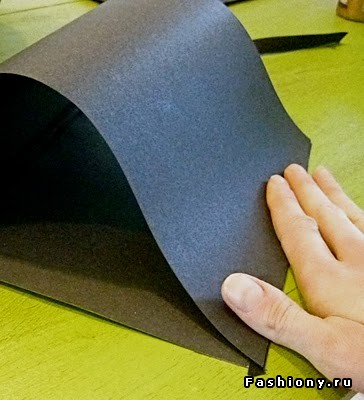
- ¬ырезать исход€ из выше представленного фото 4 детали. –азмер- по вашему желанию*
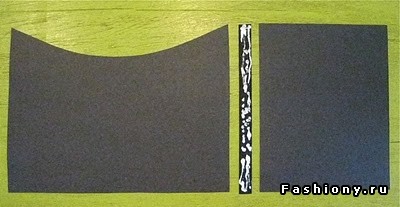
- ѕри помощи узкой отделочной ленты, длинной равной длине основани€ €щика, смазанной клеем- проклеить между собой дно и верхнюю часть.
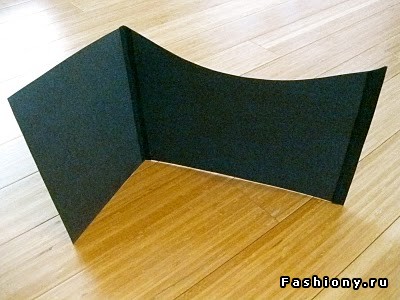
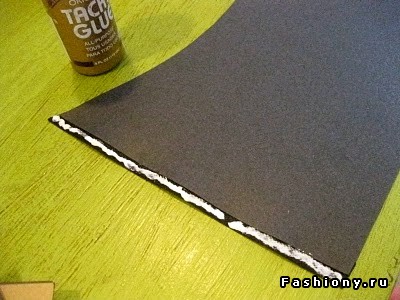
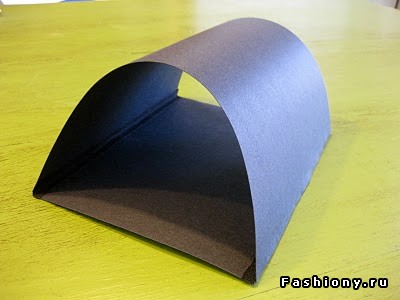
ќстаетс€ прикрепить крышки...
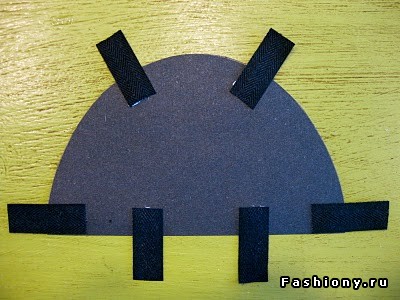
6 кусочков ленты приклеить на маленькую крышку, как указано на фото.
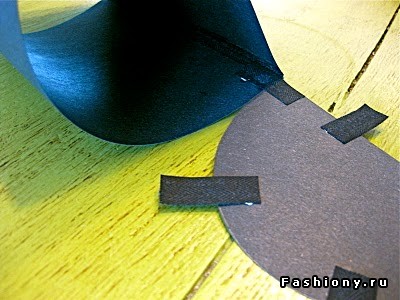
ќставшуюс€ часть ленты приклеить с внутренней стороны почтового €щика.
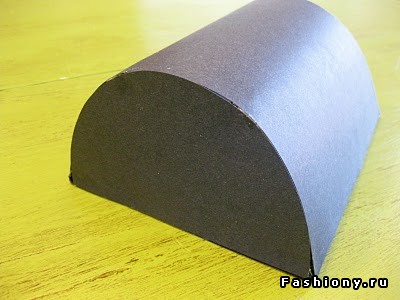
«адн€€/ нижн€€ крышка приклеена.
ѕередн€€/ верхн€€ больша€ крышка проклеиваетс€ таким образом, чтобы она могла открыватьс€.
ƒекорируем по вкусу и в результате вешаем на дверь такое произведение.

* из такого почтового €щика можно сделать как настольный €щик дл€ ручек, так и €щичек, к примеру, дл€ ванных принадлежностей. ¬се зависит от длинны €щика.
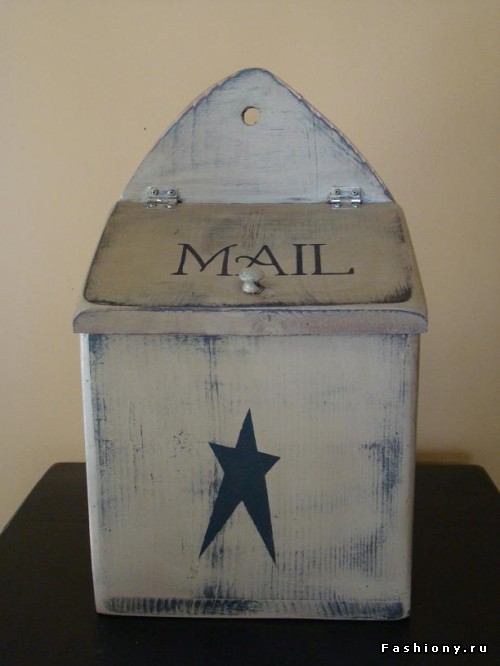
“акой же почтовый €щик можно сшить и из ткани.
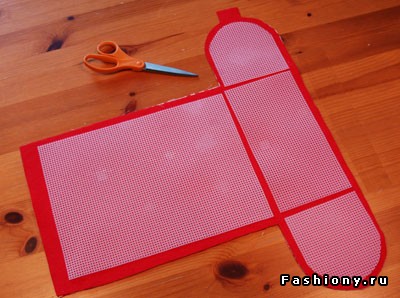
¬ыкройка дл€ тканевого почтового €щика. ћежду внутренней тканью и наружной дл€ прочности прокладываетс€ пластикова€ сетка.
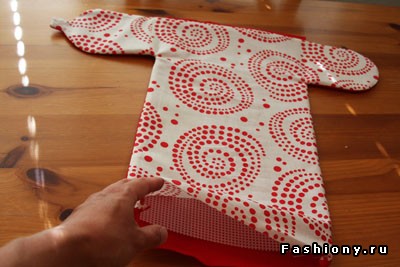
—шиваютс€ ткани, а сгибающиес€ часть- прострачиваютс€.
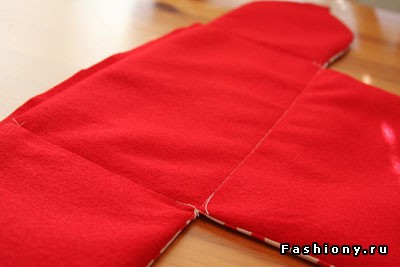
Ѕокова€ и задн€€ части пришиваютс€ вручную.
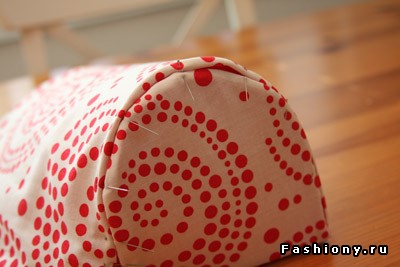
—боку крепим магнитную кнопку.
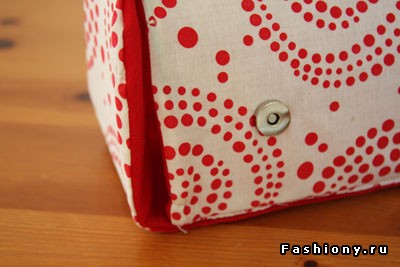
¬нутри зажимаем "усики".
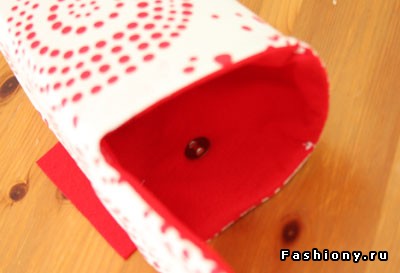
‘лажок уведомлени€...
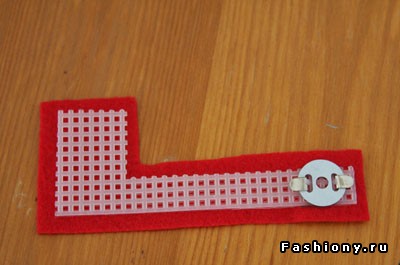
—лой красной плотной ткани, пластикова€ сетки и кнопка.
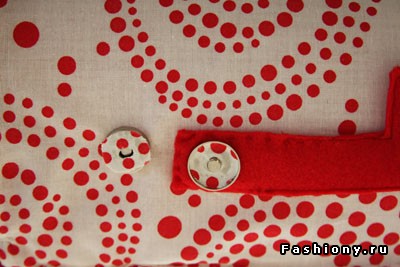
—шиваем между собой части и получаем флажок со второй частичкой магнитной кнопки.
» вот результат.
ћетки: мастер-класс скрап |
ѕасхальные скрап-фигурки на шпажках. ћастер-класс |
Ёто цитата сообщени€ √лебова_≈лена [ѕрочитать целиком + ¬ свой цитатник или сообщество!]
ƒоброго времени суток!
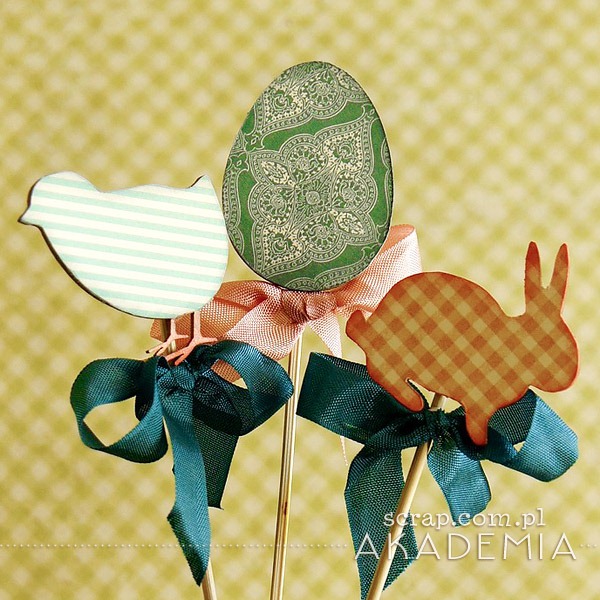
„удесный вариант декора к любому празднику - символическа€ фигурка на шпажке. ћожно украсить праздничный стол, дополнить композиции или просто воткнуть шпажку в цветочный горшок /€ последним способом чаще всего и пользуюсь:) ј можно вручить такие штучки в подарок гост€м:) ћы с вами посмотрим как сделать скрап-вариант пасхальных фигурок на шпажках от Mamajudo, причем автор рекомендует воспользоватьс€ уже готовыми шаблонами, но ничего - нам не привыкать, мы и вырезать можем - из старой обувной коробки, например:)
’очу порекомендовать вам новый бесплатный видеокурс от јлександра Ѕорисова - ак создать блог за 3 часа! –аскрутить! «аработать! ћне тем более при€тно это делать, так как € €вл€юсь преданным читателем интересного и необычайно полезного дл€ блоггеров ресурса, созданного јлександром - Isif-life.ru. „итайте, изучайте и успешно зарабатывайте на своем блоге!
ћетки: пасха |
÷веты своими руками |
Ёто цитата сообщени€ fotofeua [ѕрочитать целиком + ¬ свой цитатник или сообщество!]
јльбом с моими работами foto.mail.ru/mail/feuakracotka/_myphoto/19.html
*******************************************
Først vil jeg lage ”blonde blomster”. Til dette trenger du en punch med bølgekant.
Dette er de tre punchene jeg har brukt.
First I will make some “lace flowers”, and for this you need a scalloped punch.
These are the punches that I used.
Turn the punch upside down, and do one petal at the time.
Here you can see my flowers, before I distress the edges, and decorate them.
Almost done.
Her er de ferdige blomstene.
Here my flowers are finished.
Nå vil jeg lage en stor, artig blomst.
Her må du bruke dobbeltsidig ark, og det du trenger er to store, og to små blomster, og en liten sirkel. Sirkelen vil ikke synes.
Now I will make a big flower. You need a two sided pattern paper, and punch out two large, and two small flowers, and a small circle. The circle will not show.
Fold all the flowers.
Fasten the two large parts next to each other, by using the small circle.
Lim de to små delene sammen, på tvers over skøyten.
Turn the flower, and do the same with the small parts.
Decorate the center, and your flower is done.
Til mine neste blomster har jeg brukt kartong, stoff og dobbeltsidig teip. Alle typer stoff kan brukes, men det blir penest om det ikke er alt for tykt.
For my next flowers I have used cardstock, fabrics, and double sided adhesive tape. All kind of fabric can be used, but it is best if it is not too thick.
I start with fastening fabric to the cardstock.
Så tegner jeg blomsten på baksiden, og klipper ut for hånd, siden punch og stoff er en dårlig kombinasjon.
Then I drew the flower, and cut it out by hand. Punch and fabrics are a bad combination.
Her har jeg laget en liten blomst også, og sotet kantene med litt Distress. Nå mangler det bare litt pynt i midten.
Now I have made a small flower as well, and distressed the edges. Now I just decorate the center, and my flower is done.
*******************************************************
Min siste blomst er veldig enkel å lage, og her kan du få brukt opp litt restebånd.
My last flower is easy to make, and if you have some ribbon leftovers, it will be perfect to use here.
Make a hole in the center of the flower, and cut small bows on each petal with a scalpel.
Now you use the ribbon, like shown in the pictures.
********************************************************
Til slutt har jeg laget noen kort med de nye blomstene mine.
Here I have made some cards with my new flowers.
I hope you have enjoyed my tutorial, and that you have got some new ideas that you would like to try out.
—ери€ сообщений " вилинг":
„асть 1 - вилинг
„асть 2 - ћастер класс по квилингу
...
„асть 5 - ќригами- «вездочки счасть€. ¬идио урок.
„асть 6 - ќткрытка вышита€ лентами.
„асть 7 - ÷веты своими руками
„асть 8 - –озочки из бумажной или атласной ленты.
„асть 9 - »дейки дл€ всех видов торчества
...
„асть 11 - Ѕумажные шары.
„асть 12 - Ўкатулка к ’ристову ѕразднику. вилинг.
„асть 13 - —алфеточный квилинг
—ери€ сообщений "ќткрытки своими руками":
„асть 1 - ƒетские бантики и ленточки в горошек.
„асть 2 - ќткрытка на новый год.
„асть 3 - Ќовогодние игрушки «везда
„асть 4 - ÷веты своими руками
„асть 5 - –озочки из бумажной или атласной ленты.
„асть 6 - »деи дл€ открыток. нига.
...
„асть 20 - ¬ытынанки
„асть 21 - ќткрытка-бюстик.
„асть 22 - ѕродам репсовые ленты с рисунком , атласные ленты с рисунком
ћетки: скрап |
Ўаблон "÷веток с лепестками в виде сердечек" |
Ёто цитата сообщени€ ¬арварушка_–укодельница [ѕрочитать целиком + ¬ свой цитатник или сообщество!]


ћетки: скрап |
¬оздушные капли росы ћ |
Ёто цитата сообщени€ magpie1 [ѕрочитать целиком + ¬ свой цитатник или сообщество!]
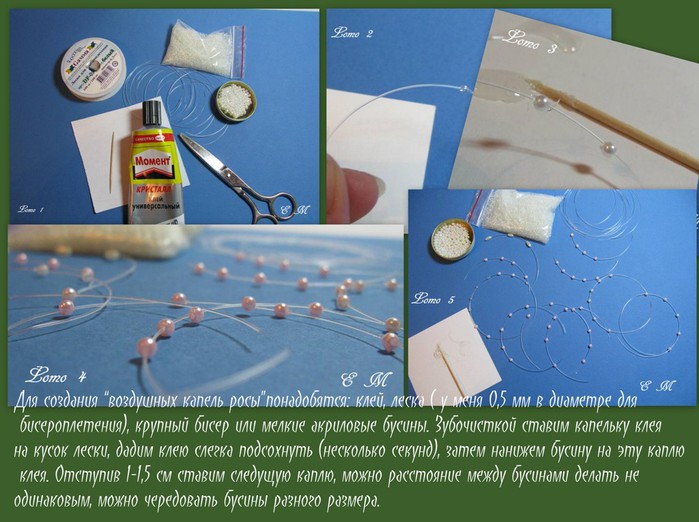
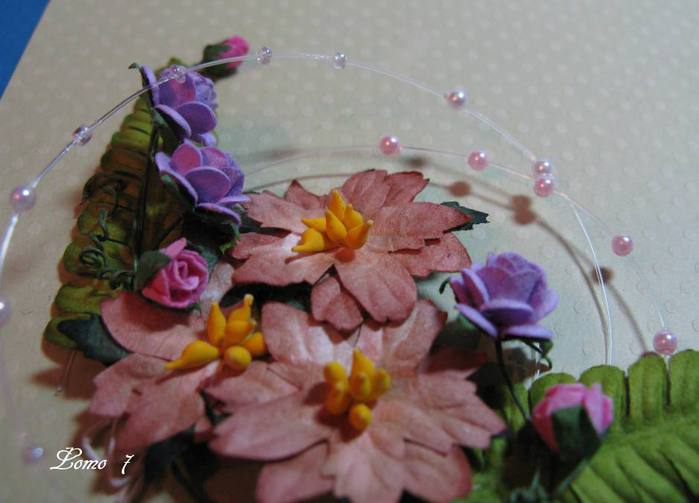
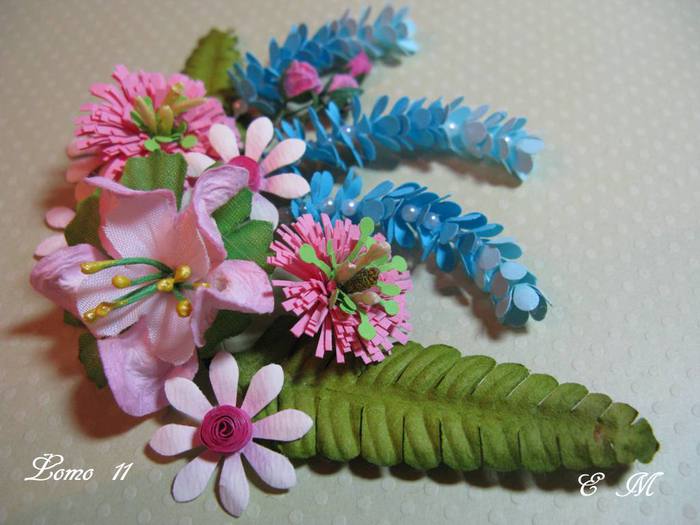
¬ своих скрап-поделках € часто примен€ю такой элемент, который назвала "воздушные капли" (как его называют по-другому не знаю). ƒелать его не сложно:
ј так капли смотр€тс€ в работах:
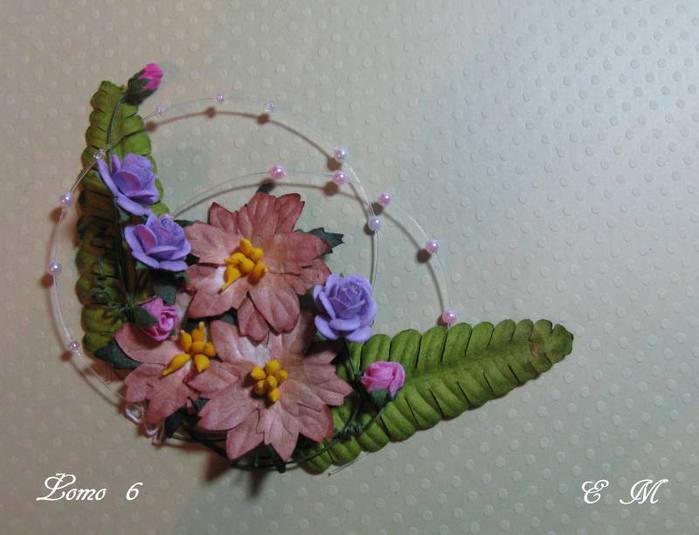
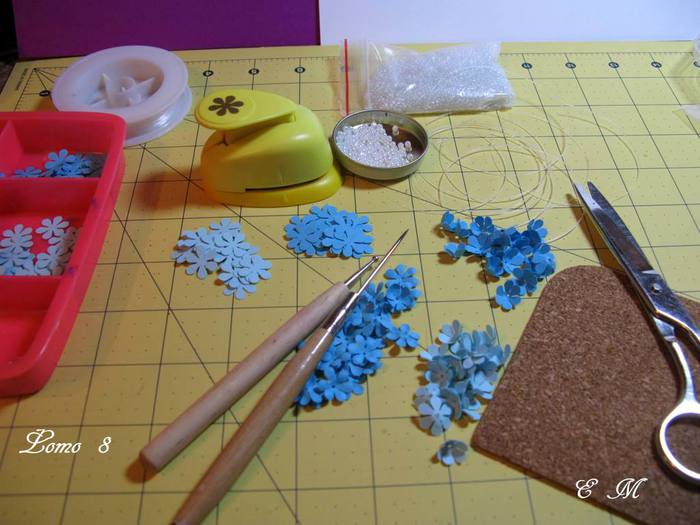
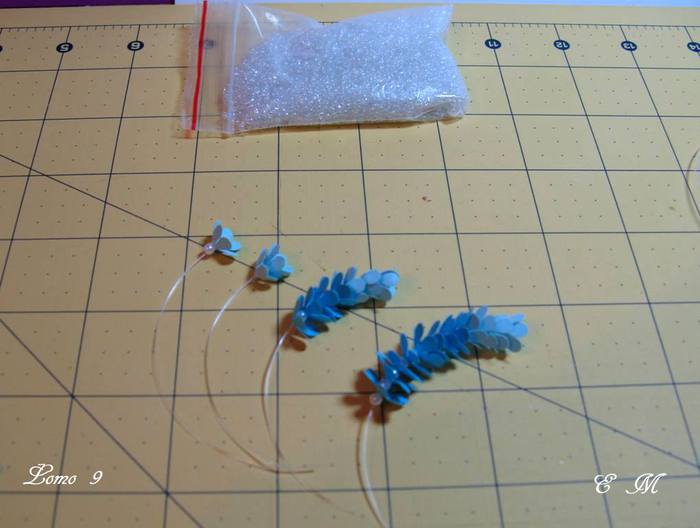
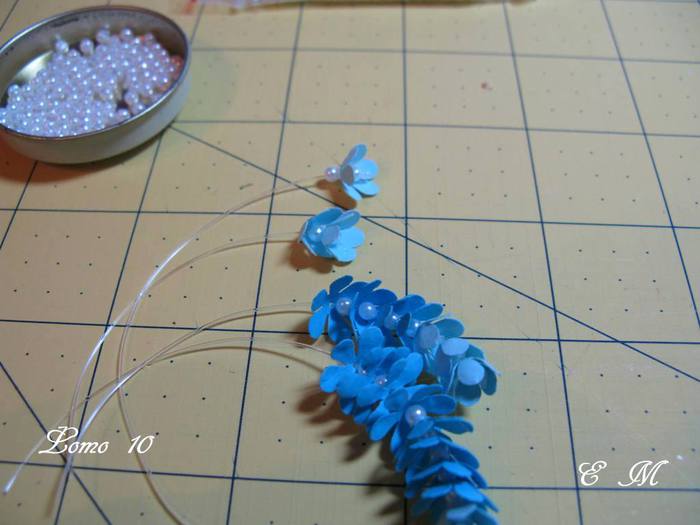
»спользу€ этот не хитрый способ можно собрать вот такую цветочную веточку. ¬озьмем дырокольные цветы голубого и синего цвета, плотность бумаги 160 г/м2. ÷ветам с помощью инструмента дл€ тиснени€ придать нужную форму, с помощью шила проколоть в центре дырку. „ереду€ цветы и бусины нанизать на леску (бусину об€зательно сажать на клей) . ¬еточку начинала с бусины и заканчивала бусиной.
ћетки: мастер-класс скрап |
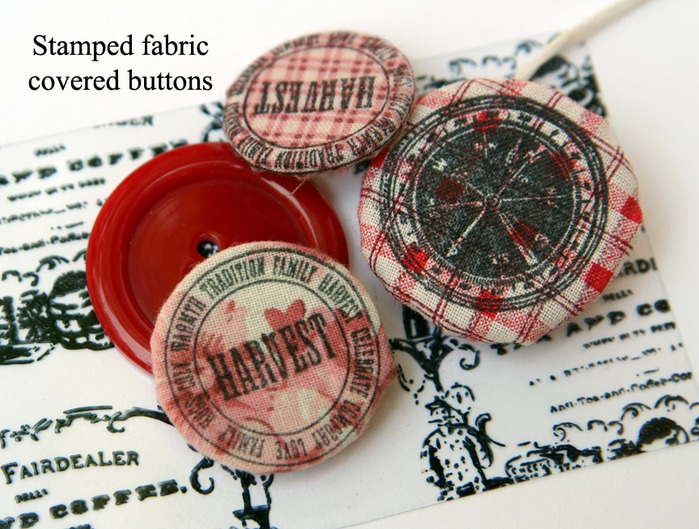
ѕуговки дл€ альбома.»де€+ћ |
Ёто цитата сообщени€ “э_амо [ѕрочитать целиком + ¬ свой цитатник или сообщество!]
ћетки: мастер-класс скрап украшени€ |
Atena |
Ёто цитата сообщени€ белка28 [ѕрочитать целиком + ¬ свой цитатник или сообщество!]
ћетки: скрап декор декупаж пасха |
÷елый набор бумажных цветов от ASTORIA |
Ёто цитата сообщени€ Fly-Tata [ѕрочитать целиком + ¬ свой цитатник или сообщество!]
¬еликолепный и подробный мастер-класс по изготовлению разнообразных цветов, которые вы видите на фотографи€х ниже. ≈го любезно предоставила в »нтернет ASTORIA . ћало того, она ещЄ и лекала даЄт дл€ каждого цветка. ≈сли будете копировать, об€зательно укажите авторство, автор настаивает: http://asti-n.ya.ru/replies.xml?item_no=184
ќт мен€ лично большое спасибо ASTORIA за такую кропотливую работу и щедрость. ѕодтоговить такой мастер-класс дело трудное.


ћетки: мастер-класс скрап |
÷веты из бумаги ћ |
Ёто цитата сообщени€ pogtanya [ѕрочитать целиком + ¬ свой цитатник или сообщество!]
ћетки: мастер-класс скрап |
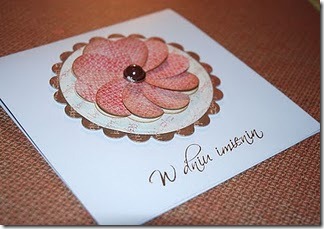
”крашение дл€ открытки |
Ёто цитата сообщени€ ЋЄкочка [ѕрочитать целиком + ¬ свой цитатник или сообщество!]
ѕростой и интереснй ћ - цветочек из сердечек.
scraphouse.ru/ideas/postcards/decoration-flower-cards.html
ћетки: мастер-класс скрап |
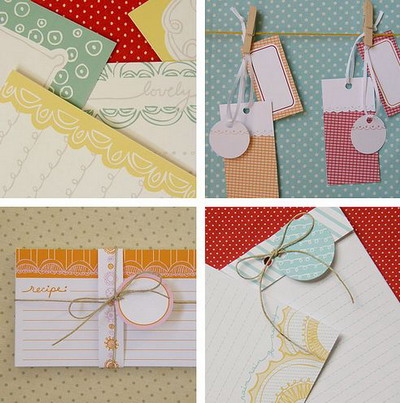
—амодельные бирочки к подаркам |
Ёто цитата сообщени€ Sontina [ѕрочитать целиком + ¬ свой цитатник или сообщество!]
„то-то мен€ в последнее врем€ "пробило" на упаковку подарков и вс€ких заморочек в этом духе ј тут ещЄ в ћагии рукодели€ подн€лась тема бирок. ¬от и решила € сделать подборочку по биркам дл€ упаковки подарков. ¬едь с этим, казалось бы, невзрачным элементом подарок будет выгл€деть куда солиднее. » получать его будет куда при€тнее!
ћетки: скрап |
ћастер-класс по изготовлению цветов дл€ скрапбукинга |
Ёто цитата сообщени€ Neonay [ѕрочитать целиком + ¬ свой цитатник или сообщество!]

я не думала что такую красоту можно сделать вручную. я покупала такие цветочки в интернете в специализированных магазинах, по 3.5 грн. за 1 шт. ј на самом деле не так сложно сделать самому такую красоту.
¬от на этом сайте выложен подробный пошаговый мастер-класс. я благодарна автору за такую красоту. ѕопробую сделать дома сама, если получитьс€, об€зательно покажу результат.


ћетки: мастер-класс скрап |
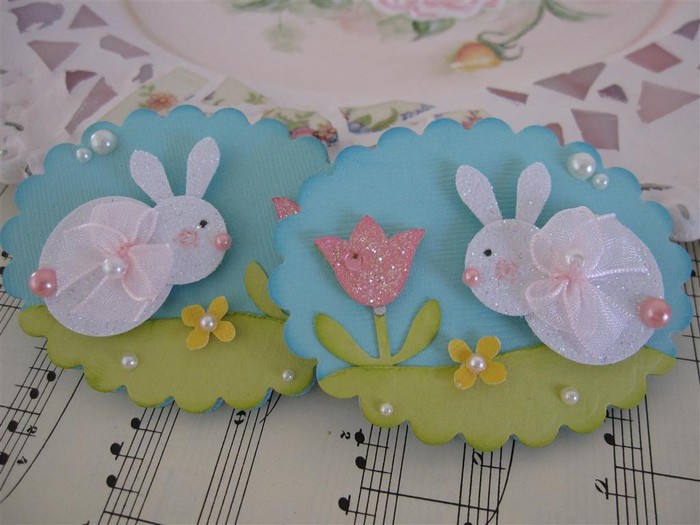
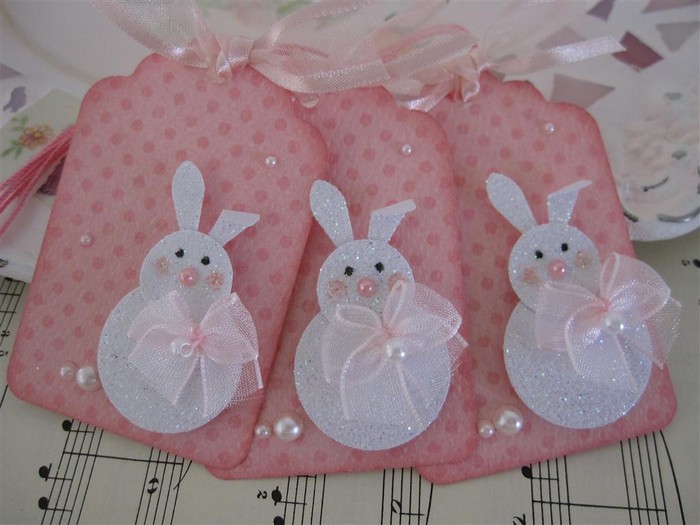
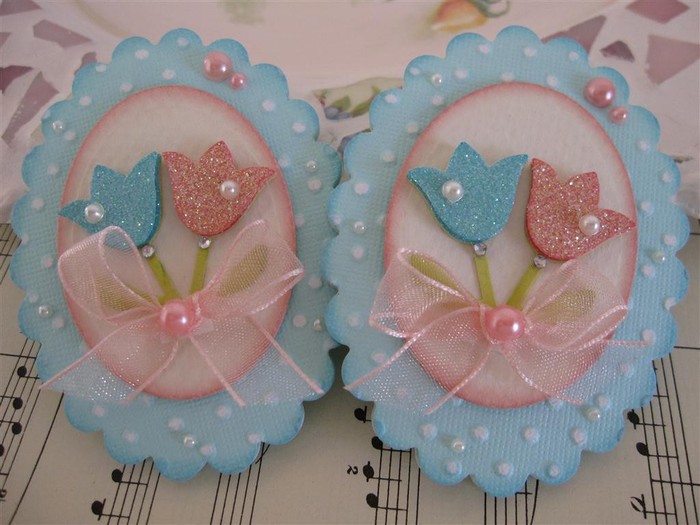
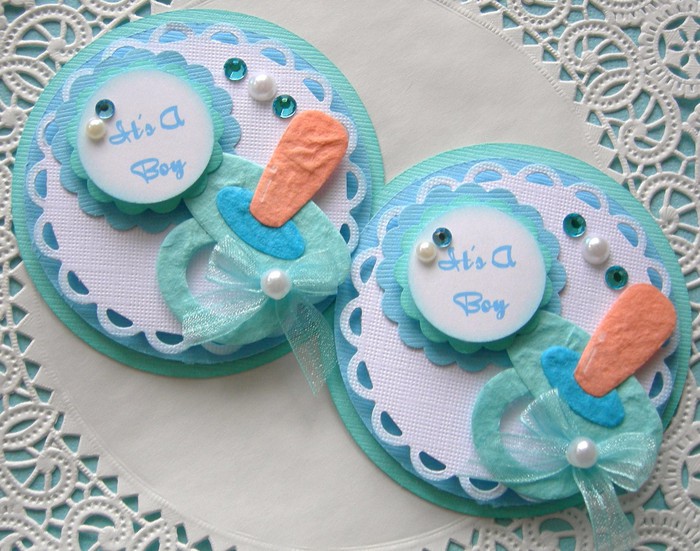
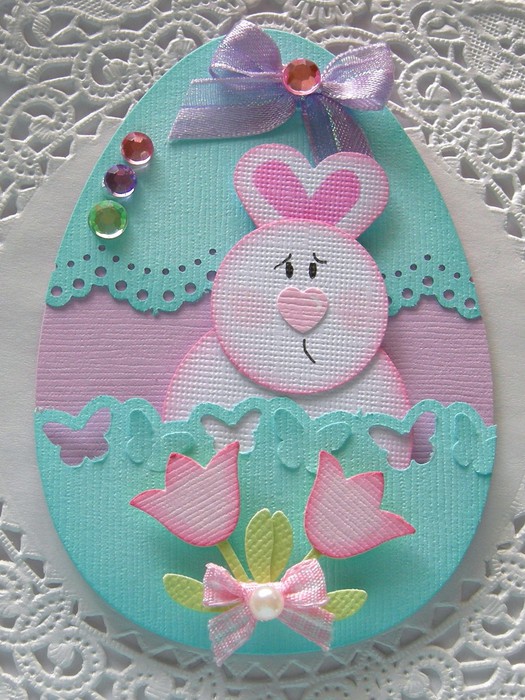
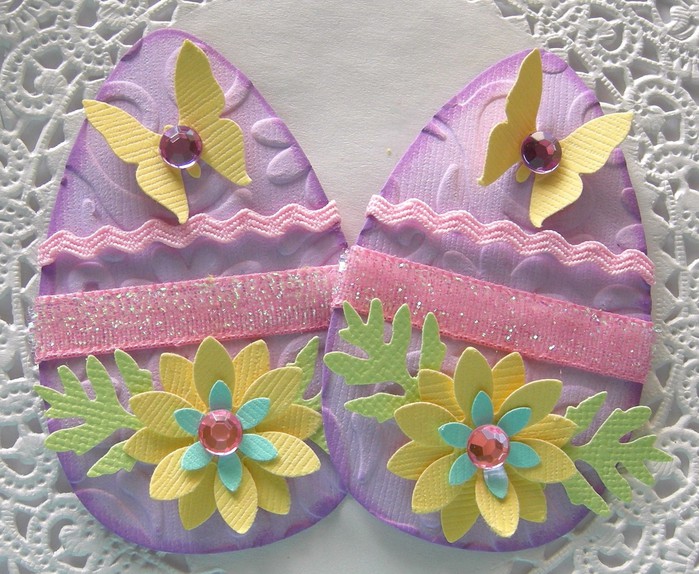
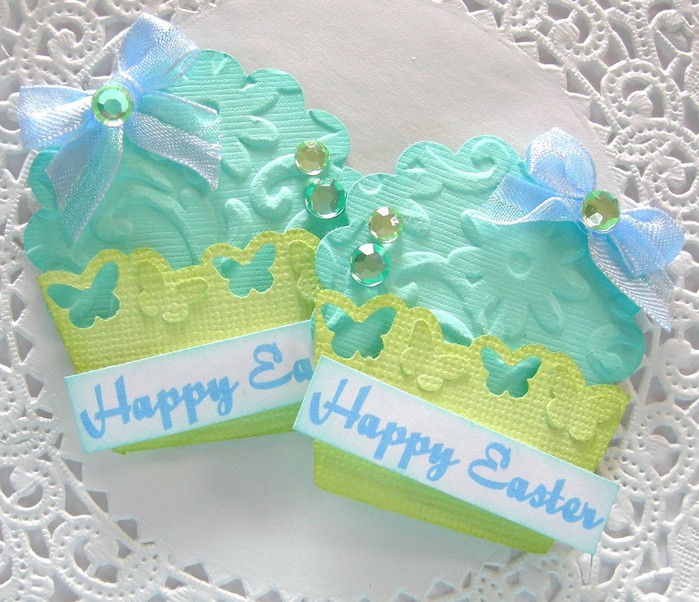
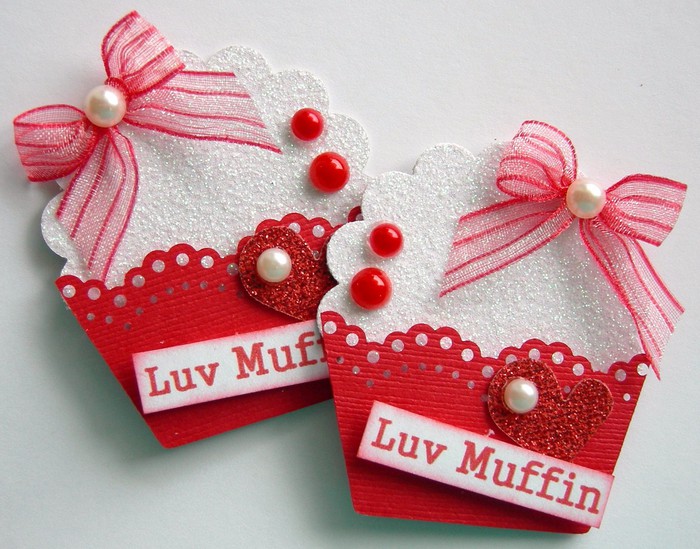
ѕасхальное и не только... |
Ёто цитата сообщени€ »юньска€_акварель [ѕрочитать целиком + ¬ свой цитатник или сообщество!]


ћетки: пасха поделки из бумаги |
орзиночка к ѕасхе. ћ . |
Ёто цитата сообщени€ tatianaamo [ѕрочитать целиком + ¬ свой цитатник или сообщество!]
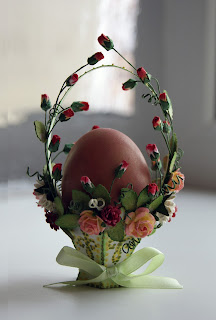
орзиночка к ѕасхе. ћ .

ƒл€ начала вырезаем 6 одинаковых деталей вот по этой выкройке:

и ручку дл€ корзинки шириной примерно 7-8 мм и длиной 17-18 см

Ќа этом этапе можно начать украшать нашу будущую корзиночку, € слегка тонировала кра€ каждой детали дисстресс-чернилами.
Ќарезаем остатки бумаги на полоски шириной примерно 5 мм и длиной 3-4 см. “еперь самое сложное - склеиваем наши детали между собой. —ложно это, потому что линии стыка не пр€мые, а слегка изогнутые. ƒелаем это в 2 этапа , сначала стык выше "талии":


«атем нижнюю часть отгибаем наружу и склеиваем:

“очно также соедин€ем последний стык:

ѕриклеиваем ручку и "пример€ем" €йцо, идеальный размерчик!:)

ќсталось лишь украсить корзиночку на ваше усмотрение! » еще два примера дл€ вашего вдохновени€!

ћетки: мастер-класс скрап пасха |
ѕасхальные открытки!!! |
Ёто цитата сообщени€ Joli_M [ѕрочитать целиком + ¬ свой цитатник или сообщество!]
»сточник http://kak-sdelat-samoj.ru/pasxalnye-otkrytki/
1.

2.

3.

4.

5.

6.

7.

8.

ћетки: пасха открытки |
ќткрытки к 8 ћарта |
Ёто цитата сообщени€ goel [ѕрочитать целиком + ¬ свой цитатник или сообщество!]


ћетки: вышивка крестиком открытки |
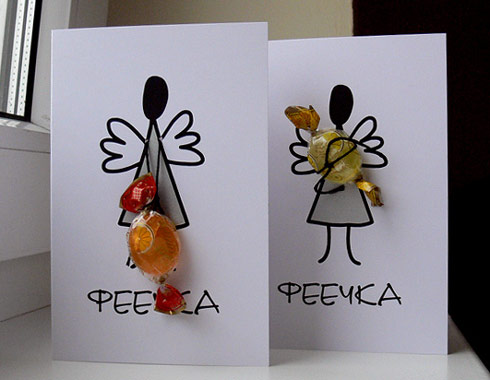
‘еечка-открытка с ручечками |
Ёто цитата сообщени€ Joli_M [ѕрочитать целиком + ¬ свой цитатник или сообщество!]
ћетки: идеи скрап открытка |
Ўкатулочка своими руками с подробным ћ . |
Ёто цитата сообщени€ fljuida [ѕрочитать целиком + ¬ свой цитатник или сообщество!]
ѕосмотрите очень подробный мастер-класс
ћетки: мастер-класс скрап полезные поделки |


