-Рубрики
- Вязание крючком (294)
- Разное (37)
- Амигурами (35)
- Плед (30)
- Шнуры (23)
- Бантики, сердечки,бабочки (22)
- Новогоднее (16)
- Узоры (16)
- Совушки (11)
- Пинетки (9)
- Пасха (8)
- Салфетки (8)
- Поделки (6)
- Листики (5)
- Прибавки-убавки (4)
- Соединение мотивов (3)
- Шапки и шарфы (3)
- Смена цвета (1)
- Тапочки,носки (12)
- Туники (9)
- Цветы (40)
- Вязание спицами (183)
- Шапки и шарфы (60)
- Узоры Косы (28)
- Варежки, митенки (27)
- Разное (26)
- Узоры (23)
- Носочки,тапочки (13)
- Другой цвет (7)
- Набор и виды петель (6)
- Плед (5)
- Сшивание (3)
- Резинка (3)
- Протяжки (2)
- Шитье (130)
- Игрушки (25)
- Канзаши (9)
- Подушки (8)
- Платья,халаты (8)
- Цветы из ткани (76)
- Лепка (62)
- Бусины (18)
- Цветы (9)
- Разное (8)
- Соленое тесто (7)
- ХФ (11)
- ХФ рецепт (15)
- Аксессуары (47)
- Браслеты (21)
- Колье,бусы (17)
- Бисероплетение (16)
- Пояс (4)
- Огород (35)
- Плетение из газет (10)
- Обручи (5)
- Переделки (3)
- Банты (1)
- Мои работы (0)
- Бабочки (11)
- Бумага (199)
- Разное (4)
- Окраска бумаги (3)
- Вытынанки (12)
- Гофрированная бумага (36)
- Из салфеток (7)
- Квиллинг (24)
- Оригами (11)
- Плетение (10)
- Рамка (11)
- Упаковка (26)
- Цветы из бумаги (49)
- Новый год (27)
- Пластик (18)
- Разное (60)
- Рецепт (5)
- Снежинки (3)
- Трафареты (7)
-Поиск по дневнику
-Подписка по e-mail
-Статистика
Бусины снежинки |
I started with a blue colored clay that has some pearl in it for a nice sheen. You can also use a transluscent instead but the blue is easier to see in the photos.
1 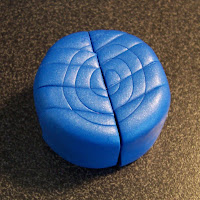 2
2 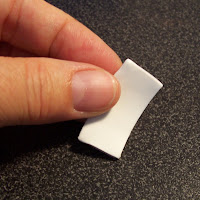
1. Form your clay into a round plug about 2" in diameter and 1-1/2" high. Cut the plug in half down the center. Separate the halves and make cuts into each piece making both sides equal as shown in the photo.
2. For the snowflake "veins" I used a mixture of half white and half pearl clay and rolled it out on the #2 setting of my pasta machine which is the second thickest setting. Cut pieces in the following sizes to fit into the cut areas (see photos 2 & 3):
2 pieces 1/4" wide x 1-1/2" (height of you cane)
2 pieces 3/8" wide x 1-1/2"
2 pieces 1/2" wide x 1-1/2"
2 pieces 5/8" wide x 1-1/2"
Pinch and taper one side of the long edge of each piece (pic 2).
3 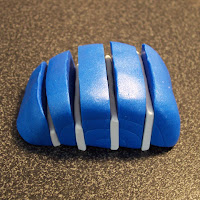 4
4 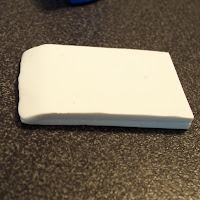
3. Place the white pieces between the blue clay as shown in photo 3 with the tapered ends facing up.
4. For the center vein, use a double thickness of the white/pearl clay and cut a piece 1-1/2" x 1-3/4". Pinch and taper along the 1-1/2" edge on one side (pic 4).
5 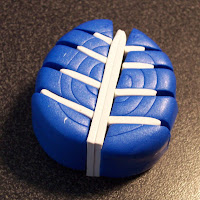 6
6 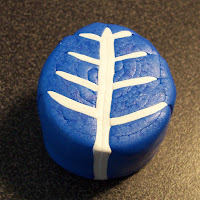
5. Insert the center vein lining up the squared end at the bottom and the tapered end at the top.
6. Press the clay together into a tight round plug again.
7 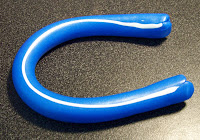 8
8 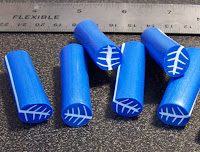
7. Reduce the cane to about 14" or longer. Trim off the distorted ends.
9. Cut the remainder into 6 or 8 pieces -- depending on how many sections you want to use.
9 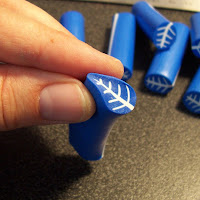
9. Pinch the top end of each cane piece like forming a flower petal or leaf.
10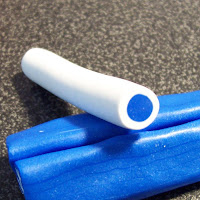 11
11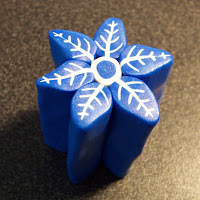
10. For the snowflake center, make a bulls eye cane with blue as the center (3/8" or 10 mm diameter) and wrapped in the white/pearl rolled out at a #3 PM setting (3rd thickest).
11. Arrange the snowflake cane pieces around the center matching up the stems so they line up and touch the center white.
12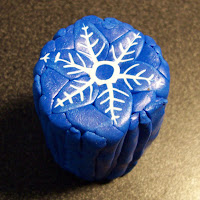 13
13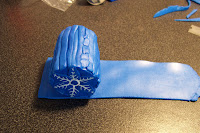
12. Fill in around with more blue clay, packing it tightly.
13. Wrap the cane in a sheet of blue clay.
14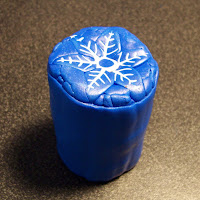 15
15
14. The cane is now ready to reduce.
15. Here are my snowflake canes reduced down to several sizes ready to use.
| Рубрики: | Лепка/Бусины |
| Комментировать | « Пред. запись — К дневнику — След. запись » | Страницы: [1] [Новые] |


