-–убрики
- јнглийский €зык (20)
- јппликаци€ (28)
- крючком (19)
- аудиокниги (15)
- аудиоспектакли (11)
- јфрика (18)
- Ѕабочки (24)
- Ѕисер (53)
- Ѕукет из конфет (23)
- Ѕутылки (10)
- ¬ал€ние (21)
- авторские игрушки (1)
- бусины (2)
- игрушки (9)
- обувь (2)
- сумки и др. (7)
- ¬месте с детьми (36)
- бумага (6)
- лепка (14)
- ¬ышивка (6)
- ¬€заные игрушки (117)
- домики (1)
- зайчики (11)
- оты (21)
- мишки (23)
- одежда дл€ в€зунчиков (12)
- ѕтички (32)
- собачки (4)
- ƒача (9)
- ƒжинсовый мир (7)
- ƒл€ дома (5)
- ƒомики (46)
- «акладки (1)
- «доровье (14)
- »гольницы (33)
- »грушка дл€ игрушки (27)
- »нтерьер (13)
- »рландское кружево (13)
- кино (28)
- оробочки (28)
- рейзи-квилт (11)
- уклы (428)
- в€заные куклы (35)
- укольные домики (16)
- маленькие куколки (73)
- мебель (45)
- миниатюра (29)
- народные куклы (43)
- обувь (39)
- одежда (128)
- ѕодставка (1)
- “екстильные куклы (34)
- улинари€ (131)
- выпечка (51)
- десерт (18)
- заготовки (9)
- закуски (7)
- обед-ужин (29)
- супы (19)
- ћандалы (20)
- ћатрЄшки (4)
- ћотивы крючком (103)
- кайма (28)
- квадрат (8)
- книги (7)
- круглые (74)
- ћузыка (25)
- Ќовый год (373)
- ангелы (41)
- другое (43)
- ≈лки (87)
- символ года (109)
- снеговики (41)
- —нежинки (30)
- шишки (21)
- ќдежда (61)
- бохо (5)
- как шить (1)
- ќткрытки (16)
- ѕапье маше (13)
- ѕлейкасты (1)
- ѕлетение (21)
- из газет (13)
- из... (8)
- ѕодушки-коврики (59)
- ѕуговицы (6)
- –абочее место (4)
- органайзеры (3)
- –амочки (11)
- –исунки (20)
- –усский €зык (9)
- —ердечки (4)
- —овы (29)
- —сылки (2)
- —умки и мешочки (95)
- “апочки и носки (158)
- “енерифе (4)
- “ехнологи€ (55)
- ¬олосы (9)
- √лаза (22)
- репление лап и головы (12)
- нос и мордочка (7)
- уроки в€зани€ (6)
- “очечна€ роспись (6)
- ”крашени€ (322)
- браслеты (38)
- броши (70)
- бусы и колье (73)
- дл€ волос (130)
- по€са (19)
- серьги (9)
- ”паковка (52)
- ‘етр (68)
- ‘ото (13)
- обработка (10)
- ‘риформ (8)
- ’удожники (34)
- уроки (19)
- ÷вет (20)
- ÷веты (655)
- в€заные (116)
- другие (34)
- из атласных лент (128)
- из ткани (149)
- канзаши (193)
- полезное (37)
- фото и рисунки (12)
- Ўарфы, шапки, варежки (64)
- Ўвы (3)
- Ўитые игрушки (32)
- Ўнуры (26)
- кумихимо (7)
- япони€ (2)
-ѕоиск по дневнику
-ѕодписка по e-mail
-ѕосто€нные читатели
-—ообщества
-“рансл€ции
-—татистика
¬ыбрана рубрика кайма.
—оседние рубрики: круглые(74), книги(7), квадрат(8)
ƒругие рубрики в этом дневнике: япони€(2), Ўнуры(26), Ўитые игрушки(32), Ўвы(3), Ўарфы, шапки, варежки(64), ÷веты(655), ÷вет(20), ’удожники(34), ‘риформ(8), ‘ото(13), ‘етр(68), ”паковка(52), ”крашени€(322), “очечна€ роспись(6), “ехнологи€(55), “енерифе(4), “апочки и носки(158), —умки и мешочки(95), —сылки(2), —овы(29), —ердечки(4), –усский €зык(9), –исунки(20), –амочки(11), –абочее место(4), ѕуговицы(6), ѕодушки-коврики(59), ѕлетение(21), ѕлейкасты(1), ѕапье маше(13), ќткрытки(16), ќдежда(61), Ќовый год(373), ћузыка(25), ћотивы крючком(103), ћатрЄшки(4), ћандалы(20), улинари€(131), уклы(428), рейзи-квилт(11), оробочки(28), кино(28), »рландское кружево(13), »нтерьер(13), »грушка дл€ игрушки(27), »гольницы(33), «доровье(14), «акладки(1), ƒомики(46), ƒл€ дома(5), ƒжинсовый мир(7), ƒача(9), ¬€заные игрушки(117), ¬ышивка(6), ¬месте с детьми(36), ¬ал€ние(21), Ѕутылки(10), Ѕукет из конфет(23), Ѕисер(53), Ѕабочки(24), јфрика(18), аудиоспектакли(11), аудиокниги(15), јппликаци€(28), јнглийский €зык(20)
ажурна€ обв€зка кра€ крючком |
Ёто цитата сообщени€ Ќика- Ћ”Ѕ-Ќика [ѕрочитать целиком + ¬ свой цитатник или сообщество!]
|
оллекци€ вариантов обв€зки кра€ - крючком |
Ёто цитата сообщени€ Rukodelkino [ѕрочитать целиком + ¬ свой цитатник или сообщество!]
оллекци€ вариантов обв€зки кра€ - крючком
—мотреть подборку с описанием далее >>>>>
ѕодборка пользовател€ „ипул€
 „ипул€
 |
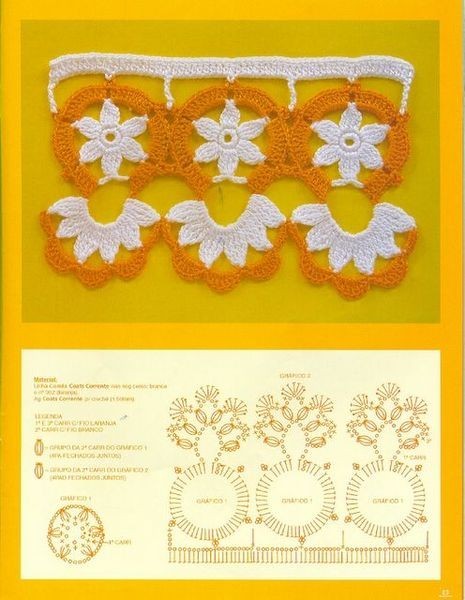 |
 |
 |
 |
 |
|
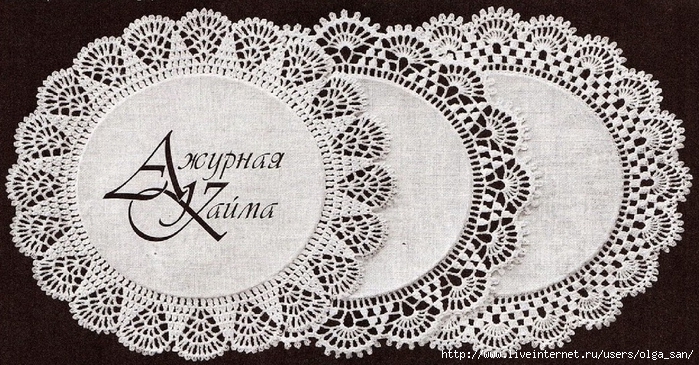
јжурна€ кайма по старинным издани€м |
Ёто цитата сообщени€ ќльга_—ан [ѕрочитать целиком + ¬ свой цитатник или сообщество!]
|
ј…ћј ,обв€зка кра€ –ё„ ќћ |
Ёто цитата сообщени€ AlenDi [ѕрочитать целиком + ¬ свой цитатник или сообщество!]
|
4 способа обв€зки пледов крючком. 4 видео |
Ёто цитата сообщени€ »римед [ѕрочитать целиком + ¬ свой цитатник или сообщество!]
|
–омантична€ кайма крючком |
Ёто цитата сообщени€ w-woman [ѕрочитать целиком + ¬ свой цитатник или сообщество!]
|
айма с помпончиками крючком. ¬идео + ћ |
Ёто цитата сообщени€ »римед [ѕрочитать целиком + ¬ свой цитатник или сообщество!]
|
÷веточна€ кайма от Norminha. ћастер-класс |
Ёто цитата сообщени€ »римед [ѕрочитать целиком + ¬ свой цитатник или сообщество!]
|
¬еселое в€зание |
Ёто цитата сообщени€ Dama_Madama [ѕрочитать целиком + ¬ свой цитатник или сообщество!]
|
Tutorial - Easy Zig-Zag Crocheted Edging |
ƒневник |
missabigailshopechest.blogspot.ru/2011/04/tutorial-easy-zig-zag-crocheted-edging.html
Crocheted thread edging can add a beautiful heirloom-quality to so many articles in a hope chest. This simple crocheted edging is the perfect embellishment for ordinary kitchen towels, pretty printed sheets or plain white pillowcases. It looks lovely on washcloths and tablecloths and even a baby’s burp cloth. It is so easy and fast. The kitchen towel in the picture was completed in about 30 minutes!
The stitches used in thread crochet are the same as for yarn, but the thread and hook are both much smaller. If you have never worked with steel hooks and cotton thread, don’t be afraid to try! If it’s been a while since you’ve crocheted, you may want to practice first with yarn until you are comfortable making the basic stitches. Then try a “finger”weight yarn or a size 3 cotton thread with a small hook until you get used to using the tiny hook with thread. Try to be patient with the initial clumsiness. It won’t last long, I promise.
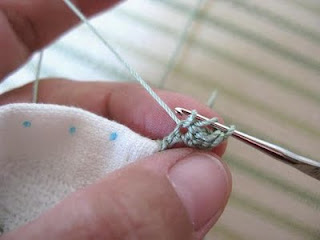
To begin, if you are right handed, grab the thread with your left hand pinkie finger and loop it around the finger. Then loop the thread over your left hand index finger and grip the slip knot between the thumb and middle finger. As you crochet, you will work with the section of thread that is between your index finger and the hook. Make sure the thread will move smoothly through your fingers. This is called tension. In the beginning, finding a comfortable tension is a bit of a challenge. I like to wrap the thread twice around my pinkie, and sometimes I gain extra control of the thread, temporarily, by wrapping it twice around my left index finger, as well.
The process is really much the same as using larger yarns and hooks, but the thread feels quite different in your hand. You’ll hold everything quite the same as you do a larger hook and yarn, but don’t be afraid to experiment with something different. It is quite common to pull the stitches too tightly as you first work with thread. Concentrate on working relaxed stitches and try to make them even. Don’t be discouraged with your first efforts. It takes some practice, but soon you’ll be putting lace on everything!
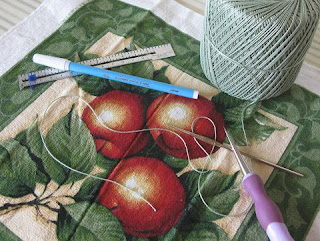
To embellish the edge of an ordinary kitchen towel, you’ll need these materials: A towel, size 10 cotton crochet thread (you can also use Perle cotton, which is a kind of twisted embroidery thread), a size 7 or size 9 steel crochet hook, an embroiderer’s awl (to punch a hole), a washable marking pen, and a ruler.
Use the washable marking pen to mark across the edge of the towel every 3/8-inch. (Use ½-inch markings with size 3 cotton thread.)
Pull the thread through the hole and make the first slip knot.
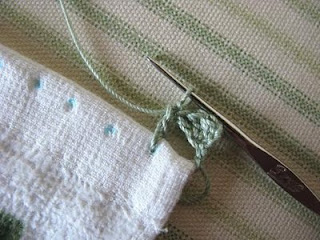
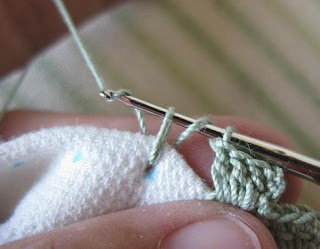
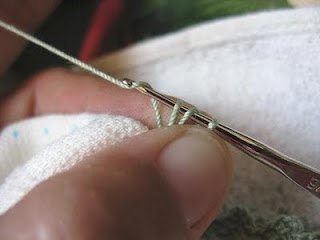
Make another double crochet and then a third double crochet in the same space.
3 dc along with the initial ch 3 = 4 stitches in the cluster.
Use the embroiderer’s awl to punch holes in a few of the marks. I usually do eight to ten holes ahead of my crochet. If I do too many at one time, they simply pull together before I can get to them and then I can’t find the hole. So, I’ve learned to do just a few at a time.
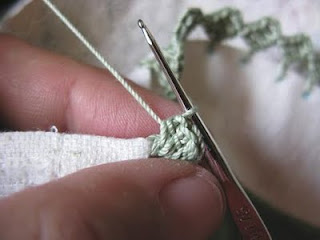
Chain three. These chain stitches form the “rise” of the cluster.
Over the same post, make a second double crochet and then a third. (Ch 3, 3 dc altogether)
In the next hole, make a double crochet.
In the next hole, make a double crochet.
Again, chain three to form the rise. Continue across, using this pattern: (dc in the hole to form the post, ch 3, 3 dc over the dc “post”). Every few stitches, stop and look for any mistakes.
Chain three as usual. Make 2 dc over the post. Then, make a final half-double crochet for the last stitch. Clip the thread about 4 inches from the hook. Make a yarn over and pull the thread through the loop to fasten it off. Using a half-double crochet in these last stitches will make the cluster lay just a bit tighter against the edge.
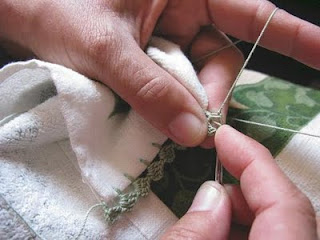
Doesn’t it look pretty! Now, do the other end of the towel. You can do just one end. Sometimes, if I'm in a real hurry with a gift, I will do just one end of a towel, but I think it looks nicest to do both ends.
Weave the end of the thread (both ends) into the stitches and clip. After weaving through a few of the stitches, I sometimes push the needle into the hem and pull the thread a little way into the hem before I clip it off.
I sponge the towel to wash the markings away and “block” the crocheted edge with steam from the iron. Then I fold the towel and it’s finished.
The following pics show one of my common mistakes. If I get distracted or have to stop and pick things up again, I sometimes mistakenly do a chain three after I finish a cluster. Then I proceed to make another post in the next hole and continue.
You can see the gap in the stitches when I make this mistake. It is easy to just pull it out back to the mistake and then continue again.
As I work with the thread, I find it easier to sort of “lay” the stitch over the pad of my finger as I pull the thread through. This helps me keep the stitches even.
If you are having trouble with the stitches being too loose, it may help to move your fingers to pinch close to the hook as it slides through the thread to complete the stitch.
One final tip. Because I do so much marking, I made a cardboard marking aid, with a row of marks at 3/8-inch and a row of ½-inch markings. I find this quicker than using a ruler.
|


