�������������� �������. ��������. �� �������� �������� ����. ��������: ...
������� �� ����� - (0)�������� ������ ������� �������- ������ ������ 2018 ���� ...
������� �� ����� - (0)������ �������- ������ ���� 2018 ��������� ��� ������ �������: — ���� ���� ����...
����� ������� �� ����� ����������. ��������. - (0)����� ������� �� ����� ����������. ��������. ��������: vk.com/club11428863...
����������� ������� �� �������� ����. ��������. - (0)����������� ������� �� �������� ����. ��������. ��������: https://vk.com/c...
���������� ��� ����� |
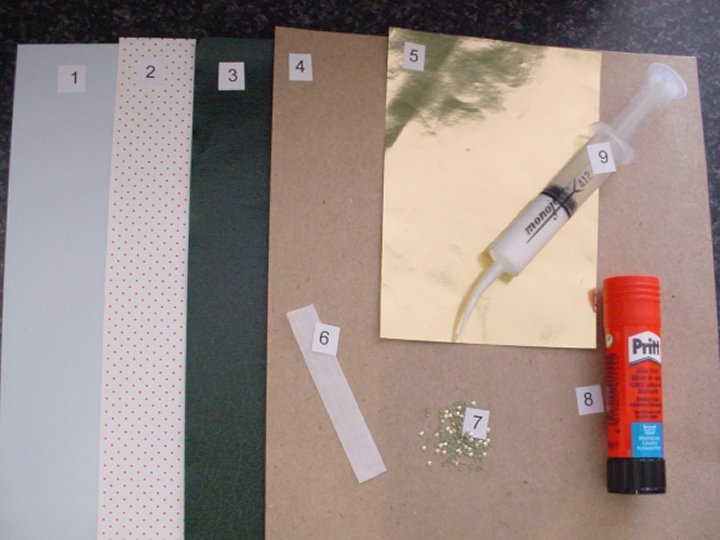
Close-up image of materials needed

1. Start by cutting your mount board into ten pieces of the following sizes:
- Two (2) pieces cut to 29mm x 43mm (1.14" x 1.69")
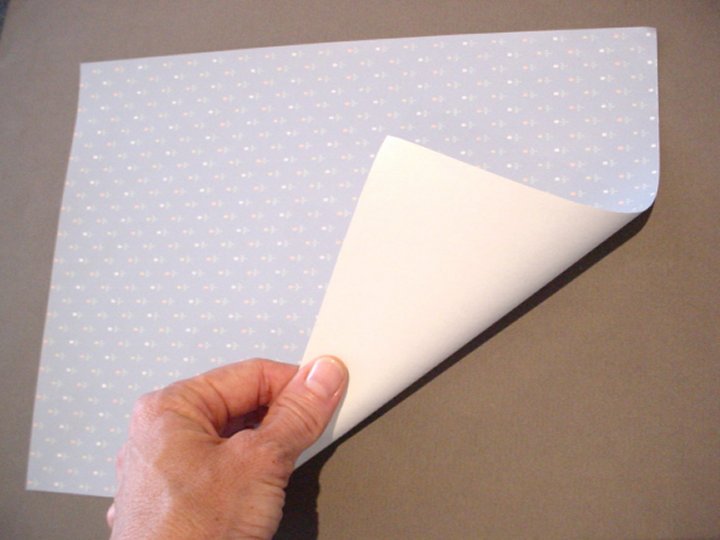
2. Take up your piece of patterned wallpaper and flip it over to the back side.
Enlarge picture showing where to start with the wallpaper
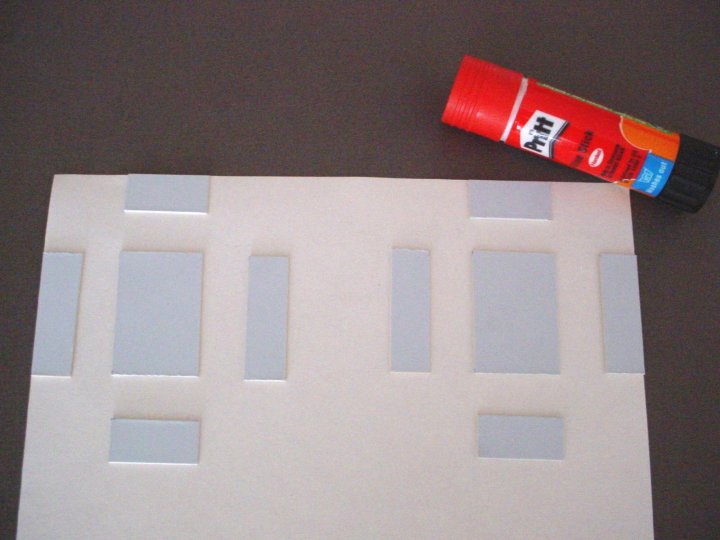
3. Using your glue stick, paste your 10 pieces of mount board onto the wrong side of your patterned wallpaper. Leave at least a 15mm (½"-¾") gap between pieces.
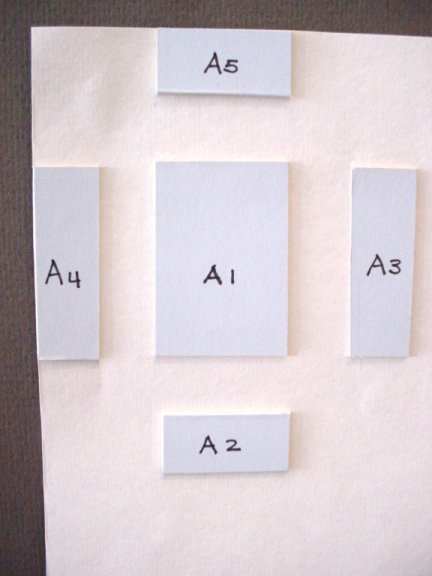
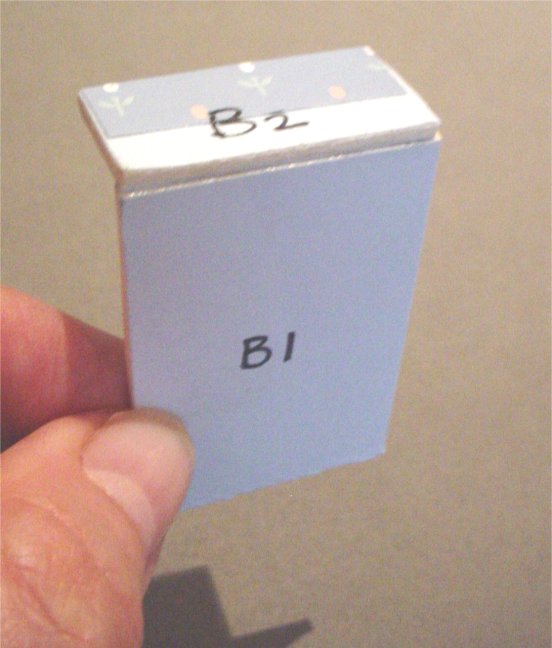
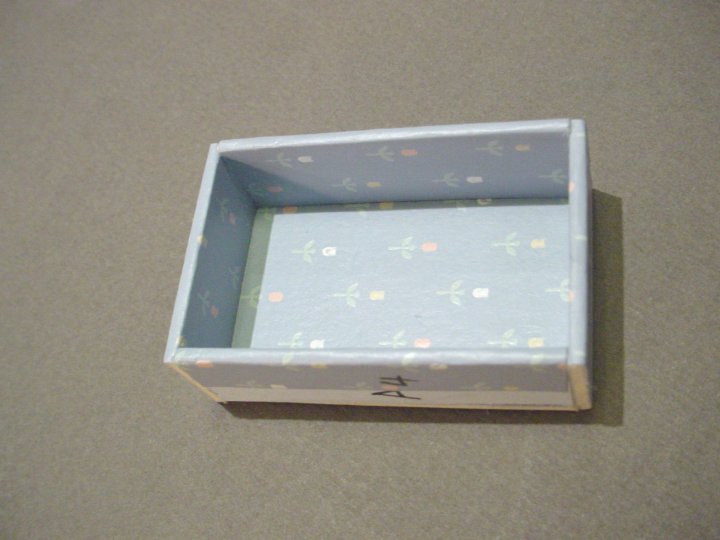
4. Using a pencil, label your mount board pieces like this: A1, A2, A3, A4, and A5 (reference the image).
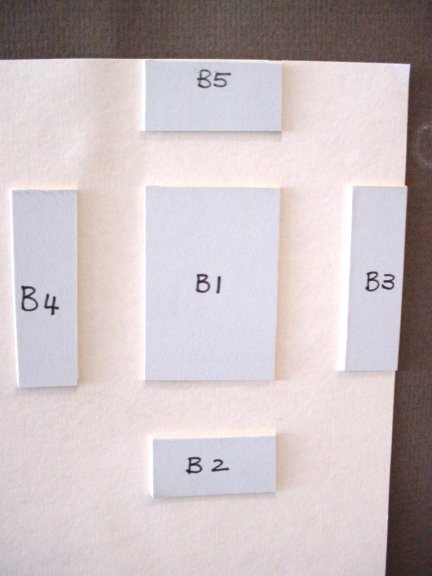
5. The right side is to be labeled like this: B1, B2, B3, B4 and B5
Enlarge picture showing how to mark the mount board

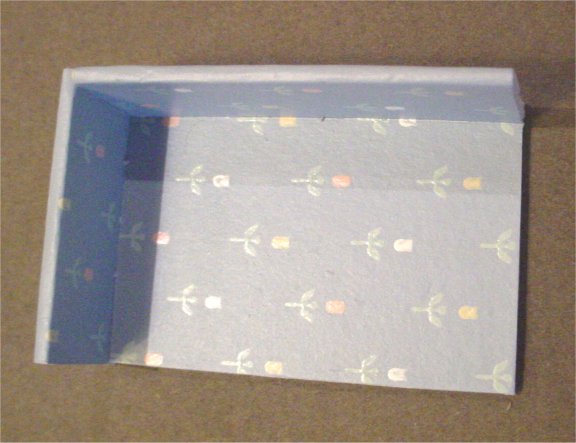
6. Using a craft knife on a cutting mat or a small pair of scissors, cut out your pieces as shown, leaving 1cm (1/3") of your wallpaper sticking out beyond the board as shown on 4 of the 5 pieces of your A-side.
Enlarge picture showing how to cut the pieces marked A

7. Then repeat for side marked B.
Enlarge picture showing how to cut the pieces marked B
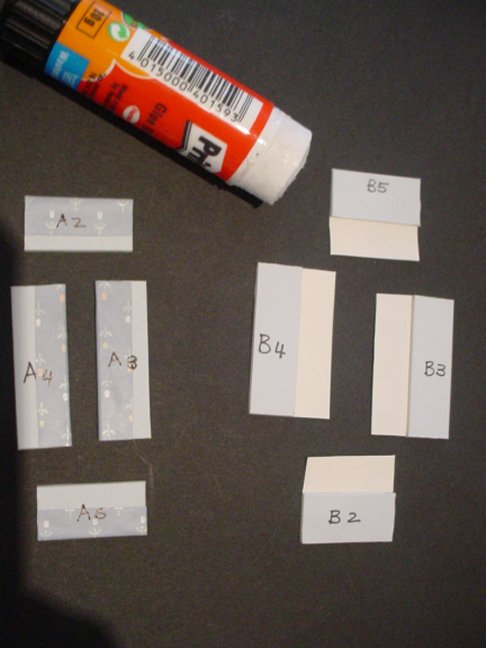
8. Take the 8 pieces that have wallpaper extending from them and use your glue stick to glue these extended bits onto the mount board. (Pieces A2, A3, A4, A5 and B2, B3, B4 and B5.)
When you glue down the wallpaper it will probably cover the "labels" which you marked onto your pieces earlie; just write them again as they certainly help when it comes to assembling the trunk.
Enlarge picture showing the gluing of wallpaper edges on the A parts
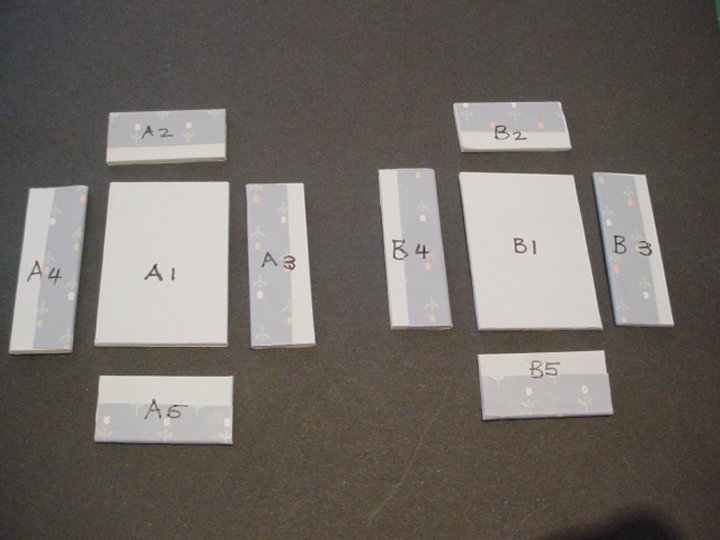
9. Your ten pieces should now look something like this.
Enlarge picture showing progress so far

10. Pick up pieces A1 and A2. Using a glue syringe full of tacky glue, or a toothpick, run a line of glue along the top, narrow edge of piece A1 and push piece A2 up against it and hold. (Important: Do not put A2 onto A1 - it butts up against it).
Enlarge picture assembling A1 and A2 together
11. While that is drying, pick up pieces B1 and B2 and repeat the previous step. Glue B1 up against B2.
Enlarge picture assembling B1 and B2 together
12. Next, put a line of tacky glue along the rough, long side of A3 NOT the long edge that has wallpaper folded over it, the other long edge, and also along one short edge and glue it on top of A1 as shown in the image.
Enlarge picture showing where to glue the third piece

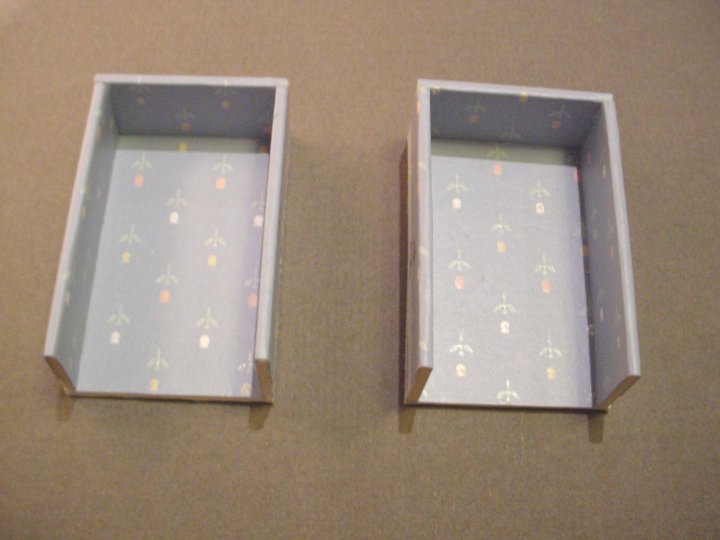
13. Now repeat the previous step and put a line of tacky glue along the rough, uncovered edge of B3 and glue it onto B1, so that it butts up to B2. Your two sides of the trunk should now look something as shown in the image.
Enlarge picture showing where to attach B3 to B1
14. Next, use your tacky glue to attach A4 onto A1, so that it butts up to A2, as shown in the image.
Enlarge picture showing the assembling of A4 to A1
15. Next, glue B4 onto B1 so that it pushes up against B2. Your two sides should now look like this.
Enlarge picture showing progress so far
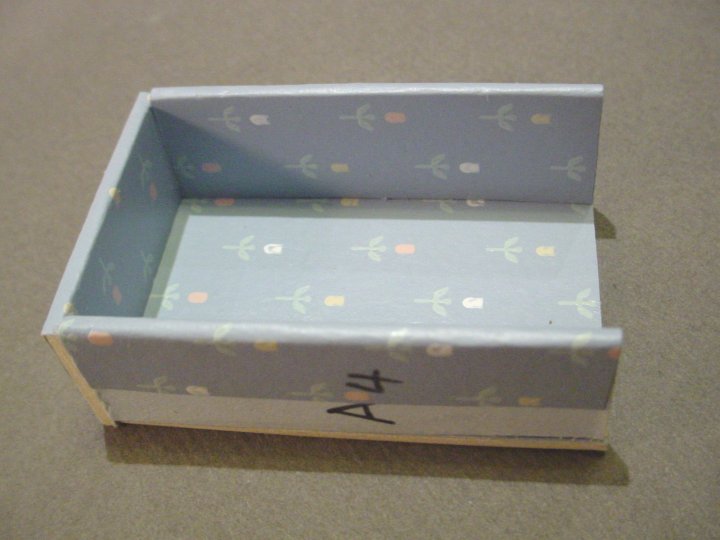
 16. Glue piece A5 against A1, butting up to A3 and A4 like this.
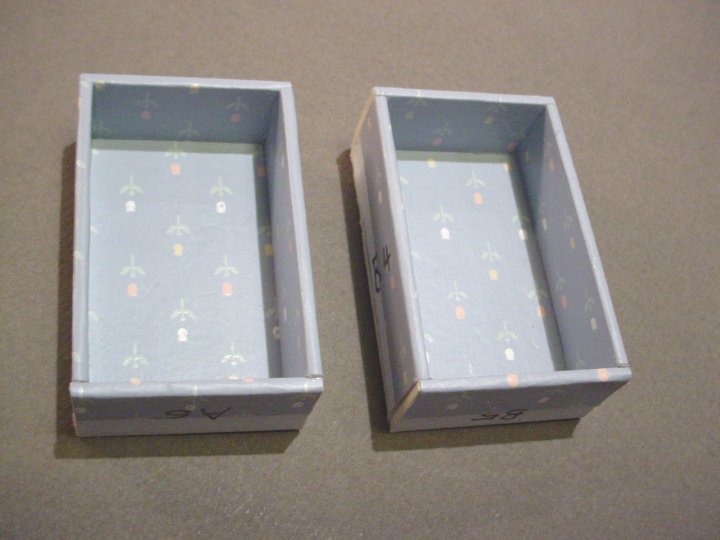 17. Finally glue B5 against B1, butting up against B3 and B4. Your two sides should look something like this.
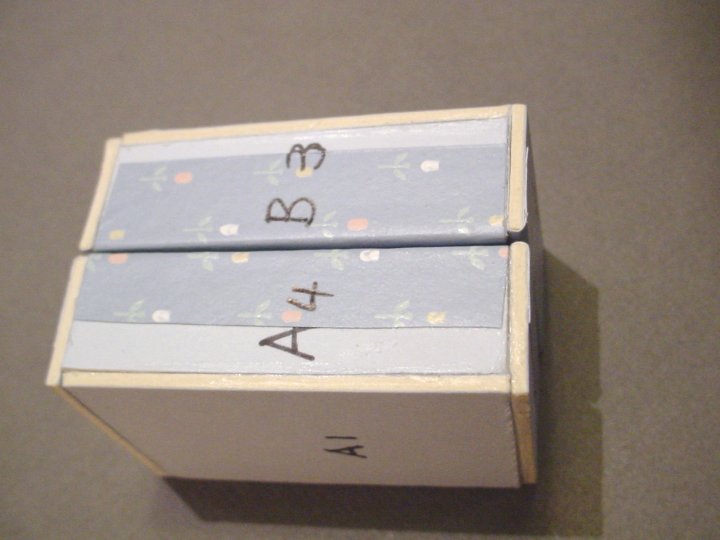 18. Now place the two sides A and B so that their openings face each other and they are almost touching about 1mm (0.039") apart.
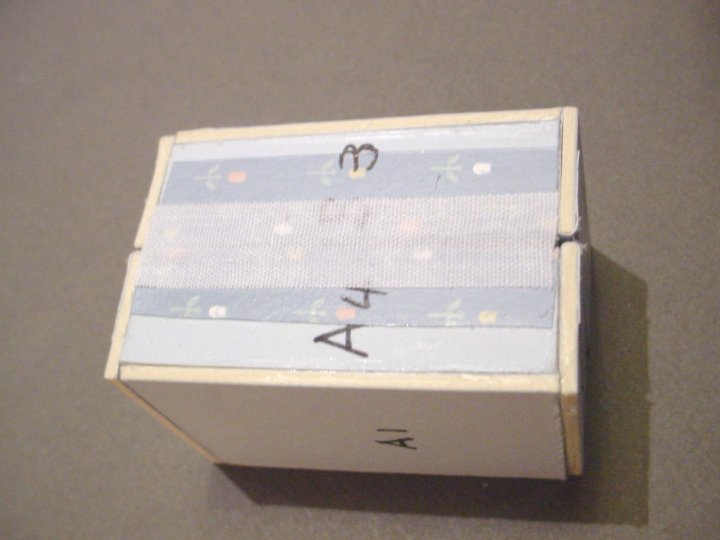 19. Take your strip of white cotton fabric, place it onto the length of the trunk and mark off where to cut it. Then use your glue stick to paste this cotton strip down, joining the two sides of the trunk together.
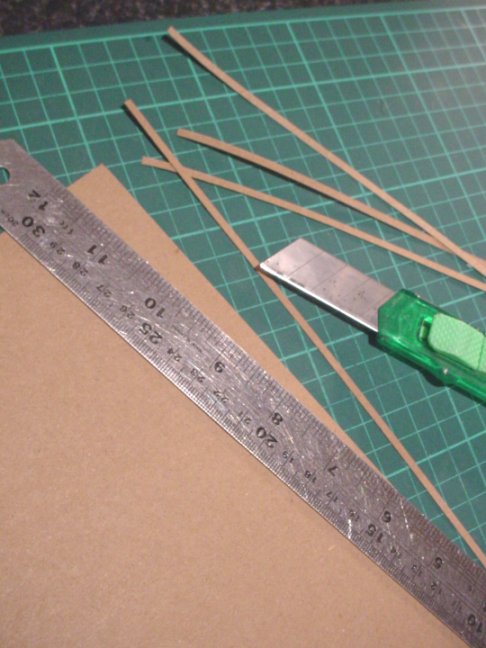 20. Put your trunk aside for the cotton strip to stick properly and do the following: Take your brownish-coloured card, put it onto a cutting mat and then use a craft knife and metal ruler to cut about six 3mm (0.118") strips from this card.
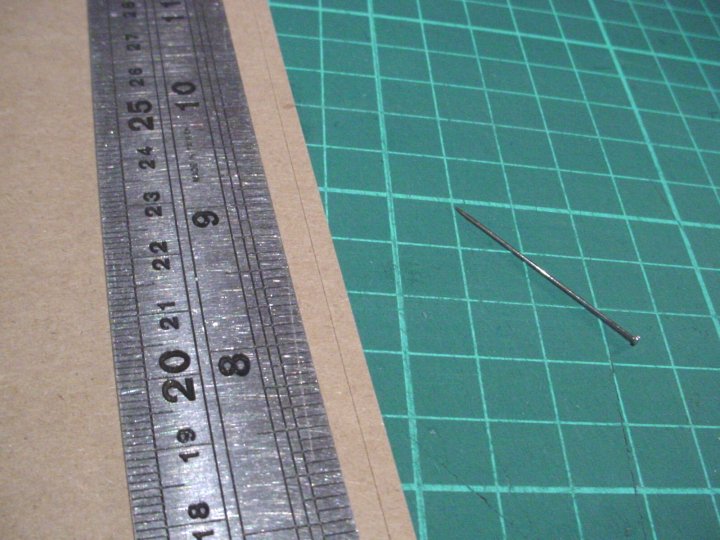 21. From the same brown card, measure a 3mm (0.118") strip, but instead of cutting it, use a pin or embroidery needle to gently score against the ruler.
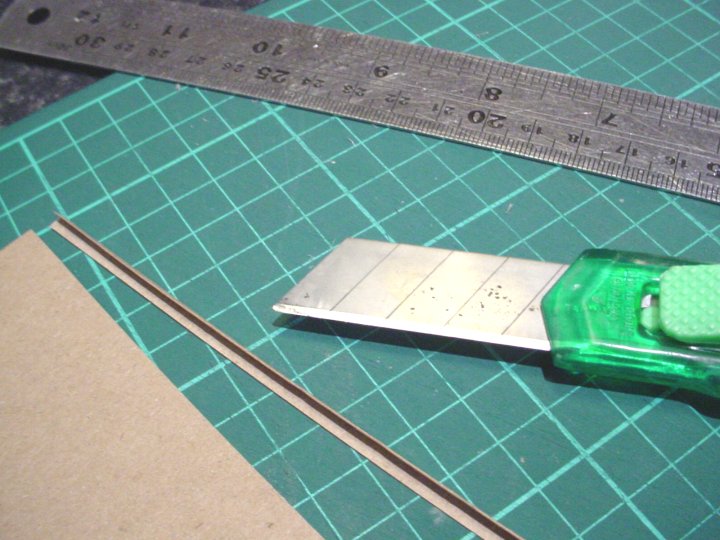 22. Then, 3mm (0.118") from that scored line, cut with your ruler and craft knife again. You will have a 6mm (0.24") strip that has been gently scored down the centre, so that it can be folded perfectly in half.
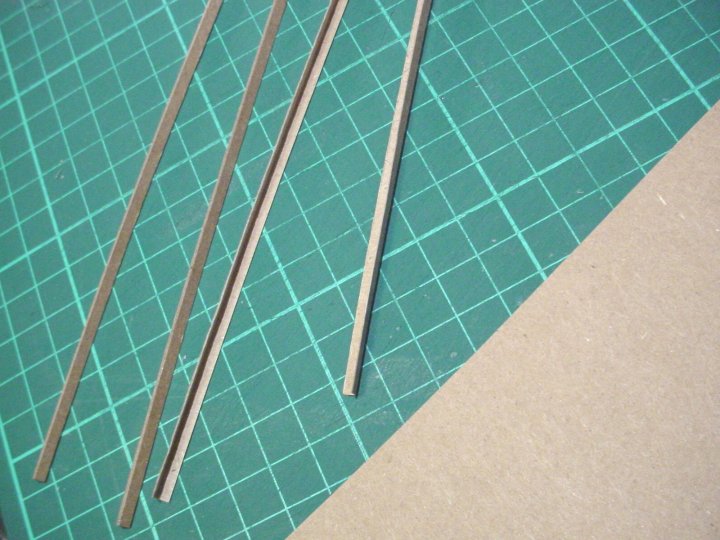 23. Cut 3 more of these strips that are scored down the centre, so that you have 4 in total.
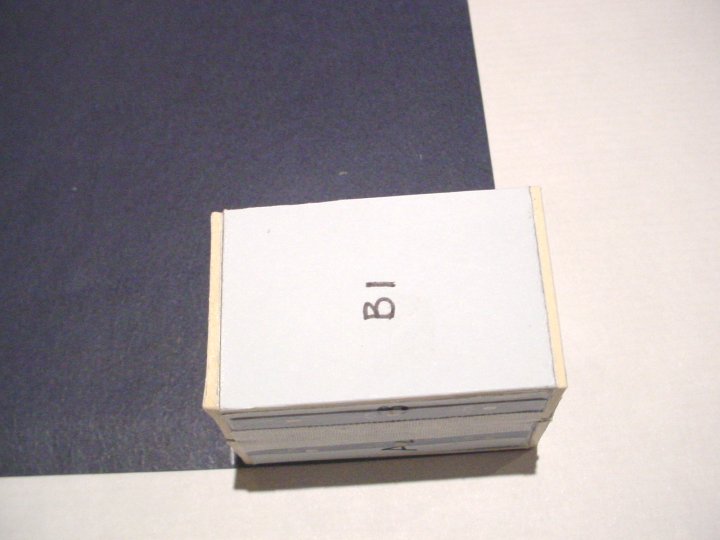 24. Take your "faux leather" paper or scrapbook card, turn it over to the wrong side and place your trunk down on it in one corner. Draw around the trunk with a pencil.
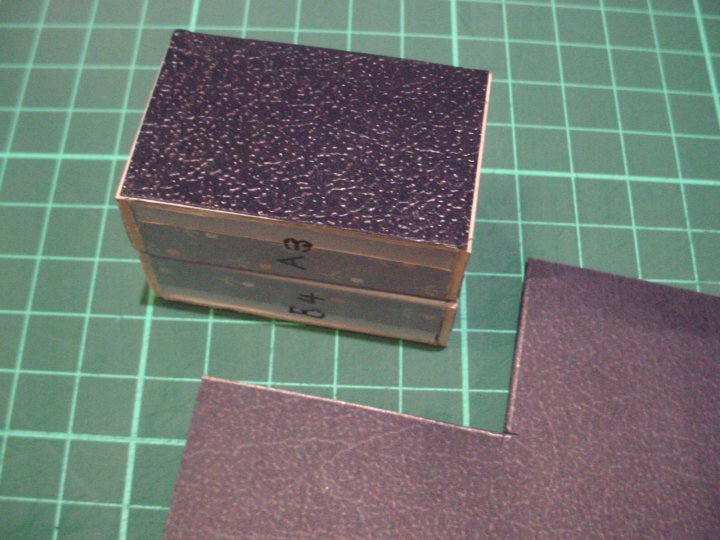 25. Use your craft knife to cut inside of your pencil lines. Check your cut piece against the trunk for size. Now paste the cut piece onto the trunk using your glue stick. It must not hang over the edges, rather let it be 1mm (0.039") or so smaller.
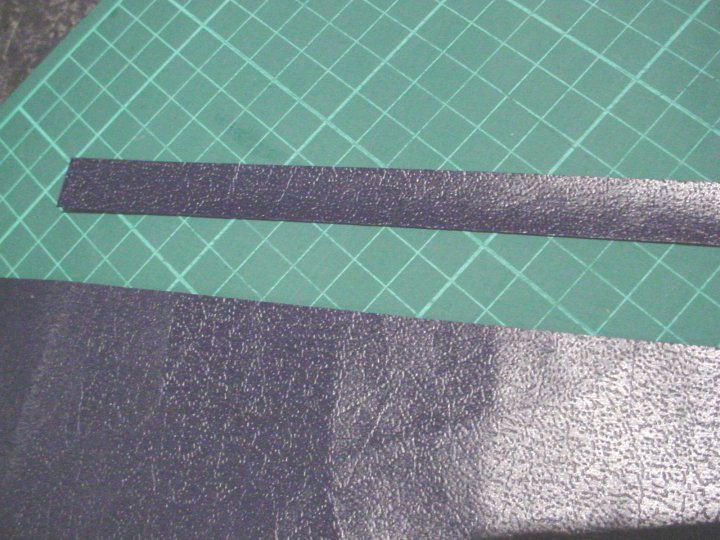 26. Now cut a strip from this same paper/card about 13mm (½") wide by the length of the paper.
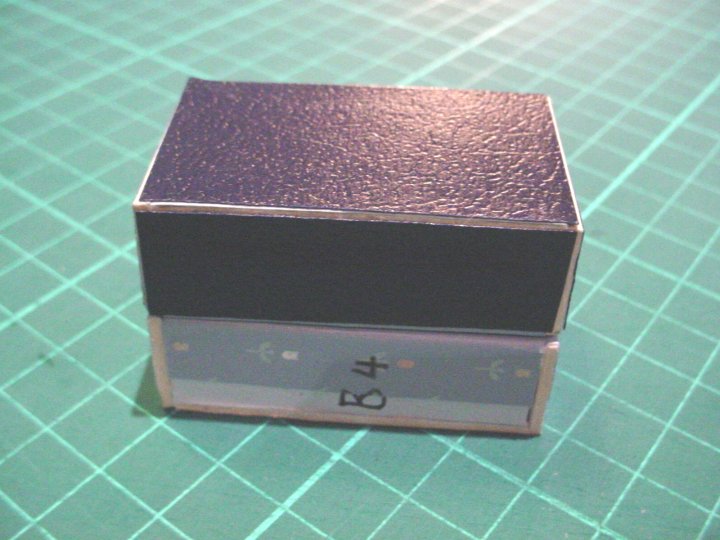 27. Use this strip to cut off 4 pieces which you need to glue to the remaining 4 sides of A (A2, A3, A4 and A5).
 28. Take a strip of the 3mm (0.118") brown card that you previously cut. Now glue and place along the 4 edges of 'A' closest to 'B', as shown in image.
 29. Next, use your scored strip to do the very same thing, but on the outer edges of side 'A'. Cut 2 pieces to cover your long outer edges of 'A'. Glue on with tacky glue.
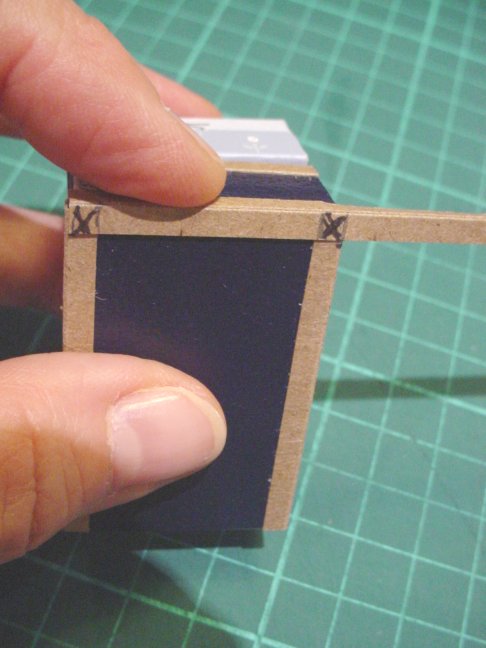 30. The next two pieces need to be cut from the folded brown strips once again. You'll need to make little cut outs for a snug fit when gluing, as shown in the image.
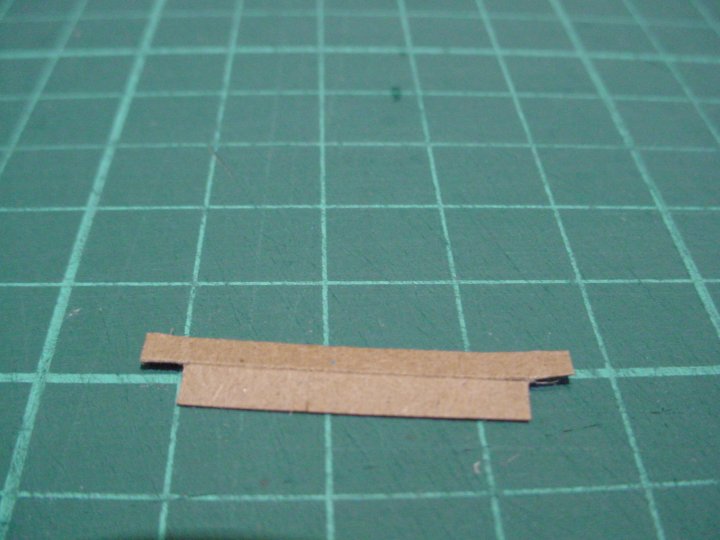 31. After measuring, cut the strip. It should look as shown in the image.
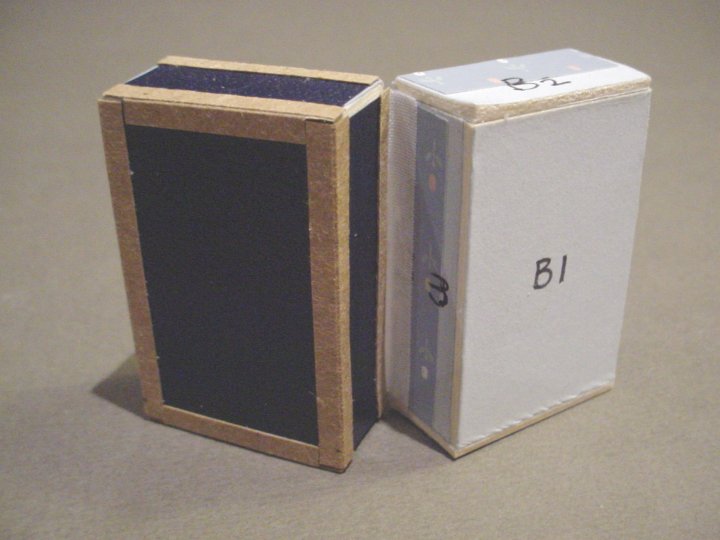 32. Glue this piece on, then repeat Steps 30, 31 and 32 on the bottom side of 'A' until your trunk looks as shown in the image.
 33. Use the same folded/scored strips to finish off the remaining 4 very short edges left on the 'A' piece. Measure, cut and glue; reference the image for how it should appear at this stage.
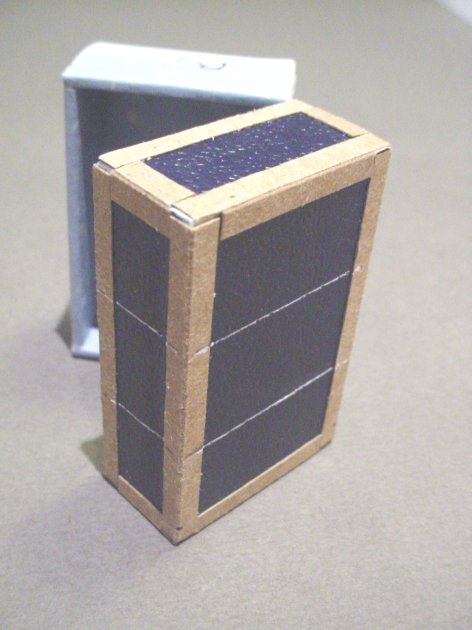 34. Use your ruler and a pencil to divide your trunk into thirds across its length. (Lines are about 15mm (0.594") apart. I've used a white gel pen where you would draw your lines with the pencil.
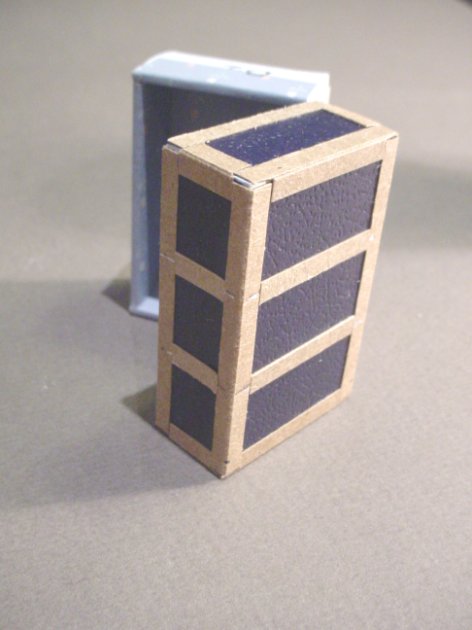 35. Take another of your 3mm (0.118") brown card strips and use it to cut and paste pieces that cover wherever my white lines are on the navy blue.
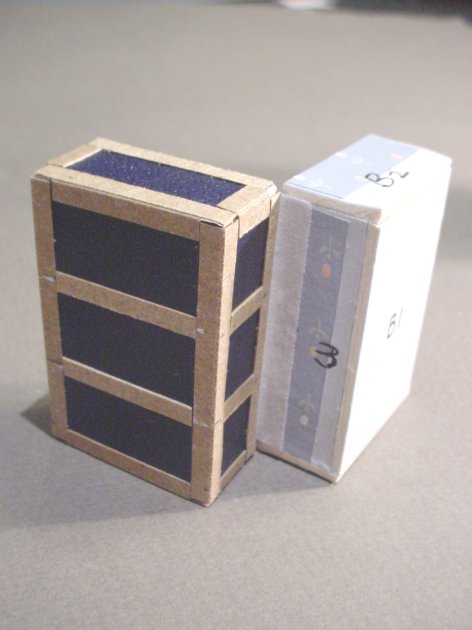 36. Another view of how to glue the brown strips over the lines.
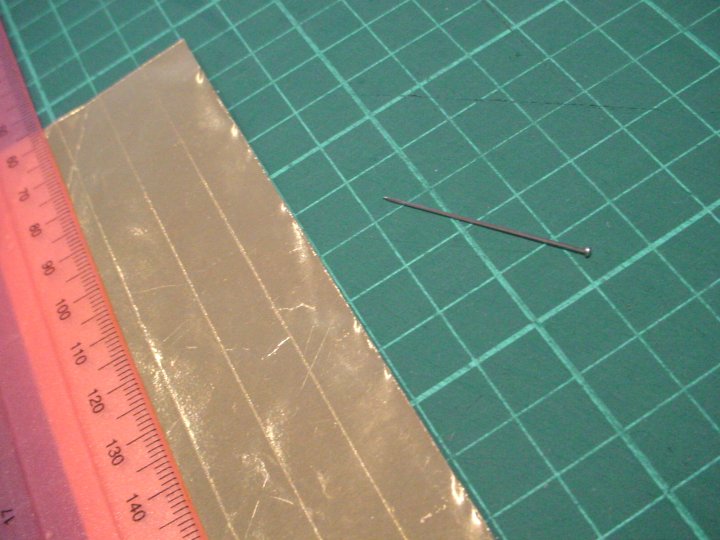 37. Now, using the gold metallic paper, preferably on a cutting mat marked in centimetres, score a piece of the gold paper into 1cm (0.39") blocks with a pin. Have at least 16 blocks.
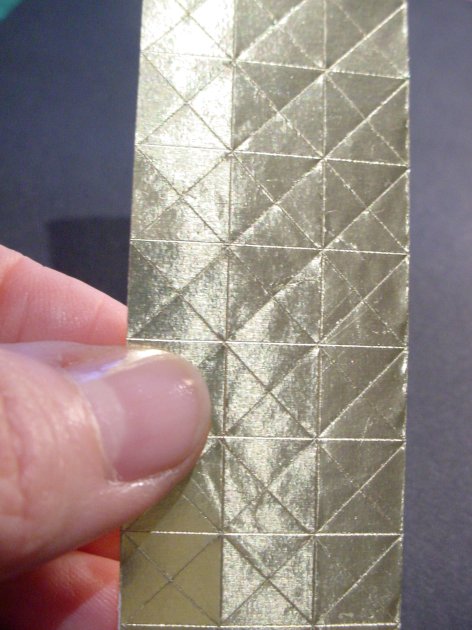 38. Then score lines diagonally through the blocks to form perfect crosses.
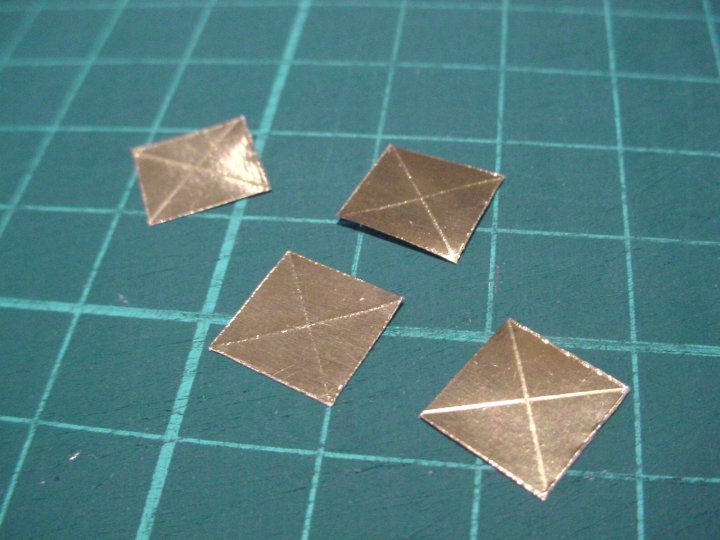 39. Carefully cut 4 of these gold blocks out.
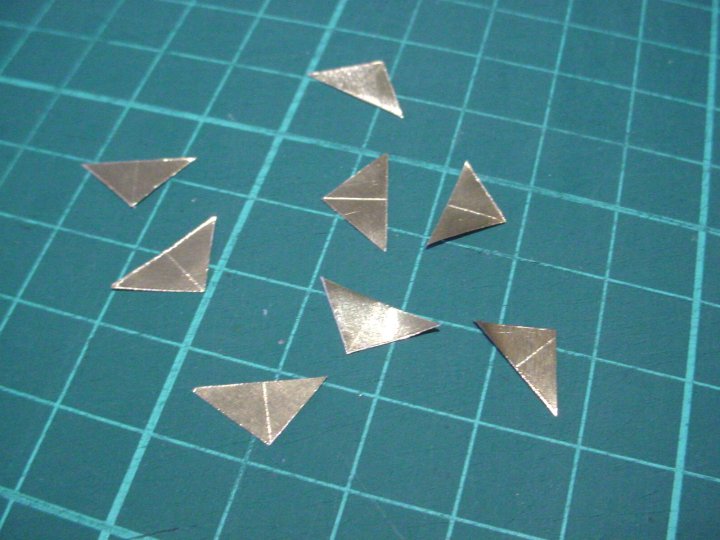 40. Then cut these gold blocks diagonally across the centre so that you have 8 triangular "halves", as shown.
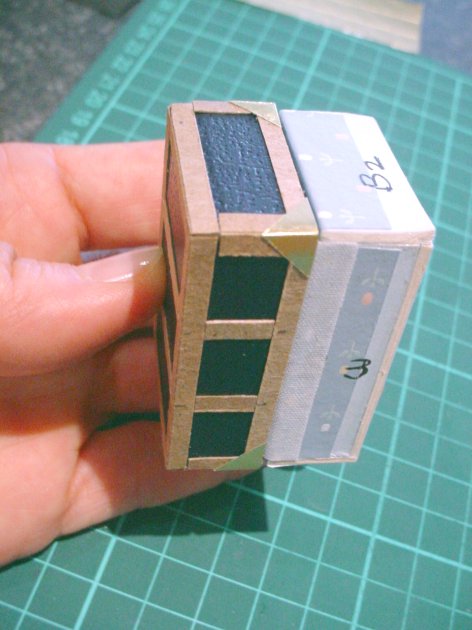 41. Fold the gold triangles carefully on the scored line, then using your tacky glue, paste 4 of these on the 4 corners of side A of your trunk closest to side B. (The other 4 gold triangles will be used on side B later, so put them aside).
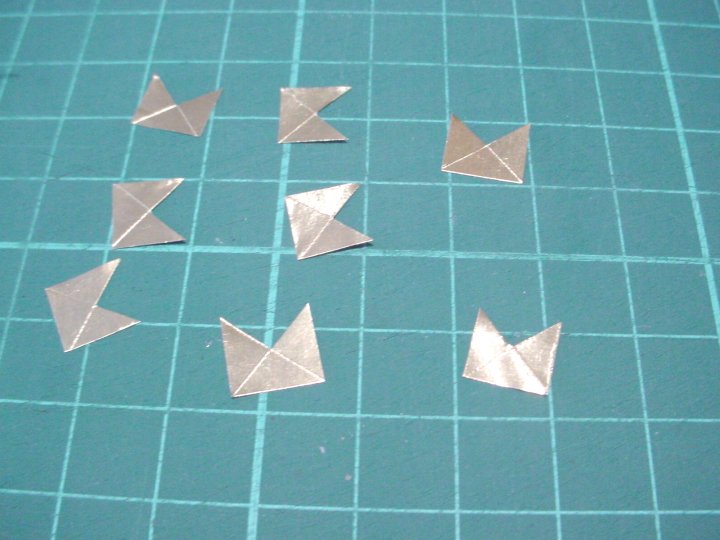 42. Take 8 more gold squares (4 of these will be used on side 'B' of the trunk later). Carefully cut a quarter section out of each square (see image for comparison). I find that a small sharp pair of scissors works best here.
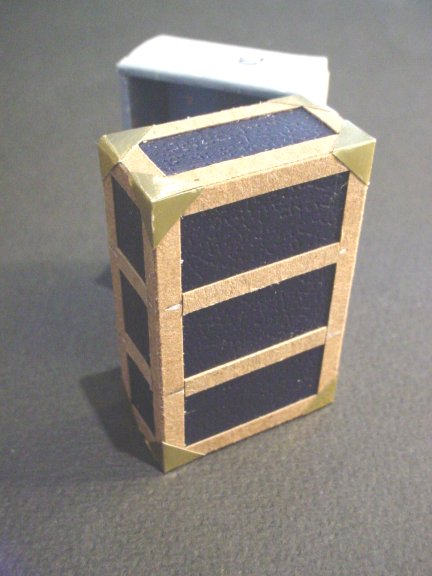 43. This next step requires the utmost patience. First pick up a gold square that has had a quarter section cut out. On the scored lines gently bend it, put tacky glue on and paste over the 4 outer corners of side 'A'.
 44. Next, cut a 3mm (0.118") strip of gold paper. From the strip cut off 3mm (0.118") squares and glue two on the front of the trunk like this.
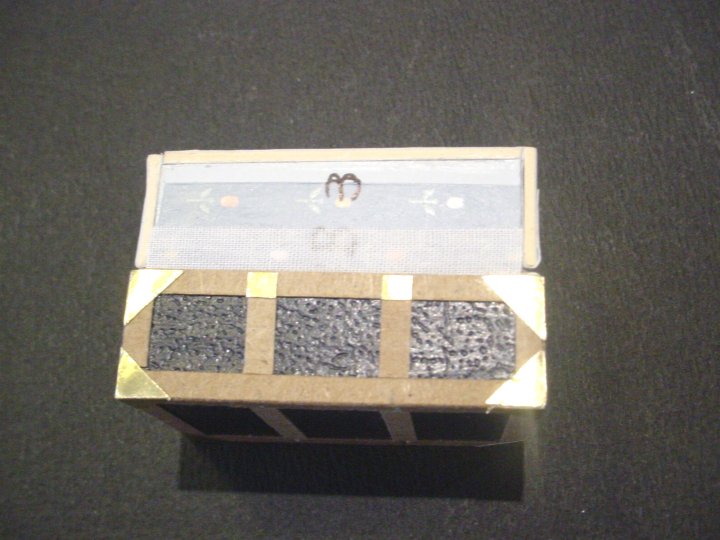 45. Then paste (glue) two of the gold blocks on the back, as shown.
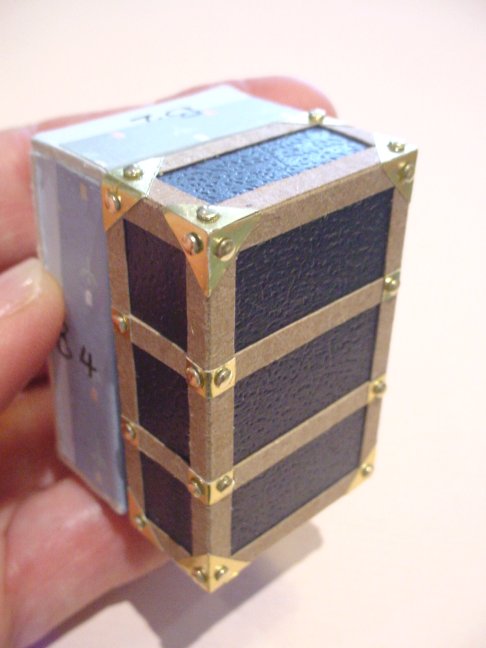 46. Use more of the 3mm (0.118") gold strips to cut off pieces about 7-8mm (apprx ¼") in length, which are folded and glued onto the trunk to look like this. Reference the image for additional details.
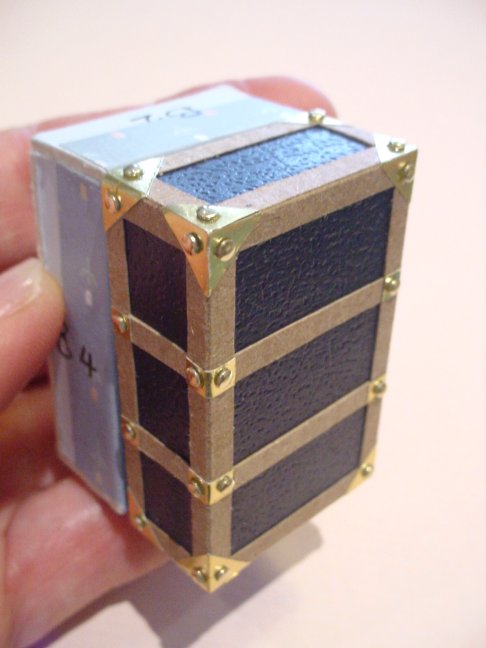 47. Finally, glue gold studs or sequin centres onto your gold papered bits if required, to look like the trunk in the image.
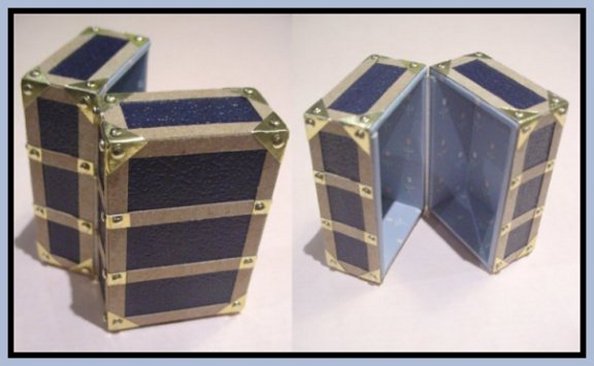
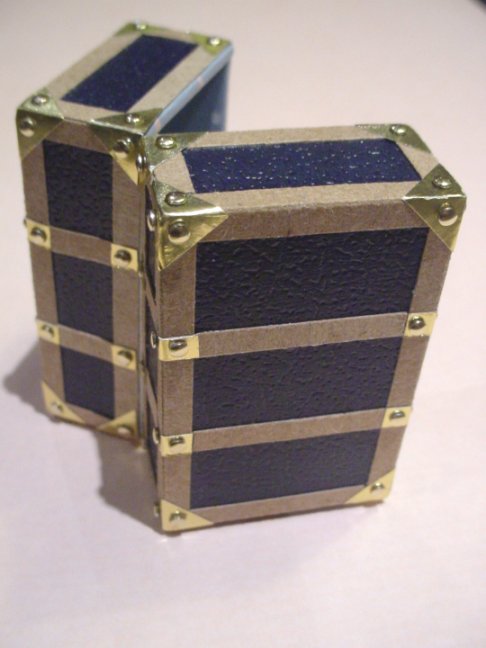 48. Repeat from Step 20 through to Step 43 to finish off side 'B' of your trunk. Your trunk is now completed and should look like the image.
 49. Your trunk is complete. Now you need to make something to put inside your trunk.
����� ��������� " ������ ��� �����":������ ��� ������������ 1 - �������
����� 2 - ��� ���������
...
����� 5 - ������ ��� ������
����� 6 - �������� �����
����� 7 - ���������� ��� �����
����� 8 - �������� ������ ��� ����� (����)
����� 9 - ������ ��� ����� ������ ������.
...
����� 18 - ������ ������ ��� �����.
����� 19 - ������ ��� �����.
����� 20 - ������
| �������������� | « ����. ������ — � �������� — ����. ������ » | ��������: [1] [�����] |


