Очень красивый свитер - и цвет (теплый желтый), и узоры.Схема ...
Найдено на сайте Mila Стиль - (0)Найдено на сайте Mila Стиль Вывязывание сложных контуров 1. Вывязывание горловины ЧВ (сов...
Невероятно красивые броши в виде маленьких сказочных драконов ручной работы - (0)Невероятно красивые броши в виде маленьких сказочных драконов ручной работы Талантливая мастер...
Тарталетки «Дракончики» на Новый год - (0)Тарталетки «Дракончики» на Новый год Из закусок на праздничный стол пр...
Очень красивый свитер - (0)Очень красивый свитер - и цвет (теплый желтый), и узоры.Схема ...


Радужные пупсы Мастер класс |
Дневник |
|
Небольшая поэтапка лепки головы милой девушки (в последующем - кукла Принцесса Эльфов |
http://www.livemaster.ru/topic/151061-nebolshaya-p...lepki-golovy-miloj-devushki-v-

1 фото.Общий вид.
1.Скатали шарик из фольги,придали форму яйца, со стороны лица сделали более плоским,скальпелем разделили крест-накрест посередине. Сделали углубления ручкой кисти - для глаз - чуть выше пересечения , одинаково от центра, мажду углублениями должен поместиться еще один глаз.
2.На небольшие кусочки пластики посадила два предварительно выпеченных из белой пластики глаза и утопили их ровно наполовину.
3.Теперь небольшими тонкими лепешками пластика закрываем все пространство фольги, глаза прорезаем скальпелем.
4.Намечаем нос строго по центру, сверяясь с фото.Примазываем с боков, катаем два маленьких шарика - ноздри- примазываем на нужной высоте,сверяясь с фото.Делаем в них отверстия и формируем ноздри.
5.Делаем лоб- овальная лепешка с мысиком к переносице.
6.Подбородок - овальная лепешечка.
7.Щеки - две полукруглые "запятые".
8.Глаза- верхние веки - две полосочки с заостренными краями , нижние веки - такие же,но поменьше.
9. Фото всегда должно быть перед глазами.
10. Проминаем две впадинки на висках.
11. Прорезаем скальпелем рот, сверяясь с фото и формируем губы, верхняя - чуть побольше нижней.
12.Формируем затылок - большая лепешка.
13.Прилепляем ушки- примерно чуть ниже уровня глаз.
14. Делаем палочкой отверстие для шеи, надеваем трубочку из фольги,придвигаем к голове и все закрываем пластиком.
15. После шеи формируем выход к груди и спине (небольшой), т.к.все будет под одеждой.
16.Все сверяем с фото,если результат порадовал - выглаживаем и в духовку.
17.Дальше - роспись...и....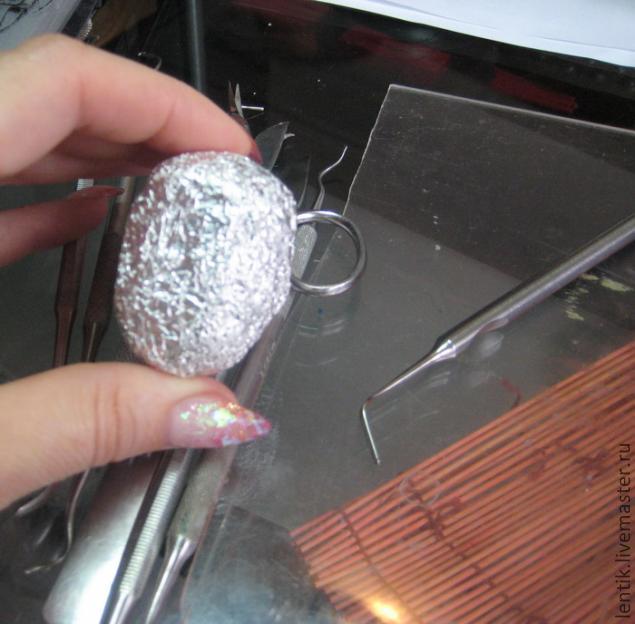
|
Без заголовка |
Забавные медведики и зайки от Юлии Овцыной
* Julia Ovtsyna * Julia Ovtsyna * Julia Ovtsyna * Julia Ovtsyna * Julia Ovtsyna *

|
куклы "подружки" |


|
Пупс из лоскутка. Мой мастер класс |
Вот такие пупсики можно сделать из небольшого кусочка трикотажа. Никакой выкройки!
Для работы понадобится кусочек х/б трикотажа 10/15 см, нитки в цвет, иголка средней длины, ножницы и наполнитель.
Кусочек ткани складываем вдвое вдоль и прошиваем на машинке. На фото положена тёмная нить для лучшего обозрения. Лишнее отрезаем на расстоянии 4 мм от шва.
Выворачиваем. Чтобы удлинить ножки, прошьём поверх машинной строчкой на 2 см. Затем наполняем холофайбером.
Получается вот такая заготовочка.
Да, макушку зашиваем вручную вот таким образом (собрать по контуру мелкими стежками и стянуть).
Отделяем голову, перетянув ниткой в определённом месте.
Поворачиваем куклу к себе спинкой и делаем попу. Для этого закрепляем нитку между ног и и выводим иглу с ниткой на середине туловища. И так два раза, потом стягиваем и закрепляем нить.
Хочу заметить, что после закрепления нить я не отрываю, а перехожу к следующей операции путём протяжки внутри туловища.
Поворачиваем куколку к себе лицом и делаем утяжку на уровне груди. Это ручки будущие, хотя больше похоже на грудь.
Нитку закрепляем и ставим точки в следующих местах. На фото жирные чёрные точки. Можно вколоть булавки, но с ними потом работать не удобно и небезопасно. Ставить точки нужно еле заметные, три с одной стороны и три с другой.
Вид сбоку, здесь видны все три точки.
Эта третья точка немного спрятана на спинке, как на фото.
Нитку я не отрывала и она выходит на середине груди. Дальше делаем правую ручку проколов иглой в верхней точке и вытащить в нижней.
Вытащив иглу в нижней точке делаем прокол иглой в точке, которая спряталась на спинке и вытаскиваем иглу опять в верхней (первой) точке.
Отступив 1 - 2 мм из этой же точки опять делаем прокол в нижнюю...
а из нижней прокалывам на груди снизу вверх.
Теперь стягиваем туго и получается вот такая маленькая ручка. Чтобы было понятно, то ручку утягиваем по принципу восьмёрки.
Аналогично делаем утяжку другой руки. Закрепляем нить на груди (под ладошками).
Нить не отрываем, а выводим между ножек. Ставим две точки, как на фото.
... и ещё две точки, но сзади.
С передней точки назад делаем внутренний прокол...
и прокалываем между ножек на перёд.
Хорошо стягиваем и закрепляем. Получается так.
Вид сзади после утяжки.
А это вид сбоку.
...
...
Выводим нитку на уровне колен и ставим ещё две точки или помечаем булавками места сгиба ножки.
Нитку кладём сверху и делаем прокол как на фото. Стягиваем, закрепляем.
Аналогично делаем на второй ножке. и выводим нитку ещё ниже, чтобы отделить ступни.
Прошиваем вышеописанным способом.
Прошиваем коленочки.
...куколка готова. Вид спереди.
Вид сбоку.
Вид сзади.
Личико можно нарисовать, вышить или пришить, как я, бусинки . Делается такое личико по принципу "куклы из носочков"
... и фантазируйте. На спинку можно пришить крылышки и получится ангелочек, можно пришить косички, хвостики и многое другое. Как вы уже поняли, то для такой куколки достаточно только одного небольшого кусочка трикотажной ткани. Хорошо делать таких пупсов тем, кто делает куколок из капроновых колготок. Минимум швов, только утяжки. Мне остаётся только пожелать вам удачи!
|
Потрясающие куклы от Сью Линг Ван |
Создательница этих прекрасных созданий - Сью Линг Ванг (Siu Ling Wang). Куклы делаются или целиком из фарфора, или только отдельные части, например руки, ноги и голова. Но особенно запоминаются удивительные глаза кукол – огромные, выдутые из лучшего стекла специально для этих кукол и сияющие в свете ламп.
")
|
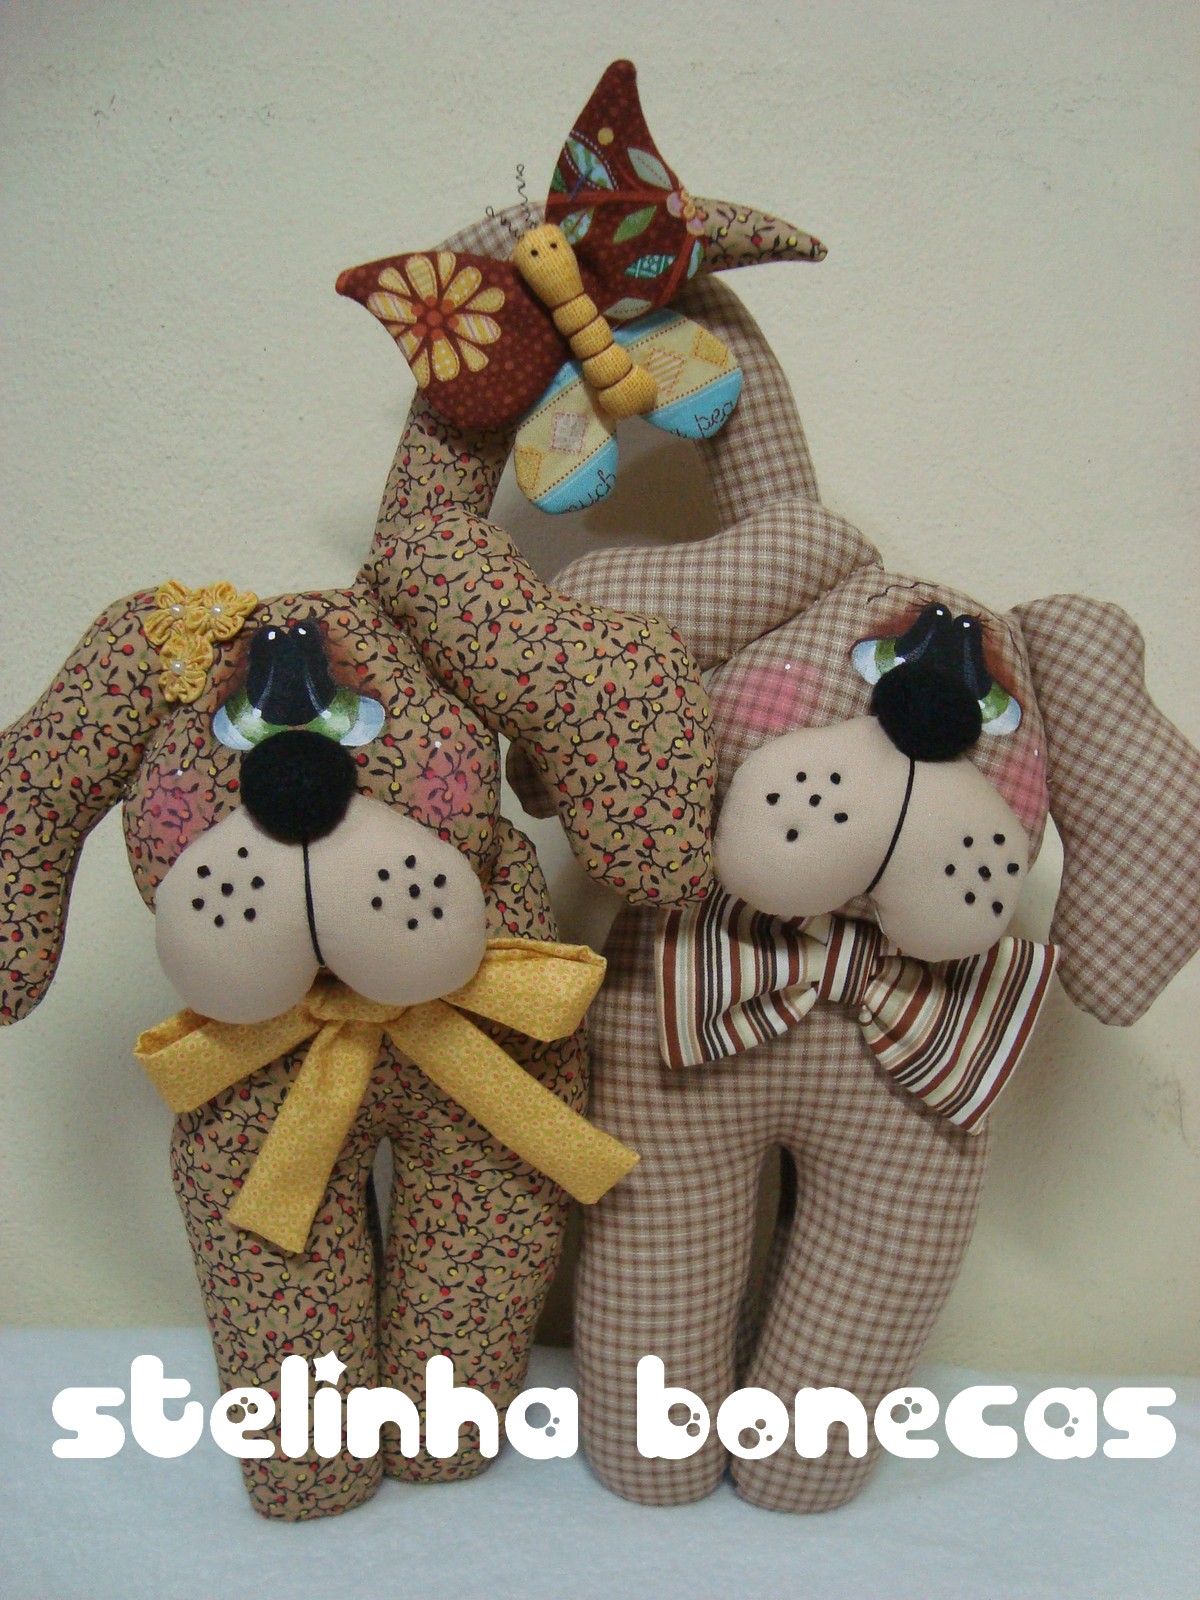
Мастер кукольник из Перу Stelinha Bonecas (Стелинха Бонекас) - текстильные куклы |
Мастер кукольник из Перу Stelinha Bonecas (Стелинха Бонекас) -
текстильные куклы
Stelinha Bonecas (Стелинха Бонекас) из Перу шьет забавные, милые и очень позитивные куклы и игрушки в стиле примитив и Тильда.

Метки: текстильные куклы |
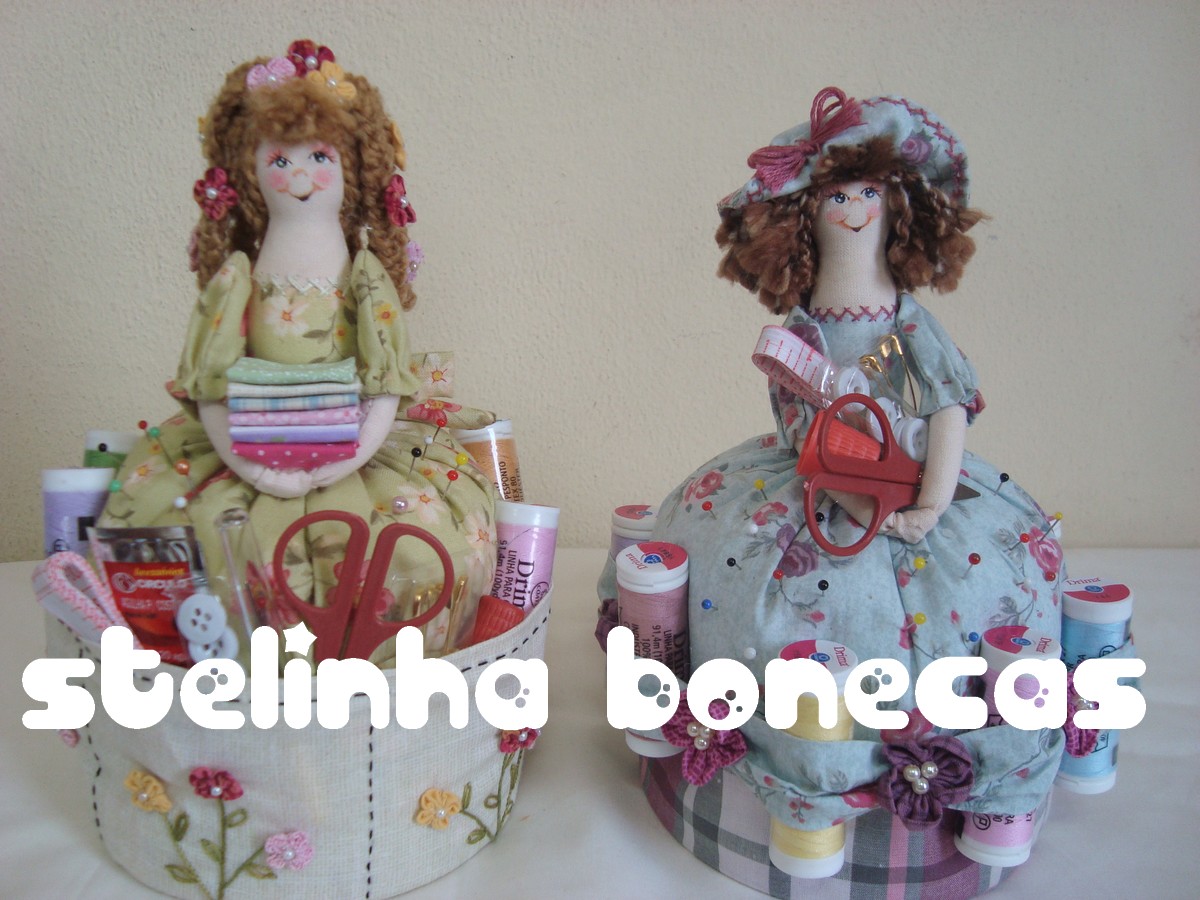
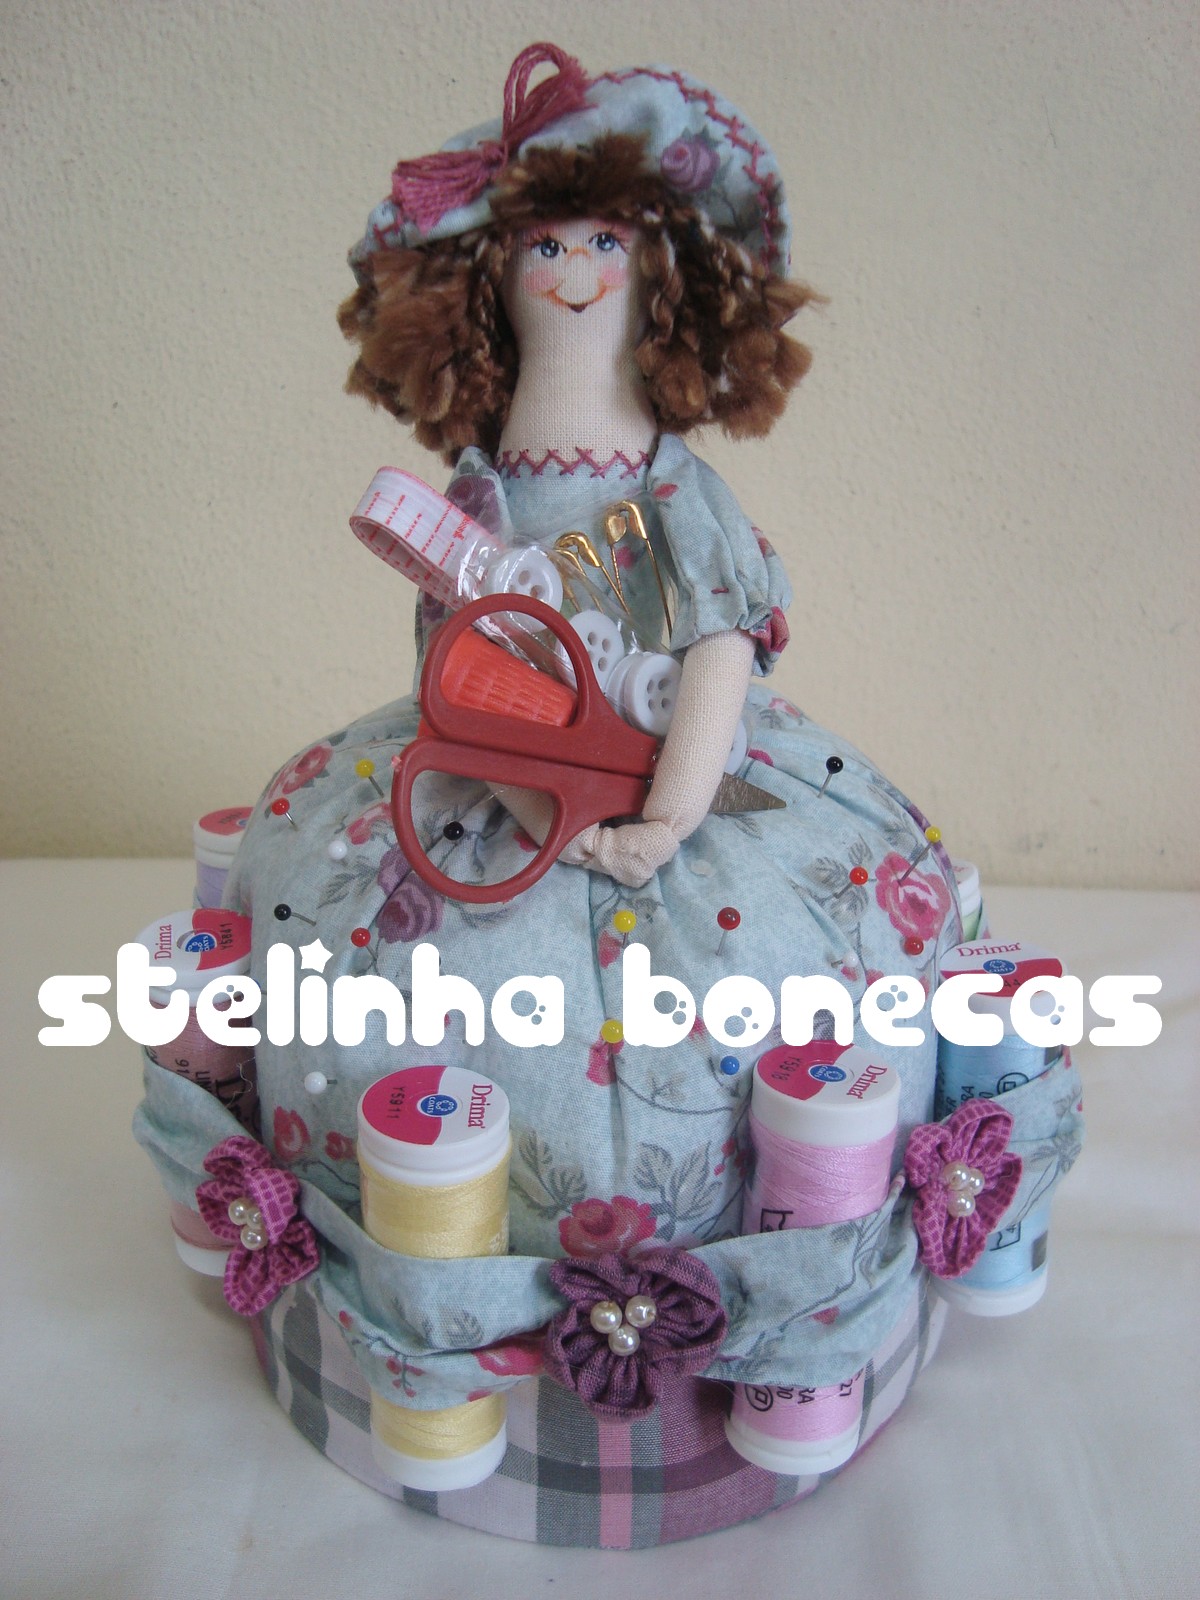
Мастер кукольник из Перу Stelinha Bonecas (Стелинха Бонекас) - текстильные полезные вещицы для дома |
Мастер кукольник из Перу Stelinha Bonecas (Стелинха Бонекас) - забавные и приятные текстильные мелочи для дома, кухни и творчества
Stelinha Bonecas (Стелинха Бонекас) живет в Перу, но известна рукодельницам и других стран своими забавными куклами-примитивами. Это и куклы люди, животные, панно и композиции из них к праздникам и для украшения и вещицы утилитарного характера. Все ее куклы довольно крупные и могут относиться к интерьерным куклам и исполнены в милой манере, очень декоративны и позитивны.

Метки: куклы |
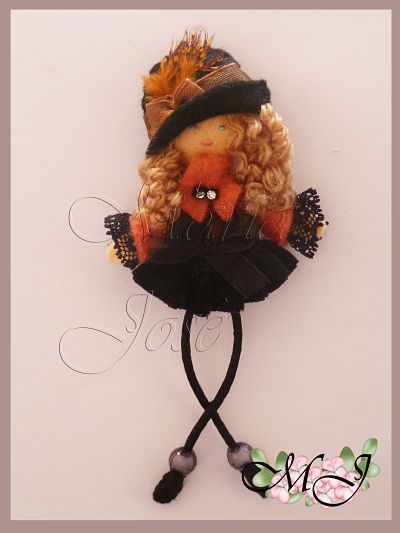
Маленькие фетровые куколки-брошки от M ª José |
Дорогие мои читатели, хочу показать вам очаровательные брошки, сделанные мастерицей Марией Хосе
1.

2.
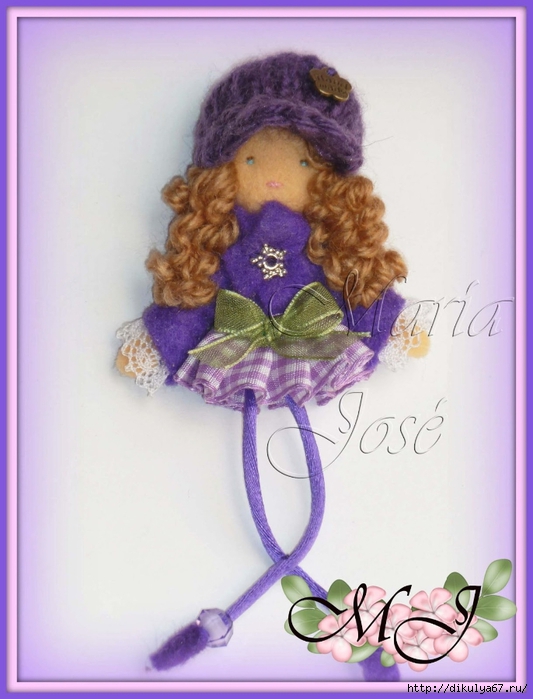
3.
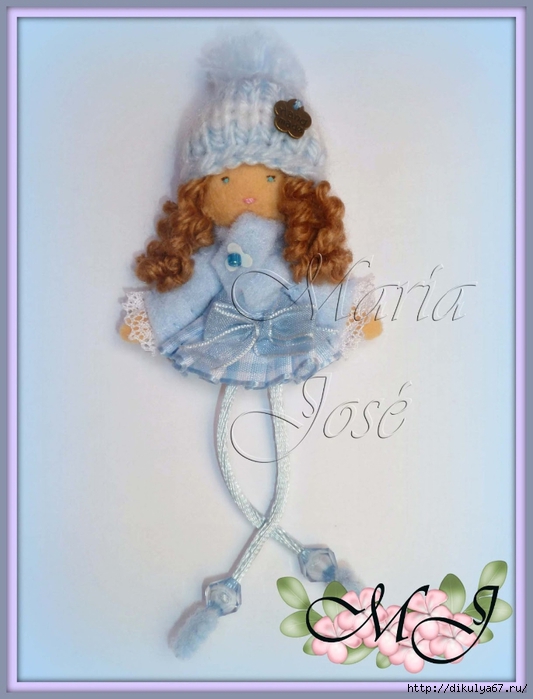
4.
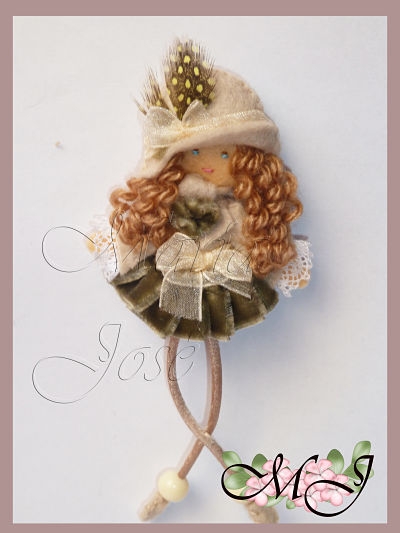
5.
Метки: куклы |
Куклы из чулок |
Дневник |
Метки: куклы |
Очень подробный МК по кукольной ножке |
Стащила отсюда http://members.home.nl/asrai/cursus-en.htm
|
The foot in this tutorial is from heel to big toe about 1.8 inch long. Always use the head as a comparison for the size of the feet. The length of the feet is equal to the size of the head. |
 |
 |
|
In this tutorial I will only make the right foot. Try to work simultaneously on both feet because it is hard to make an equal looking foot afterwards. You start off by making a 2.5 inch long cylinder shaped roll of clay, about 0.8 inch thick (pict. 1). Bend the roll of clay in an angle like in pict. 2. The top will become a part leg and the other part the foot. |
|
 |
 |
| Flatten the clay by pressing it together between thumb and point finger towards the 'toes'. Be careful not to make it too flat. (pict. 3 + 4). | |
 |
 |
|
Now it is time to form the heel. Push/smear some clay from under the foot backwards (towards the heel) and push/smear some clay from the lower leg down (towards the heel) (pict. 5). This way you'll get more clay on the heel and a better shape at the sole of the foot. Press the clay with your thumb on the inside of the foot to make it more hollow (pict. 6). |
|
 |
 |
|
Before you can make incisions for the toes, the front of the foot needs to be reshaped a bit. Cut off a piece of clay slantwise starting at the 'big toe' (pict. 7). After this smooth the edge with your fingers (pict. 8). |
|
 |
 |
|
Look at the foot to see if it's not too thick, if it is you can make it thinner by smearing the clay from the instep to the leg. You can also smear clay upwards just above the heel towards the leg, this way the foot will become slimmer (pict. 9). Sculpt as smooth as possible, use a damp finger to rub the clay for a smooth finish. Now you can make incisions for the toes with the help of a sharp tool. Don't forget the big toe needs to be bigger than the other toes (pict. 10). |
|
 |
 |
|
Spread out the toes gently so you have more working space (pict. 11). Hold the toes one by one between your point finger and thumb. While warming the clay by the warmth of your hands, very gently roll the toes slightly back and forth, so the inside of the toes will also become round. This will probably make the toes become too long but that doesn't matter (pict. 12). When the toes have the right thickness and are nice and round, you can cut them off at the right size. Smooth the edges of the toes with your fingers. |
|
 |
 |
|
You can use a sculpting tool for the areas that are difficult to reach, like between the toes (pict. 13). If everything is nice and smooth, we are ready to make the nails (pict. 14). |
|
 |
 |
|
You could use the small hollow chisel again as I used in the hands lesson, but this time I will sculpt the lines by hand. For this I used a sharp sculpting tool, the one in pict. 10. You could also use a small knife (not too sharp). Press left and right from the 'nail' a straight line in the clay (pict. 15). Now you have to connect those two lines, this is a very precise work. You could also use a sharp wooden toothpick for this (pict. 16). They start to look more and more like real nails. |
|
 |
 |
|
Some polymer clay brands can become overworked, it can become too soft. So at this time I gave the nails some rest and focused on the sole of the foot. Halfway each toe I draw a line on the inside, except the small and the great toe (pict. 17) The nails weren't finished yet. We also have to connect the lines at the front of the toe with a sharp tool, as you can see in pict. 18. |
|
 |
 |
|
Draw lines on the 'knuckle' area of the toes with a small sculpting tool or toothpick , the same way as I did in the hands tutorial. This makes it look more natural (pict. 19). The sole of the foot needs some more modeling. Place 3 slices of clay on the heel, ball and big toe, like in pict. 20, carefully blend the seams with your sculpting tool or fingers until the seams are blended in with the sole. |
|
 |
 |
|
Moisten your finger and polish everything smooth.This also works for removing unwanted fingerprints. At pict. 21 you can see a sideview of the foot, it looks much better now because of the modeling we did at the sole of the foot. Use a sculpting tool or rubbertip brush to add lines to accentuate the tendons/bones of the foot (pict. 22). |
|
 |
 |
|
Rub the lines with a wet finger to blur and make it look more natural (pict. 23). Now it's time to make the knuckles on the ankles. Before you start check out the foot from all sides to see if it still looks okay (pict. 24). |
|
 |
 |
|
Pay attention to the ankle area that it is not too fat. If it is you still have the chance now to sculpt it slimmer (pict. 25). Place a small slice of clay on both sides of the ankle where the knuckle should be. Study your own foot to see how this looks (pict. 26). |
|
 |
 |
|
Blend the seams with a sculpting tool (pict. 27), don't blend it too wide because it wouldn't look like bone anymore. Just blend only the edges. Gently rub over the knuckles with a slightly wet finger to make it smooth (pict. 28). |
|
 |
 |
|
The foot is almost ready now. Before curing check the feet from all sides and correct any mistakes, don't forget the sole of the feet (pict. 29 + 30). |
|
 |
 |
|
Cut off the leg at about 1.40 inch. Use a wooden toothpick to make a hole in the leg, make sure it's deep enough, about 0.80 inch. Twist the stick a little to make the holes wider so it will fit the armature. I use a small wooden board with big nails through it, as a stand to place the feet on (pict. 31). I pre-heat the oven at 220-266 Fahrenheit and bake the feet for about 30 minutes. Always use an oven thermometer to make sure the oven is at the right temperature, because if it gets too hot the polymer clay may turn yellow/brown. Leave the feet to cool in the oven before you take them out (pict. 32). |
|
 |
 |
|
After cooling down I made it a little smoother by sanding the clay with a polishing sponge. Sometimes rubbing it with a soft cloth is enough. If there are any small scratches visible, you can gently touch them with some acetone on a brush and usually they disappear. Use very little acetone because too much can give white spots on the clay! Next step is painting and coloring the foot. This can be done by either acrylics, watercolor paint or water- or oil based patina. For this foot I use watercolor paint and acrylic paint (pict. 33). First I rub the clay in with some skin powder make-up to give it a warmer tone. The color of the nails was created by blending different shades of watercolor paint. I use a thin paintbrush to apply the paint, I paint the nails several times, letting it dry in between coats. This paint is transparent and doesn't really stick to the clay. So you need to do this a few times, some of the paint's pigment will be absorbed by the clay, just enough for a natural color (pict. 34). |
|
 |
 |
|
I mix white acrylic paint with a bit black or yellow to get an off-white shade. With a very thin painting brush I paint the 'half moons' and the 'nail borders' (pict. 35). After the paint is dry I add some Fimo gloss varnish (not the water-based one) to finish the nails (pict. 36). I like this varnish a lot, it will not turn yellow and even after several years it will still look glossy. Now the foot is finished...! (pict. 37) |
|
 |
|
|
You can now attach the feet to the armature. If the hole in the leg is too wide you can add some papertape to the wire for a better fit. Later on you can use some glue (for instance hot glue gun) to attach them permanently.
|
|
 |
|
| The best moment for this depends on the kind of clothes he or she will be wearing. Sometimes it is easier dressing the doll, if the feet can still be detached from the legs. | |
 |
|
Метки: куклы |
Куклы от my originals Veronika |
Метки: куклы |
Лепка головы куклы из пластика |
Дневник |
Метки: куклы |
Авторская кукла от Ольги Егупец-последние штрихи |
Дневник |
Метки: куклы |
Авторская кукла от Ольги Егупец |
Дневник |
Метки: куклы |
Авторская кукла от Ольги Егупец |
Дневник |
Метки: куклы |
Авторская кукла от Ольги Егупец |
Дневник |
Метки: куклы |
Потрясающий МК куклы-ребенка на видео |
Метки: куклы |
Процесс лепки куклы из полимерной глины. |
К сожалению картинки без перевода. Но всё интуитивно понятно.
На столько подробный мастер класс, что понятен без слов.
1.

Метки: куклы |
ТЕКСТИЛЬНЫЕ КУКЛЫ |
Метки: куклы |
| Страницы: | [2] 1 |


