Цитата сообщения Fleure_de_Paris
1.

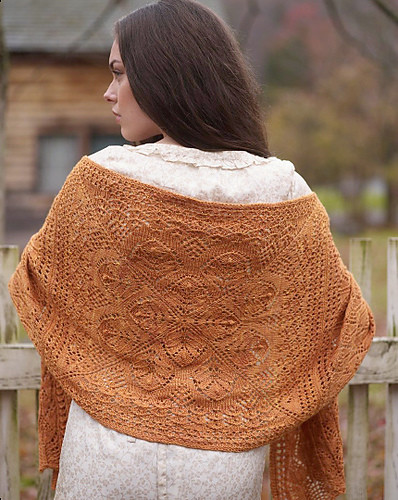
21" (53.5cm) wide x 74" (188cm) long
Yarn
1,000 yd (914m) of fingering-weight yarn:
2 skeins Sundara Yarn Fingering Silky Merino, 50% Merino wool, 50% silk, 5? oz (150g), 500 yd (457m), color Spiced
Needles
Size 5 (3.75 mm) 24" (60cm) circular needle, or size to obtain gauge
Set of 5 size 5 (3.75mm) double-pointed needles
0.6mm crochet hook or short length of beading wire for placing beads
Notions
Stitch markers (optional)
732 size 6/0 silver lined topaz seed beads
Tapestry needle
Rustproof pins for blocking
Gauge
21 stitches and 37 rows = 4" (10cm) over center lace pattern after blocking
Notes
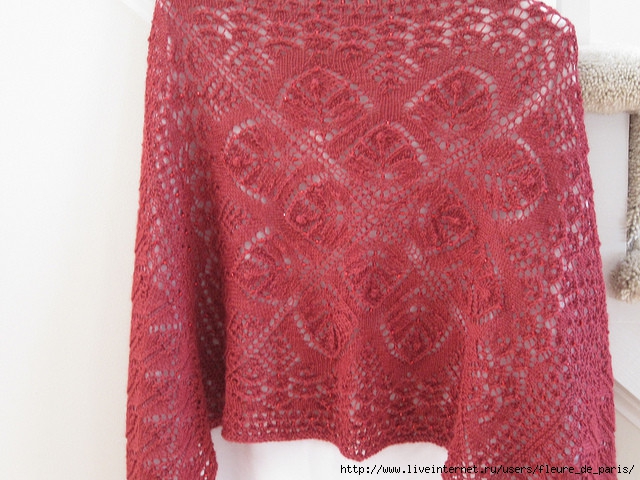
? The stole begins with a square center panel that is worked in the round from the center outward, and then two side panels are worked outward from this center.
? The center charts (A, B, and C) represent one-quarter of the pattern. Repeat the pattern 4 times around the square to complete the center panel. Placing a stitch marker after each repeat will help you keep track of the pattern.
? The charts show both right- and wrong-side rows.
? Purchase a few extra beads to allow for the inevitable broken or misshapen ones.
? When a stitch is to be beaded, work the stitch or decrease as indicated on the chart before placing the bead on the stitch. To place a bead, insert a fine crochet hook through the bead and use the hook to draw the stitch through the bead. Replace the beaded stitch on the right-hand needle. (Or bend a short length of fine beading wire to use in lieu of a crochet hook. There’s no need to place the stitch back on the needle, just push the bead off the wire and onto the stitch.)
Knitting Charts
Chart A
Charts B, C, D, E, F
Center panel
With double-pointed needles, cast on 8 stitches. Join to work in the round, being careful not to twist your stitches around the needles. Place a marker to indicate the beginning of the round.
Knit 1 round.
Work Chart A. Repeat the chart pattern 4 times around the square, placing a marker after each pattern repeat.
Change to circular needle.
Work Chart B, repeating the chart pattern 4 times around the square.
Work Chart C, repeating the chart pattern 4 times around the square—392 stitches.
Next round: Loosely bind off 98 stitches to the first marker, knit 98 stitches to the second marker and place these stitches on a stitch holder, loosely bind off 98 stitches to the third marker, and knit the remaining 98 stitches.
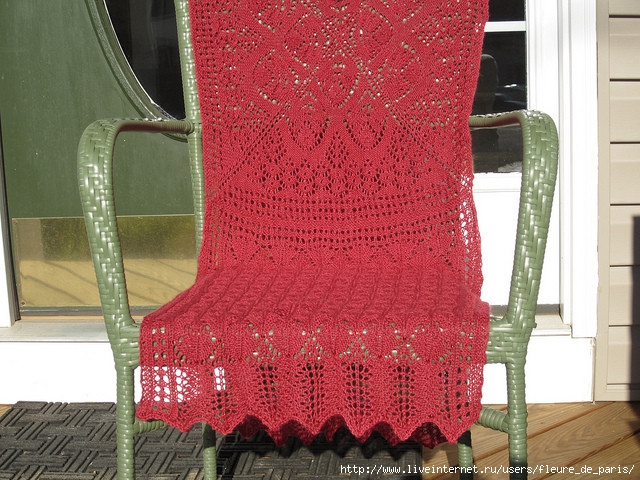
First side panel
Next row (WS): K3, place marker, * p23, m1; repeat from * twice more, p23, k3—101 stitches.
Next 9 rows: Slip 1 stitch with yarn in front, k2, slip marker, work Chart D to marker, slip marker, k3.
Next row (row 10 of Chart D): Slip 1 stitch with yarn in front, k2, slip marker, p19, * M1P, p19; repeat from * 3 times more, slip marker, k3—105 stitches.
Maintaining 3-stitch borders as established, begin working from Chart E. Work rows 1–20 of chart 8 times, then work rows 1–10 once more.
Maintaining 3-stitch borders as established, begin working from Chart F. Work rows 1–6 once, then work rows 3–6 twice, then work row 3 once more—117 stitches.
Next row (WS): Knit.
Next row (RS): P2, * p1 and bead this stitch, p3;
repeat from * to the last 3 stitches, p1 and bead this stitch, p2.
Bind off loosely.1.
2.
3.
4.

5.