-–убрики
- »коны молитвы обереги (23)
- ћаги€ (19)
- омнатные цветы!!! (9)
- ѕолезные советы от передачи ¬—≈ Ѕ”ƒ≈ ƒќЅ–≈ (5)
- Ѕуфы (3)
- ћќ» ѕќ’¬ј—“”Ў »! (2)
- Ќовости (1)
- ћои мысли (1)
- дл€ дневника (55)
- город ќдесса!! (20)
- интересное в мире (24)
- ”–ќ » —“»Ћя!!!! (11)
- выкройки одежды (79)
- видео и мастер классы по пошиву одежды (52)
- мои мастерклассы (8)
- программы дл€ построени€ выкроек (12)
- книги и журналы по шитью (25)
- ј“јЋќ√ ћќƒ≈Ћ≈… (32)
- моделирование (27)
- аксесуары дл€ одежды своими руками (30)
- ќбработка деталей одежды (35)
- одежда дл€ собак (12)
- сумки своими руками (20)
- ћј—“≈– Ћј——џ ѕќѕќЎ»¬” Ў“ќ– (62)
- полезна€ информаци€ о шторах (13)
- подушки (8)
- чехлы на стуль€ (13)
- покрывала (6)
- больша€ коллекцы€ штор (5)
- рукоделие идеи декор (49)
- цвет≥ изткани (11)
- флористика (12)
- выкройки игрушек (10)
- кашить чехлыдл€ мобильных телефонов (7)
- обновлени€ в моем дневнике (2)
- € готовлю (2)
- салаты (21)
- учимс€ готовить (53)
- закрутки (7)
- € и мое путешествие (2)
- ћќя ЋёЅ»ћјя ћ”«џ ј (2)
- флеш игры (6)
- ћјЌ» ё– » ѕ≈ƒ» ё– (12)
- мысли фразы великих людей (19)
-я - фотограф
мои рисунки штор
-ѕоиск по дневнику
-ѕодписка по e-mail
-—татистика
—ери€ сообщений "аксесуары дл€ одежды своими руками":¬ыбрана рубрика аксесуары дл€ одежды своими руками.„асть 1 - ”чимс€ шить галстук! ‘ото мастер-класс.
ћатериал, выставленный в моем блоге, вз€т из открытых источников и используетс€ исключительно в некоммерческих цел€х. ≈сли ¬ы €вл€етесь автором материала или обладателем авторских прав на него и против его использовани€ в моем блоге,пожалуйста, сообщите об этом. ≈сли ¬аше авторство не было указано, можете сообщить мне личным письмом или оставьте комментарий под постом.
„асть 2 - ћастер-класс Ћены –одиной. ѕалантин .
„асть 3 - ќльга Ќикишичева. “еплые аксессуары своими руками
„асть 4 - Hand made - декор из молнии
„асть 5 - ћастер класс, как сделать ремни из подручных средств.
„асть 6 - аксессуары из чего попало.
„асть 7 - ћастер-класс по зав€зыванию саронга_сумочка
„асть 8 - ћодный акцент! ¬оротнички - идеи и мастер-классы
„асть 9 - ѕов€зка на голову своими руками в вечернем стиле.
„асть 10 - –емень дл€ джинс и легких брюк за полчаса. ћастер-класс
„асть 11 - ј —ƒ≈Ћј“№ √ќ‘–»–ќ¬јЌЌџ… Ўј–‘ —¬ќ»ћ» –” јћ»
„асть 12 - ѕќя— — ÷¬≈“ ќћ а-л€ Ќ»Ќј –»„„» «ј ѕќЋ„ј—ј!
„асть 13 - ќжерелье из галстука
„асть 14 - Felt Flower Scarf Tutorial
„асть 15 - ак сшить косынку на резинке
„асть 16 - ƒ≈¬„ќЌ » Ќ≈ ѕ–ќ’ќƒ»“≈ ћ»ћќ!!!! Ўј–‘»
„асть 17 - Ѕраслет из джинсовой ткани. ƒелаем сами
„асть 18 - Ѕрошь-цветок из натуральной кожи.
„асть 19 - 3 необычных украшени€ с мастер-классами.
„асть 20 - Ѕисерна€ косынка дл€ бизнес-леди
„асть 21 - ѕ–ќ ј —≈——”ј–џ
„асть 22 - ѕревращаем галстук-бабочку в ожерелье.
„асть 23 - Wrap Belt/ќбертывание ѕо€с
„асть 24 - Ћили€ из ткани ћ
„асть 25 - ак сделать розочки на обруче
„асть 26 - ”крашаем одежду.
„асть 27 - Ўапочка наушники своими руками
„асть 28 - ћастер-класс: Ўаблон дл€ зав€зывани€ бантов и его использование
„асть 29 - ак сшить перчатки - пошагово
„асть 30 - Ѕусы "летн€€ пол€на"
ƒругие рубрики в этом дневнике: € и мое путешествие(2), € готовлю (2), чехлы на стуль€(13), цвет≥ изткани(11), флористика(12), флеш игры(6), учимс€ готовить(53), ”–ќ » —“»Ћя!!!!(11), сумки своими руками(20), салаты(21), рукоделие идеи декор(49), программы дл€ построени€ выкроек(12), ѕолезные советы от передачи ¬—≈ Ѕ”ƒ≈ ƒќЅ–≈(5), полезна€ информаци€ о шторах(13), покрывала(6), подушки(8), одежда дл€ собак(12), ќбработка деталей одежды(35), обновлени€ в моем дневнике(2), Ќовости(1), мысли фразы великих людей(19), ћќя ЋёЅ»ћјя ћ”«џ ј(2), ћќ» ѕќ’¬ј—“”Ў »!(2), ћои мысли(1), мои мастерклассы(8), моделирование(27), ћј—“≈– Ћј——џ ѕќѕќЎ»¬” Ў“ќ–(62), ћјЌ» ё– » ѕ≈ƒ» ё–(12), омнатные цветы!!!(9), книги и журналы по шитью(25), кашить чехлыдл€ мобильных телефонов(7), ј“јЋќ√ ћќƒ≈Ћ≈…(32), интересное в мире(24), »коны молитвы обереги(23), закрутки(7), дл€ дневника(55), город ќдесса!!(20), выкройки игрушек(10), видео и мастер классы по пошиву одежды(52), Ѕуфы(3), больша€ коллекцы€ штор(5), выкройки одежды(79)
”чимс€ шить галстук! ‘ото мастер-класс. |
Ёто цитата сообщени€ √лебова_≈лена [ѕрочитать целиком + ¬ свой цитатник или сообщество!]
|
ћетки: ”чимс€ шить галстук! ‘ото мастер-класс. |
ћастер-класс Ћены –одиной. ѕалантин . |
ƒневник |
»так, нам понадоб€тс€: св€занное полотно (основа палантина), кружево, клеева€ паутинка, тонкие нитки в тон.
“акже нам понадоб€тс€ инструменты: спицы є4 или в€зальна€ машина, ножницы, утюг, линейка с пр€мым углом и швейна€ машинка.
¬ данном материале были использованы: пр€жа Ћейс Ћюкс 1 моток, кружево, разрезанное вдоль -2,6 метров.
1. ¬€заное полотно отпарить с изнанки.
2. ра€ кружевного полотна выровн€ть.
3. »спользуем паутинку шириной 4 мм. Ќа бумажной основе. ” кого паутинка широка€, то тогда ее режем вдоль на узкие полоски.
4. ѕриутюживаем паутинку на край (срез) кружева с лицевой стороны. —нимаем бумагу.
5. Ќакладываем край в€заного полотна на кружевной край, оставив припуск на угол (2 ширины кружевного полотна на каждый угол), склеиваем (при помощи утюга) до угла.
6. ¬ыкладываем углы. »х также фиксируем паутинкой.
7. ѕритачиваем полотно к кружеву (шов зигзаг).
8. ”глы срезаем близко к строчке, дублируем второй строчкой. √отово.
ћетки: ћастер-класс Ћены –одиной. ѕалантин . |
ќльга Ќикишичева. “еплые аксессуары своими руками |
ƒневник |
|
ћетки: ќльга Ќикишичева. “еплые аксессуары своими руками |
Hand made - декор из молнии |
ƒневник |
|
ћетки: Hand made - декор из молнии |
ћастер класс, как сделать ремни из подручных средств. |
ƒневник |
 |
|
|
аксессуары из чего попало. |
ƒневник |
|
ћетки: аксессуары из чего попало. |
ћастер-класс по зав€зыванию саронга_сумочка |
ƒневник |
 |
|
|
ћодный акцент! ¬оротнички - идеи и мастер-классы |
Ёто цитата сообщени€ Money-box [ѕрочитать целиком + ¬ свой цитатник или сообщество!]
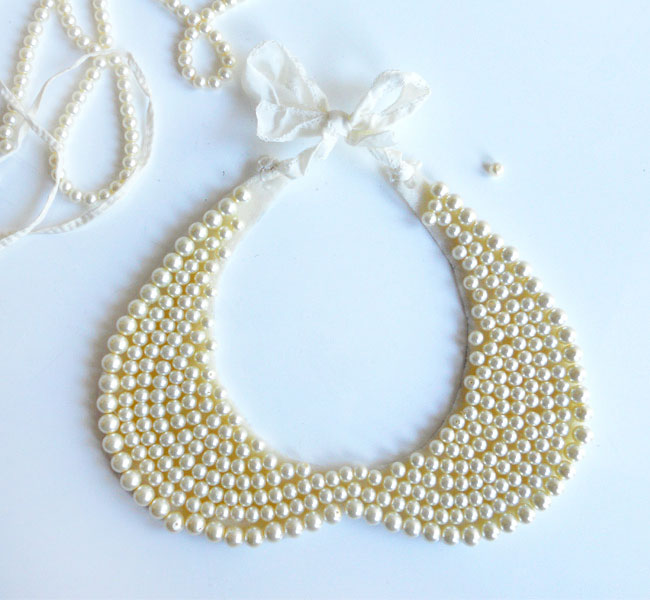
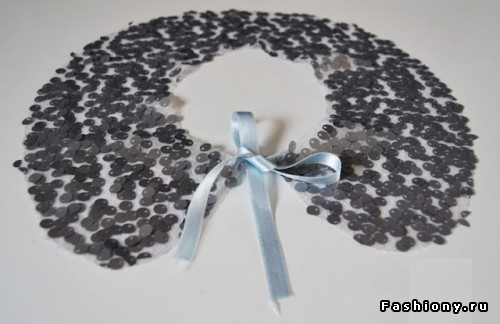
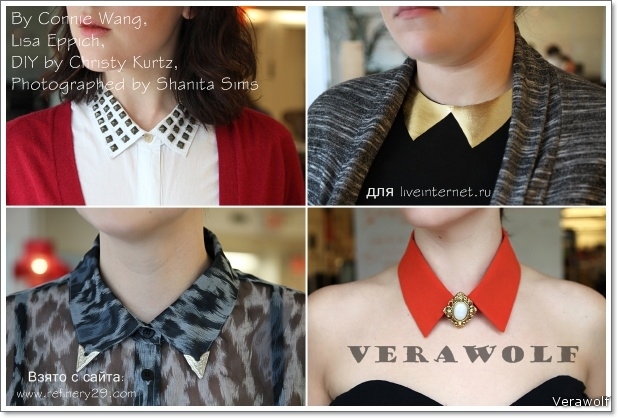
ак украсить простой нар€д и сделать его изысканным? ќдеть воротник !!! ј сделать его совсем нетрудно и дл€ декора в закромах что-то найдетс€ ( ведь не только € все откладываю на вс€кий случай ?![]() )
) ![]()
Natali Lyuta


»деи
|
ћетки: ћодный акцент! ¬оротнички - идеи и мастер-классы |
ѕов€зка на голову своими руками в вечернем стиле. |
ƒневник |
|
ћетки: ѕов€зка на голову своими руками в вечернем стиле. |
–емень дл€ джинс и легких брюк за полчаса. ћастер-класс |
Ёто цитата сообщени€ »римед [ѕрочитать целиком + ¬ свой цитатник или сообщество!]
јвтор: √ончарова “ать€на
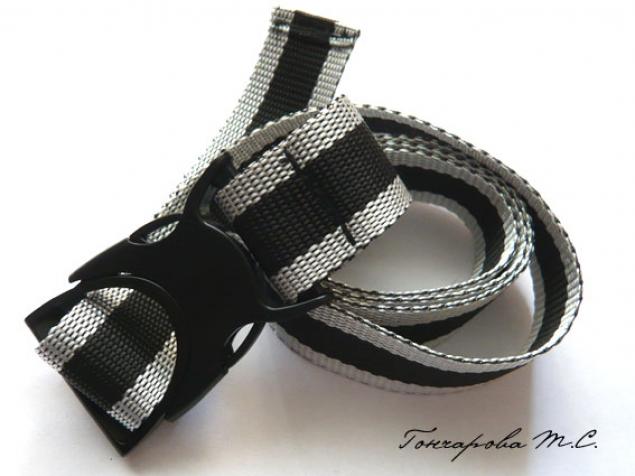
Ќеобходимые материалы и инструменты:
- стропа средней жесткости (примерно 1,25 м на мою талию 50-го размера);
- карабин;
- нитки подход€щие по цвету;
- ножницы;
- зажигалка.

ћастер-класс здесь:
http://www.livemaster.ru/topic/107466-remen-dlya-dzhins-i-legkih-bryuk-za-polchasa
|
|
ј —ƒ≈Ћј“№ √ќ‘–»–ќ¬јЌЌџ… Ўј–‘ —¬ќ»ћ» –” јћ» |
Ёто цитата сообщени€ »римед [ѕрочитать целиком + ¬ свой цитатник или сообщество!]
http://e1.interweave.com/dm?id=D087EC0A6C30B1BE89AA2B2FD95CD71F2164CA6DD2A8BFAD

ѕересказ мой ![]() »римед
»римед

|
ћетки: ј —ƒ≈Ћј“№ √ќ‘–»–ќ¬јЌЌџ… Ўј–‘ —¬ќ»ћ» –” јћ» |
ѕќя— — ÷¬≈“ ќћ а-л€ Ќ»Ќј –»„„» «ј ѕќЋ„ј—ј! |
Ёто цитата сообщени€ »римед [ѕрочитать целиком + ¬ свой цитатник или сообщество!]
“акой по€с сделает ¬аш образ романтичным и женственным, оживит не только любое платье, но и комплект из романтичной блузки и строгой юбки-карандаш.

»сточник вдохновени€: ћарион оттиль€р (актриса, исполнительница роли Ёдит ѕиафф, за исполнение которой получила ќскара) в платье от Ќина –иччи и по€се с цветком, журнал ¬ог (Vogue), июль 2010.


Ќам потребуетс€:
ќстатки 5 различных оттенков ткани цвета персика, шампанского, сиреневого фиолетового и пурпурного.
јтласна€ лента или поход€ща€ ткань дл€ по€са
“екстильный клей, в данном случае марки Aleens, но ¬ы можете воспользоватьс€ любой другой маркой
»голка с ниткой
Ўирока€ и тонка€ резинка
Bыкройка от ћарты —тюарт http://images.marthastewartweddings.com/][/url] (используетс€ большой цветок)

¬ырезаем по выкройке 5 больших цветков.

«ащипываем центр каждого цветка и ст€гиваем их вместе тонкой резинкой.

ѕриклеиваем широкую резинку вокруг основани€ цветка (желательно, чтобы широка€ резинка подходила приблизительно по цвету). “о же самое проделываем с оставшимис€
оттенками ткани.

ѕрикрепл€ем каждый цветок к ленте с помощью кле€ и нитки с иголкой.

¬аш цветок готов!

¬џ –ќ… ј ÷¬≈“ ј (€ оставила маленький цветок тоже, хороша€ форма, пригодитс€!)

ѕеревод »римед (мой)
»—“ќ„Ќ» :http://rubymines.blogspot.com/
—ери€ сообщений "ћќ» ѕ≈–≈¬ќƒџ":
„асть 1 - Ѕуфы - современный взгл€д
„асть 2 - ѕрихватки из войлока "ќсенние листь€". ћастер-класс
...
„асть 5 - ƒвухсторонние крючки и крючки тунисские. ¬ чем разница?
„асть 6 - ∆ј ≈“ «ј 30 ћ»Ќ”“? ƒј!!!
„асть 7 - ѕќя— — ÷¬≈“ ќћ а-л€ Ќ»Ќј –»„„» «ј ѕќЋ„ј—ј!
„асть 8 - Ўј–‘-“–јЌ—‘ќ–ћ≈– FIVE-WAY
„асть 9 - ј —ƒ≈Ћј“№ ј ”–ј“Ќџ≈ ”√ќЋ » ѕ–» ѕќЎ»¬≈. ћј—“≈–- Ћј——+¬»ƒ≈ќ
...
„асть 33 - —умка "тучный" мешок по-€понски. Ќова€ модель (крючок)
„асть 34 - Ўьем тунику дл€ пл€жа. ќчень быстро!
„асть 35 - Ўикарна€ роза из ткани. ¬идео (с переводом)
|
ћетки: ѕќя— — ÷¬≈“ ќћ а-л€ Ќ»Ќј –»„„» «ј ѕќЋ„ј—ј! |
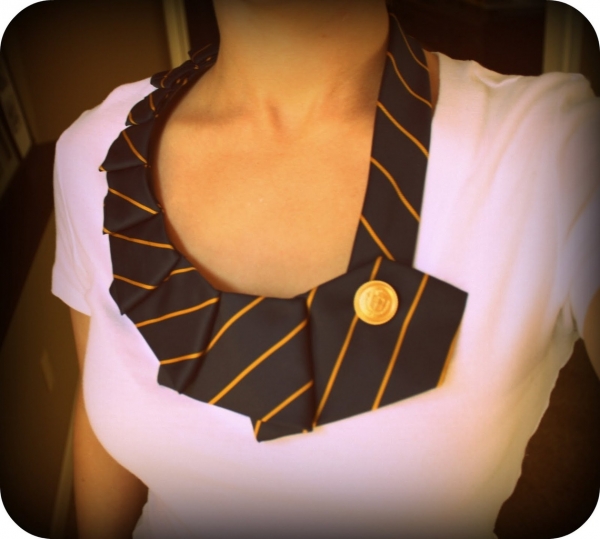
ќжерелье из галстука |
Ёто цитата сообщени€ ∆≈Ќј [ѕрочитать целиком + ¬ свой цитатник или сообщество!]
|
ћетки: ќжерелье из галстука |
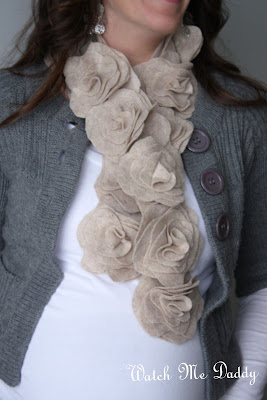
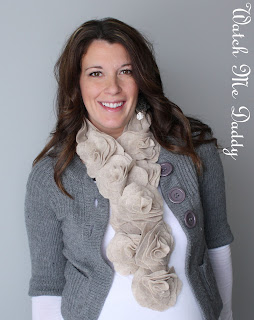
Felt Flower Scarf Tutorial |
Ёто цитата сообщени€ [ѕрочитать целиком + ¬ свой цитатник или сообщество!]
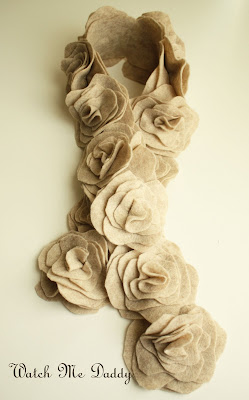
Felt Flower Scarf Tutorial
Really, my goodness, I didn't expect so many people to be interested in it.
I'm happy to share this tutorial for you on how to make one of your own!
Materials needed:
1/2 yard of 72" Felt or Felted Wool (this measurement is to be safe... but you'll end up with some extra here for sure.)
Scissors
Needle and Coordinating Thread
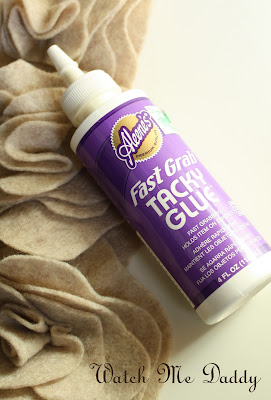
*optional - Fast Grab Tacky Glue or Hot Glue
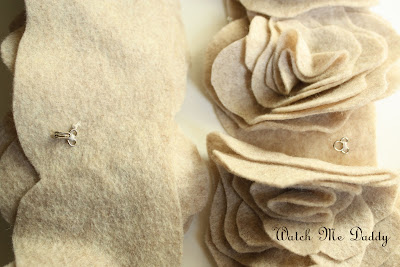
*optional - Small hook and eye
Let's get started shall we?
1. Cut everything out
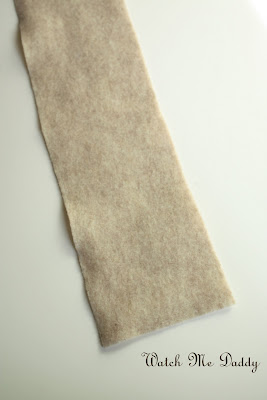
Start by cutting your long scarf piece.
Mine was 42" long by 4 1/2" wide. You could certainly make it longer or shorter depending on how long you like to wear your scarves. (You'll just need to adjust the number of flowers you make.)
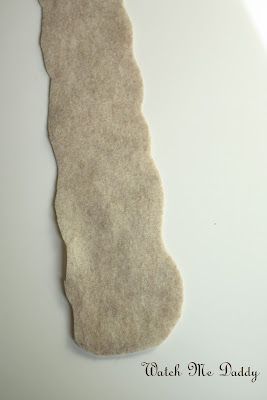
Now, cut a scallop around the edge of your long scarf piece. (This just adds to the fullness of your flowers.)
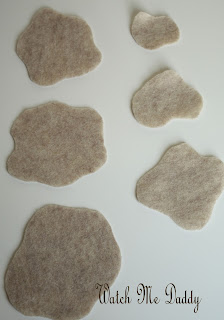
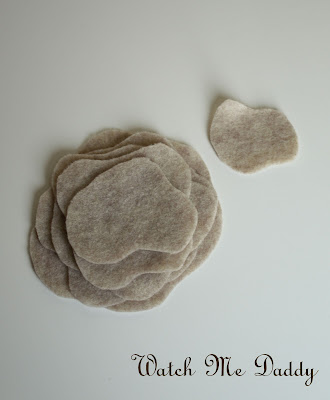
Next, circle cutting mania.
Each flower will have 6 circles. My largest was 5" and my smallest was 2". With small declining sizes for each of the circles in between.
DO NOT spend the time cutting out perfect circles. Just cut one for size, then hold it over your fabric and cut around it.
For a 42" scarf you will need 13 flowers. So, cut out 13 of each size.
Now scallop all of the circles.
If you like deep looking petals, cut deeper scallops. If you want a subtle look, cut shallow scallops. I like a mixture of both.
2. Assemble the Flowers
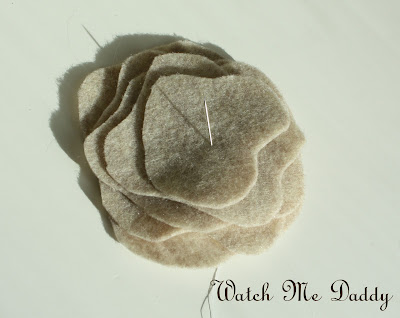
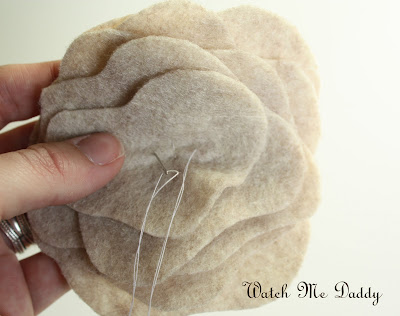
Stack your 5 largest circles.
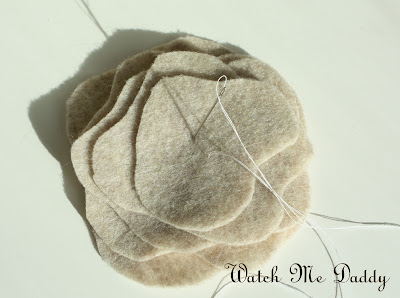
Now go back down through the stack about 1/2 inch away, on the other side of center.
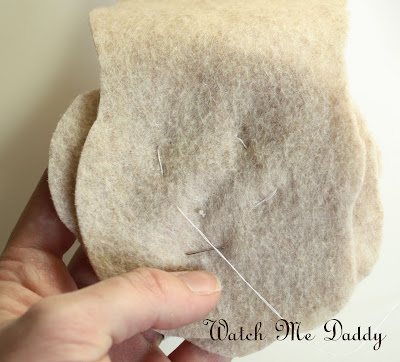
Now make an X. So you'll make another stitch at one of the unused sides of center, and go back down 1/2 inch or so away from that on the other side of center.
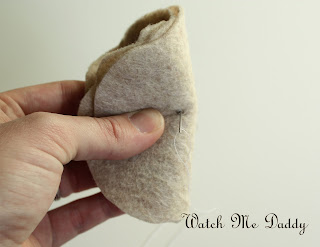
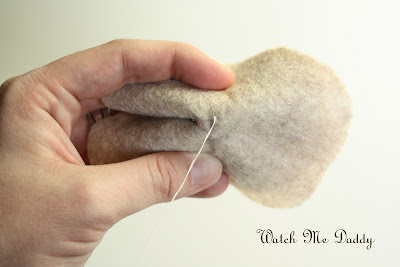
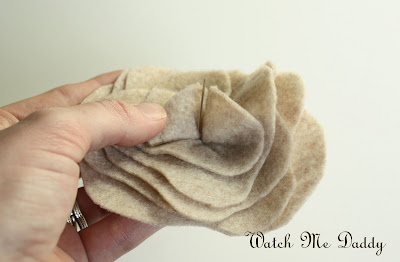
Fold the flower in half with the gather and make another stitch directly over the one you just made. Pull very tight. Really, don't break your thread, but pull it very very tight to hold the gather in your flower.
Tie a few strong knots, but do not cut your thread.
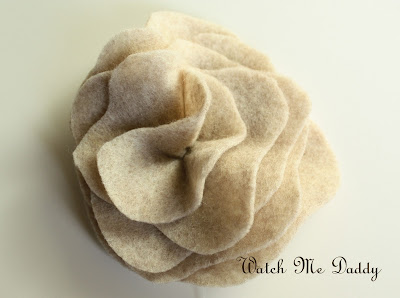
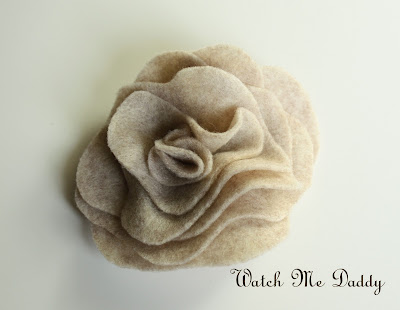
This is how your flower will look so far.
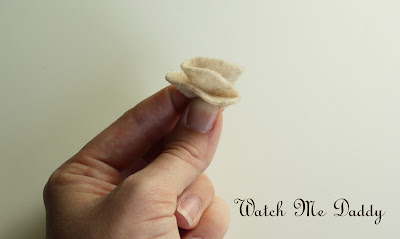
Take your smallest circle and gather it together. You can do this a number of ways, but an easy way is to just fold it in half, then fold it in half again.
Hold it in place where you want it on the center of your flower.
Pull very tight and tie a strong and secure knot.
Cut thread and your flower is complete!!
Now repeat 12 more times. :)
3. Scarf Making Time
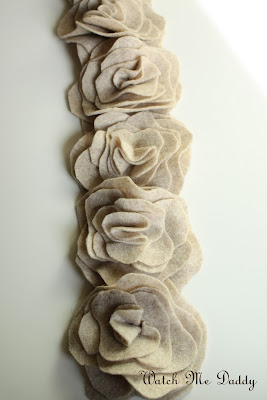
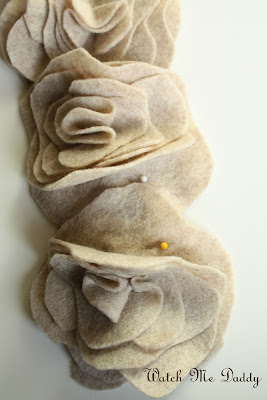
Line up all of your flowers on your long scarf piece with the bottom layer of each flower overlapping a bit. This is what gives it the fullness. Don't be afraid to get them in there close together.
Get all 13 flowers set on just where you like them then pin only the bottom layer of each flower to the scarf.
Stitch a small, but tight circle through the bottom layer of the scarf and flower. Knot tightly. Cut the thread as you finish attaching each flower, and start new with the next flower.
Continue until all 13 are attached.
** This step is optional, but not for me. I have two 3-year-olds, so scarves (and any accessory I own) have to be tough if they're going to survive. I went around on each flower and added a bit of Fast Grab Tacky Glue to make sure they were held in place firmly. You could also use hot glue if you prefer.
** This step is also optional. I hate when scarves move all around when you're wearing them, or when they blow away in the wind.
SO, I put on the scarf, and placed a pin on each end of the scarf where I wanted them to match up. I wanted it to be one flower longer on one side.
Sew the hook on the longer side on the back of the scarf, and the eye, sort of tucked away beneath a flower, on the front of the shorter end of the scarf.
4. Wear!!!
|
ћетки: Felt Flower Scarf Tutorial |
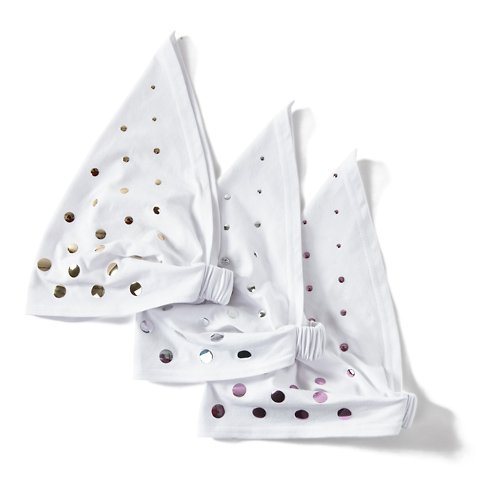
ак сшить косынку на резинке |
Ёто цитата сообщени€ –укоделки_посиделки [ѕрочитать целиком + ¬ свой цитатник или сообщество!]
источник http://9xxz.livejournal.com/17119.html
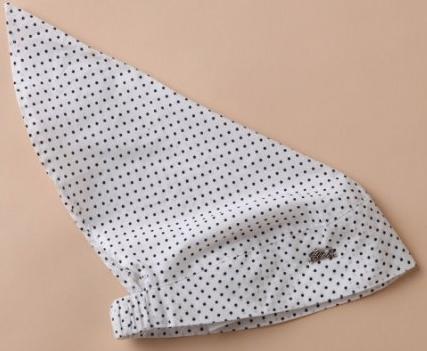
√лавные удобства такой косынки – легко надевать, не надо мучатьс€ с зав€зыванием, и оптимальное облегание головы (не слишком туго и не слишком свободно – в самый раз!). “акже такие косынки очень удобны дл€ маленьких деток.
|
ћетки: ак сшить косынку на резинке |
ƒ≈¬„ќЌ » Ќ≈ ѕ–ќ’ќƒ»“≈ ћ»ћќ!!!! Ўј–‘» |
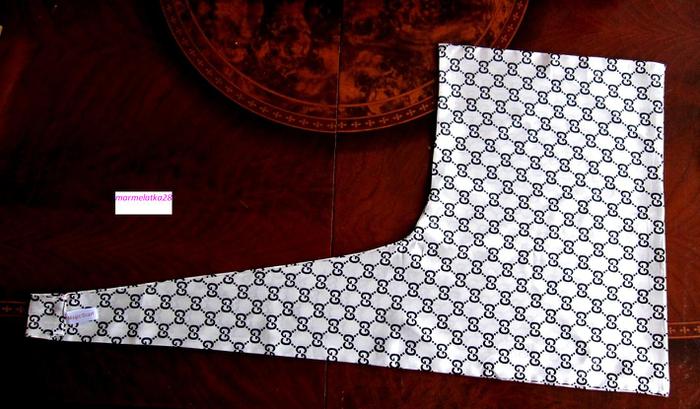
Ёто цитата сообщени€ marmelatka28 [ѕрочитать целиком + ¬ свой цитатник или сообщество!]
ћЌ≈ ѕќƒј–»Ћ» Ўј–‘» . » ” ћ≈Ќя —ќ«–≈Ћј ћџ—Ћ№ ѕќƒ≈Ћ»“—я — ¬јћ» ¬џ –ќ… ќ….
—Ќј„јЋј ‘ќ“ќ Ё“ќ√ќ Ќ” ќ„≈Ќ№ Ќ≈ќЅџ„Ќќ√ќ –ќя Ўј–‘ј.
|
ћетки: ƒ≈¬„ќЌ » Ќ≈ ѕ–ќ’ќƒ»“≈ ћ»ћќ!!!! Ўј–‘» |
Ѕраслет из джинсовой ткани. ƒелаем сами |
Ёто цитата сообщени€ annikushka [ѕрочитать целиком + ¬ свой цитатник или сообщество!]

|
ћетки: Ѕраслет из джинсовой ткани. ƒелаем сами |
Ѕрошь-цветок из натуральной кожи. |
Ёто цитата сообщени€ –ышарда [ѕрочитать целиком + ¬ свой цитатник или сообщество!]
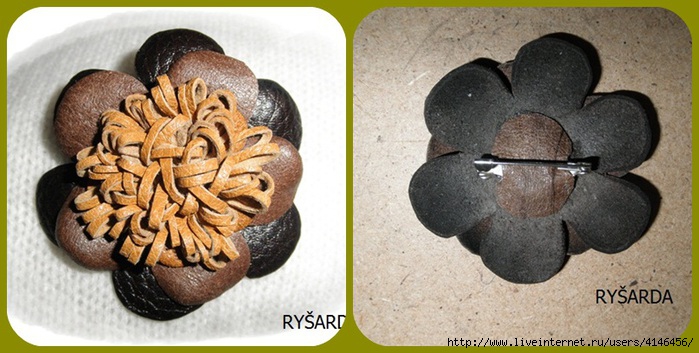
ѕо многочисленным просьбам решила найти врем€ и показать поэтапную работу самой простой броши,как у мен€ это получилось-судить ¬ам.
|
ћетки: Ѕрошь-цветок из натуральной кожи. |
3 необычных украшени€ с мастер-классами. |
Ёто цитата сообщени€ ѕодарки_своими_руками [ѕрочитать целиком + ¬ свой цитатник или сообщество!]
Ќашла эти идеи на сайтах жизнь модели и любимые подарки , рекомендую : )
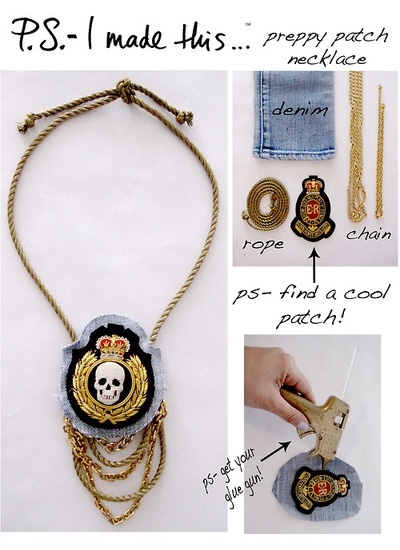
ќжерелье "череп и кости"
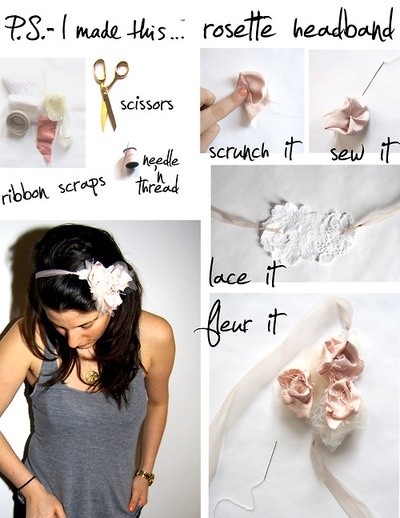
ѕов€зка с кружевами и цветами из атласных лент на голову.
Ёпалеты : )
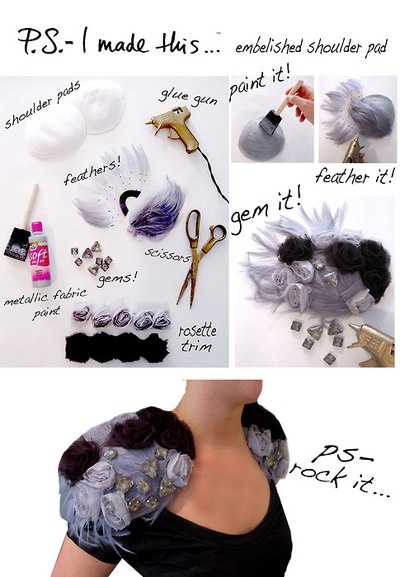
расоты!
» не много рекламы почти по теме.
ѕромоушен агентство Worldpromo это не только возможность сделать заказ пошива спецодежды но и отрисовка эскизов, подбор ткани, пошив промоформы любым тиражем. ¬озможно сшить даже 2 промо плать€ дл€ моделей. » заказать у них промо персонал так же.
|
ћетки: 3 необычных украшени€ с мастер-классами. |
Ѕисерна€ косынка дл€ бизнес-леди |
Ёто цитата сообщени€ ћаленька€_«олушка [ѕрочитать целиком + ¬ свой цитатник или сообщество!]
|
ћетки: Ѕисерна€ косынка дл€ бизнес-леди |
| —траницы: | [2] 1 |


