-÷итатник
Ўапка спицами *ћагноли€* от ћари€ —оха ќписание на английском или по...
Ѕез заголовка - (1)♥ღ♥¬ечерний кинозал♥ღ♥ ♥ღ♥Ћюдмила √урченкоb...
Ѕез заголовка - (0)ак полностью почистить компьютер. ѕошагова€ инструкци€ ¬ этом видео ¬ы узнаете о секретн...
куклы - (0)укла * ¬ыкройка
ћаки - (0)ћаки источник http://stranamasterov.ru/blog/18377?page=2 ј это - они же в сыром виде......
-–убрики
- ѕравославие (45)
- —в€тые (22)
-Ќовости
-—сылки
-ћузыка
- Dulce Pontes Cancao Do Mar
- —лушали: 7888 омментарии: 0
- Adriano Celentano - Stivalie Colbacco
- —лушали: 8879 омментарии: 0
- Lara Fabian, Je Suis Malade
- —лушали: 4521 омментарии: 0
- Ўопен
- —лушали: 932 омментарии: 1
- ѕоль ћориа - ѕоль ћориа ѕадает снег
- —лушали: 67277 омментарии: 0
-ћетки
-
ƒобавить плеер в свой журнал
© Ќакукрыскин
-я - фотограф
-ѕоиск по дневнику
-ѕодписка по e-mail
-ƒрузь€
-ѕосто€нные читатели
-—ообщества
-—татистика
«аписи с меткой идеи дл€ дома
(и еще 44949 запис€м на сайте сопоставлена така€ метка)
ƒругие метки пользовател€ ↓
ангелы афоризмы батик блог блоги вышивка в€зание в€зание крючком в€зание спицами димитрий дневник забавное здоровье игрушки идеи дл€ дома интересно искусство истори€ кино комментарии комп кошки крючок кухн€-прихожа€ мех мк молитва москва мотив музыка перфомансы платье православие прически пэчворк рецепты рисование рукоделие св€тые семь€ смешное соленое тесто сумки схемы фото цветы человек шапки шапочка шитье
окна-дача |
ƒневник |

http://homes.yahoo.com/blogs/spaces/you
|
ћетки: идеи идеи дл€ дома |
студи€ |
Ёто цитата сообщени€ јлици€_√адовска€ [ѕрочитать целиком + ¬ свой цитатник или сообщество!]
√остина€-студи€ или гостина€ совмещенна€ с кухней - это удобно и функционально, особенно дл€ тех людей, которые предпочитают активный образ жизни. ≈сли кухню воспринимать как элемент дизайна, а не как фабрику по ежедневному приготовлению пищи, то гостина€-студи€ станет прекрасным вариантом!
Ѕарна€ стойка в гостиной-студии просто незаменима! јроматный утренний кофе с бутербродами - то что нужно дл€ хорошего настроени€! «а стойкой можно хорошо отдохнуть и расслабитьс€. ѕоскольку гостина€-студи€ св€зана с кухней единым дизайном, то ее можно разделить на зоны. «она комфорта и отдыха, а также рабоча€ зона, в которую водит обычный стандартный набор - мойка, шкафчики дл€ посуды, выт€жка и плита.
≈диный ансамбль и расширение пространства гарантируют удобное врем€препровождение. Ќе всем подойдет такой вариант. ≈сли вы ежедневно готовите борщи и печете пироги - то вам необходимо отдельное помещение.
Ёти фотографии вдохнов€т вас на ремонт и новую отделку помещени€!
 +на правах рекламы+
—овременный дизайн квартир от студии ƒизажио, котора€ находитс€ по адресу иев, ул. √орького 72, отличаетс€ креативностью и интересными цветовыми сочетани€ми. ухн€ соединенна€ с гостиной расширит пространство и позволит вам функционально использовать территорию квартиры. √остина€-студи€ - это комфортно и функционально.

|
ћетки: идеи дл€ дома |
ч”дный домик |
Ёто цитата сообщени€ Donnarossa [ѕрочитать целиком + ¬ свой цитатник или сообщество!]

|
ћетки: идеи дл€ дома |
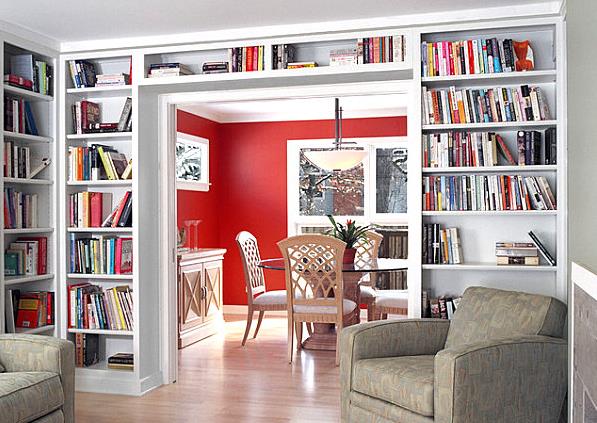
ќформление дверного и оконного проЄмов книжными полками |
Ёто цитата сообщени€ Donnarossa [ѕрочитать целиком + ¬ свой цитатник или сообщество!]
|
ћетки: идеи дл€ дома |
‘альш-окна |
ƒневник |
«еркало-окно дл€ прихожей - слегка раздвинет границы и оживит маленькую прихожую.

3. ѕотолочные фальшь-окна.
¬ отдельную категорию стоит выделить фальшь-окна, расположенные на потолке. Ётот прием используетс€ сегодн€ гораздо чаще, чем создание настенных фальшивых окон. ќкно можно создать на ровном потолке. Ќо гораздо эффектнее выгл€д€т фальшь-окна на подвесных потолках. ¬озникает эффект стекл€нной крыши.
ќчень эффектными получаютс€ конструкции, создаваемые с комбинированием навесных и нат€жных потолков. ¬ этом случае используетс€ нат€жное фотополотно с изображением неба, космоса, звезд.
 ћного интересного
http://plastikaokon.livejournal.com/
|
ћетки: идеи дл€ дома |
ќЅ”¬№. ак хранить и где |
ƒневник |
ќбувной лайфхак
»сточник перевод дл€ mixstuff – —вета √оголь
≈сли в доме полно обуви, котора€ занимает слишком много места, спр€чьте несколько пар, которыми пользуетесь не очень часто, под драпировкой кровати.

»ли развесьте по стенам при помощи карнизов дл€ штор или архитектурных профилей.
ћожно даже подвесить к потолку
«адекорируйте обувные полки занавеской
¬ оттоманке тоже может поместитьс€ довольно много обуви, особенно если соорудить дл€ неЄ специальные кармашки. Ёто легко сделать – вам понадобитс€ только полоска ткани и степлер.
≈сли вы храните обувь в коробках, сделайте €рлыки с фотографи€ми содержимого – найти нужную пару будет гораздо легче.
ƒерев€нный поддон как полка дл€ обуви – отличное решение дл€ дачи.
ƒл€ хранени€ детской обуви прекрасно подойдЄт сама€ обыкновенна€ вешалка.
“ака€ конструкци€ дл€ хранени€ обуви очень удобна, занимает мало места, и еЄ легко сделать самому.
–азноцветные резинки – оригинальное решение, которое позволит сэкономить жизненное пространство.
—пр€чьте лишнюю обувь под кроватью, поместив еЄ в старую раму. “ак вам легче будет еЄ доставать.
¬ыдвигающа€с€ полка дл€ обуви. —делать такую будет непросто, но зато удобство трудно переоценить.
ѕодвесьте такие кармашки к раздел€ющей комнату ширме
ƒержите обувь, в которой не ходите каждый день, в комоде спальни

Ќесколько нат€жных стержней позвол€т избавитьс€ от обувных завалов в кладовой
ѕодвесьте детскую обувь к карнизу дл€ штор.
ѕрикреплЄнные к стене жест€ные банки прекрасно подойдут дл€ хранени€ летней обуви.
»—“ќ„Ќ» http://mixstuff.ru/archives/25980
|
ћетки: идеи дл€ дома |
часы на стену |
Ёто цитата сообщени€ Amenika [ѕрочитать целиком + ¬ свой цитатник или сообщество!]
Ѕезумно понравилась эта иде€, € даже уже присмотрела на какой стене сделаю такие же креативные часы))) ћожет еще кому то пригодитс€)

¬ам понадобитс€:
• серебр€на€ краска
• дерев€нные числа, можно разных размеров
• часовой механизм со стрелками
• двусторонний скотч
|
ћетки: рукоделие идеи дл€ дома часы |
сказочные домики |
ƒневник |


|
ћетки: идеи дл€ дома рукоделие |
кашпо |
Ёто цитата сообщени€ подружка5 [ѕрочитать целиком + ¬ свой цитатник или сообщество!]
http://www.mastera-rukodeliya.ru/pletenie/pletenie-iz-gazet/3174-kashpo-dlya-tsvetov.html
ћастер-класс по плетению из газет: ашпо дл€ цветов
1.

|
ћетки: плетение цветы идеи дл€ дома |
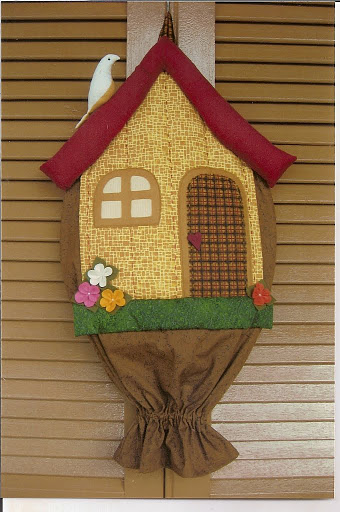
пакетницы |
Ёто цитата сообщени€ TomaMos [ѕрочитать целиком + ¬ свой цитатник или сообщество!]
“акое впервые,поэтому не знаю как писать.
—лово за слово и оказалось, что многие бы хотели присоединитьс€ к тем,кто будет шить пакетницы.
Ёто же здорово!!!
ѕоставим сроки и ¬ѕ≈–≈ƒ! » уже не отвертетьс€ своей зан€тостью.
то захочет,то давайте начнем 10 сент€бр€.
—роки изготовлени€ как вы сами решите.
еще примеры пакетниц
|
ћетки: рукоделие пакетница идеи дл€ дома |
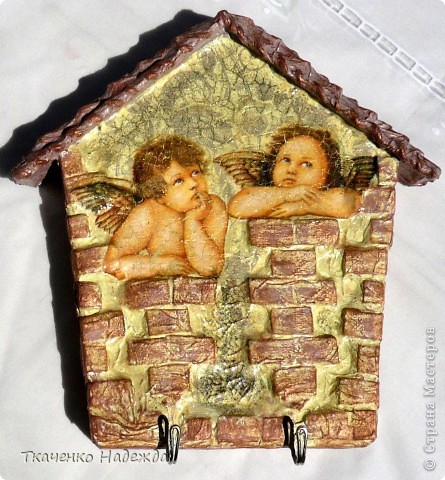
ключница |
Ёто цитата сообщени€ Katra_I [ѕрочитать целиком + ¬ свой цитатник или сообщество!]
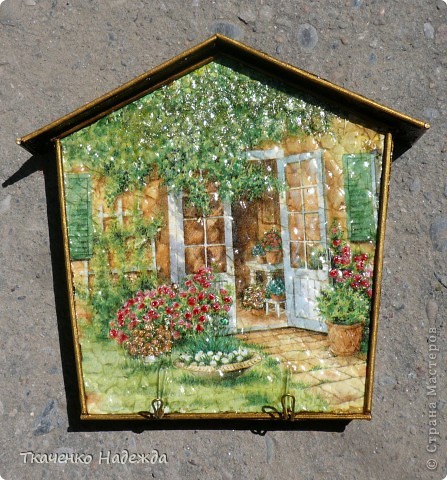
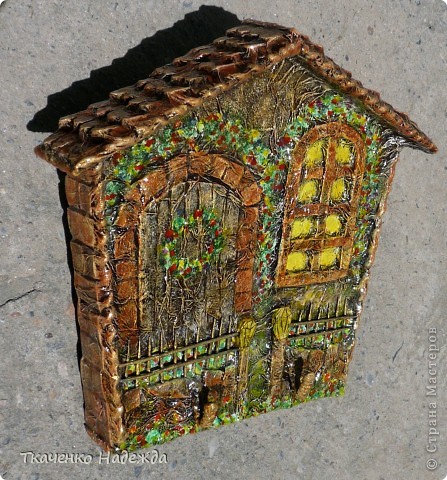
—нова показываю бумажные чудеса, теперь от мастерицы Ќадежды “каченко
ƒелаем ключницы. »з картона. ћастер-класс
«дравствуйте дорогие мастерицы! я к вам с новыми ключницами.
|
ћетки: рукоделие идеи дл€ дома |
мебель |
Ёто цитата сообщени€ Ѕражук [ѕрочитать целиком + ¬ свой цитатник или сообщество!]
Ёто стоит посмотреть
|
ћетки: идеи дл€ дома |
мелочи |
Ёто цитата сообщени€ Dama_Madama [ѕрочитать целиком + ¬ свой цитатник или сообщество!]
|
ћетки: идеи дл€ дома |
10 цветов. ѕринос€т счастье в дом |
ƒневник |
|
ћетки: цветы здоровье идеи дл€ дома |
Ѕез заголовка |
ƒневник |

- Place the Rounded Corner Template on the outside right edge of one square, aligning as above. Pin and cut.

- Without moving the pieces, place the Rounded Corner Template on the outside left edge of the opposite square, aligning as above. Pin and cut.
- It's important to keep track of your lefts and rights so the mitts are correctly cut to fit on each end of the hot pad.
- Repeat steps 11-14 to cut the mitt lining pieces.

At Your Sewing Machine & Ironing Board
Assemble the mitts
- Pin a 3" x 8" strip right sides together with the inside straight edge of each front mitt front piece. Stitch together using a ½" seam allowance. Press seam open.

- Match up the opposite 8" side of each strip with the inside straight edge of each mitt lining piece. Stitch together using a ½" seam allowance. Press seam open.

- You now have two flat mitt pieces. Fold each one in half, matching all raw edges and creating a clean-finished fold along the border edge.
- Use one folded piece as a template to cut TWO pieces of thermal batting. Remember, I promised we'd do this.

- Sandwich a batting piece in between the fabric layers of each mitt, making sure all the layers are smooth and flat. Using a ¼" seam allowance, machine baste around the raw edges. Do not stitch along the folded border edge.

Assemble the front layers
- Place the batting down first on your work surface, place the front body piece on top, right side up. Place a finished mitt on each end. Keep the raw edges of all the layers flush. Pin the layers together and the mitts in place.

Final assembly
- Layer the hot pad back piece right sides together with the assembled front.

- Pin all around, leaving an approximate 6" opening along the edge opposite the hanger . Just to make sure you're paying attention, in my picture that opening is shown at the top of the photo.

- Using a ½" seam allowance, stitch around the entire hot pad. Go slowly around the curved ends, stopping as needed, with your needle in the down position, to slightly adjust your presser foot position if needed. Remember to back tack or lock stitch at either side of the 6" bottom opening.
- Trim the seam allowance and clip the curves. Do not trim back the seam allowance along the opening.
- Turn right side out through the opening. Use your finger or a long blunt tool, like a chopstick or knitting needle, to help smooth out the curved ends.
- Fold in the raw edges of the opening so they are flush with the sewn seam. Pin in place and slip stitch closed.


|
ћетки: рукоделие идеи дл€ дома |
ќзеленение балкона |
Ёто цитата сообщени€ подружка5 [ѕрочитать целиком + ¬ свой цитатник или сообщество!]
‘отографии в альбоме Ђозеленение балконаї mad1959 на яндекс.‘отках
 читать дальше
|
ћетки: цветы идеи дл€ дома балкон |
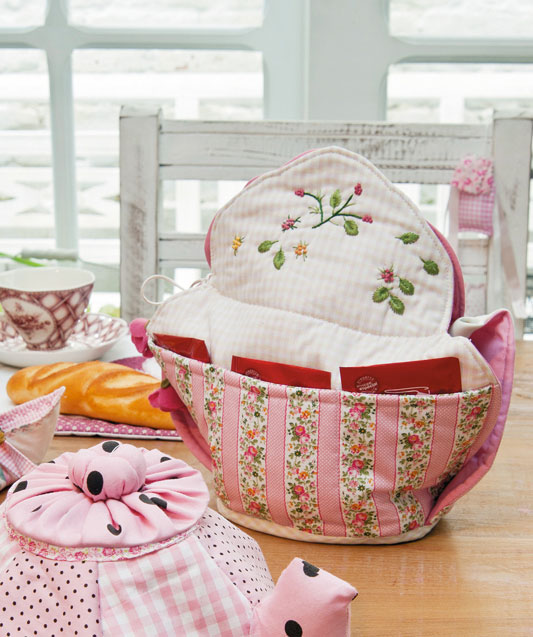
корзинка дл€ чайных пакетиков и свежих булочек |
Ёто цитата сообщени€ ћарриэтта [ѕрочитать целиком + ¬ свой цитатник или сообщество!]
»нтересна€ форма у корзиночки дл€ булочек и чайных пакетиков, не правда ли?
|
ћетки: идеи дл€ дома |
Ѕез заголовка |
Ёто цитата сообщени€ —има_ѕекер [ѕрочитать целиком + ¬ свой цитатник или сообщество!]
 http://petelki.com/vjazanie-dlja-doma/vjazanye-cve...jazanyj-chehol-dlja-stula.html
„ехол дл€ стула св€зан крючком жаккардовым узором.
¬ам потребуетс€: ѕр€жа средней толщины (100% акрил): 600 г синего цвета и 100 г голубого цвета; крючок є 5.
¬иды петель: ѕолуст. с/н.
∆аккардовый узор: по схеме.
ѕлотность в€зани€: 10 см = 12 п.
¬нимание: размеры чехла даны в соответствии с размерами стула на фото.
ѕеред началом работы следует сн€ть размеры стула и выполнить по ним выкройку. Ўирину сидень€ и спинки следует рассчитать на 1-2 см меньше, с учетом раст€жени€ полотна.
¬ыполнение работы
—иденье и спинка: ¬€з. одной деталью. Ќитью синего цвета набрать цепочку из 53 в. п. и в€з. полуст. с/н след. образом: первые и последние 19 п. в€з. нитью синего цвета, центральные 15 п. - жаккардовым узором по схеме. Ќа высоте 14 см от начала в€зани€ нитью контрастного цвета наметить линию сгиба и в€з., уб. каждые 15 см 2 раза по 1 п. = 49 п. Ќа высоте 42 см от линии сгиба приб. с обеих сторон по 5 п. (= 59 п.) и в€з. 60 см спинки, затем закрыть с обеих сторон по 5 п. ¬€з. 64 см пр€мо и нитью контрастного цвета наметить линию сгиба. Ќа общей высоте 194 см закончить в€зание.
Ѕоковые детали: —в€зать 2 детали. ƒл€ каждой детали нитью синего цвета набрать цепочку из 54 в. п. и в€з. полуст. с/н. Ќа общей высоте 14 см закончить в€зание.
—борка: ¬ыполнить обработку деталей. —ложить деталь сидень€ и спинки по лини€м сгиба (см. выкройку). ѕришить боковые детали и выполнить оставшиес€ швы. Ќитью голубого цвета обв€зать нижние кра€ издели€ 3 р. полуст. с/н.
|
ћетки: идеи дл€ дома |
а ничего так, красиво |
Ёто цитата сообщени€ —има_ѕекер [ѕрочитать целиком + ¬ свой цитатник или сообщество!]
|
ћетки: в€зание крючком идеи дл€ дома |
| —траницы: | [1] |


