-Рубрики
- ВЯЗАНИЕ (808)
- шапки (117)
- детям (48)
- шарфы,палантины (41)
- тапочки (20)
- воротнички, манишки (10)
- шарфы, палантины, шапки, шали (9)
- мужчинам (9)
- круглая кокетка (8)
- сумки (8)
- шали (5)
- разное (3)
- Секреты мастерства (2)
- коврики, пледы (50)
- мастер-класс (140)
- носки, варежки (43)
- платья, юбки, туники (54)
- полуверы, свитера, жакеты (83)
- скатерти, салфетки (14)
- спицы, крючок (2)
- топы, сарафаны, жилеты (47)
- узоры (152)
- ИНТЕРЕСНО (28)
- ШИТЬЕ (27)
- СТИХИ (12)
- ПОЗДРАВЛЕНИЯ (8)
- Масленица, Пасха, прощеное воскресенье (6)
- 8 Марта (1)
- Новый год (1)
- ПРИТЧИ (4)
- ОБЫЧАИ И ПРИМЕНЫ (1)
- ПЕРЕДЕЛКИ (0)
- ДЕЛА ОГОРОДНЫЕ/полезная информация (146)
- Защита растений от болезней и вредителей (15)
- цветник (13)
- лук, чеснок (8)
- малина (1)
- ДЛЯ ДУШИ (25)
- ДОМ, ИНТЕРЬЕР (29)
- ЗДОРОВЬЕ (111)
- уход за кожей (12)
- уход за волосами (5)
- КОМПЬЮТЕР (29)
- КУЛИНАРИЯ (361)
- заготовки на зиму (27)
- салаты и закуски (10)
- постный стол (9)
- блины, сырники (7)
- соусы (5)
- блюда из мультиварки (4)
- сыры (3)
- на скорую руку (3)
- пасхальный стол (2)
- супы (2)
- морепродукты (2)
- восточные блюда (6)
- выпечка (116)
- готовим в горшочках (5)
- диетическая кухня (5)
- запеканки (18)
- курица (39)
- мясные блюда (38)
- овощи (31)
- рыба (27)
- салаты (27)
- тесто (2)
- РАМОЧКИ (7)
- РУКОДЕЛИЕ (13)
-Музыка
- Серебро - скажи, не молчи
- Слушали: 2218 Комментарии: 0
- Ирина Круг - Любить не страшно
- Слушали: 445 Комментарии: 0
- Владимир Алтайский "Женщина любимая"
- Слушали: 408 Комментарии: 3
-Поиск по дневнику
-Подписка по e-mail
-Постоянные читатели
-Сообщества
-Статистика
Бабушкин прямоугольник |


To Start
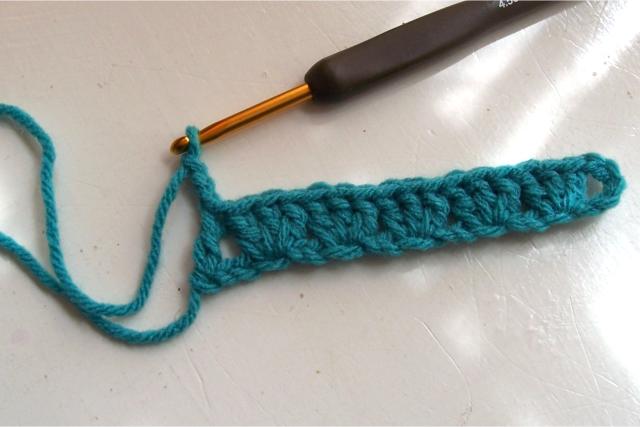
Make a sliding ring. Draw up a loop and ch 6(counts as dc, ch3), 3dc, ch3, dc in the ring.

Tighten up the ring and chain 3.

Rows
Turn, and work as a row on the bottom side with 2dc in the first ch space and 3dc in the next ch3 space. Ch3 and turn.

Make 3dc in the space between the 2 groups of 3dc of the previous row, and 1dc in the top of the ch3 of the previous row. Ch 3 and turn.

Continue working as rows, alternating with ch3, 3dc in next space, dc in the top of the ch3 of the previous row for 1 row and ch3, 2dc in the ch space, 3dc in the next ch space for the next row. Make however many rows you want, but you want to end with a row that has a center 3dc and a ch3/dc at each end.

I am going to change colors, so I am ending with a ch3 instead of a dc. That gives a consistent ch3 for each “corner” of my rectangle. If I was going to keep on with the same color, I would just do a dc, ch 3 for the round instead.

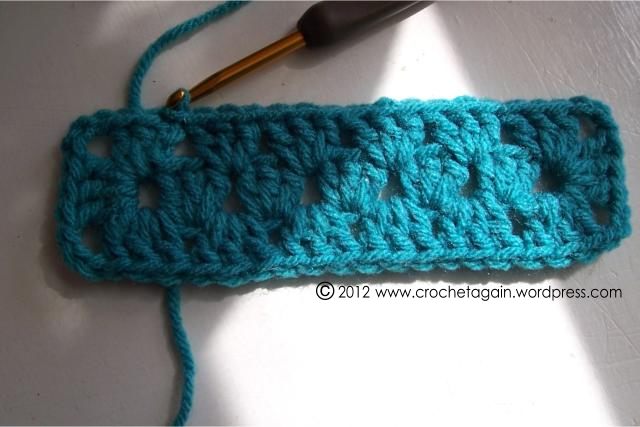
Slip stitch to the top of the ch3 of the previous row. End off. You now have a narrow rectangle of rows, with corner spaces.

Rounds
Attach a new color in a corner space with a dc (or slpst, ch3). 2dc, ch3, 3dc.

Continue around, doing 3dc along the side in the space between the 3dc’s of the rows and 3dc, ch3, 3dc in each corner space.

And there you have it, a crocheted granny rectangle.

For the size I did in the example:
Ch 22 Ch 21 (corrected 8-24-13)
In the 6th chain from the hook, 3dc.
Skip 2 stitches, 3dc in same stitch.
Continue across, skipping 2 and doing 3dc in the same stitch. When you reach the last ch, 1dc. Ch3 (counts as a dc)
In the space on the end created by the dc and foundation ch; 2dc, ch3, 3dc, ch3, 3dc. 2 corners on the end made.
3dc in each space between across…
At the next end; in the ch 5 space 3dc, ch3, 3dc, ch3, 3dc to make the corners on the other end.
Now, go across the other side, making 3dc in each space between…
Slpst into the top of the beginning ch3 and there you have it!
I find diagrams so helpful (pretend you don’t notice that I forgot the ending slpst in the diagram):
| Рубрики: | ВЯЗАНИЕ/коврики, пледы |
| Комментировать | « Пред. запись — К дневнику — След. запись » | Страницы: [1] [Новые] |


