-Метки
accessories accessory apple baby stuff backgrounds bag bags banana beads beautiful places beauty blog boho bottles box cake candle candles carton cats cd chair cover chocolate clay clock cooking curtain curtains cushion cushions decor decorative bottles decorative serving design dessert dye eggs embellishment embllishment fashion flower flowers foil food food decoration frame frames furniture garden gifts health jewelry kids room kids rooms kitchen knitting lamp lamps lampshade light links miniature miniatures mirror necklace painting paper pillow plastic bottle plastic bottles potato puff pastry re-fashion re-style recycle refashion ribbon rug serving sewing sewing patterns shawl shelves shoes sre storage sweets t-shirt tableau thread toys useful vase victorian wall wall art wedding wedding glass wire zipper
-Рубрики
- DECOR (1018)
- Frames, wall art, mirror (204)
- Kids Rooms (97)
- Box & basket (95)
- Painting, stamp (85)
- Walls (77)
- Kitchen (70)
- Miniatures (70)
- Cushions (69)
- Curtains (58)
- Baby Stuff (51)
- Storage (46)
- Candles (41)
- Toys & dolls (36)
- Gifts (34)
- Shelves (34)
- Salt Dough, Mold, clay (33)
- Vase (32)
- Furniture (32)
- Bedroom (29)
- Clocks (29)
- Kids Pillows (27)
- Rugs & floor (26)
- Chair Cover (26)
- Bathroom (23)
- pouffe (15)
- Pin Cushions (14)
- Jewelry Display (14)
- Table Setting (14)
- Foil (11)
- Felt & mesh (11)
- Shadow-Box (11)
- Tissue Box (10)
- Table (9)
- Butterfly (8)
- Napkin Folding (5)
- Soap (4)
- Tassels (3)
- FASHION (818)
- Sewing patterns (170)
- Accessories (158)
- Embllishment (150)
- Re-fashion (98)
- Knitting (89)
- Bags (83)
- Beads (71)
- Shoes (65)
- T-shirts transformation (52)
- SRE (52)
- Scarfs (28)
- Buttons (21)
- Zipper (19)
- Shawl (19)
- No-Sew (15)
- Dye, stamp (14)
- Chinese Knots (11)
- Mending (9)
- Zig Zag (9)
- MultiWear & Infiniti Dress (8)
- boho (7)
- girl dress (3)
- Kids (2)
- Beauty (1)
- RECYCLE (694)
- Paper & newspaper (97)
- Plastic Bottles (86)
- Decorative Bottles (79)
- Thread, Rope & Wire (55)
- Blankets, jeans,leather....etc (55)
- Carton (54)
- Kitchen Items (38)
- Branches (32)
- Pipes & Tubes (30)
- Molding (27)
- Tins & Cans (22)
- CDs (19)
- Socks (14)
- Egg Carton (14)
- Sea Shell (14)
- Cloth Pin (14)
- Egg Shells (11)
- Pasta (9)
- Feather (8)
- Tires (8)
- Plastic Spoons (5)
- Towels (5)
- Coat Hangers (5)
- Wooden Spoon (4)
- Drinking Straw (4)
- Books (4)
- Light Bulbs (4)
- Hangers (3)
- China & Kitchen ware (3)
- Dried Flowers (3)
- glass bottles (2)
- IceCeam Sticks (2)
- light bulb (1)
- Corn Husk (1)
- COOKING (310)
- Dessert (140)
- Decorative Serving (111)
- Chocolate (46)
- No-bake (37)
- Egg (33)
- Bread (23)
- Puff Pastry (20)
- Food Decoration (20)
- Potato (18)
- Apple (18)
- Stuffed (17)
- Rolls (17)
- Meat (16)
- Salad (15)
- Sausage (15)
- Chicken (15)
- Marrow (13)
- Ice Cream (12)
- Banana (10)
- Cheese (10)
- Loaf (7)
- Pasta (6)
- Pizza (5)
- Cabbage (5)
- Eggplant (5)
- Fish (5)
- Mushroom (4)
- Rice (4)
- jello (3)
- yogurt (1)
- Toast (1)
- coconut (1)
- Grape Leaves (1)
- Tuna (1)
- LIGHT (148)
- Lamps (107)
- Chandelier (73)
- Baby Lights (8)
- Flower Making (115)
- USEFUL (103)
- health & beauty (67)
- GARDEN (63)
- Vertical Garden (13)
- WEDDING (44)
- Glass (26)
- Pillows (5)
- Baskets (1)
- Backgrounds (42)
- VICTORIAN (35)
- Victorian Lady (10)
- Cushions (7)
- Box (5)
- Bags (2)
- Beautiful Places (32)
- Cats (29)
- LINKS To Crafts (22)
- in minutes (17)
- Computer & internet (12)
- Games (7)
- Alphabet (5)
- PRIVATE (3)
-Приложения
 Дешевые авиабилетыВыгодные цены, удобный поиск, без комиссии, 24 часа. Бронируй сейчас – плати потом!
 Я - фотографПлагин для публикации фотографий в дневнике пользователя. Минимальные системные требования: Internet Explorer 6, Fire Fox 1.5, Opera 9.5, Safari 3.1.1 со включенным JavaScript. Возможно это будет рабо
 ОткрыткиПерерожденный каталог открыток на все случаи жизни
- Настольные игры онлайнМы предлагаем Вам сразиться в любимые настольные игры со своими друзьями, не отходя от компьютера. У нас вы сможете поиграть в дурака, преферанс, тысячу, нарды, шахматы, шашки, крестики-нолики, точки,
-Я - фотограф
-Поиск по дневнику
-Подписка по e-mail
-Друзья
Друзья онлайн
Лариса_Воронина
Друзья оффлайнКого давно нет? Кого добавить?
-Лала-
alladenadi
Best-I-A
besta-aks
Cymylau
echeva
Fire_Work
galaflame
gla-mur
goldregen
Inessa_Rjabinina
larusik
Legionary
leonarda_putane
Martina25
Matrioshka
microfon
narmar
Nata007
NatalNata
Natalyyy
Olga_Gerasimenko
sirena-li
Smila_Berufmaenedjer
tantana
tata-stern
tezegul
Valentina_Kutzner
zabava_21
Акулка
Алёна_Ганьжина
Бархатная_Шляпка
Вера_Маркина
Вьюгитта
Георг_Нат_Ник
Глебова_Елена
Инноэль
Ирина_Александровна
ИСПАНСКИЙ_РЕСТОРАНЧИК
Кель_РА
Королева-мать
КОТктейль
Марриэтта
Мастерская_Нормы_Рихтер
Независимая_cat
Ненила
Сания_Магизова
Сахарина
Светлана_Ковалевска
Сима_Пекер
-Постоянные читатели
0656 Charodeika66 Elisabet_L Enigmatica Iren-lm Kalina29 Libava MEREWKA Mynyasha Natalyyy OliSe_SH Osenja Rika_Ichimaru SVETTOMA Tanjusha62 Tatiana_Goroshko Viktory27 adul51 dalsi2009 eleonoraw fsvetlana galya_nowa gmb_volkova grs helen-ka honey25 keti_cqnapi liudamilaya marmelatka28 meirbruk pappesa Бархатная_Шляпка Белая_гвоздика Галина_Стеновская Елена_Мар Зулиана Ирина_Бутурля Кель_РА Клара66 ЛеМурка0808 Леля_Луцко Любовь_Мих Любовь_Суфранова МарияРия Наталья_Ивановна_НИК Сания_Магизова Тамара_Романовна Царевна_полей Элизабет777 алеванка
-Статистика
ribbon rose |
I’m going to show you how to create ribbon rosettes suitable for paper crafting… with recycled and new materials you may already have in your home!
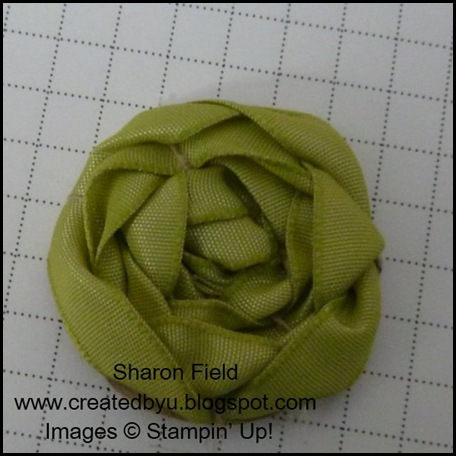
Wouldn’t these ribbon rosettes look fabulous on your lapel, a paper project, headband, or gift bag?
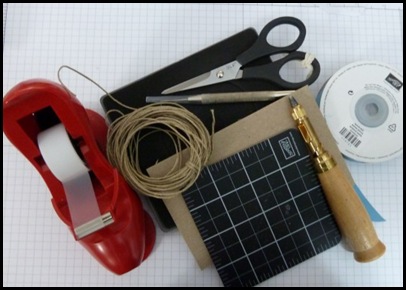
Here’s the supply list for a 3” Ribbon Rosette:
- Chipboard… this can be recycled cardboard from packaging and/or cardstock. I prefer 1/8” thick or better.
- Paper piercing tool and snips and/or Japanese Hole Punch and snips.
- Ribbon… I prefer 1/2” or wider, approximately 4 feet of ribbon is needed for a 3” ribbon rosette.
- Hemp Twine*
- Household Tape
- Mat Pack
- 3” sizzix circle die
- Big Shot Machine
Step by Step Directions:
- Cut a 3” circle using the Big Shot Machine and Die from scrap chipboard.
-
Find the center of the chipboard by drawing a line both the 1.5” line horizontally and vertically. As you can see in the photo below, I used the self healing mat that came with my SU! Mat Pack to find the center of the 3” circle die cut.

- Pierce a hole where the lines cross… I used my Japanese Hole Punch to make the hole, but you could just as easily use a paper piercing tool.
- Use the fine point tip of your paper snips and a twisting downward motion to increase the size of the center hole. You will be threading hemp twine* through the hole several times, it needs to be approximately 1/4” in diameter.
-
Thread hemp twine* through the center hole, and attach to the 3” chipboard circle with household tape. The center whole in the photo below is actually smaller than it should be… I had to increase the size with paper snips before completing the project!

-
Wrap hemp twine* around the 3” circle, threading forward through the center hole….

-
Repeat the process until you have 7 spokes, or more on your 3” chipboard circle disc.

- In order for this ribbon rosette to form properly, you need to have an odd number of hemp twine* spokes. You may increase and/or decrease spokes as desired.
-
Using the very end of your ribbon of choice, wrap the ribbon twice to tie a knot which will become the center of your ribbon rosette.

- Snug the ribbon down, but not too tightly… you want a nice and fluffy flower center!
-
Insert the tail of the knot through the 3” chipboard circle and secure to the back with household tape.

-
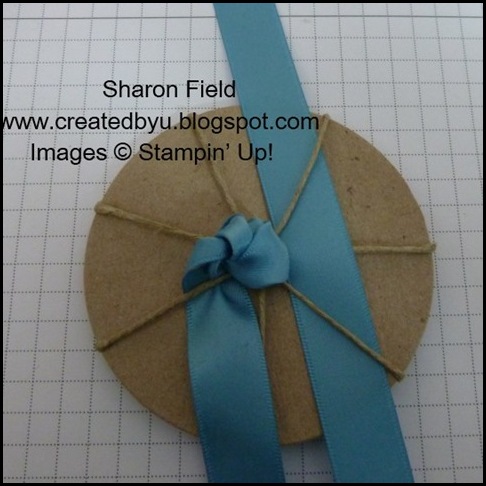
Using an over/under motion, begin threading the ribbon through the spokes.. under the first spoke, over the next… etcetera.
-
Be mindful to straighten out the ribbon as you tug it towards the center… the twist in the photo below is NOT good… see the big red X?

-
The ribbon should be flat and flowing in one direction as you work around the 3” chipboard circle.

-
Continue working around the circle in an over/under motion until the entire 3” chipboard circle has been covered with ribbon, snugging the ribbon in even tugging motions.

-
Once the 3” chipboard circle has been filled with ribbon, attach the last ribbon end to the back of the 3” chipboard circle with household tape.

-
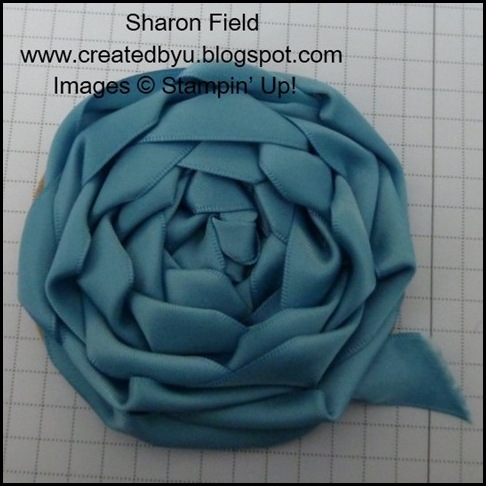
Your 3” Chipboard Ribbon Rosette is now ready to use for that special paper crafting project..Isn’t it lovely?
-
Wouldn’t the ribbon rosette look fabulous on a gift bag? Or a fabulous vintage sweater or card?
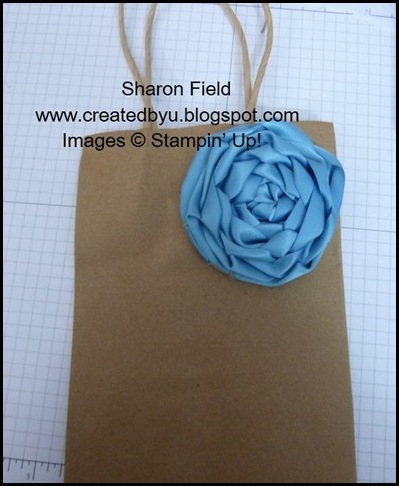
- Of course it would be even more fabulous with some antique brads, pearls or rhinestones LOL! But I’m cleaning closets so didn’t really have time to kick it up! (Maybe tomorrow LOL.)
- Varying the size of the chipboard circle, you can have perfect ribbon rosettes for wedding invitations, cards, scrapbook pages.. imagine the possibilities!!
-
This rosette began with just a 1-3/8” chipboard circle punch.
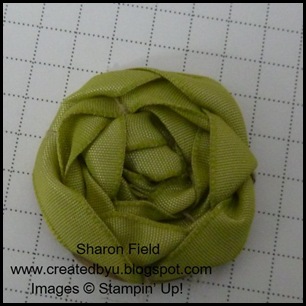
- A crop-a-dile tool was used to create the center hole, linen thread was used to make the spokes, and paper snips were used to increase the size of the hole to just under 3/4”.
*Instead of hemp twine or linen thread, use matching ribbon in a narrower version to ‘hide’ thread and hemp trails. When I made rosettes with Elly Sienkiewicz, we always used matching thread. We never used chipboard LOL… we used fabric as the backing!
http://createdbyu.blogspot.com/2011/01/super-
| Рубрики: | FASHION/Embllishment Flower Making |
Процитировано 23 раз
Понравилось: 2 пользователям
| Комментировать | « Пред. запись — К дневнику — След. запись » | Страницы: [1] [Новые] |


