Суббота, 27 Апреля 2013 г. 23:56
+ в цитатник
http://www.denofangels.com/forums/showthread.php?313990-WIP-Doll-Armor-Elric-s-black-dragon-armor-(New-Update!-May31)
WIP: Doll Armor, Elric's black dragon armor (New Update! May31)
I have been planing on Making armor for Elric for some time. I have drawn several designs until I figured out how I'd like it.
Materials I'm using are:
~ WounderFlex ---- Which can be found here -> http://www.cosplaysupplies.com/store.php?s=M4UZ
~ Apoxy sculpt
~ Super sculptly
~ Magnets and wire
~ MR. Surfacer
~ Black Spray paint,
~ Silver paint
~ Various sizes: Deep red acyclic jewels
~ Gloss varnish (For protecting coating)
~ Black satin fabric (for lining of armor pieces)
Step 1, 2 and 3 :
1 ~ Cut out paper stencils
2 ~ Trace and cut wounderflex parts
3 ~ Shape wounderflex parts. (This part was surprisingly easy.)
In the photo below: Here is the rough stretch of my armor design, along witha few of the pieces; Forearm part and the lower part of the breastplate.
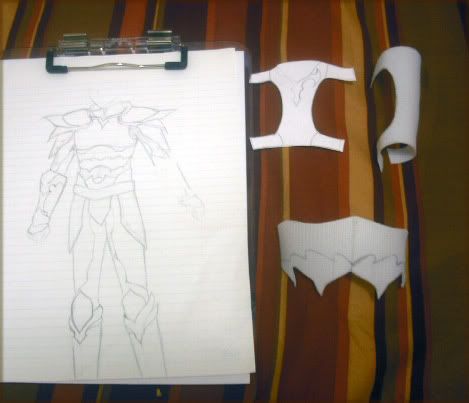
________________________________________________
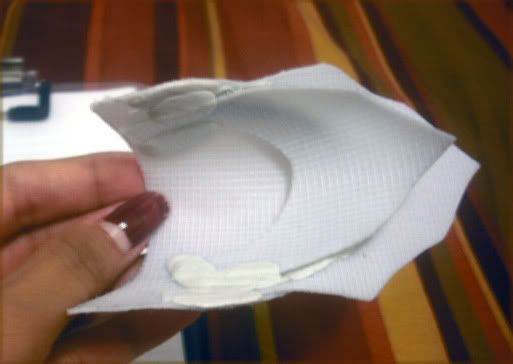
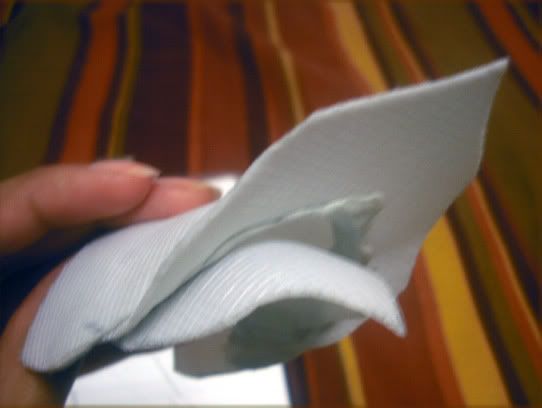
Step 4: Attaching various pieces together,
I shaped the wounderflex pieces with a clever bit of feather cutting and a hot hairdryer (with help of a metal spoon to get the curves.)
And I am currently putting the small parts together with Apoxy sculpt.
In this photo: Left paldron, or shoulder part.
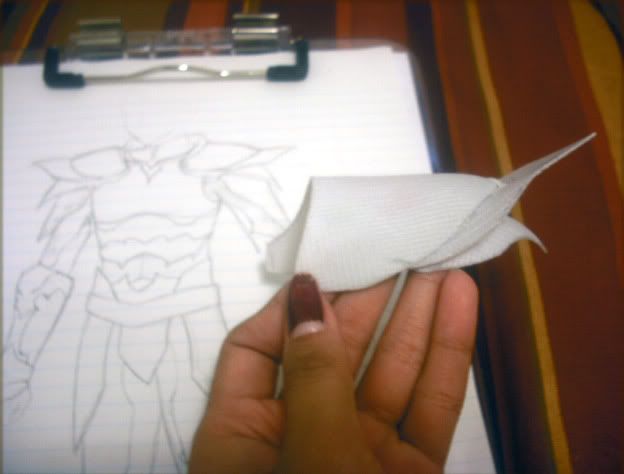
The following photos are the shoulder part at different angles showing the where I joined it useing Apoxy sculpt.
________________________________________________
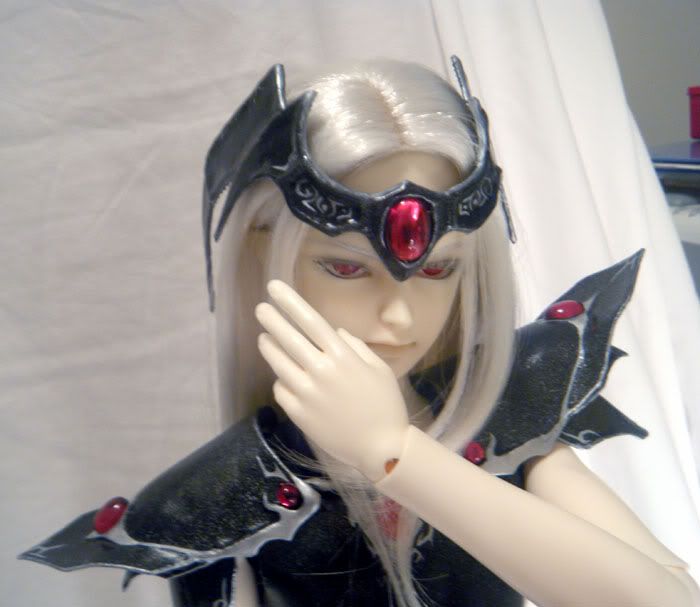
Below is a drawing of the 'headdress' and the parts of it in Wounderflex.
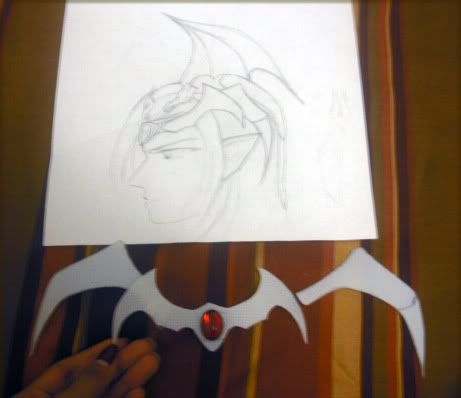
________________________________________________
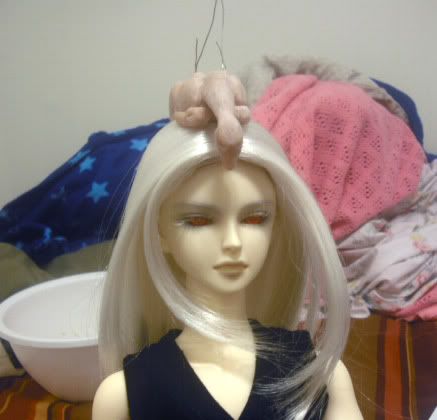
The Dragon that I've sculpted out of super scuptly. (The wires to help join the wounderfelx wings.
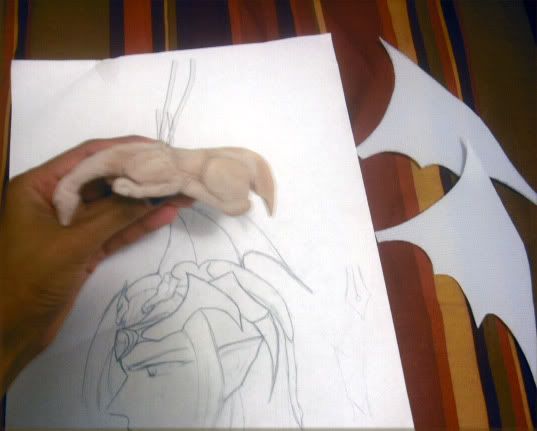
This is how the dragon will sit on top of Elric's head: 
(It will be held on with magnets and wire under his wig)
________________________________________________
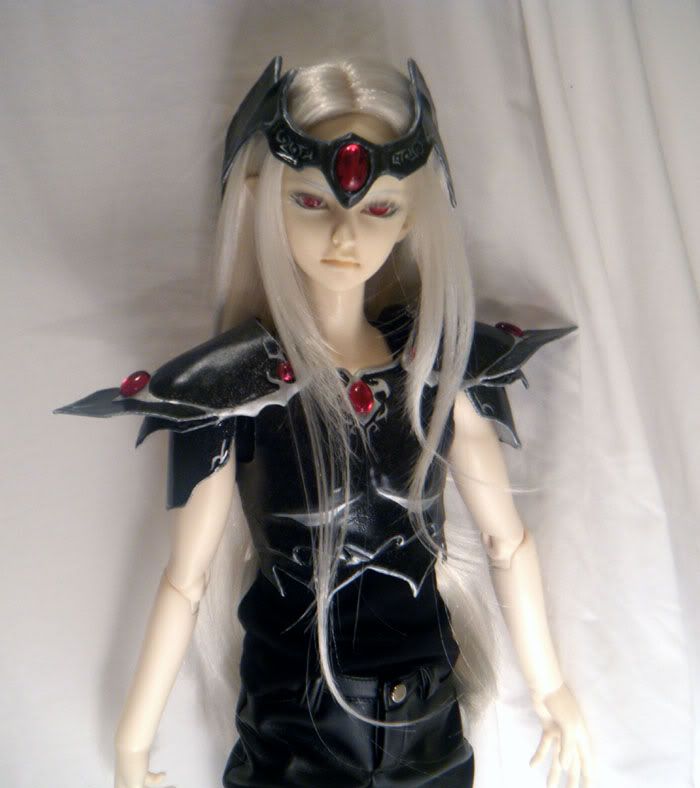
New Update: (May 31)
Step 5:
Coating the wounderflex with a few layers of MR. Surfacer to get a nice smooth finish.
Step 6:
Paint job: several long hours of painting, each part.....
Step 7:
Coating parts of my finished paint job with a an acrylic sealer via spray paint can.
Step 8: Glueing/apoxy small metal loops that would hold the parts together, (Mostly for the shoulders parts and breastplate.
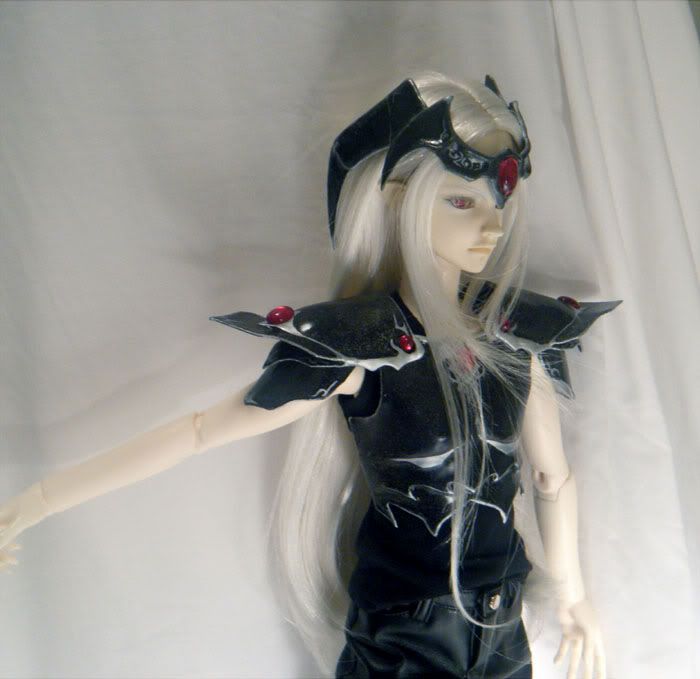
I am still in the process of putting the armor together, so what I have photos now are only the finished parts. (Breastplate/shoulders and part of the headdress.)
All the Gems are temporary stuck there with a bit of sticky-tack, I will be gluing them down later.
-
Запись понравилась
-
0
Процитировали
-
0
Сохранили
-


